For 1990-2009 cars only
Removal Procedure
- Remove the air cleaner intake duct. Refer to Air Cleaner Inlet Duct Replacement in Engine Controls - 3.1L.
- Remove the engine mount struts. Refer to Engine Mount Strut Replacement in Engine Mechanical - 3.1L.
- Install the engine support fixture. Refer to Engine Support Fixture in Engine Mechanical - 3.1L.
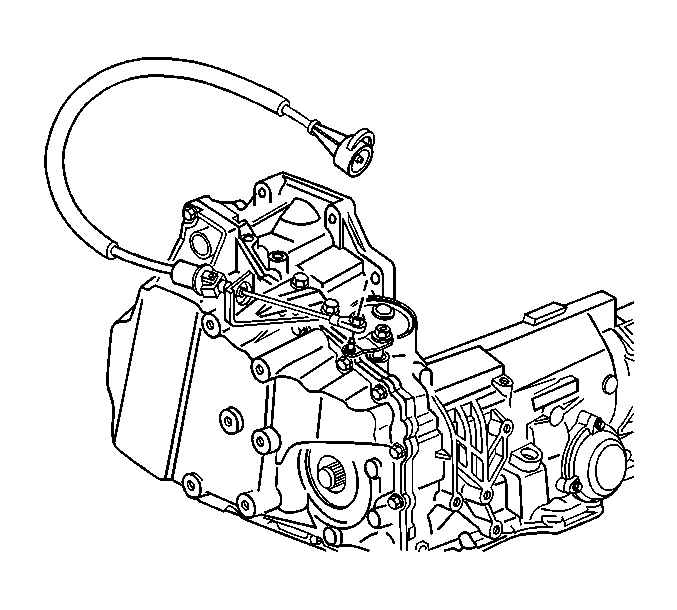
- Disconnect the range selector cable from the cable bracket and range selector lever. Refer to Range Selector Lever Cable Replacement .
- Remove the top bolt from the transaxle side cover.
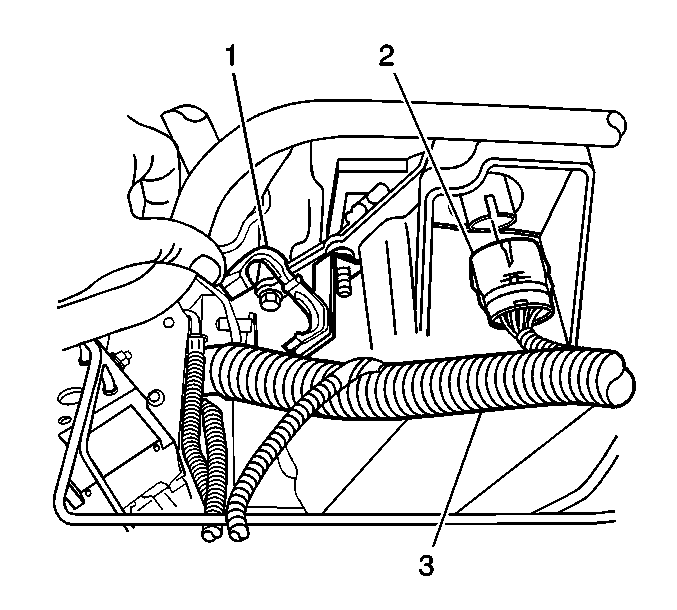
- Disconnect the transmission wiring harness connector (2).
- Remove the wire harness (3) from the wire harness retainer (1).
- Raise and support the vehicle. Refer to Lifting and Jacking the Vehicle in General Information.
- Remove the left front tire and wheel assembly. Refer to Tire and Wheel Removal and Installation in Tires and Wheels.
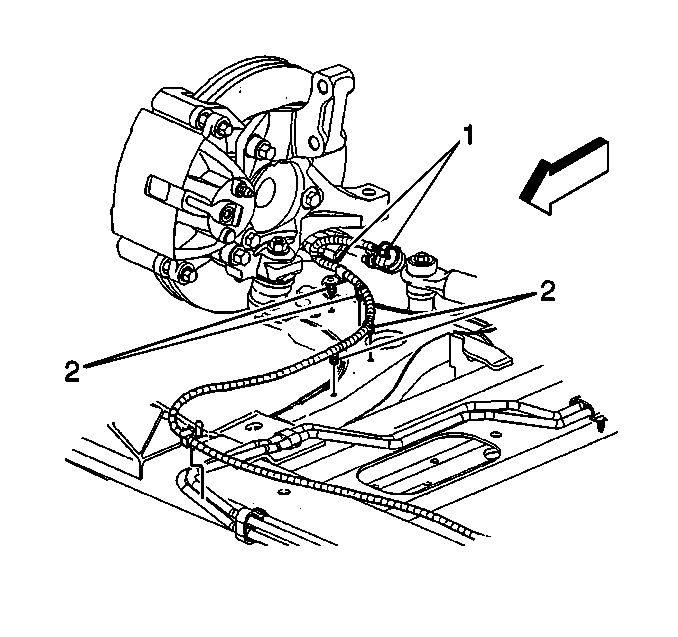
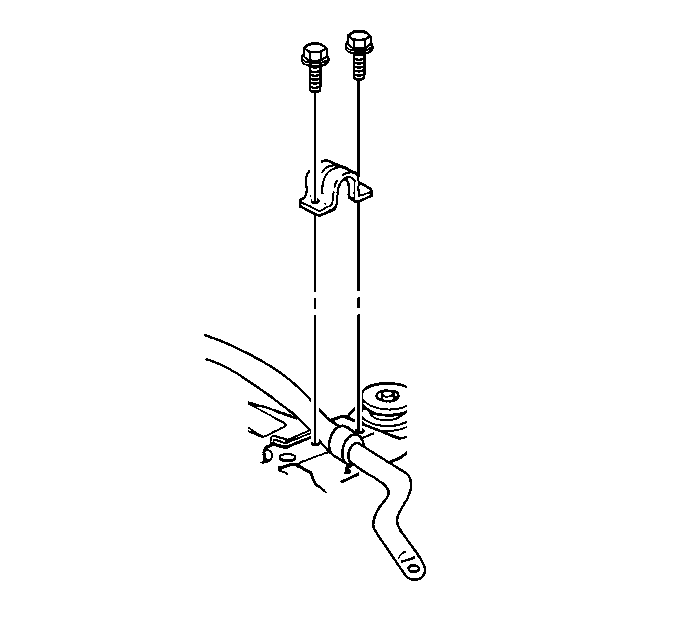
- Remove the wheel speed sensor harness (1) from the 4 retainers (2) at the frame.
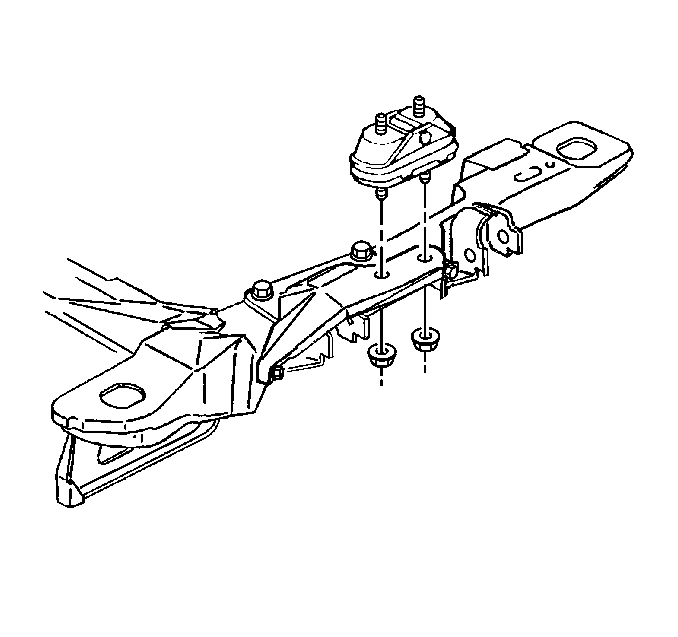
- Remove the transmission mount to frame nuts only. Refer to Transmission Mount Replacement .
- Remove the engine splash shield. Refer to Engine Splash Shield Replacement in Body Front End.
- Remove the stabilizer bolts and reposition the stabilizer. Refer to Stabilizer Shaft Replacement in Front Suspension.
- Remove the steering gear frame bolts and support the gear before lowering the frame. Refer to Steering Gear Replacement in Power Steering System.
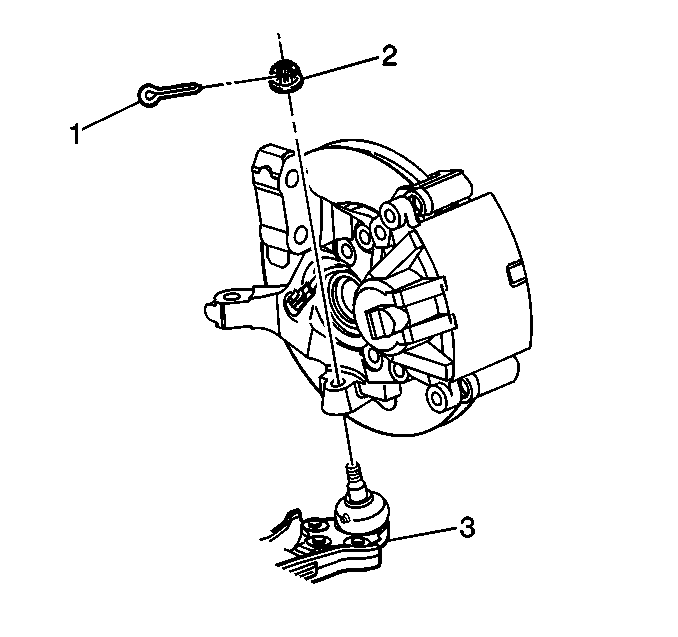
- Separate the left ball joint (3) from the steering knuckle. Refer to Lower Control Arm Replacement in Front Suspension.
- Position the drain pan under the transaxle.
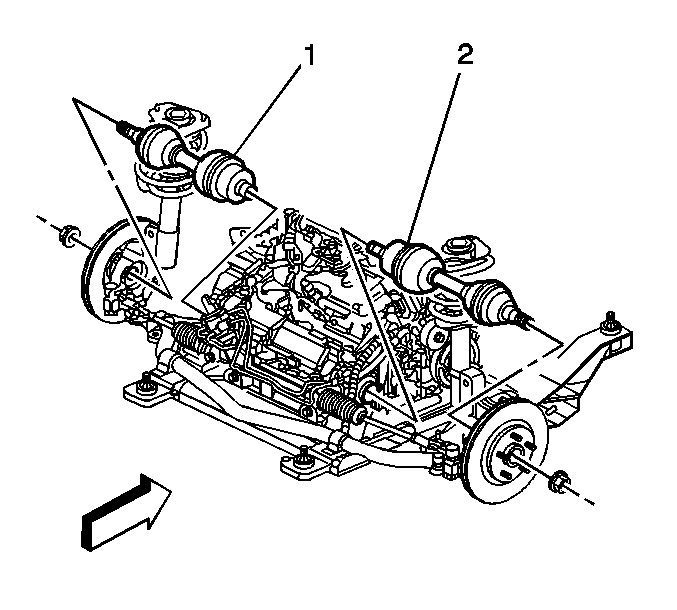
- Remove the left drive shaft (1) from the transaxle. Refer to Wheel Drive Shaft Replacement in Wheel Drive Shafts.
- Secure the drive axle to the steering knuckle/strut.
- Support the left side of the frame with a jackstand.
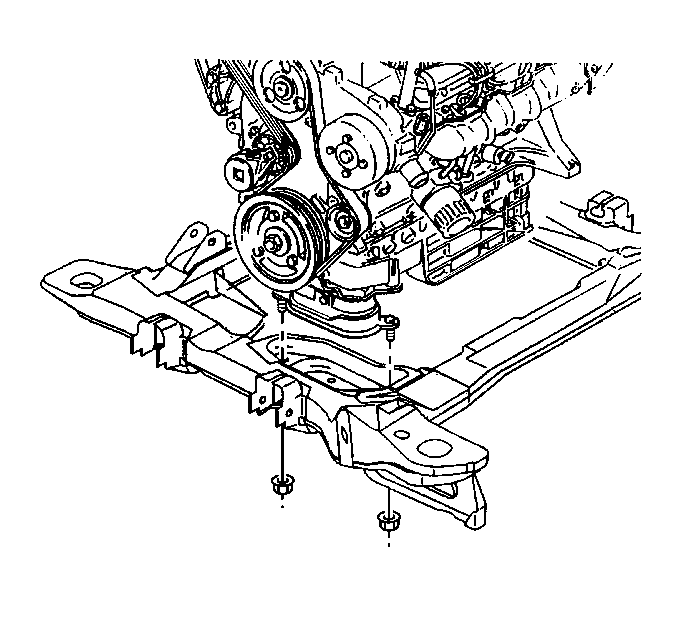
- Loosen the engine mount lower nuts. Refer to Engine Mount Bracket Replacement in Engine Mechanical - 3.1L.
- Loosen the right center frame bolt only. Do NOT loosen the right front or right rear frame bolts. Refer to Frame Replacement in Frame and Underbody.
- Remove the left frame bolts.
- Adjust the jackstand to lower the left side of the frame until the frame hangs free. Remove the jack stand.
- Lower vehicle to access engine support fixture.
- Lower the engine/transmission assembly with the engine support fixture to gain access to the remaining side cover bolts.
- Raise the vehicle to access the side cover bolts.
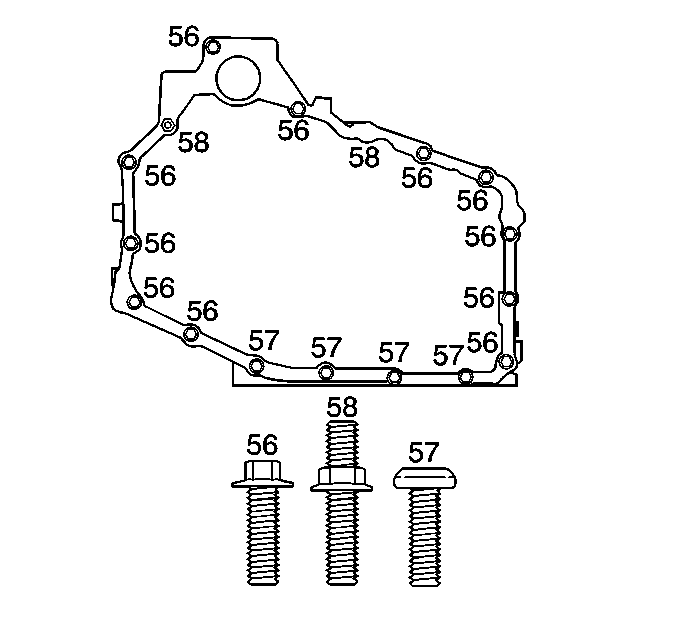
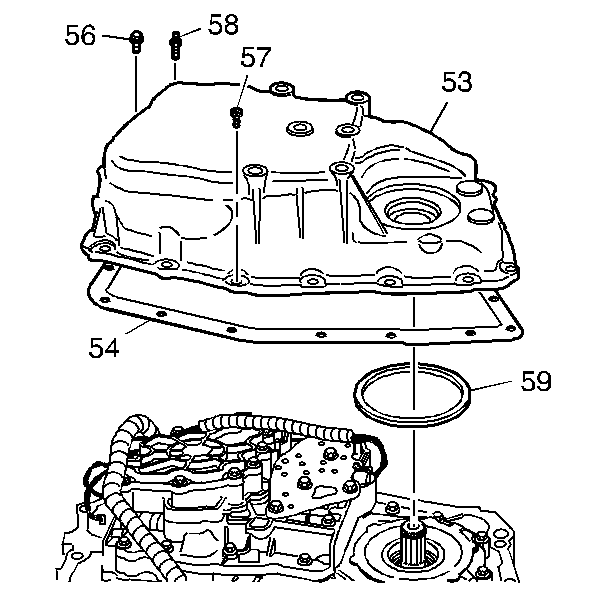
- Remove the case side cover bolts (56-58).
- Remove the case side cover pan (53).
- Remove the case side cover gasket (54).
- Clean the case.
- Clean the side cover gasket mating surfaces.
Important: Lock steering wheel in centered position with wheels straight ahead.
Installation Procedure
- Install the case side cover gasket (54).
- Install the case side cover pan (53).
- Install the case side cover bolts (56-58) except for the top bolt.
- Use a jackstand to raise the left side of the frame and engine assembly into position.
- Install the left side frame bolts and tighten the right center frame bolt. Refer to Frame Replacement in Frame and Underbody.
- Install the engine mount lower nuts. Refer to Engine Mount Bracket Replacement in Engine Mechanical - 3.1L.
- Install the transaxle mount to frame nuts. Refer to Transmission Mount Replacement .
- Remove the jackstands from the frame.
- Install the left drive shaft (1) to the transaxle. Refer to Wheel Drive Shaft Replacement in Wheel Drive Shafts.
- Remove the drain pan from under the transaxle.
- Install the ball joint nut (2) and the cotter pin (1). Refer to Lower Control Arm Replacement in Front Suspension.
- Install the steering gear frame bolts. Refer to Steering Gear Replacement in Power Steering System.
- Reposition the stabilizer and install the stabilizer bolts. Refer to Stabilizer Shaft Replacement in Front Suspension.
- Install the engine splash shield. Refer to Engine Splash Shield Replacement in Body Front End.
- Install the wheel speed sensor harness (1) to the 4 retainers (2) at the frame.
- Install the left front tire and wheel assembly. Refer to Tire and Wheel Removal and Installation in Tires and Wheels.
- Lower the vehicle.
- Connect the transaxle wiring harness connector (2).
- Install the wire harness (3) to the wire harness retainer (1).
- Install the transaxle top side cover bolt.
- Connect the range selector cable to the cable bracket and range selector. Refer to Range Selector Lever Cable Replacement .
- Remove the engine support fixture.
- Install the engine mount struts. Refer to Engine Mount Strut Replacement in Engine Mechanical - 3.1L.
- Install the throttle body air inlet duct. Refer to Air Cleaner Inlet Duct Replacement in Engine Controls - 3.1L.
- Inspect the fluid level and fill the transaxle as necessary.
- Inspect for fluid leaks.
Notice: Refer to Fastener Notice in the Preface section.
Tighten
Tighten the bolts to 25 N·m (18 lb ft).
Notice: Refer to Transmission Overfill Notice in the Preface section.
