Note: When ordering a windshield or door windows, verify if the vehicles is equipped with or without CE1 (RAINSENSE™) or Y91 (RAINSENSE™ and luxury edition) and order accordingly. The windshield and door windows have Quiet Tuning acoustic lamination. Due to the difference in processing, along with the difference in the curvature of the window, the optics of the window may appear wavy on a cross-car view from the outside of the vehicle. This is a normal condition and the windshield should not be replaced for this condition. The view through the window from the driver's position is clear and not affected.
Removal Procedure
- Remove the door trim panel. Refer to Front Side Door Trim Panel Replacement - Left Side or Front Side Door Trim Panel Replacement - Right Side.
- Remove the water deflector. Refer to Front Side Door Water Deflector Replacement.
- Remove the inner belt sealing strip. Refer to Front Side Door Window Belt Inner Sealing Strip Replacement.
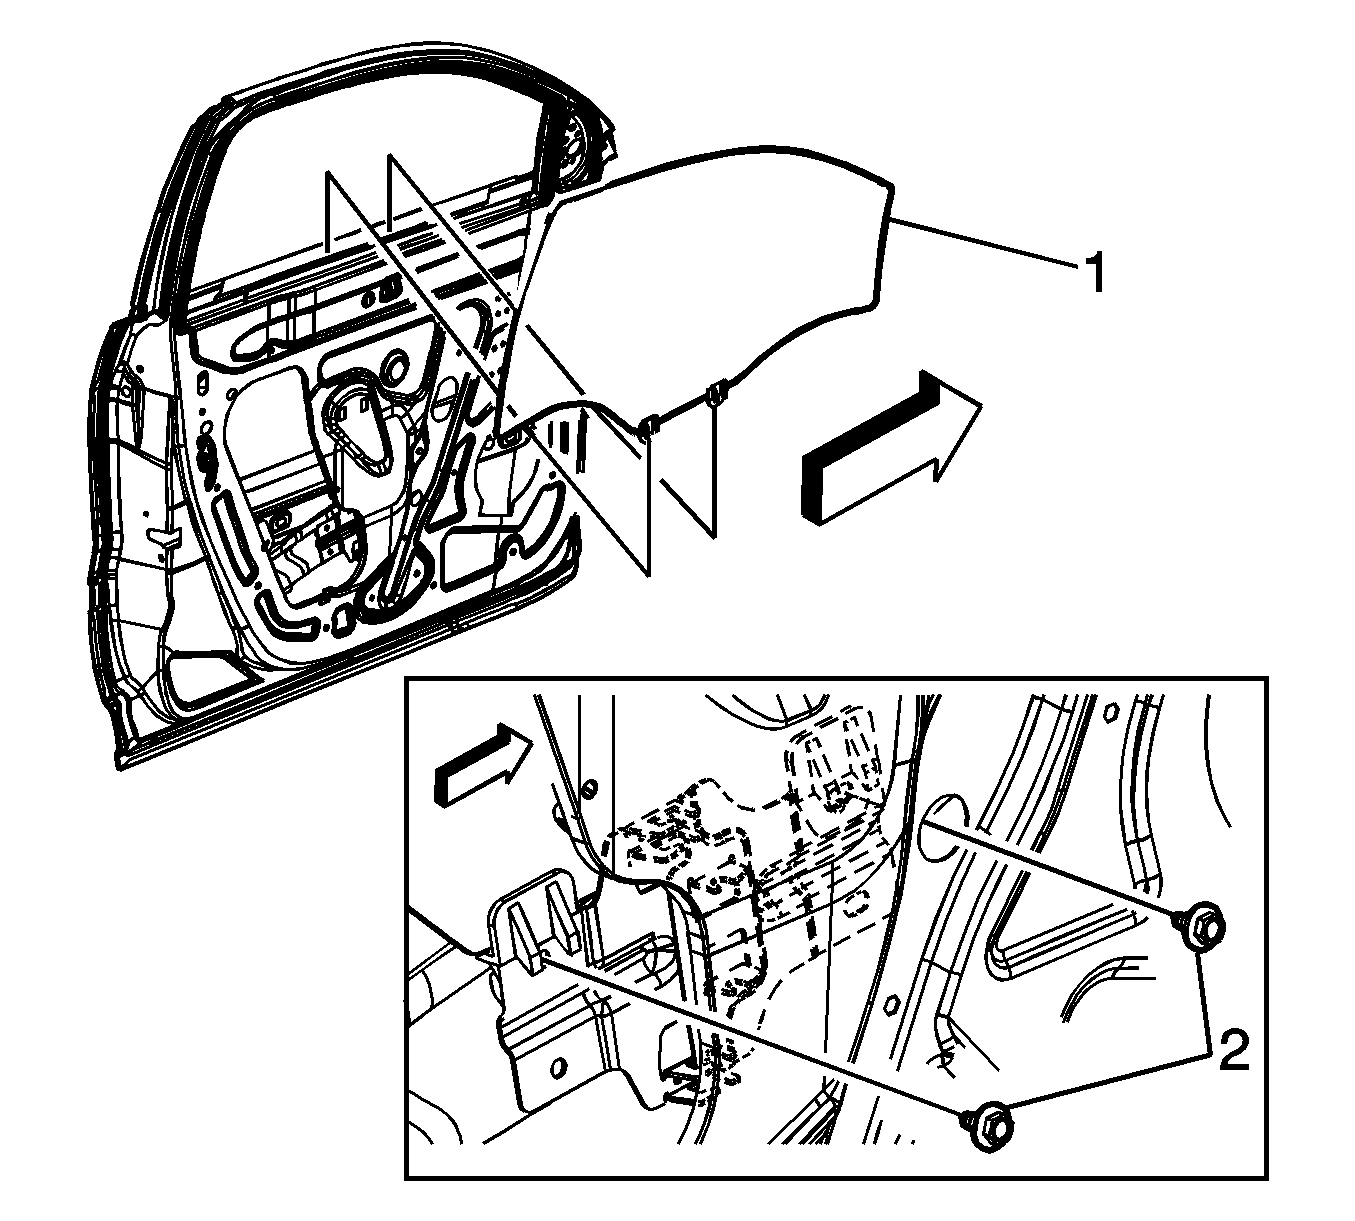
- Place the window (1) in a serviceable position.
- Remove the regulator bolts (2) at the window sash.
- In order to remove the window out of the frame, carefully grasp and tilt the window as you guide the window up and forward.
- Remove the window from the door.
Warning: Disconnect the power window switch when working inside the driver's door. When operated, the Express Down Feature allows the door window to drop very quickly, without stopping, which could cause personal injury.

Warning: Refer to Glass and Sheet Metal Handling Warning in the Preface section.
Installation Procedure
- Install the window to the door with the regulator adjusted to the remove/load position.
- Tilt the window forward and carefully guide the window into the rear run channel.
- Position the window (1) to an upright position.
- Loosely tighten the regulator bolts (2).
- Carefully move the regulator upward for short slow intervals, while ensuring that the window remains in the run channels.
- Position the window (1) to a fully secure position into the upper door weatherstrip.
- Tighten the 2 regulator bolts (2).
- Lower the window to the full down position.
- Install the inner belt sealing strip. Refer to Front Side Door Window Belt Inner Sealing Strip Replacement.
- Install the water deflector. Refer to Front Side Door Water Deflector Replacement.
- Install the door trim panel. Refer to Front Side Door Trim Panel Replacement - Left Side or Front Side Door Trim Panel Replacement - Right Side.

Note: Do not operate the regulator motor without supporting the window. Ensure that the window remains in the run channels when operating the regulator motor.
Caution: Refer to Fastener Caution in the Preface section.
Tighten
Tighten the bolts to 10 N·m (89 lb in).
