Instrument Cluster Replacement Buick
Removal Procedure
- Disable the SIR. Refer to Disabling the SIR System in SIR.
- Remove the IP cluster trim plate. Refer to Instrument Cluster Trim Panel Replacement .
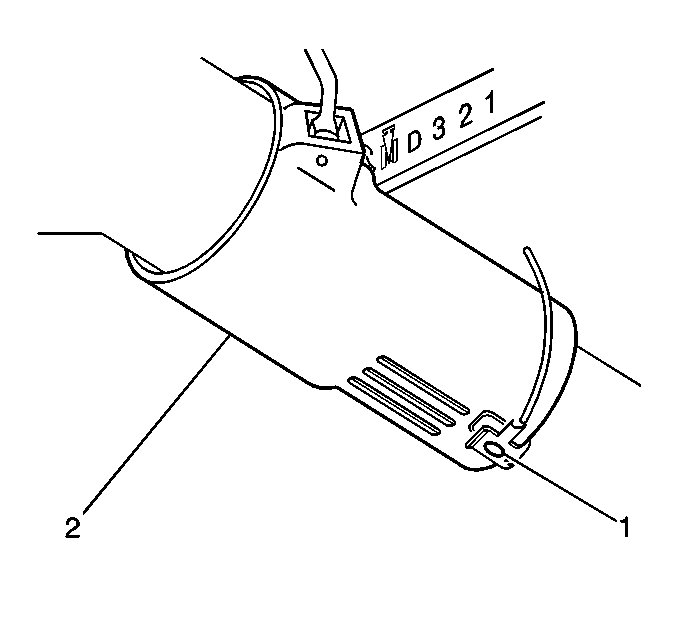
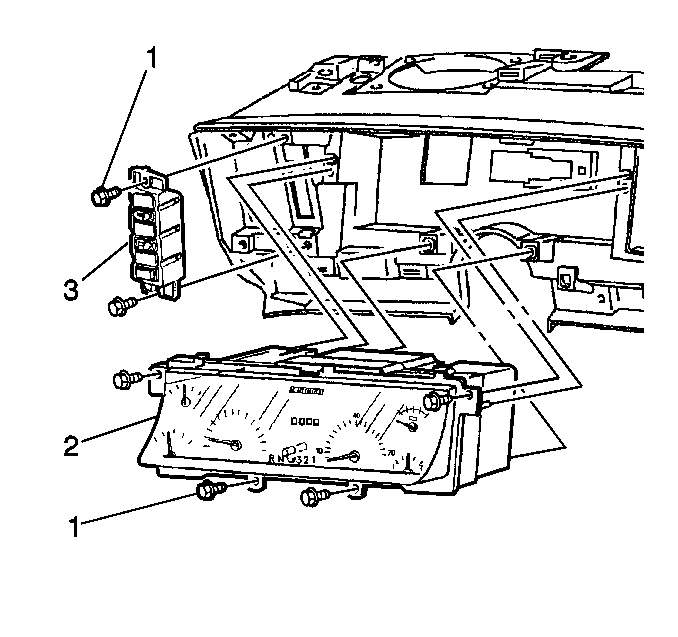
- Remove the PRNDL cable (1).
- Remove the panel lights twilight sentinel/traction control switch. Refer to Instrument Panel Multifunction Switch Assembly Replacement .
- Remove the instrument cluster fasteners to the IP (1).
- Remove the instrument cluster (2).
Caution: This vehicle is equipped with a Supplemental Inflatable Restraint (SIR) System. Failure to follow the correct procedure could cause the following conditions:
• Air bag deployment • Personal injury • Unnecessary SIR system repairs • Refer to SIR Component Views in order to determine if you are performing service on or near the SIR components or the SIR wiring. • If you are performing service on or near the SIR components or the SIR wiring, disable the SIR system. Refer to Disabling the SIR System.


Pull the cluster rearward.
Installation Procedure
- Install the instrument cluster (2) and the fasteners (1).
- Install the panel lights twilight sentinel/traction control switch. Refer to Instrument Panel Multifunction Switch Assembly Replacement .
- Install the PRNDL cable (1).
- Install the IP trim plate. Refer to Instrument Cluster Trim Panel Replacement .
- Enable the SIR system. Refer to Enabling the SIR System in SIR.

Notice: Use the correct fastener in the correct location. Replacement fasteners must be the correct part number for that application. Fasteners requiring replacement or fasteners requiring the use of thread locking compound or sealant are identified in the service procedure. Do not use paints, lubricants, or corrosion inhibitors on fasteners or fastener joint surfaces unless specified. These coatings affect fastener torque and joint clamping force and may damage the fastener. Use the correct tightening sequence and specifications when installing fasteners in order to avoid damage to parts and systems.
Tighten
Tighten the fasteners to 1.5 N·m (14 lb in).

Instrument Cluster Replacement Oldsmobile
Removal Procedure
- Remove the instrument panel (IP) cluster trim plate. Refer to Instrument Cluster Trim Panel Replacement .
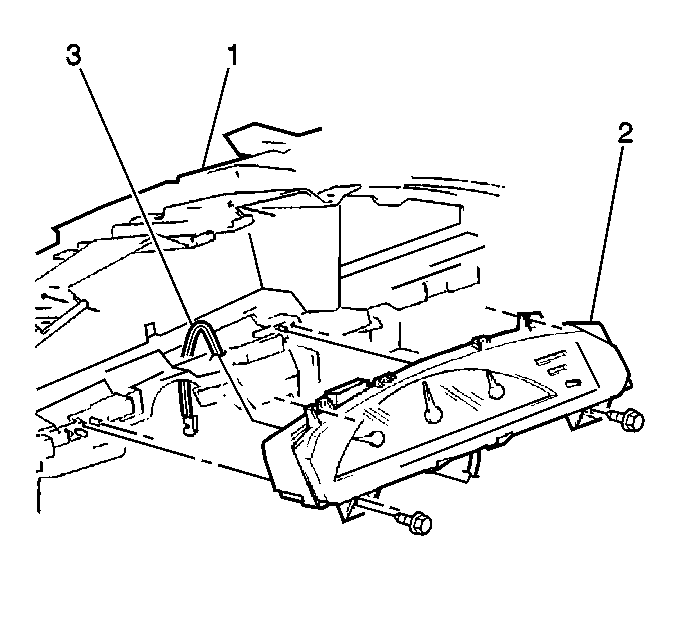
- Remove the PRNDL cable (3), if equipped.
- Remove the instrument cluster fasteners to the IP (1).
- Disconnect the cluster connector.
- Remove the instrument panel (IP) cluster (2).

Pull the IP cluster (2) rearward.
Installation Procedure
- Connect the instrument cluster connector to the cluster (2).
- Install the PRNDL cable (3), if equipped.
- Install the instrument panel cluster fasteners.
- Install the IP cluster trim plate. Refer to Instrument Cluster Trim Panel Replacement .

Notice: Use the correct fastener in the correct location. Replacement fasteners must be the correct part number for that application. Fasteners requiring replacement or fasteners requiring the use of thread locking compound or sealant are identified in the service procedure. Do not use paints, lubricants, or corrosion inhibitors on fasteners or fastener joint surfaces unless specified. These coatings affect fastener torque and joint clamping force and may damage the fastener. Use the correct tightening sequence and specifications when installing fasteners in order to avoid damage to parts and systems.
Tighten
Tighten the fasteners to 1.6 N·m (14 lb in).
Instrument Cluster Replacement Pontiac
Removal Procedure
- Disable the SIR system. Refer to Disabling the SIR System in SIR.
- Remove the steering column filler panel. Refer to Driver Knee Bolster Panel Replacement .
- Lower the steering column. Refer to Steering Column Replacement in Steering Wheel and Column-Tilt.
- Cover the top of the steering column in order to prevent scratch damage.
- Remove the IP cluster trim plate. Refer to Instrument Cluster Trim Panel Replacement .
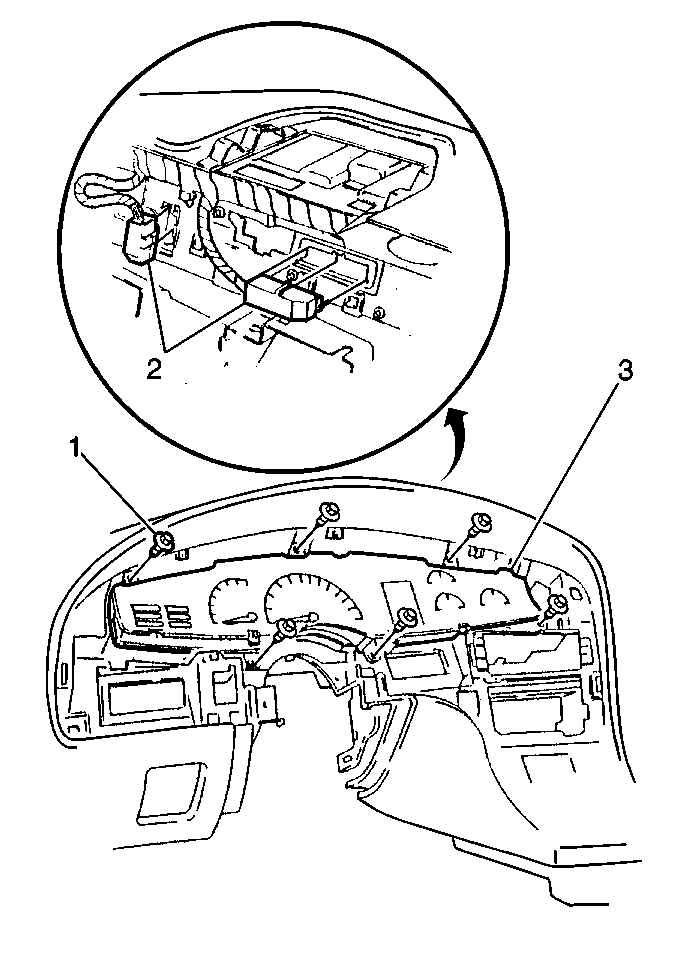
- Remove the instrument cluster fasteners (1) to the IP.
- Remove the instrument cluster connector (2) by reaching around the top (UB3) or the bottom (U50 or U2F) right side of the cluster assembly and depressing the locking tab.
- For the U50 and the U2F, remove the instrument cluster connector by reaching around the top or the bottom of the cluster assembly and depressing the locking tab.
- Remove the instrument panel cluster from the opening by sliding the cluster toward the center of the vehicle.
Caution: This vehicle is equipped with a Supplemental Inflatable Restraint (SIR) System. Failure to follow the correct procedure could cause the following conditions:
• Air bag deployment • Personal injury • Unnecessary SIR system repairs • Refer to SIR Component Views in order to determine if you are performing service on or near the SIR components or the SIR wiring. • If you are performing service on or near the SIR components or the SIR wiring, disable the SIR system. Refer to Disabling the SIR System.
Important: Remove the steering column lower mounting bolts prior to removing the upper mounting bolts or damage to the lower steering column bearing may occur.

| 6.1. | Pull the right end of the cluster (3) rearward. |
| 6.2. | Rotate the cluster assembly to face upward. |
| 7.1. | Pull the bottom of the cluster assembly rearward. |
| 7.2. | Rotate the cluster assembly to face upward. |
Important: The U50 and the U2F have 2 connectors.
Installation Procedure
- Install the instrument cluster (3) to the IP.
- Install the instrument cluster connectors (2) by reaching around the top or the bottom of the cluster assembly.
- Inspect for the following conditions:
- Install the instrument cluster (1) fasteners to the IP.
- Install the IP cluster trim plate. Refer to Instrument Cluster Trim Panel Replacement .
- Remove the protective cover from the steering column.
- Install the steering column. Refer to Steering Column Replacement in Steering Wheel and Column-Tilt.
- Install the steering column filler panel. Refer to Driver Knee Bolster Panel Replacement .
- Enable the SIR system. Refer to Enabling the SIR System in SIR.

| 1.1. | Install the instrument panel cluster facing upward. |
| 1.2. | Install the instrument panel cluster in to the opening from the center of the vehicle. |
| 1.3. | Rotate the cluster to the proper position. |
Important: Do not force the connectors. Carefully align the connectors before pushing into place. Forcing bends the pins. Use a mirror in order to look down the back side of the cluster from the center of the vehicle in order to guide the connectors.
| • | Proper connections |
| • | Bent pins |
| • | Damaged pins |
Notice: Use the correct fastener in the correct location. Replacement fasteners must be the correct part number for that application. Fasteners requiring replacement or fasteners requiring the use of thread locking compound or sealant are identified in the service procedure. Do not use paints, lubricants, or corrosion inhibitors on fasteners or fastener joint surfaces unless specified. These coatings affect fastener torque and joint clamping force and may damage the fastener. Use the correct tightening sequence and specifications when installing fasteners in order to avoid damage to parts and systems.
Tighten
Tighten the fasteners to 1.6 N·m (14 lb in).
