For 1990-2009 cars only
Removal Procedure
- Remove the electrical connector from the fluid level sensor.
- Remove the fluid level sensor. Refer to Brake Fluid Level Indicator Switch Replacement .
- Drain the brake fluid from the master cylinder reservoir.
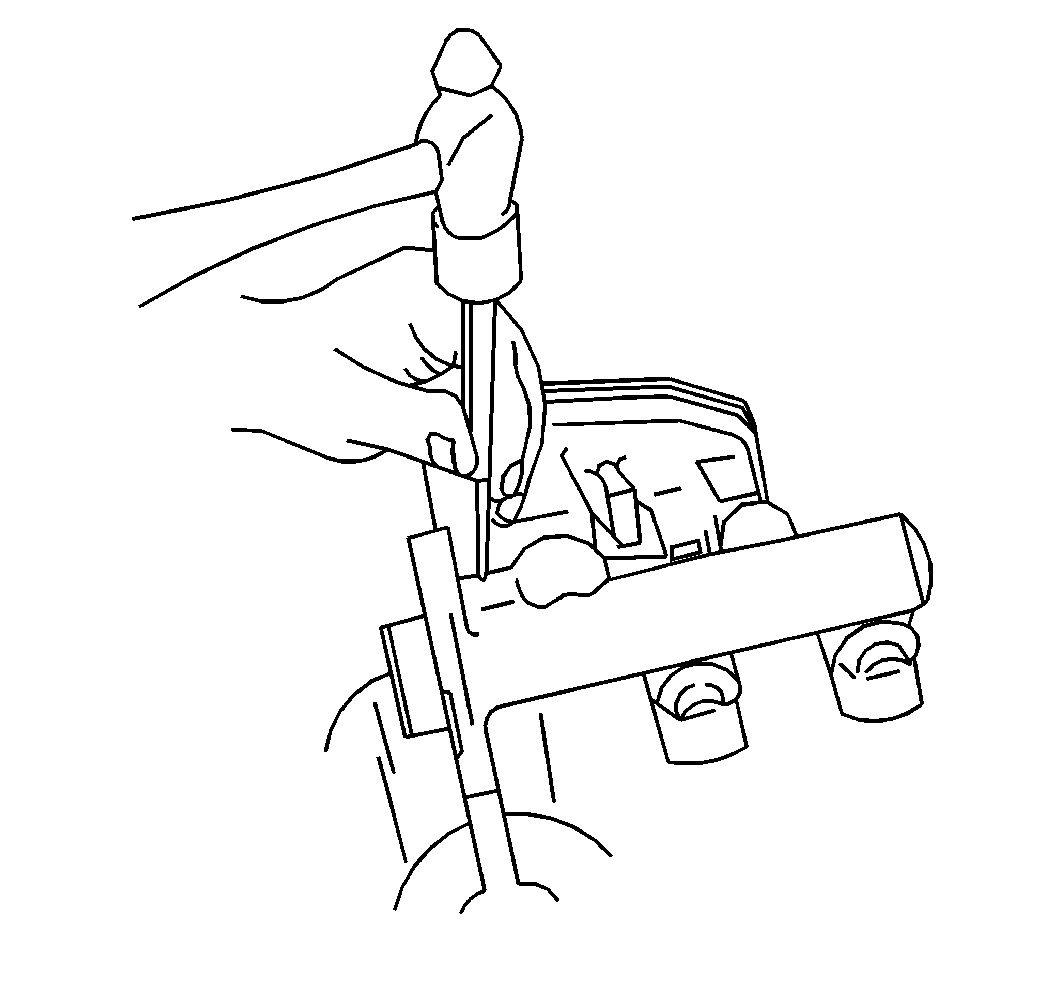
- Tap back the pins until clear of reservoir. Care must be taken to prevent damage to the reservoir or master cylinder.
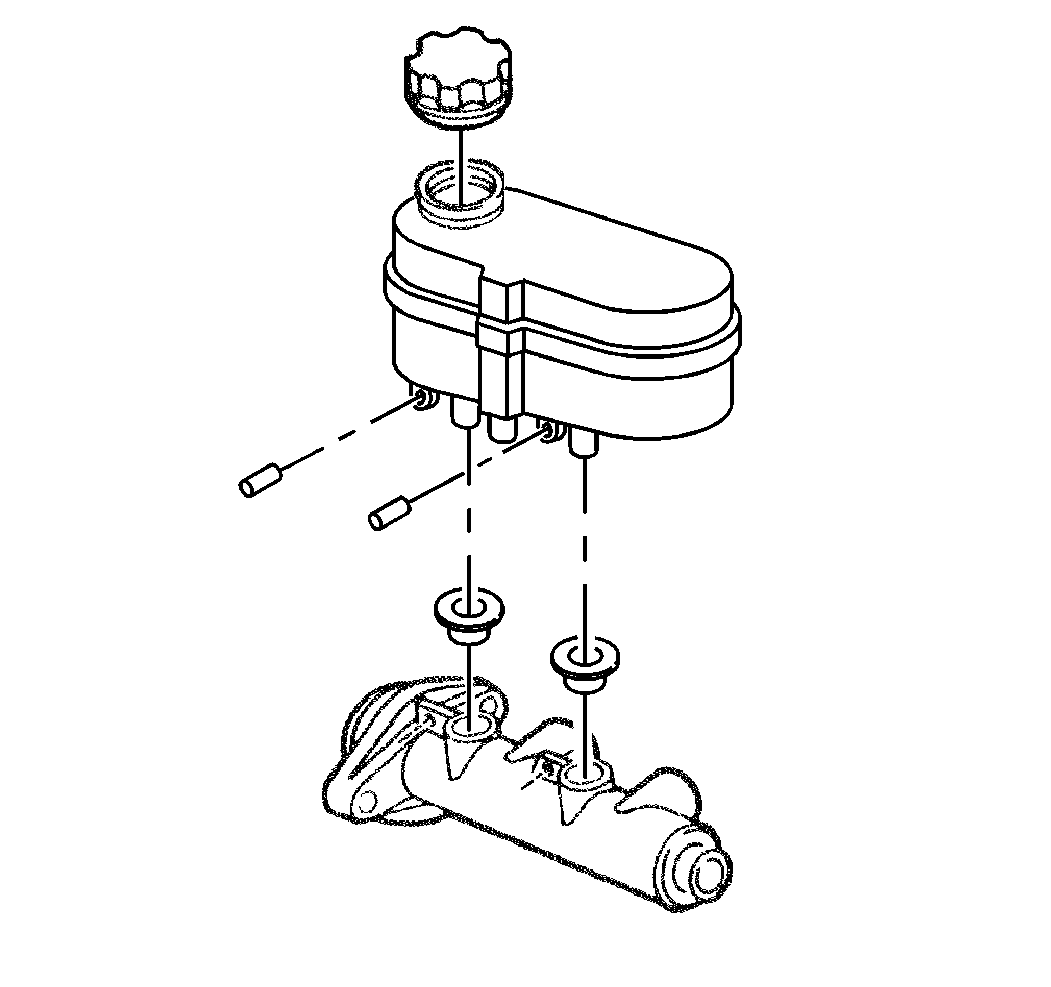
- Remove the reservoir.
- Remove the seals.
- Inspect the reservoir for cracks or deformities. If found, replace the reservoir.
- Clean the reservoir. Use clean denatured alcohol.
- Dry the reservoir. Use non-lubricated compressed air.
Installation Procedure
- Lubricate the new seals and the reservoir bayonets with clean brake fluid.
- Install the seals to the master cylinder, making sure they are fully seated.
- Install the reservoir onto the master cylinder by pressing straight down by hand until pin holes are aligned.
- Tap in the pins to retain the reservoir. Care must be taken to prevent damage to the reservoir or master cylinder.
- Fill the master cylinder reservoir to full level mark using only Delco® Supreme II Brake Fluid GM P/N 12377967, or equivalent DOT 3 brake fluid, as specified in Maintenance and Lubrication.
- Install the fluid level sensor. Refer to Brake Fluid Level Indicator Switch Replacement .
- Install the electrical connector to fluid sensor.
- Bleed the hydraulic system. Refer to Hydraulic Brake System Bleeding .