For 1990-2009 cars only
Special Tools
EN 46109 Guide Pins
For equivalent regional tools, refer to Special Tools.
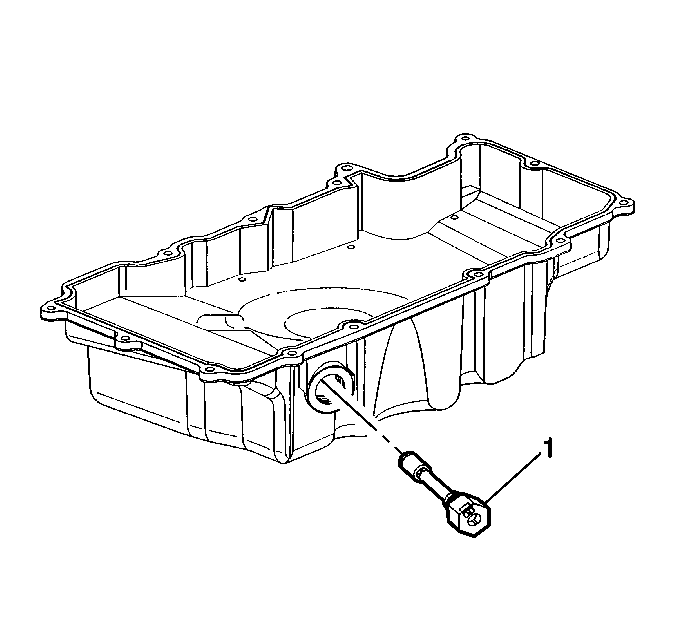
- Install the oil level switch (1) and tighten to 20 N·m (15 lb ft).
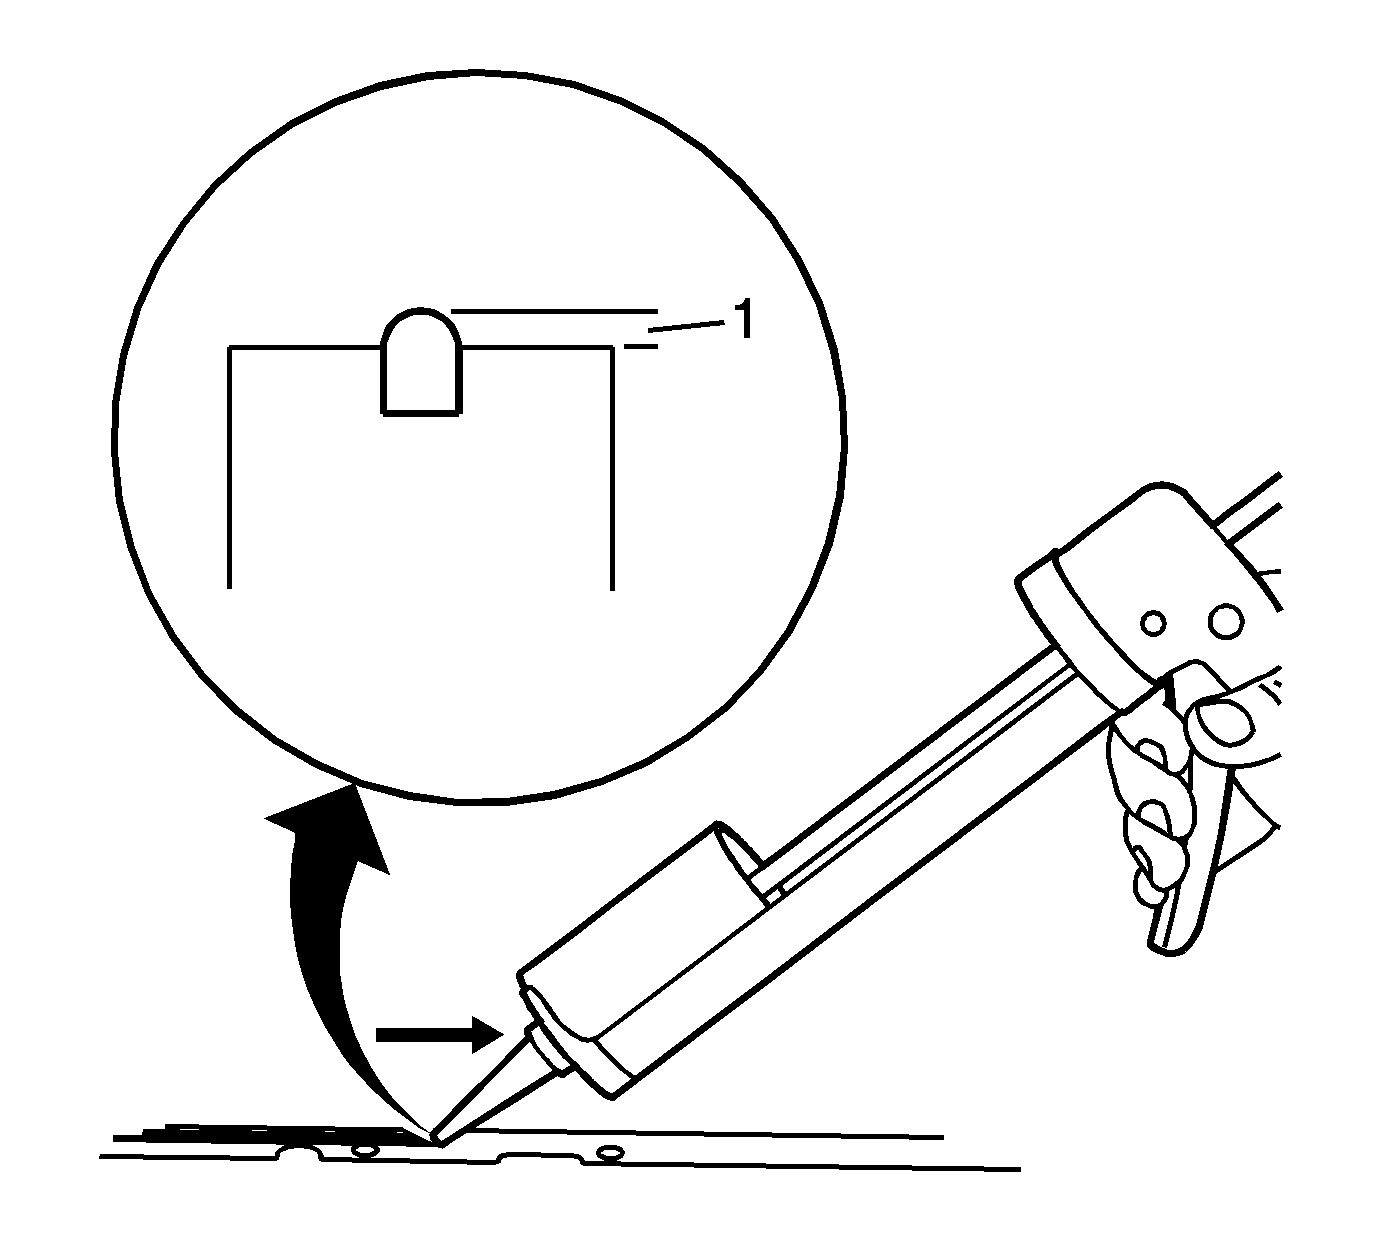
- Completely fill and slightly overfill the oil pan seal groove with a continuous bead of RTV sealant GM P/N 12378521 (Canadian P/N 88901148) or equivalent.
- Ensure the RTV sealant GM P/N 12378521 (Canadian P/N 88901148) or equivalent bead is higher than the oil pan sealing surface (1) by 3 mm (0.118 in).
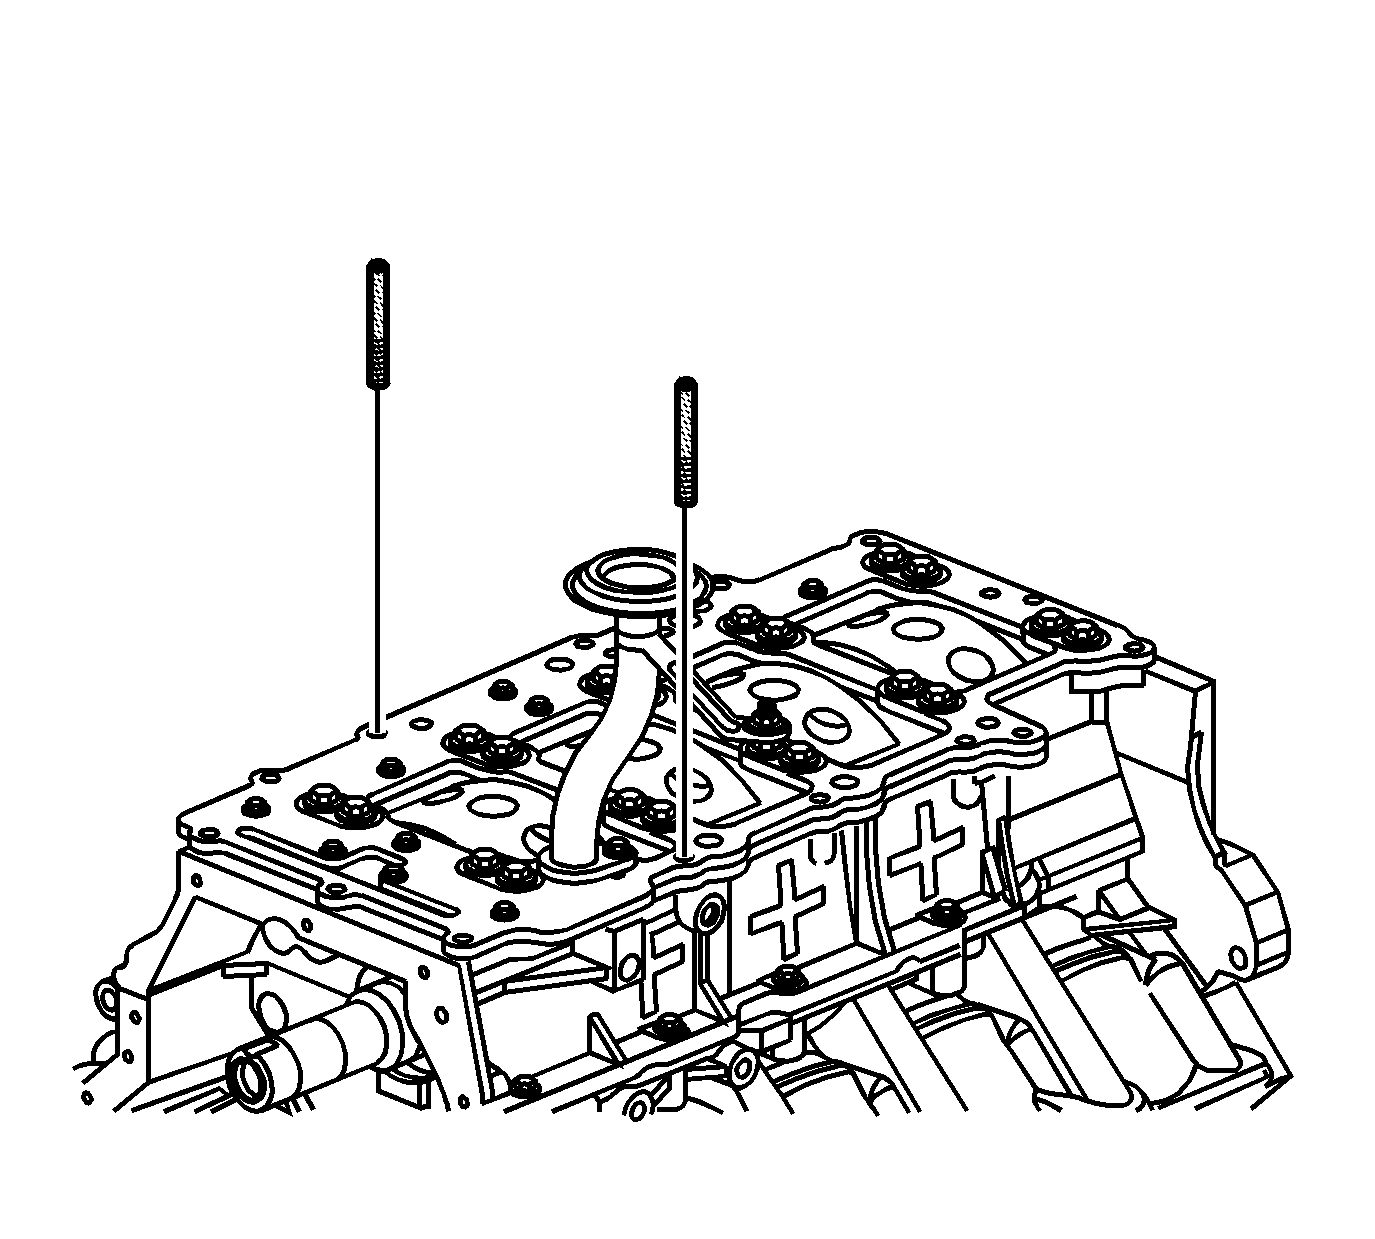
- To prevent shifting of the oil pan, install one EN 46109 pins into a bolt hole in each side of the lower crankcase.
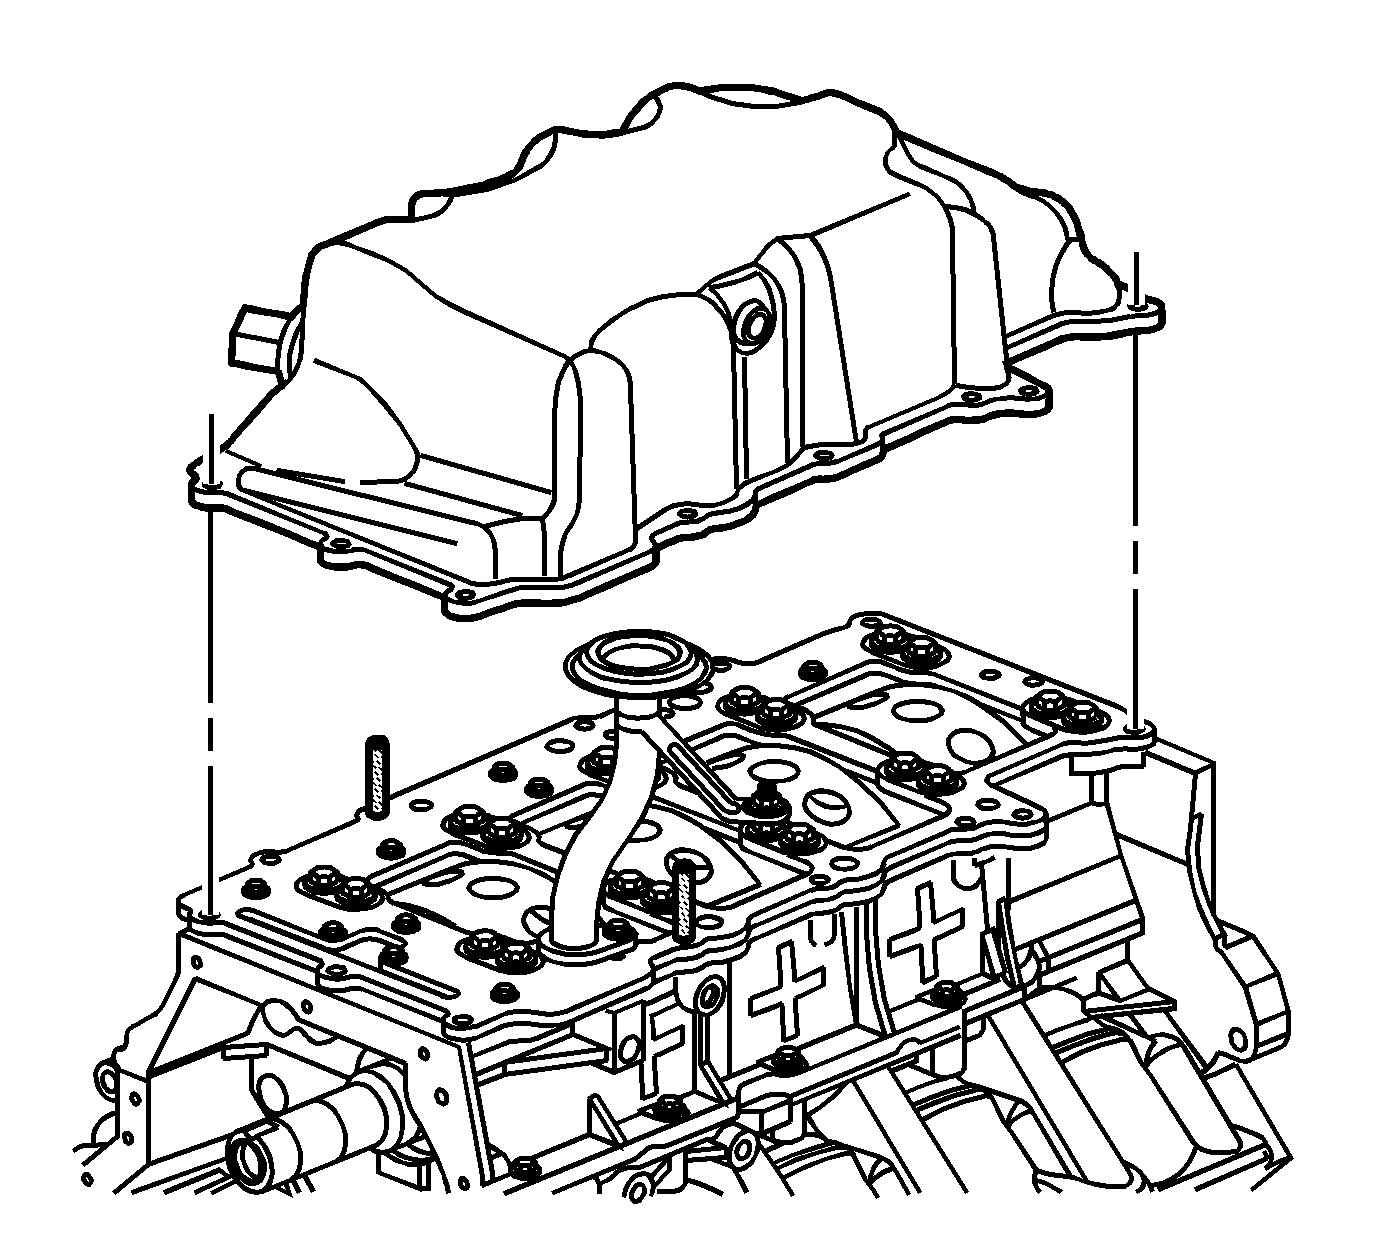
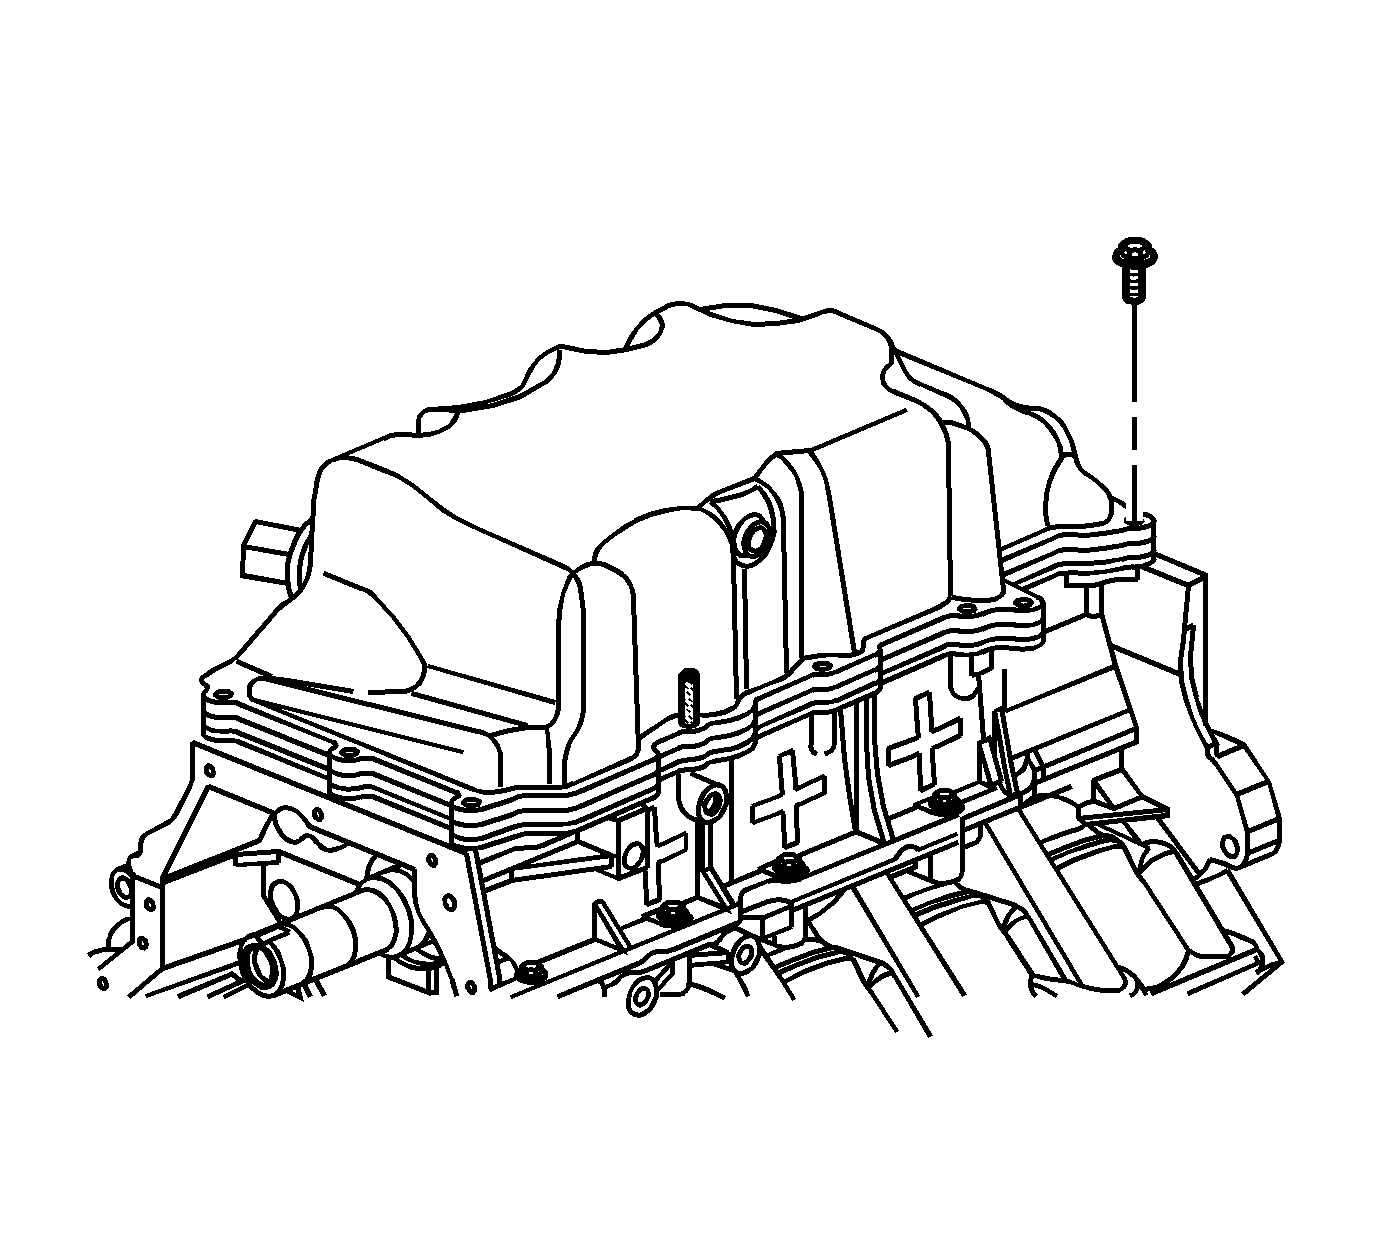
- Position the oil pan onto the lower crankcase.
- Loosely install several of the oil pan bolts.
- Remove the EN 46109 pins .
- Finish loosely installing the remaining oil pan bolts.
- Tighten the oil pan bolts in the sequence shown.
- Clean off any sealant that has protruded to the exterior of the engine.
Caution: Refer to Fastener Caution in the Preface section.
Note: Ensure components being sealed with room temperature vulcanizing (RTV) sealant are assembled within 20 minutes. Components assembled after the RTV sealant has skinned-over, approximately 20 minutes, will not seal properly.
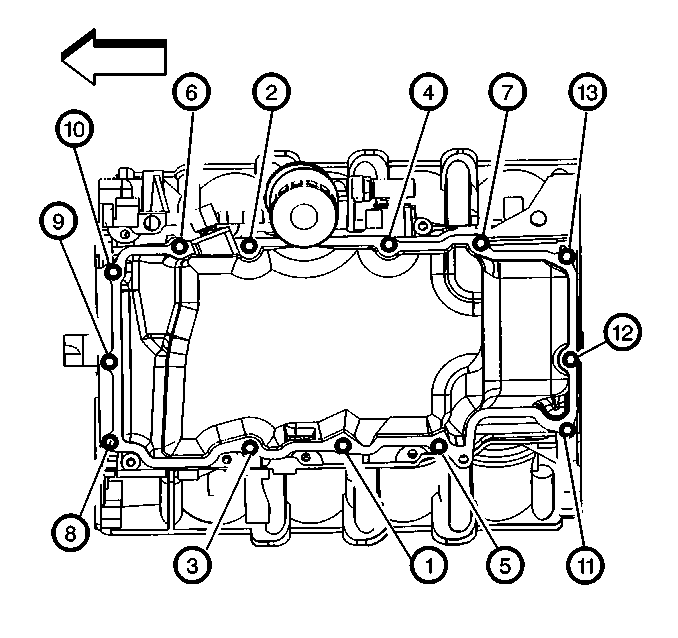
| 9.1. | Tighten the oil pan bolts a first pass to 8 N·m (71 lb in) in the sequence shown. |
| 9.2. | Tighten the oil pan bolts a final pass to 12 N·m (106 lb in) in the sequence shown. |
