For 1990-2009 cars only
Removal Procedure
- Remove the front frame. Refer to Front Frame Replacement.
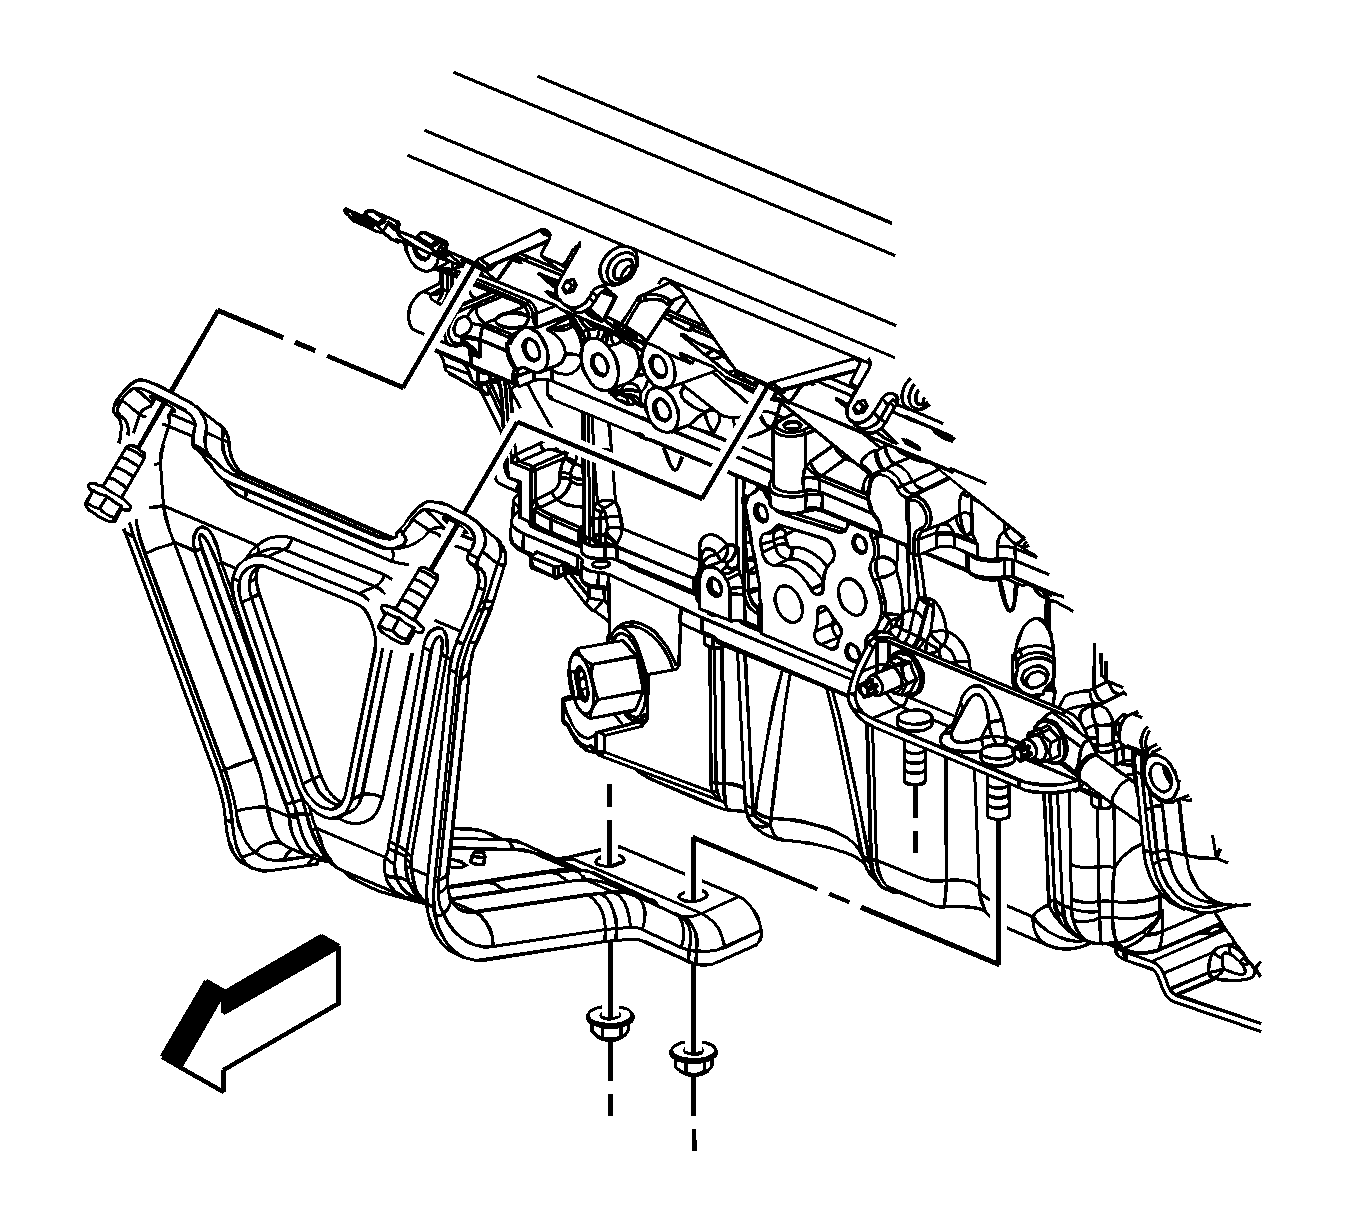
- Remove the engine mount bracket to cylinder head bolts.
- Remove the upper engine mount bracket to lower engine mount bracket nuts.
- Remove the upper engine mount bracket.
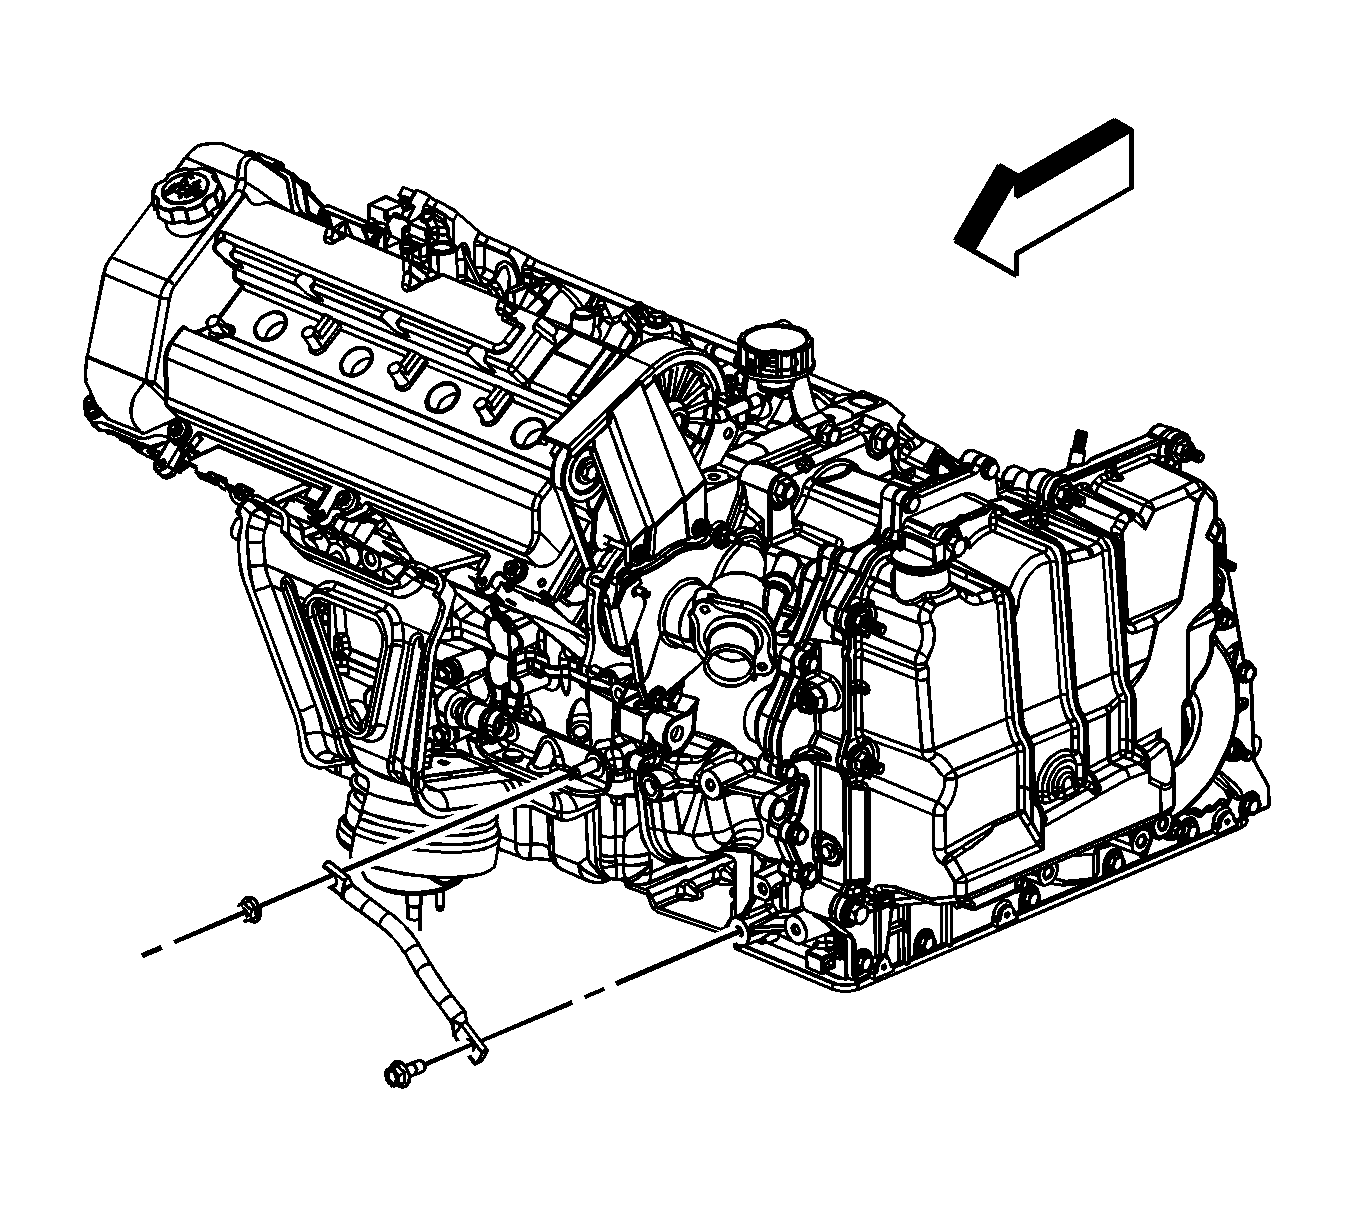
- Remove the transaxle brace bolt.
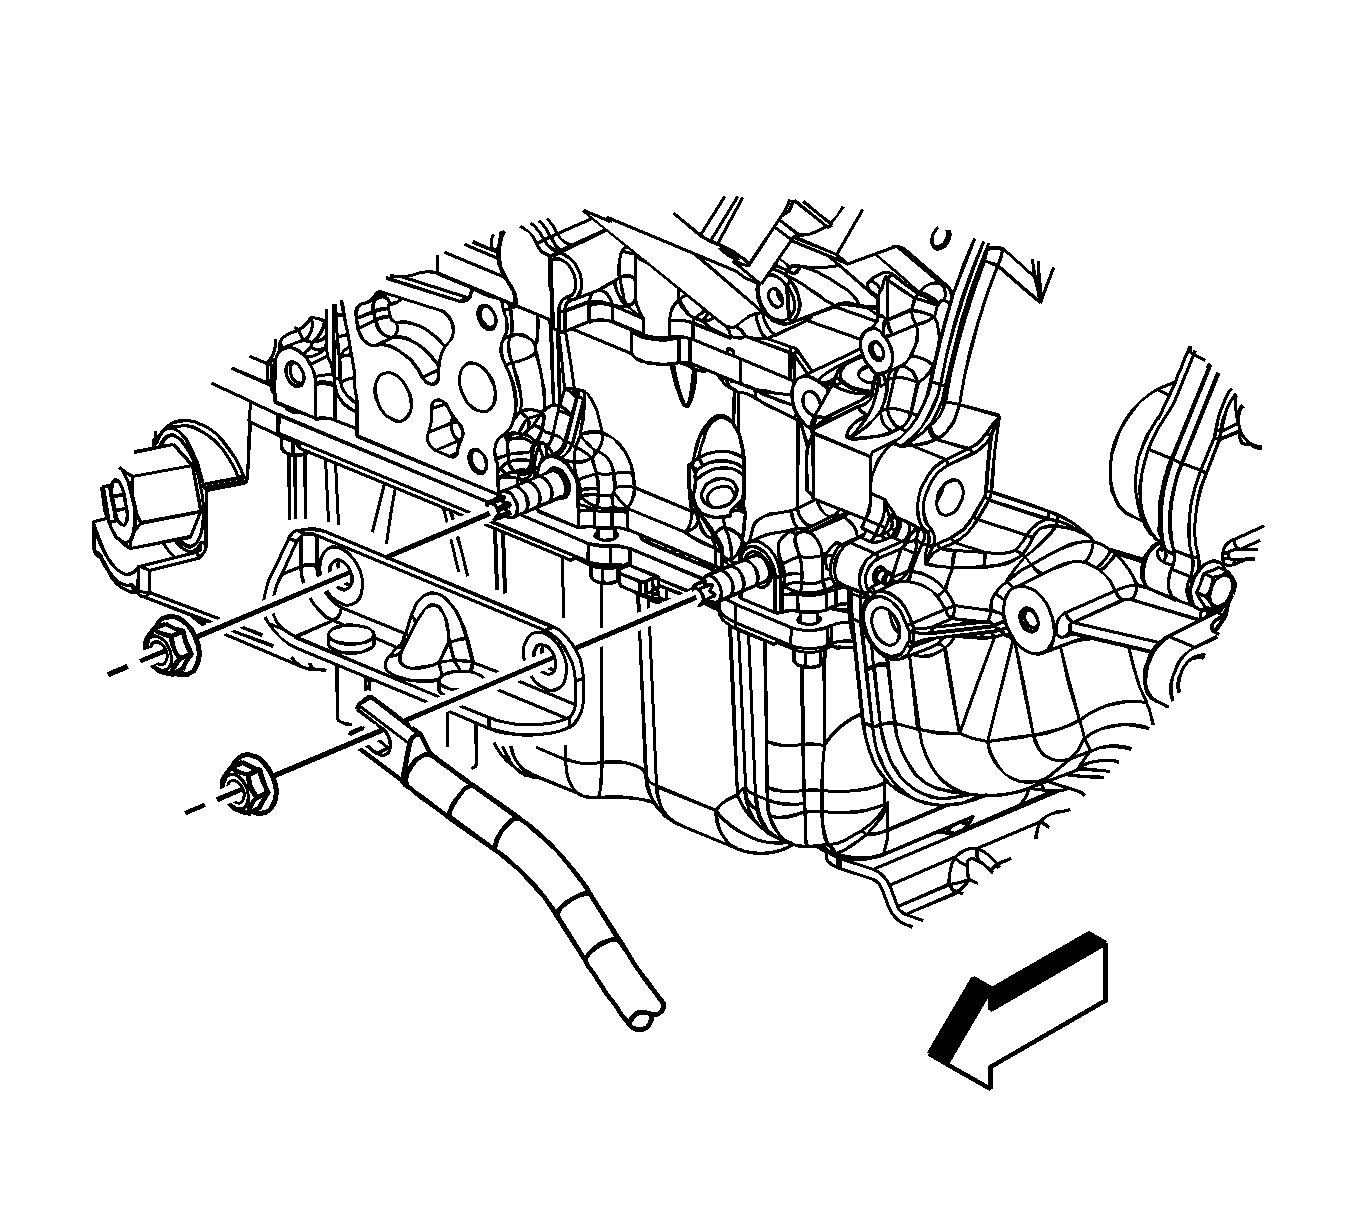
- Remove the lower engine mount bracket to engine stud nuts.
- Remove the transaxle brace.
- Remove the lower engine mount bracket.


Installation Procedure
- Install the lower engine mount bracket onto the engine studs.
- Install the transaxle brace.
- Install the lower engine mount bracket to engine stud nuts finger tight.
- Install the transaxle brace bolt.
- Install the upper engine mount bracket onto the studs.
- Install the engine mount bracket to cylinder head bolts.
- Install the upper engine mount bracket to lower engine mount bracket nuts.
- Install the front frame. Refer to Front Frame Replacement.

Caution: Refer to Fastener Caution in the Preface section.

Tighten
| • | Tighten the transaxle brace bolt to 50 N·m (37 lb ft). |
| • | Tighten the lower engine mount bracket to engine stud nuts to 50 N·m (37 lb ft). |

Tighten
Tighten the bolts to 50 N·m (37 lb ft).
Tighten
Tighten the nuts to 50 N·m (37 lb ft).
