Fuel Pump Electrical Circuit Diagnosis VIN K
Refer to Engine Controls Schematics .
Circuit Description
When the ignition is first turned ON, the powertrain control module (PCM) energizes the fuel pump relay which applies power to the in-tank fuel pump. The fuel pump relay will remain ON as long as the engine is running or cranking and the PCM is receiving reference pulses. If no reference pulses are present, the PCM de-energizes the fuel pump relay within 2 seconds after the ignition is turned ON or the engine is stopped.
The fuel pump delivers fuel to the fuel rail and injectors, then to the fuel pressure regulator. The fuel pressure regulator controls fuel pressure by allowing excess fuel to be returned to the fuel tank.
Diagnostic Aids
Inspect for the following conditions:
Many situations may lead to an intermittent condition. Perform each inspection or test as directed.
Important: : Remove any debris from the connector surfaces before servicing a component. Inspect the connector gaskets when diagnosing or replacing a component. Ensure that the gaskets are installed correctly. The gaskets prevent contaminate intrusion.
| • | Loose terminal connection |
| - | Use a corresponding mating terminal to test for proper tension. Refer to Testing for Intermittent Conditions and Poor Connections , and to Connector Repairs in Wiring Systems for diagnosis and repair. |
| - | Inspect the harness connectors for backed out terminals, improper mating, broken locks, improperly formed or damaged terminals, and faulty terminal to wire connection. Refer to Testing for Intermittent Conditions and Poor Connections , and to Connector Repairs in Wiring Systems for diagnosis and repair. |
| • | Damaged harness--Inspect the wiring harness for damage. If the harness inspection does not reveal a problem, observe the display on the scan tool while moving connectors and wiring harnesses related to the sensor. A change in the scan tool display may indicate the location of the fault. Refer to Wiring Repairs in Wiring Systems for diagnosis and repair. |
| • | Inspect the powertrain control module (PCM) and the engine grounds for clean and secure connections. Refer to Wiring Repairs in Wiring Systems for diagnosis and repair. |
If the condition is determined to be intermittent, reviewing the Snapshot or Freeze Frame/Failure Records may be useful in determining when the DTC or condition was identified.
Test Description
The numbers below refer to the step numbers on the diagnostic table.
-
Command both the ON and OFF states. Repeat the commands as necessary.
-
This step determines whether the condition is located on the coil side or the switch side of the circuit.
-
This step verifies that the powertrain control module (PCM) is providing voltage to the fuel pump relay.
-
This step tests for an open in the ground circuit to the fuel pump relay.
-
This step determines if a voltage is constantly being applied to the fuel pump relay.
-
This step tests for a grounded fuel pump supply circuit between the fuel pump and the fuel pump fuse.
-
This step determines if the condition with the circuit is intermittent. If the fuse does not open, inspect the supply voltage between the fuse and the fuel pump for an intermittent condition.
-
This step jumps the fuel pump relay in order to bypass the fuel pump relay and activate the fuel pump.
-
This step tests the fuel pump supply circuit between the fuel pump and the fuel pump relay for an open or high resistance.
-
This step tests the fuel pump ground circuit for an open or high resistance.
Step | Action | Yes | No |
|---|---|---|---|
1 | Did you perform the Powertrain On Board Diagnostic (OBD) System Check? | ||
Does the fuel pump turn ON and OFF? | Go to Intermittent Conditions | ||
With a scan tool, command the fuel pump ON and OFF. Do you hear a click from the relay when you command the fuel pump ON and OFF? | |||
Does the test lamp turn ON and OFF? | |||
Does the test lamp turn ON and OFF? | |||
Does the test lamp remain illuminated with each command? | |||
7 |
Did you find and correct the condition? | ||
8 |
Did you find and correct the condition? | ||
9 | Turn ON the ignition, with the engine OFF. Does the fuel pump operate continuously? | ||
10 |
Does the fuel pump operate continuously? | ||
11 | Is the fuel pump fuse open? | ||
Did you find and correct the condition? | |||
Is the fuel pump fuse open? | Go to Intermittent Conditions | ||
14 |
Does the test lamp illuminate? | ||
Connect a 10 amp fused jumper wire between the switch circuit of the fuel pump relay and the supply circuit of the fuel pump relay. Does the fuel pump operate? | |||
Did you find and correct the condition? | |||
|
Important: Visually and physically inspect the ground circuit for being tight, corrosion on terminals, or damage to the wiring harness. Test the ground circuit of the fuel pump for an open or high resistance. Refer to Circuit Testing and Wiring Repairs in Wiring Systems. Did you find and correct the condition? | |||
18 | Inspect for poor connections at the fuel pump. Refer to Testing for Intermittent Conditions and Poor Connections and Connector Repairs in Wiring Systems. Did you find and correct the condition? | ||
19 | Inspect for poor connections at the fuel pump relay. Refer to Testing for Intermittent Conditions and Poor Connections and Connector Repairs in Wiring Systems. Did you find and correct the condition? | ||
20 | Inspect for poor connections at the harness connector of the PCM. Refer to Testing for Intermittent Conditions and Poor Connections and Connector Repairs in Wiring Systems. Did you find and correct the condition? | ||
21 | Repair the supply voltage circuit of the fuel pump for a short to voltage. Refer to Wiring Repairs in Wiring Systems. Is the action complete? | -- | |
22 | Repair the ground circuit of the fuel pump relay for an open. Refer to Wiring Repairs in Wiring Systems. Is the action complete? | -- | |
23 | Repair the switch voltage circuit of the fuel pump relay. Refer to Wiring Repairs in Wiring Systems. Is the action complete? | -- | |
24 |
Important: Inspect for poor connections at the fuel pump, and within the fuel tank, before replacing the fuel pump.
Is the action complete? | -- | |
25 | Replace the fuel pump relay. Refer to Fuel Pump Relay Replacement . Is the action complete? | -- | |
26 |
Important: The replacement PCM must be programed. Replace the PCM. Refer to Powertrain Control Module Replacement/Programming . Is the action complete? | -- | |
27 | Operate the system in order to verify the repair. Did you correct the condition? | System OK |
Fuel Pump Electrical Circuit Diagnosis VIN 1
Refer to Engine Controls Schematics .
Circuit Description
When the ignition is first turned ON, the powertrain control module (PCM) energizes the fuel pump relay which applies power to the fuel pump through the high speed circuit, controlled by the fuel pump speed control relay. The fuel pump relay will remain ON as long as the engine is running or cranking and the PCM is receiving reference pulses. If no reference pulses are present, the PCM de-energizes the fuel pump relay within 2 seconds after the ignition is turned ON or the engine is OFF. The fuel pump delivers fuel to the fuel rail and injectors, then to the fuel pressure regulator. The fuel pressure regulator controls fuel pressure by allowing excess fuel to be returned to the fuel tank. With the engine OFF, the fuel pump can be turn ON by using the scan tool output controls function.
The PCM alters fuel pump speed by energizing the fuel pump speed control relay. Under normal conditions, the fuel pump speed control relay is energized. The applied voltage to the fuel pump is controlled by a resistor assembly. When higher fuel volume is required due to increased engine load, MAP sensor value over 90 kPa the PCM de-energizes the fuel pump speed control relay circuit. The increased voltage to the in-tank fuel pump allows a higher volume of fuel to be delivered to the fuel rail. The PCM also compensates for low system voltage by energizing the fuel pump speed control relay.
Diagnostic Aids
An intermittent may be caused by:
| • | A poor connection |
| • | Rubbed through the wire insulation |
| • | A wire broken inside of the insulation |
Check for a poor connection or a damaged harness -- Inspect the PCM harness and connectors for the following items:
| • | Improper mating |
| • | Broken locks |
| • | Improperly formed or damaged terminals |
| • | Poor terminal to wire connections |
| • | Damaged harnesses |
Test Description
The numbers below refer to the step numbers on the diagnostic table.
-
The fuel pump primes the fuel rail/injectors using the high speed circuit. This check ensures proper fuel pressure for the vehicle to start.
-
This step checks for a short to ground in the feed circuit to the fuel pump relay.
-
This step tests for continuity from the fuel pump relay to the fuel pump ground.
-
This step tests for a short to ground in the feed circuit or speed control resistor circuit to the fuel pump.
-
This step tests the fuel pump resistor and resistor pigtail for a short to ground.
-
This step tests the continuity of the speed control and fuel pump feed harness/splices.
Step | Action | Value(s) | Yes | No | ||||||
|---|---|---|---|---|---|---|---|---|---|---|
1 | Did you preform the Powertrain On Board Diagnostic (OBD) System Check? | -- | ||||||||
2 | Did DTC P0230 or DTC 1260 set? | -- | Go to DTC P0230 Fuel Pump Relay Control Circuit or DTC P1260 Fuel Pump Speed Relay Control Circuit | |||||||
|
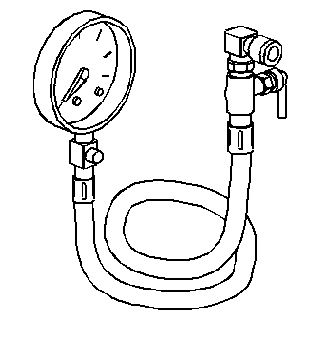
Caution: Wrap a shop towel around the fuel pressure connection in order to reduce the risk of fire and personal injury. The towel will absorb any fuel leakage that occurs during the connection of the fuel pressure gage. Place the towel in an approved container when the connection of the fuel pressure gage is complete.
Is proper fuel pressure indicated? | 333-376 kPa (48-55 psi) | |||||||||
4 |
Did the fuel pressure drop? | -- | ||||||||
|
Important: If the engine cranks but will not run, continue with the Engine Cranks but Does Not Start diagnostic table.
Is proper fuel pressure indicated? | 333-376 kPa (48-55 psi) | |||||||||
6 | Test for a blown fuel pump fuse. Is the fuse blown? | -- | ||||||||
Does the test lamp illuminate? | -- | |||||||||
Does the test lamp illuminate? | -- | |||||||||
9 | Locate and repair short between the following circuits:
Refer to Wiring Repairs in Wiring Systems. Is the action complete? | -- | ||||||||
10 |
Did the fuse blow? | -- | ||||||||
11 |
Is proper fuel pressure indicated? | -- | ||||||||
Reconnect the fuel pump resistor harness. Did the fuse blow? | -- | |||||||||
13 | Locate and repair a short to B+ in the following locations:
Refer to Wiring Repairs in Wiring Systems. Did you find and correct the condition? | -- | -- | |||||||
14 | Check for an open or short to ground in the fuel pump driver circuit in the under hood accessory wiring junction block. Refer to Wiring Repairs , Connector Repairs or Testing for Intermittent Conditions and Poor Connections in Wiring Systems. Did you find and correct the condition? | -- | -- | |||||||
15 |
Does the test illuminate? | -- | ||||||||
Is proper fuel pressure indicated? | -- | |||||||||
17 | Locate and repair open or short in the B+ feed to the fuel pump relay. Refer to Wiring Repairs in Wiring Systems. Is the action complete? | -- | -- | |||||||
18 |
Did you find and correct the condition? | -- | ||||||||
19 |
Did you find and correct the condition? | -- | ||||||||
20 | Check for an open fuel pump speed control resistor. Was a problem found? | -- | ||||||||
21 |
Does the test lamp illuminate? | -- | ||||||||
22 |
Did you find and correct the condition? | -- | ||||||||
23 | Connect the test lamp between terminal C in the fuel pump connector and chassis ground. Does the test lamp illuminate? | -- | ||||||||
24 | Locate and repair open or poor terminal connection in the fuel pump ground circuit. Refer to Connector Repairs in Wiring Systems. Is the action complete? | -- | -- | |||||||
25 | Locate and repair open or poor terminal connections in the following circuits:
Refer to Connector Repairs in Wiring Systems. Is the action complete? | -- | -- | |||||||
26 | Replace the fuel pump speed control resistor. Refer to Fuel Pump Resistor Replacement . Is the action complete? | -- | -- | |||||||
27 |
Did you find and correct the condition? | -- | ||||||||
28 | Replace the fuel pump. Refer to Fuel Sender Assembly Replacement . Is the action complete? | -- | -- | |||||||
29 | Replace the fuel pump relay. Refer to Fuel Pump Relay Replacement . Is the action complete? | -- | -- | |||||||
30 | Replace the fuel pump speed control relay. Is the action complete? | -- | -- | |||||||
31 |
Is proper fuel pressure indicated? | 333-376 kPa (48-55 psi) | ||||||||
32 |
Does the fuel pressure increase slightly when high fuel pump speed is selected? | -- | System OK |
