For 1990-2009 cars only
Oil Pan Installation LDK
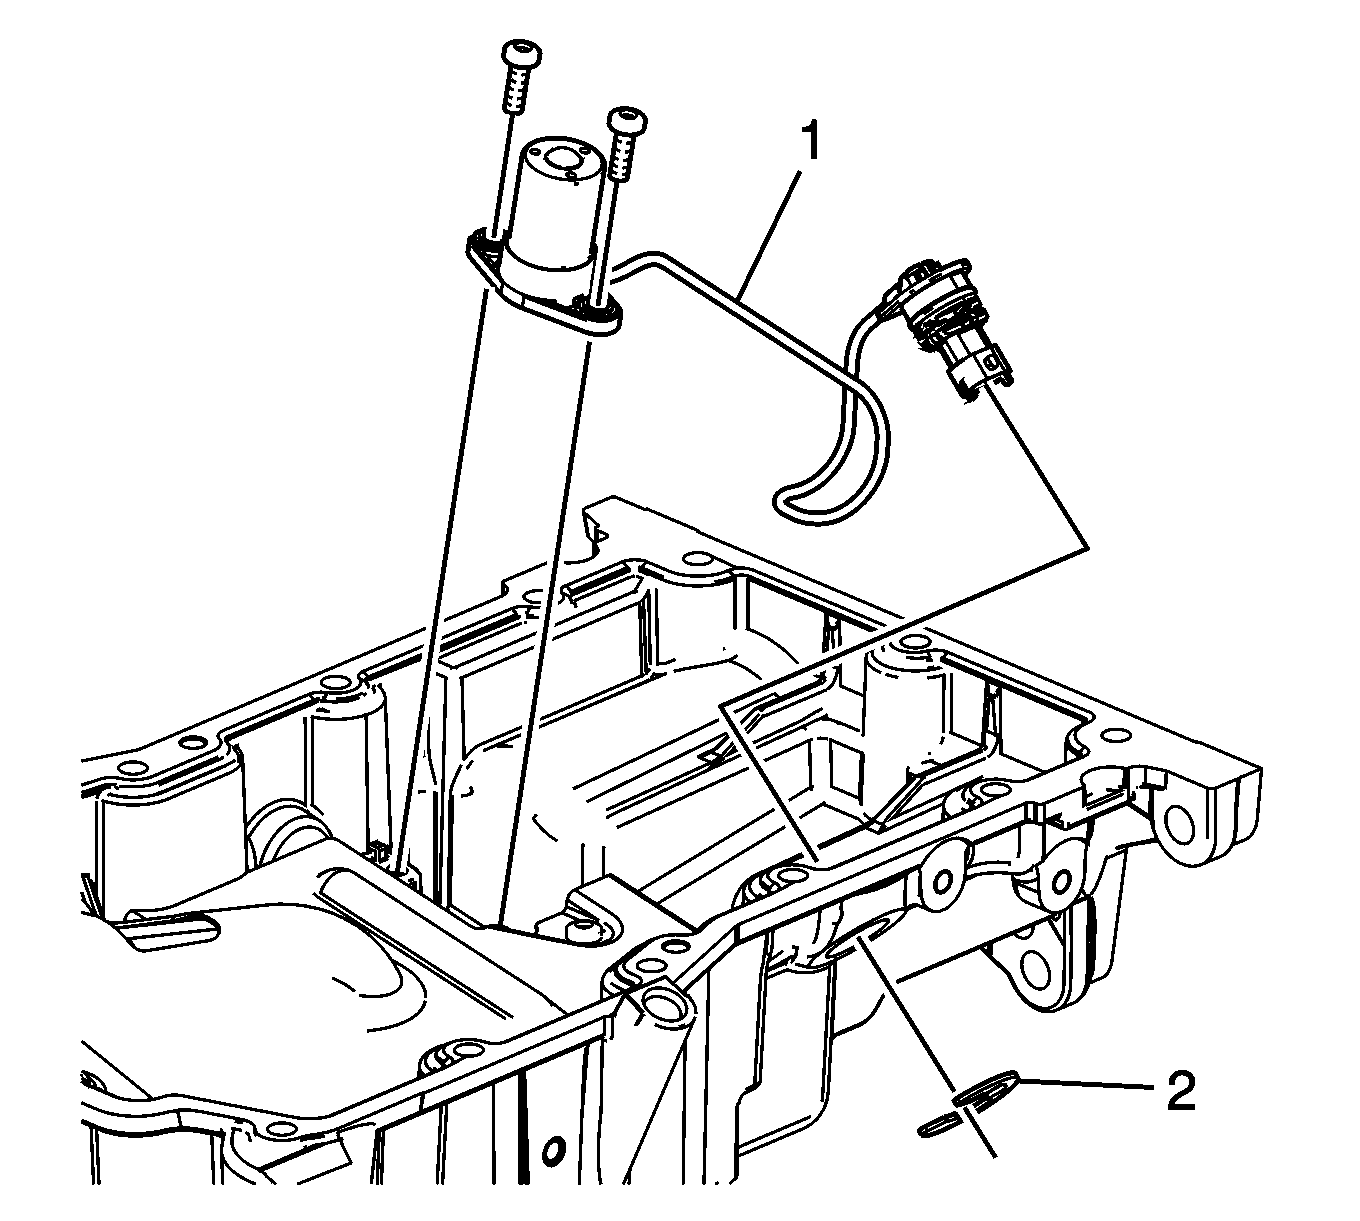
- Install the engine oil level sensor assembly (1) into the oil pan with the oil level indicator plate bolts. Tighten the bolts to 10 N·m (89 lb in).
- Install the engine oil level sensor connector and secure with a retaining ring (2).
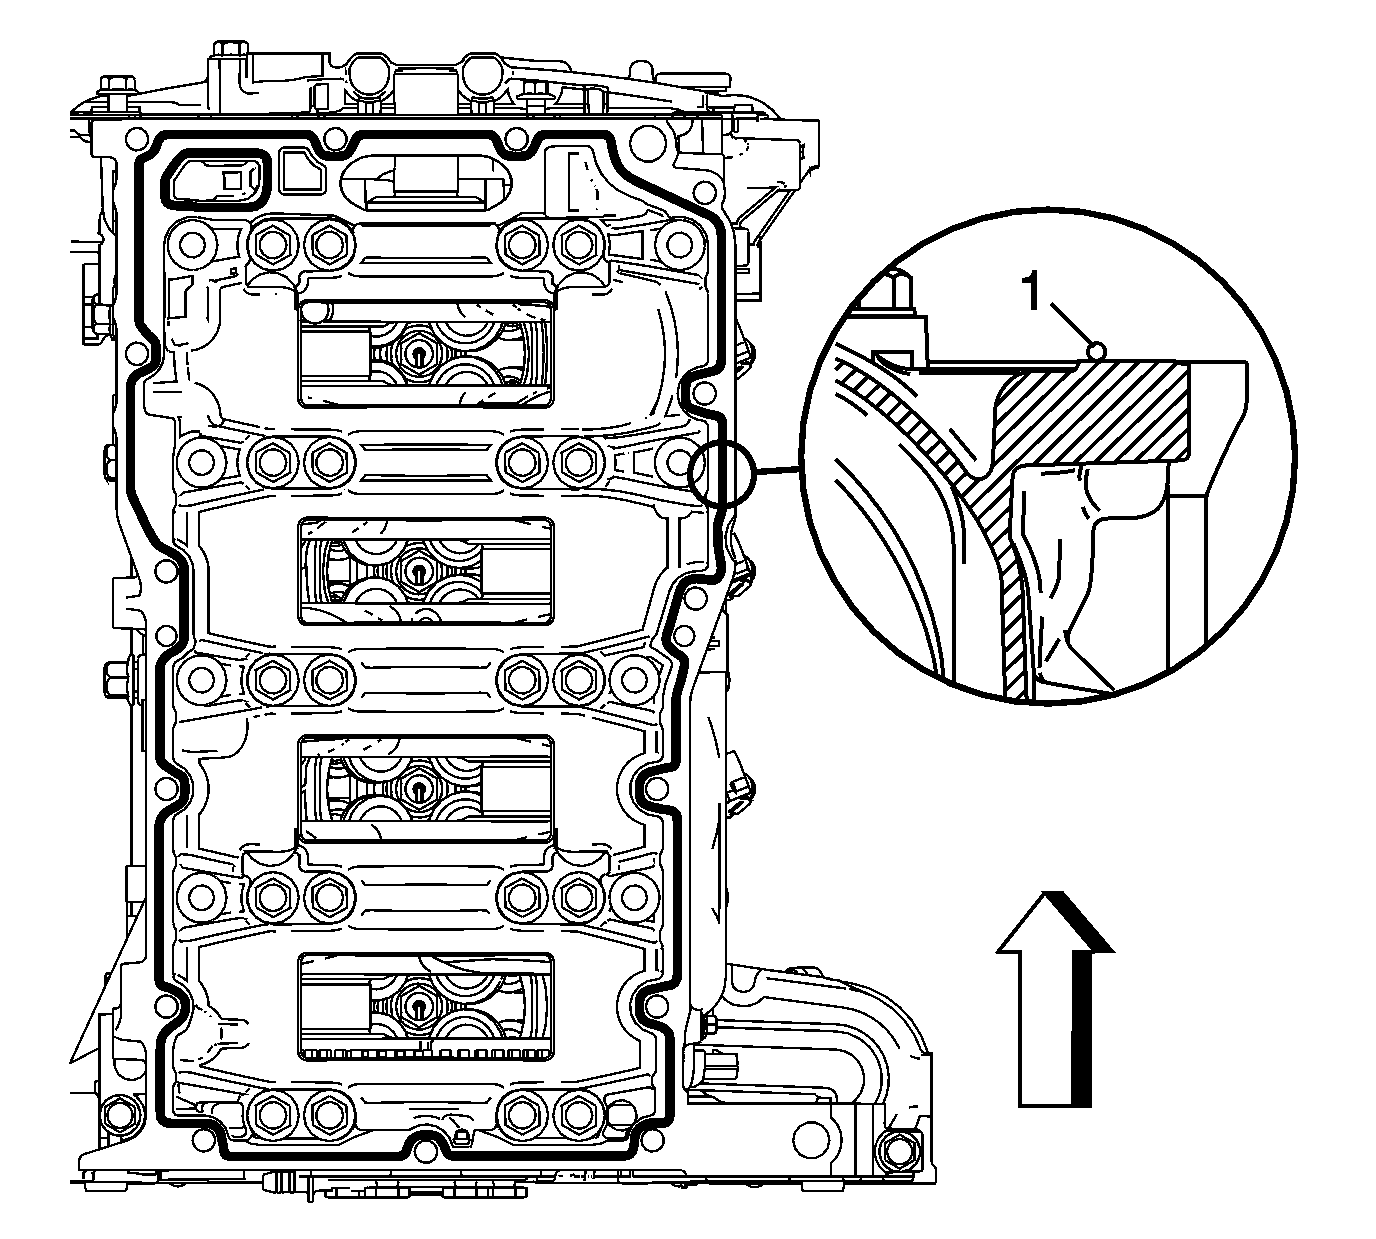
- Apply a 2.25 mm bead of sealer (1) on the level part of the flange next to the chamfer around the perimeter of the oil pan and the oil suction port opening. Refer to Adhesives, Fluids, Lubricants, and Sealers.
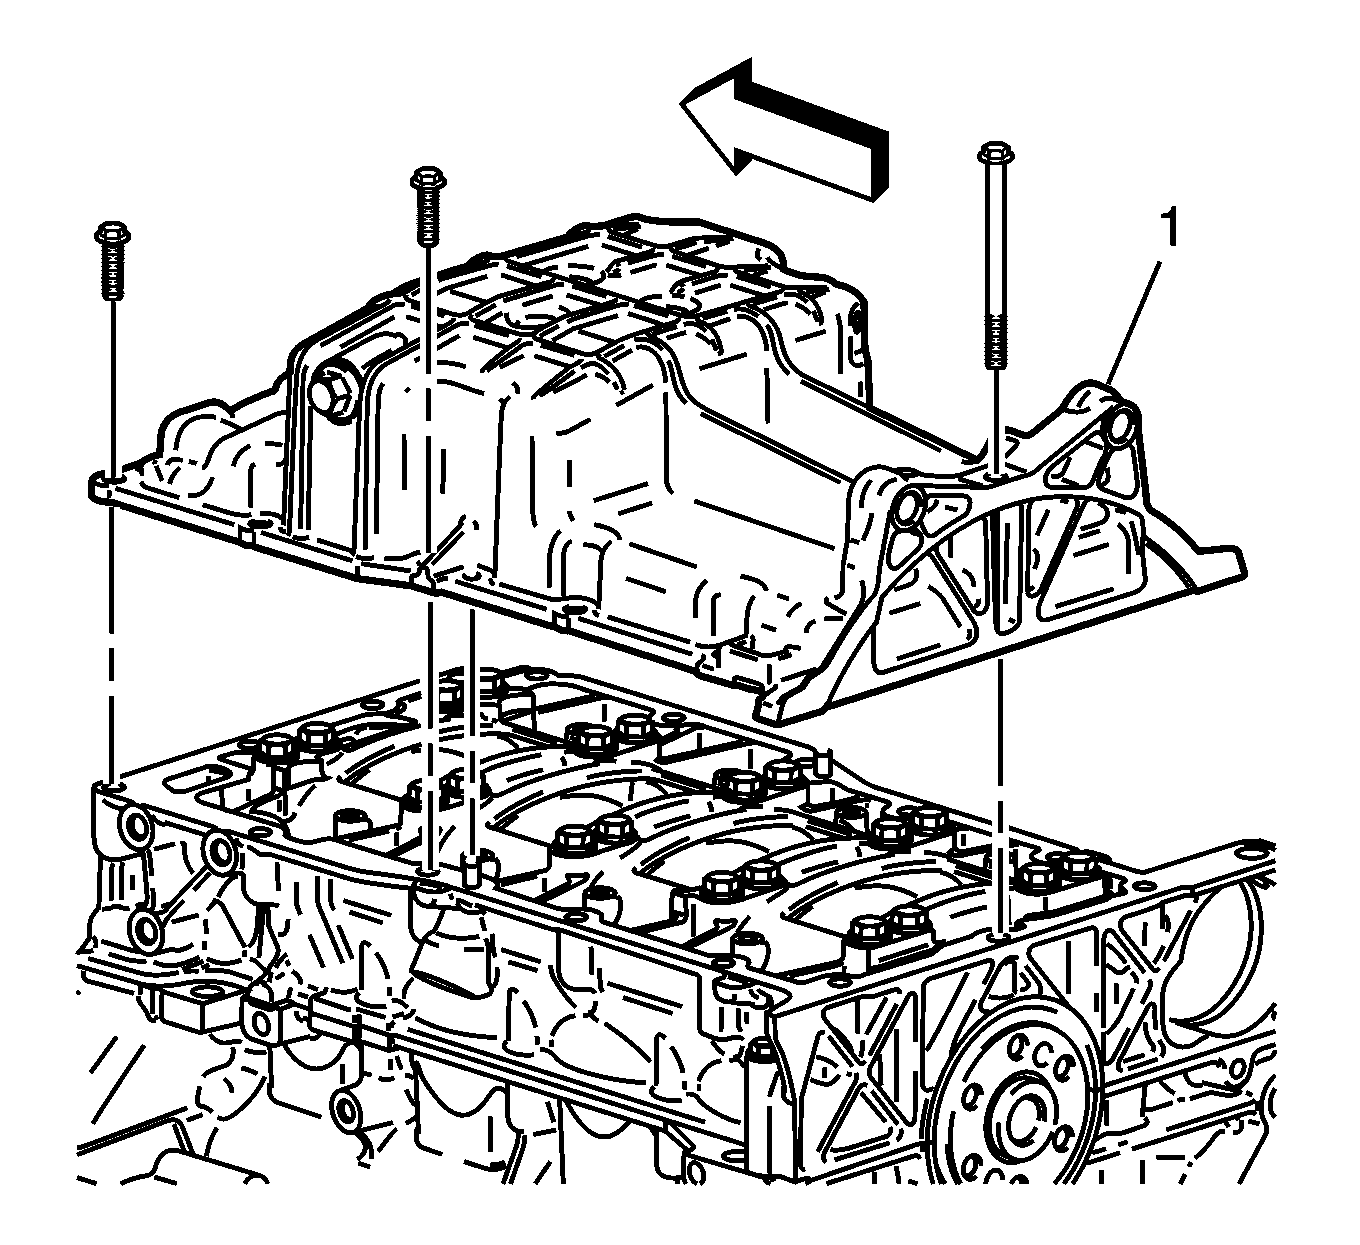
- Install the oil pan (1).
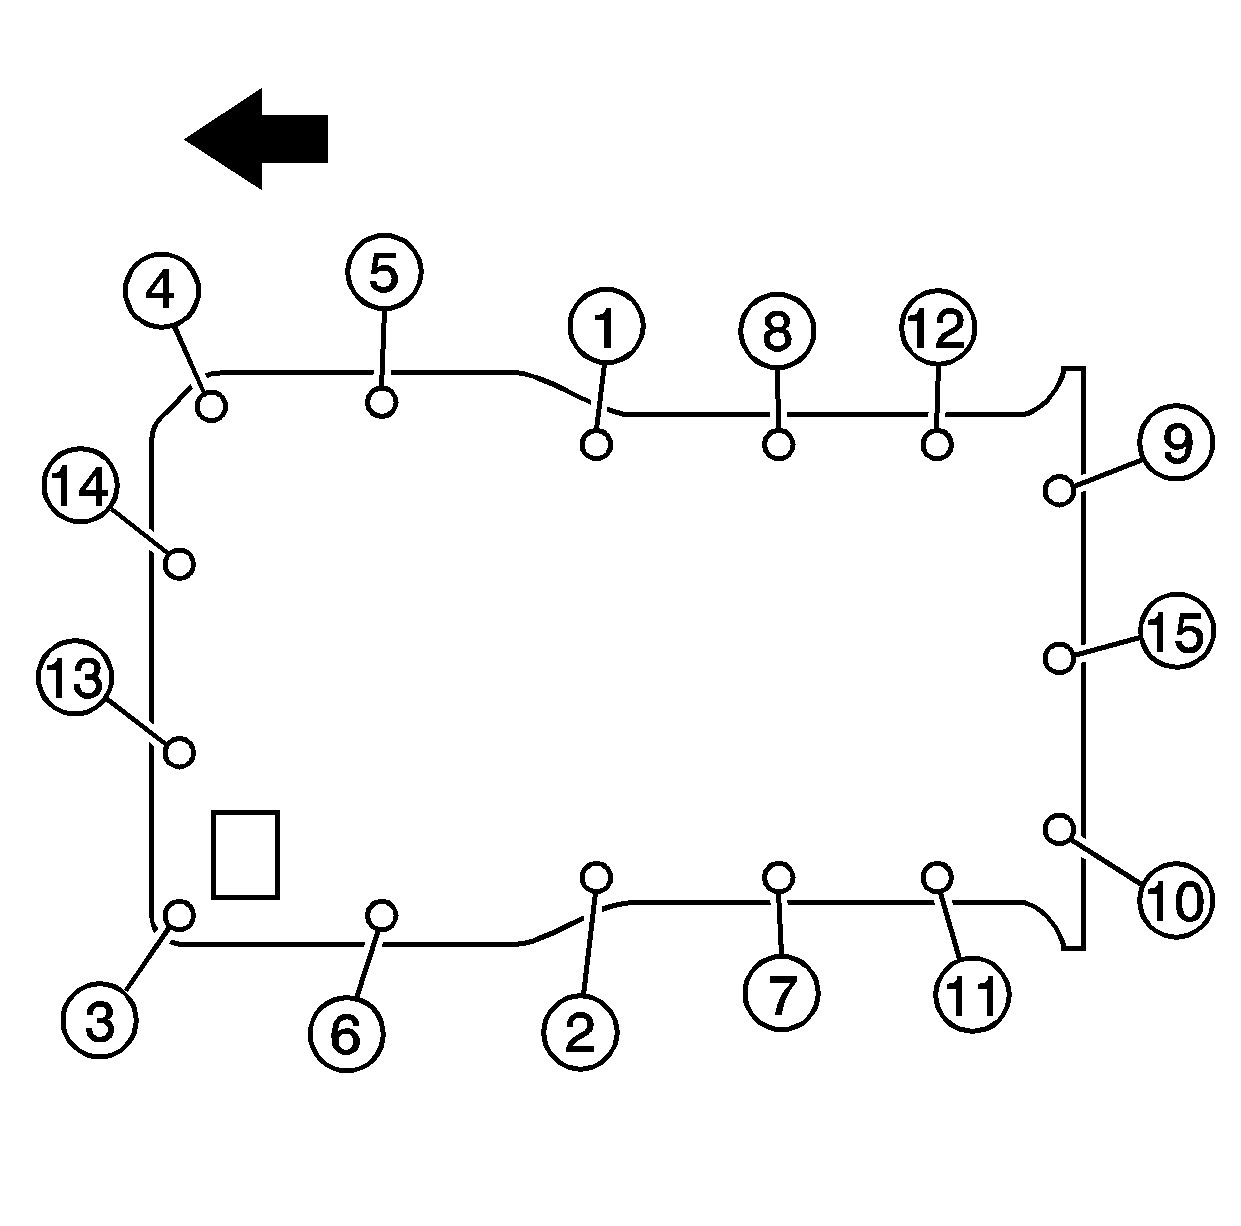
- Install the oil pan bolts and tighten the oil pan bolts in sequence to 25 N·m (18 lb ft).
Caution: Refer to Fastener Caution in the Preface section.


Note:
• The lower crankcase surface must be free of contamination prior to applying the sealer. • Install and align the oil pan to block within 20 minutes of applying the sealer. • The oil pan must be fastened to final torque specification within 60 minutes of applying the sealer.


Oil Pan Installation LTD
- Apply a 2.25 mm bead of sealer (1) on the level part of the flange next to the chamfer around the perimeter of the oil pan and the oil suction port opening. Refer to Adhesives, Fluids, Lubricants, and Sealers.
- Install the oil pan (1).
- Install the oil pan bolts and tighten to 25 N·m (18 lb ft) in sequence.

Note:
• The lower crankcase surface must be free of contamination prior to applying the sealer. • Install and align the oil pan to block within 20 minutes of applying the sealer. • The oil pan must be fastened to final torque specification within 60 minutes of applying the sealer.

Caution: Refer to Fastener Caution in the Preface section.

