Removal Procedure
- Remove the air cleaner and duct assembly. Refer to Air Cleaner Assembly Replacement in Engine Controls.
- Recover the refrigerant. Refer to Refrigerant Recovery and Recharging .
- Remove the vacuum brake booster. Refer to Power Vacuum Brake Booster Replacement in Hydraulic Brakes.
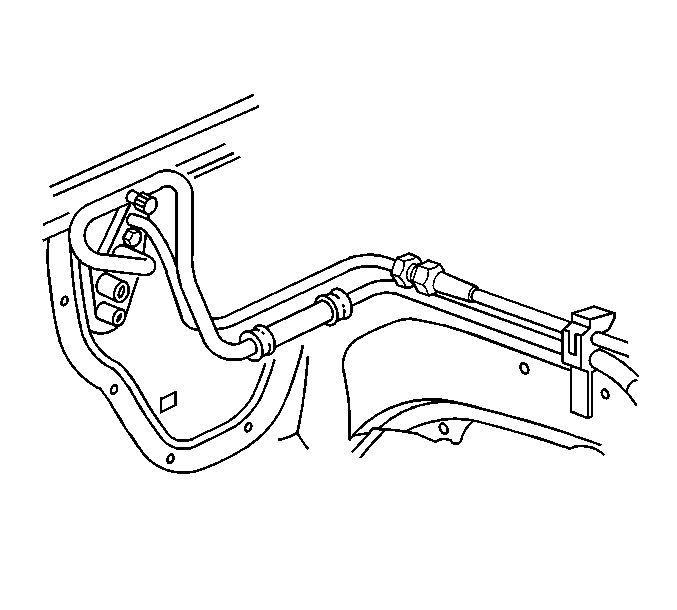
- Remove the liquid line from the bracket.
- Raise and support the vehicle. Refer to Lifting and Jacking the Vehicle in General Information.
- Remove the lower air deflector. Refer to Radiator Air Baffle Assemblies and Deflectors in Engine Cooling.
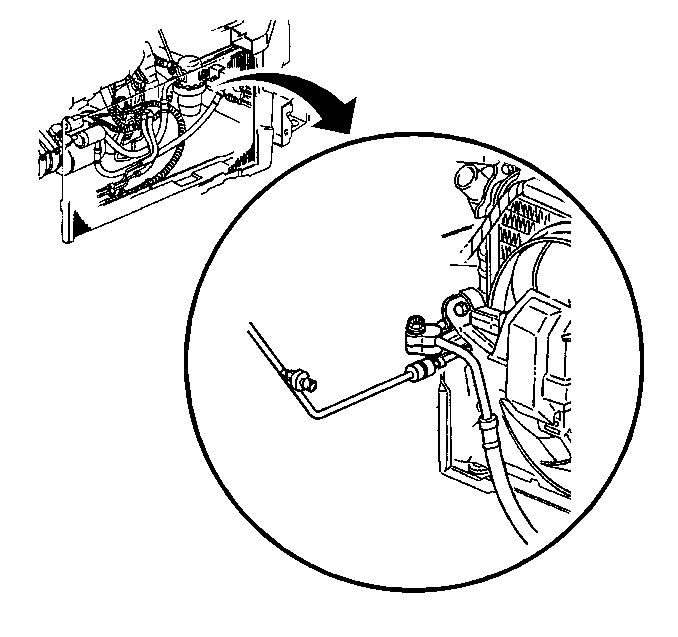
- Disconnect the electrical connector to the A/C refrigerant pressure sensor.
- Remove the liquid line nut at the condenser.
- Lower the vehicle.
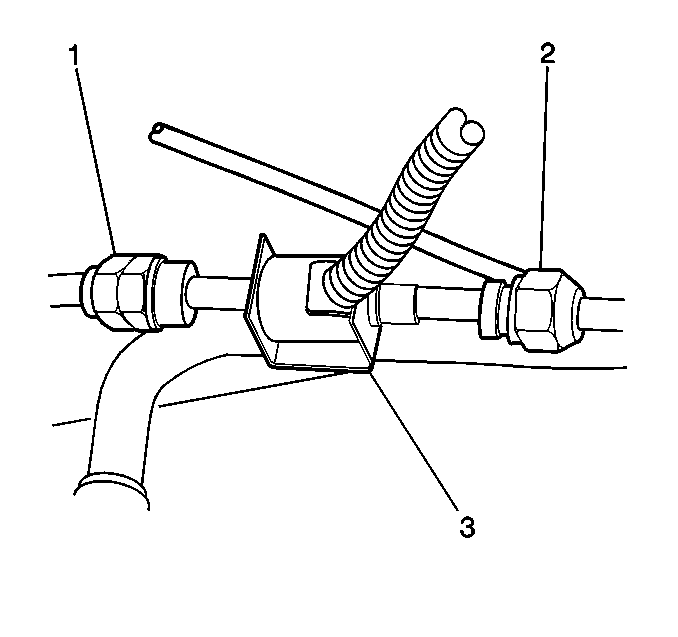
- Remove the liquid line nut at the orifice, if equipped with C60.
- Remove the liquid line nut (2) at the two stage orifice, if equipped with CJ4.
- Disconnect the transmission shift cable retainer at the left strut tower and position aside the transmission shift cable.
- Remove the liquid line.
- Remove and discard the O-rings.


Important: Use care when removing the tube.
Installation Procedure
- Install new O-ring seals onto the liquid line. Refer to O-Ring Replacement .
- Install the liquid line into place.
- Install the liquid line fitting at the orifice if equipped with C60.
- Install the liquid line fitting (2) at the two stage orifice if equipped with CJ4.
- Raise and support the vehicle. Refer to Lifting and Jacking the Vehicle in General Information.
- Install the liquid line fitting at the condenser.
- Connect the electrical connector to the A/C refrigerant pressure sensor.
- Install the lower air deflector. Refer to Radiator Air Baffle Assemblies and Deflectors in Engine Cooling.
- Lower the vehicle.
- Route the transmission shift cable into position and connect he transmission shift cable retainer at the strut tower.
- Install the liquid line/suction line bracket.
- Install the vacuum brake booster. Refer to Power Vacuum Brake Booster Replacement in Hydraulic Brakes.
- Evacuate and charge the system. Refer to Refrigerant Recovery and Recharging .
- Inspect the system for leaks. Refer to Leak Testing .
- Install the air cleaner and duct assembly. Refer to Air Cleaner Assembly Replacement in Engine Controls.
Important: The new O-ring seals must be lubricated with mineral base 525 viscosity refrigerant oil.

Notice: Use the correct fastener in the correct location. Replacement fasteners must be the correct part number for that application. Fasteners requiring replacement or fasteners requiring the use of thread locking compound or sealant are identified in the service procedure. Do not use paints, lubricants, or corrosion inhibitors on fasteners or fastener joint surfaces unless specified. These coatings affect fastener torque and joint clamping force and may damage the fastener. Use the correct tightening sequence and specifications when installing fasteners in order to avoid damage to parts and systems.
Tighten
Tighten the liquid line nut to 27 N·m (20 lb ft).

Tighten
Tighten the liquid line nut to 27 N·m (20 lb ft).

Tighten
Tighten the liquid line nut to 27 N·m (20 lb ft).
