For 1990-2009 cars only
Battery Positive Cable Replacement RPO LY7
Removal Procedure
- Disconnect the negative battery cable. Refer to Battery Negative Cable Disconnection and Connection .
- Loosen the positive battery cable nut at the battery.
- Remove the positive battery cable from the battery.
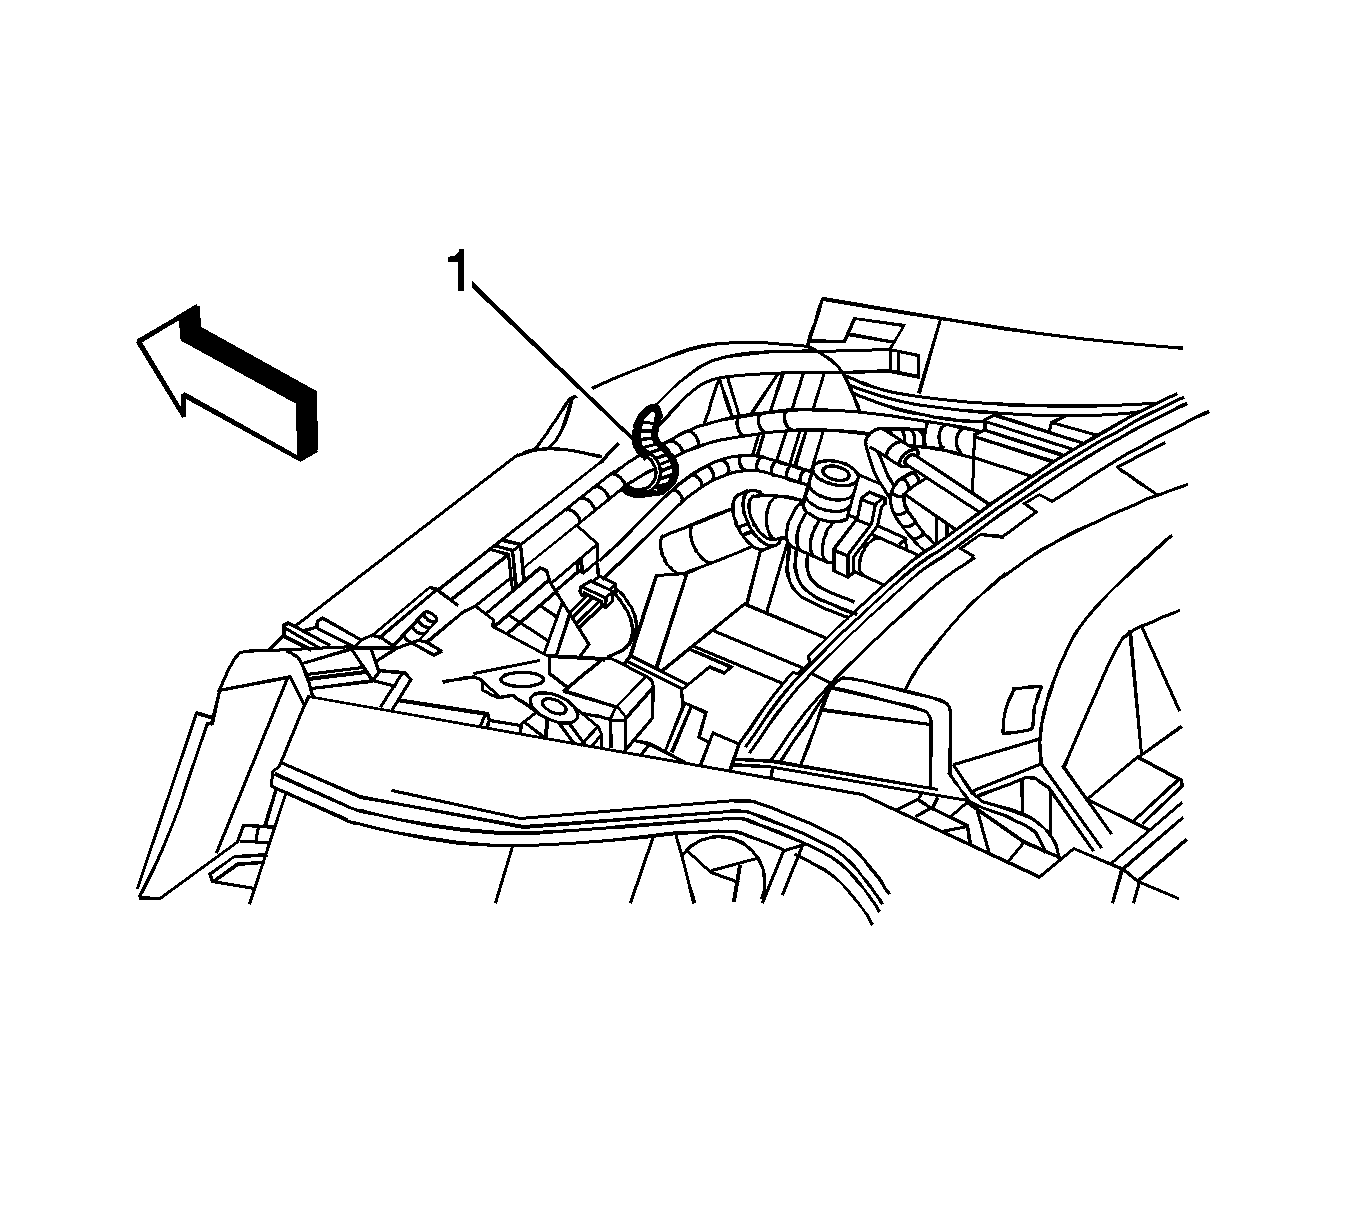
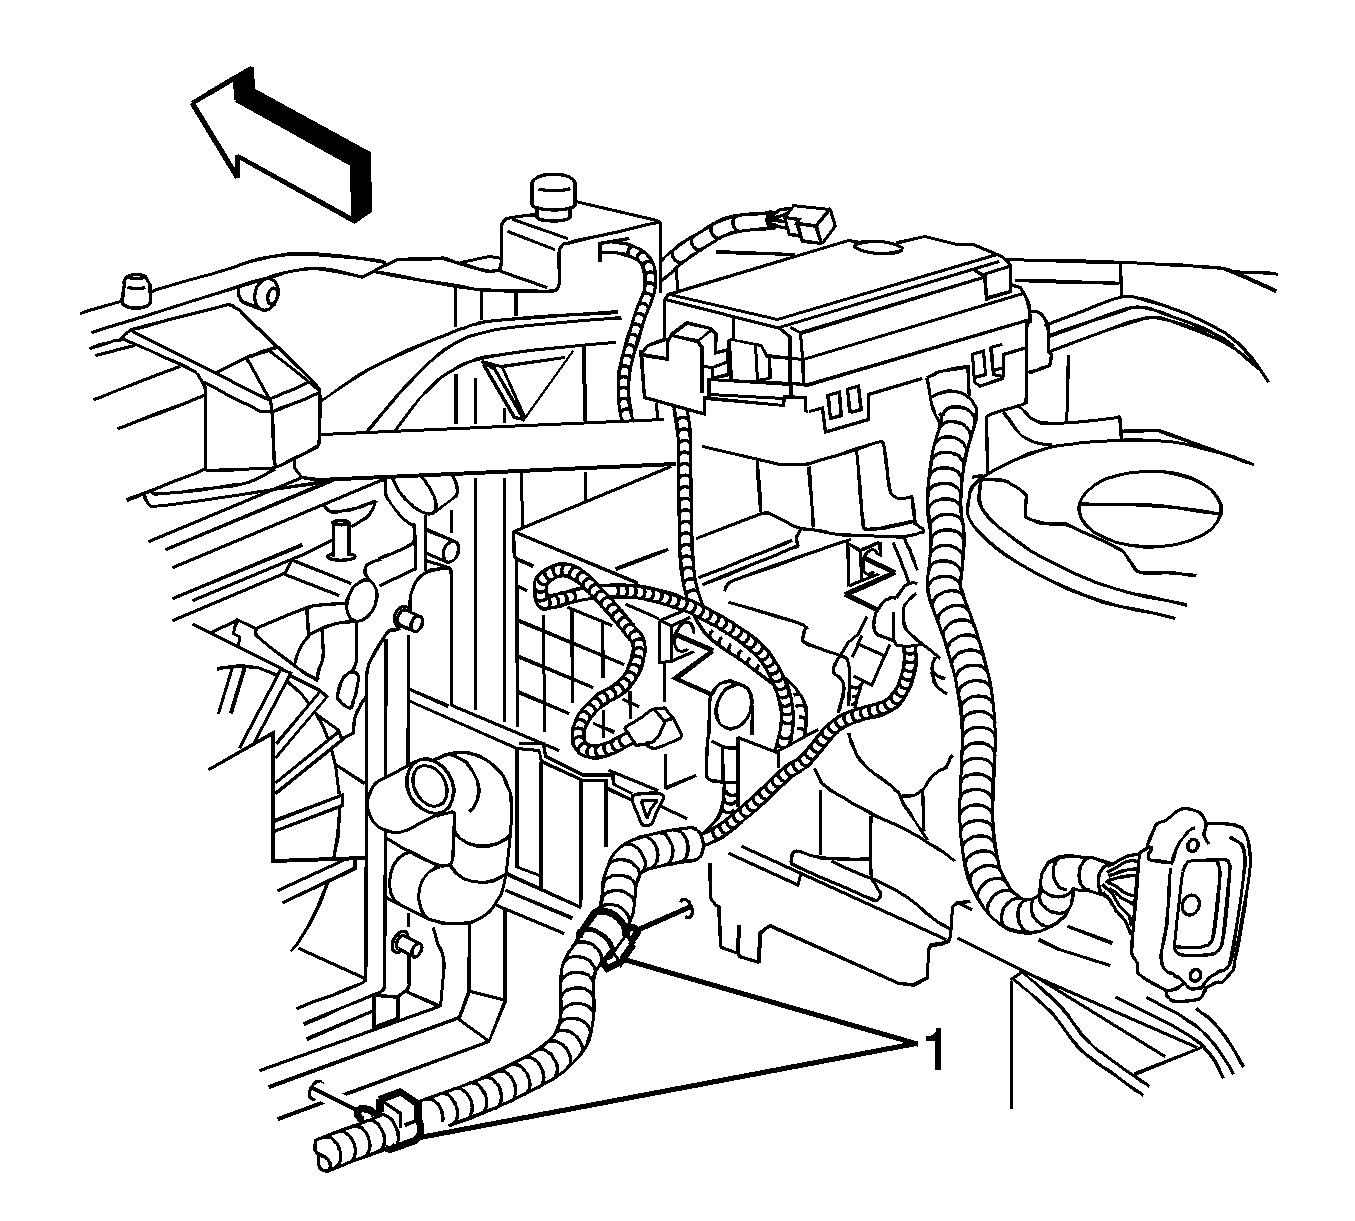
- Cut the tie strap (1) attaching the battery cable assembly to the engine harness.
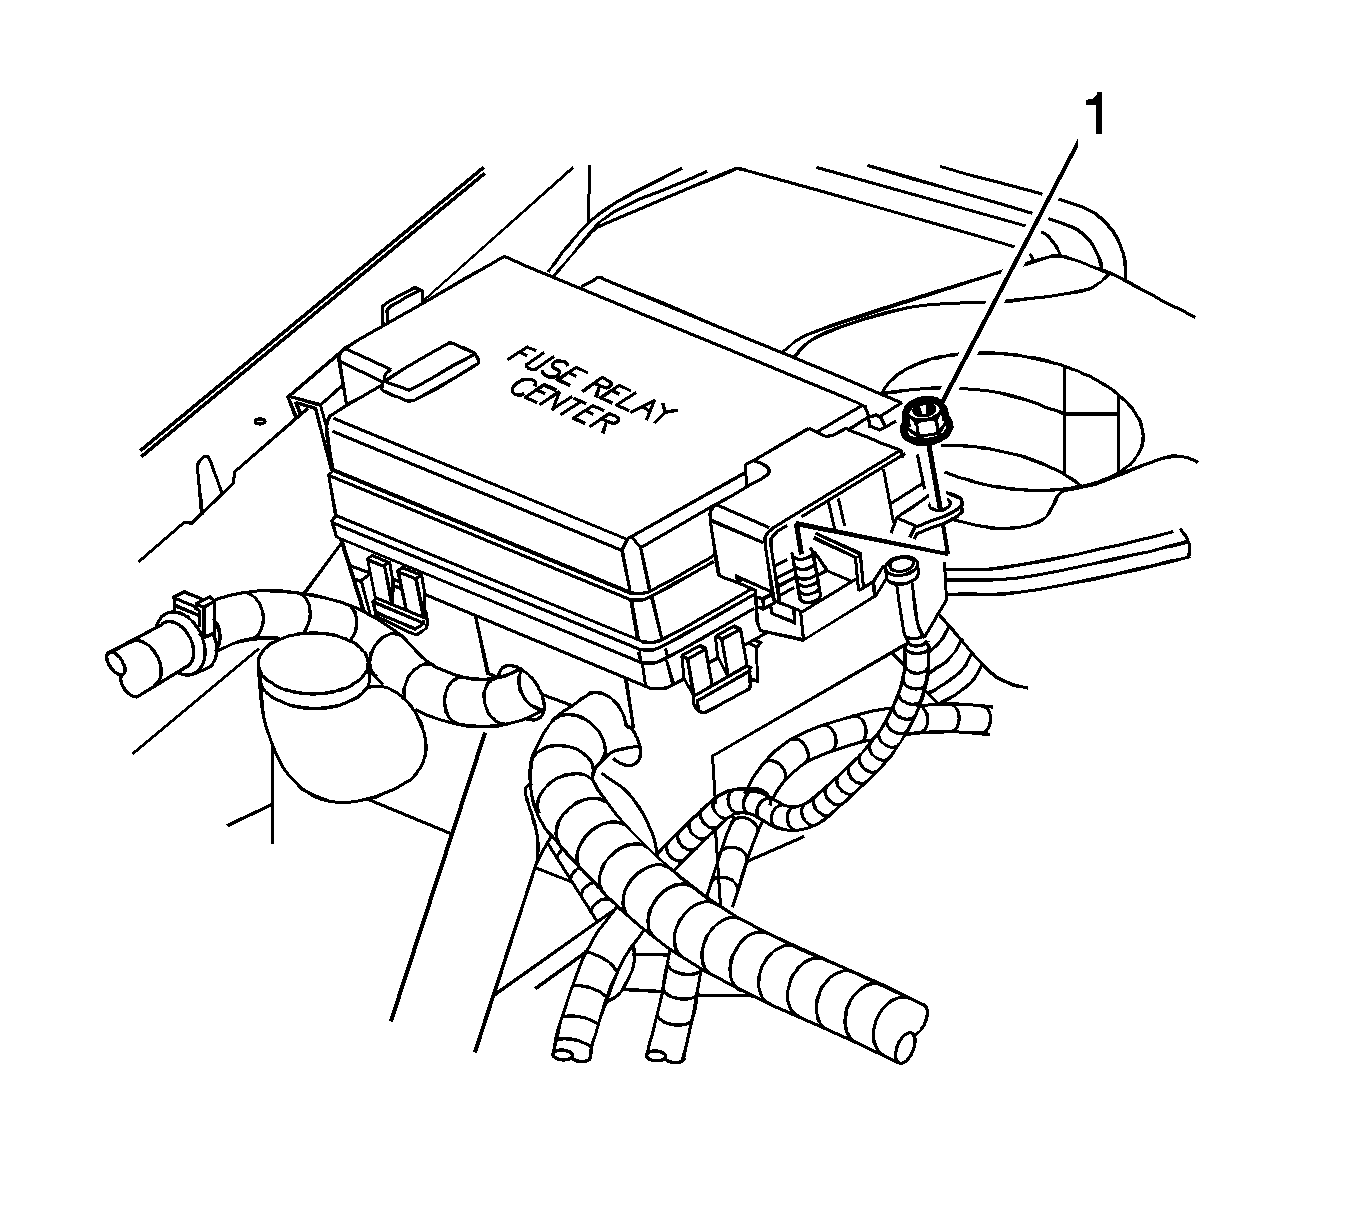
- Remove the junction block cover.
- Remove the positive battery cable to junction block nut (1).
- Remove the positive battery cable terminal from the junction block.
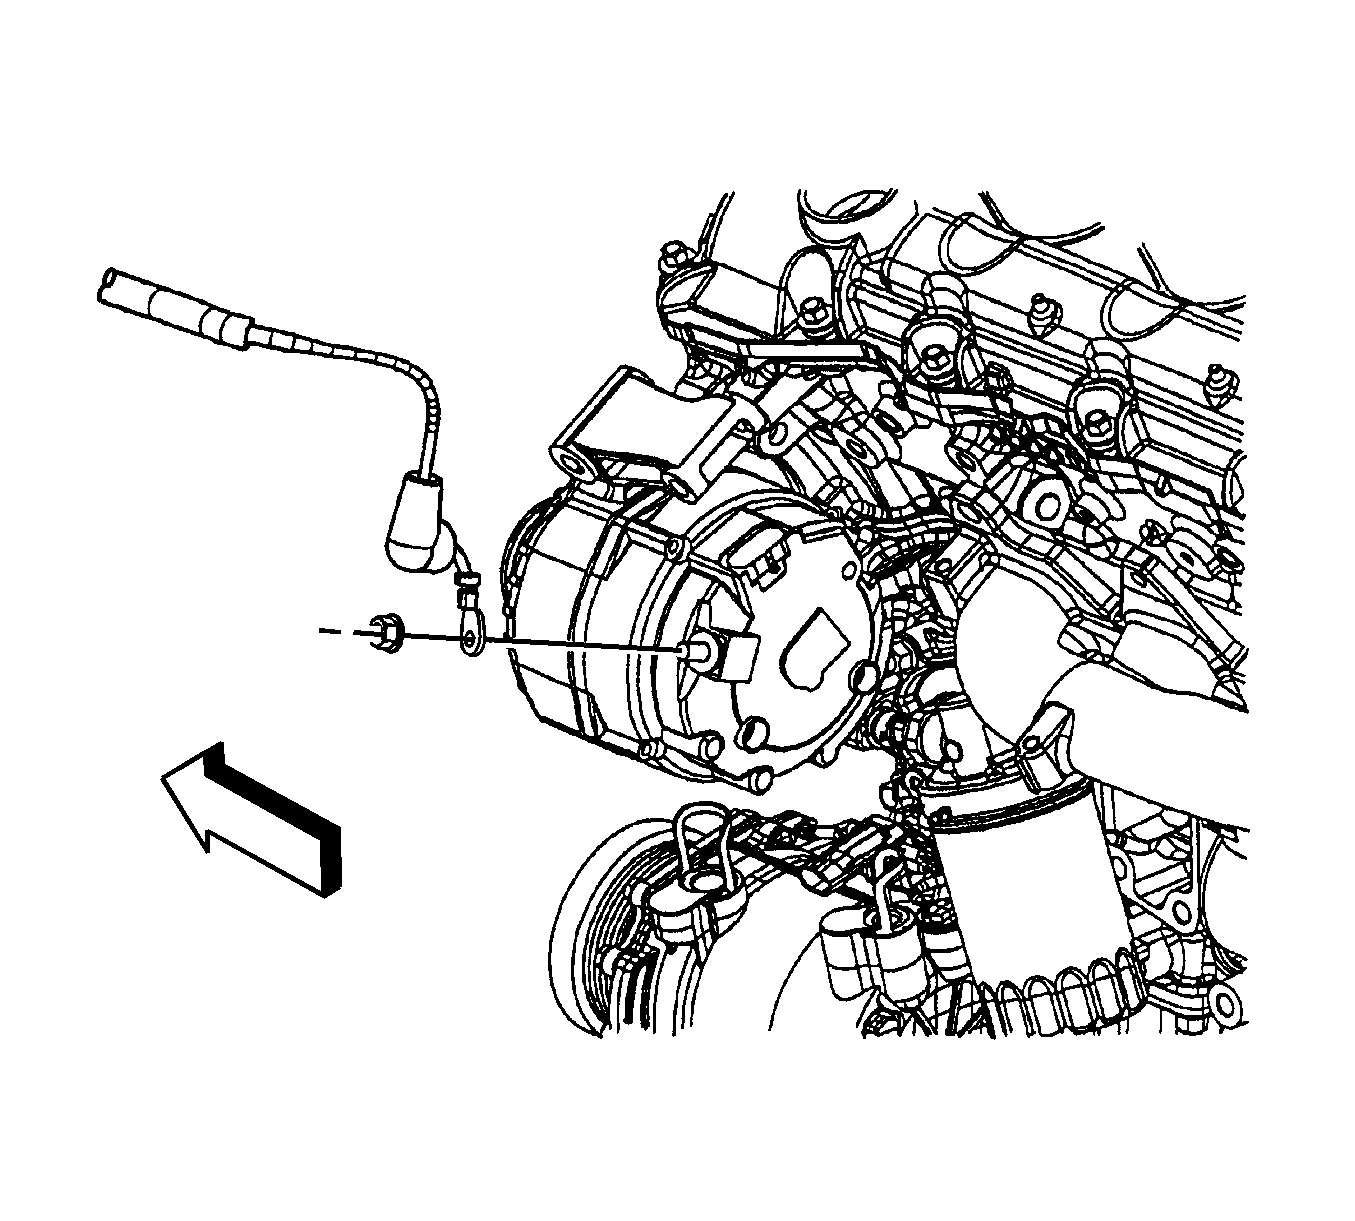
- Reposition the positive battery cable terminal boot at the generator.
- Remove the positive battery cable terminal nut.
- Remove the positive battery cable terminal from the generator.
- Remove the negative battery cable ground bolt from the radiator support.
- Separate the negative battery cable ground from the fog lamp harness ground.
- Raise and support the vehicle. Refer to Lifting and Jacking the Vehicle .
- Remove the lower radiator baffle. Refer to Radiator Air Baffle Assemblies and Deflectors .
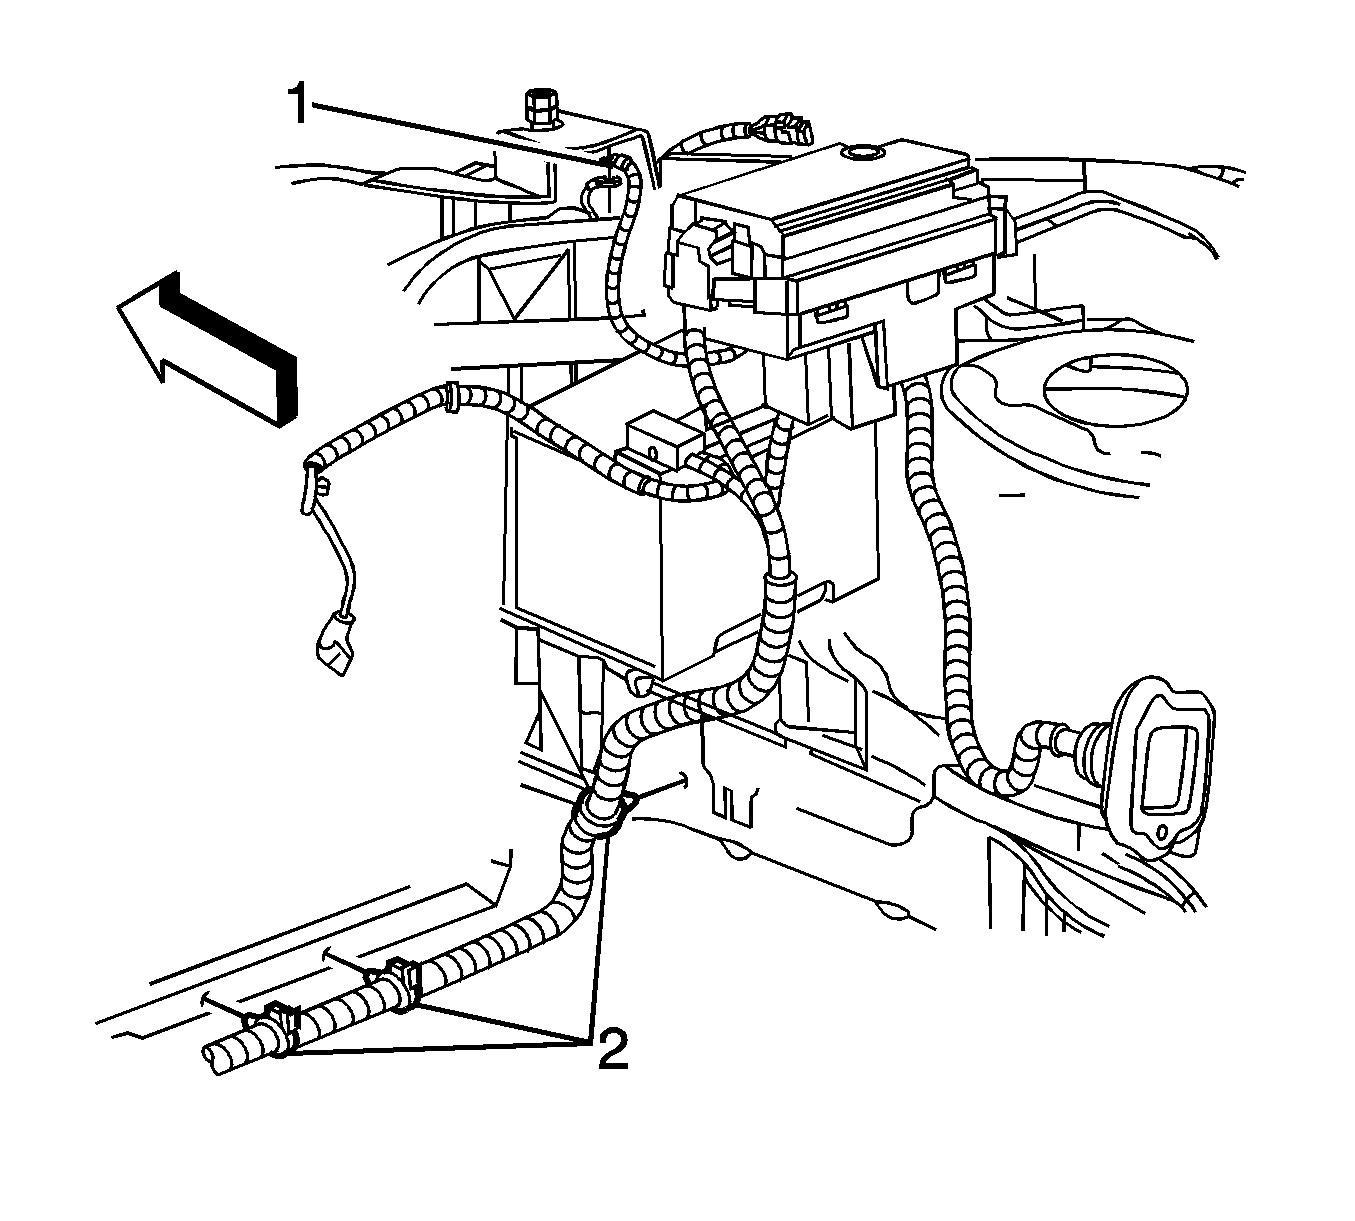
- Remove the battery cable from the clips (2) on the side rail and lower radiator support.
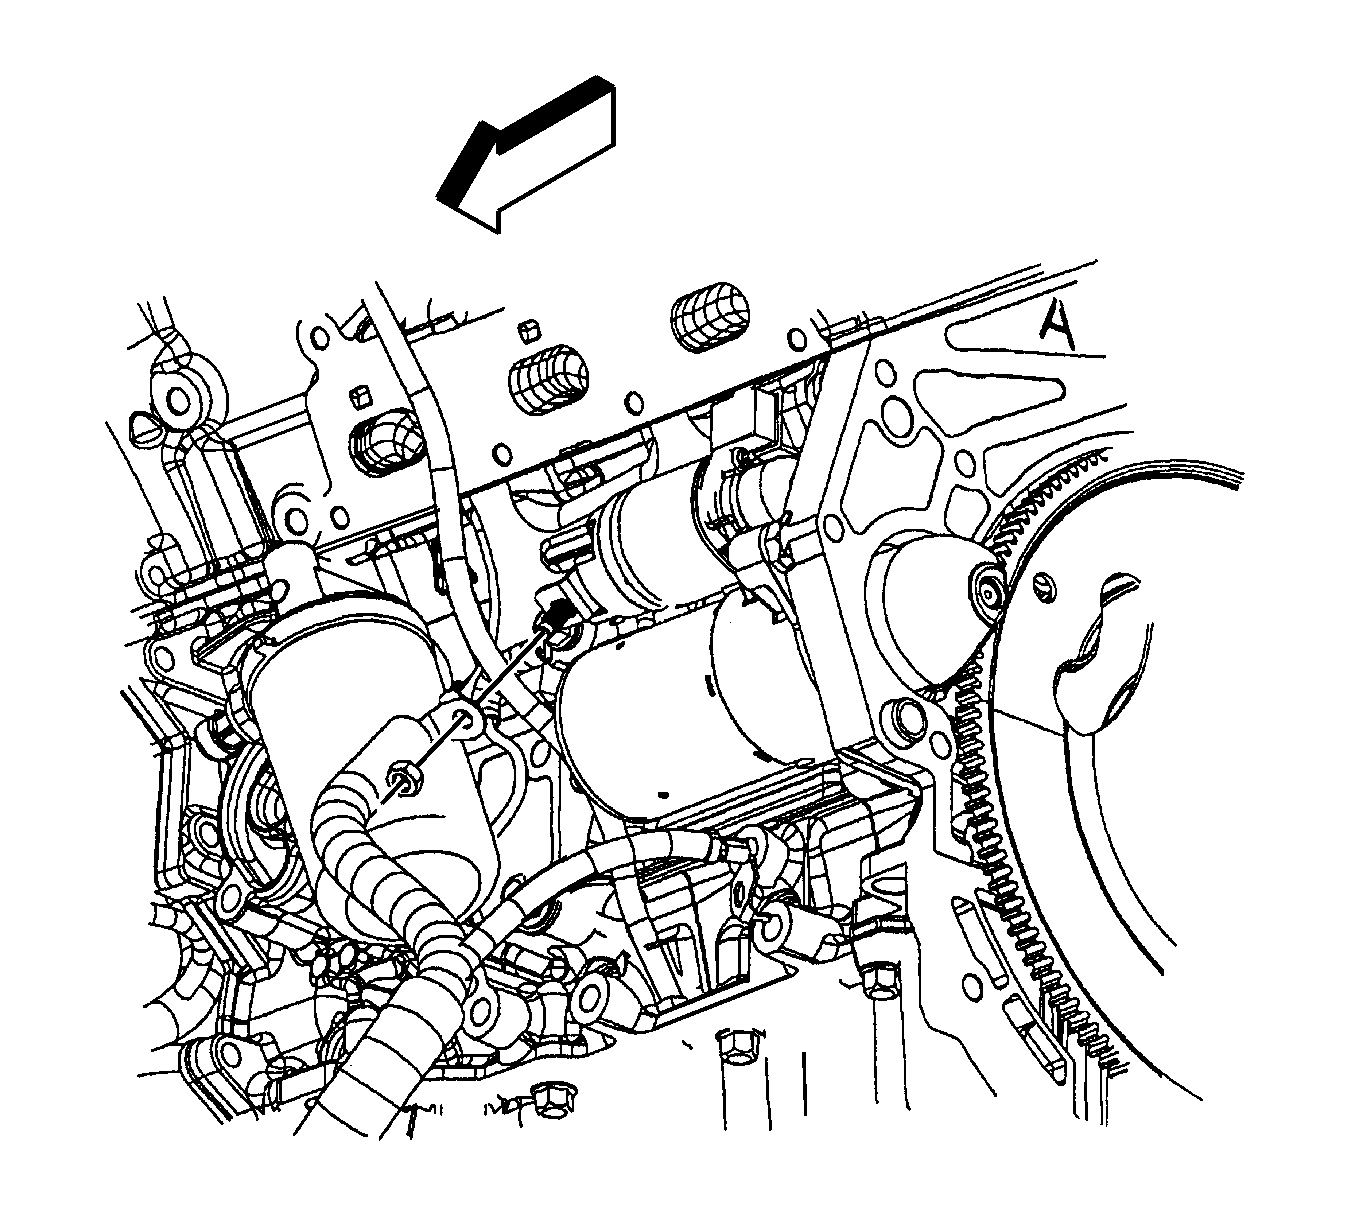
- Remove the starter solenoid nut.
- Remove the positive battery cable terminal from the starter.
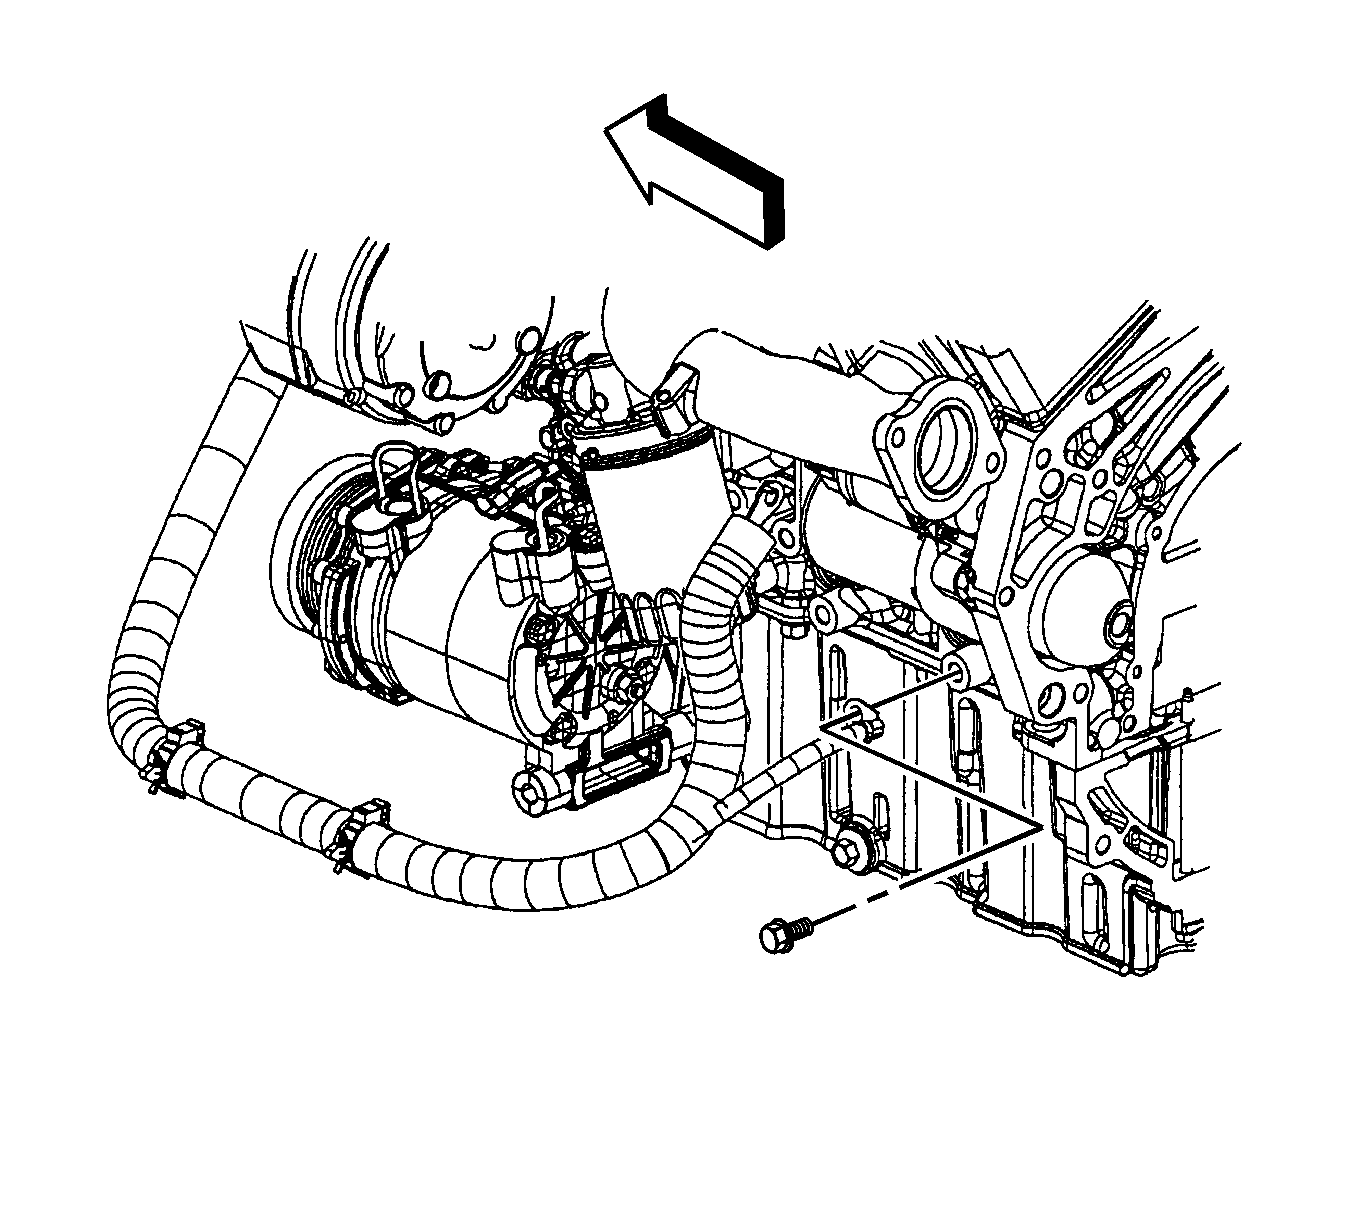
- Remove the negative battery cable bolt from the engine block.
- Remove the negative battery cable terminal from the engine block.
- Lower the vehicle.
- Remove the battery cable assembly from the vehicle.
- Place the cable assembly on a work bench.
- Cut the tape around the cable conduit.
- Open the conduit and remove the positive battery cable.
Installation Procedure
- Install the positive battery cable to the conduit.
- Tape around the cable conduit.
- Install the battery cable assembly to the vehicle.
- Raise and support the vehicle.
- Position the negative battery cable terminal to the engine block.
- Install the negative battery cable bolt to the engine block.
- Install the positive battery cable terminal to the starter.
- Install the starter solenoid "BAT" nut.
- Install the battery cable to the clips (2) on the side rail and lower radiator support.
- Install the lower radiator baffle. Refer to Radiator Air Baffle Assemblies and Deflectors .
- Lower the vehicle.
- Position the negative battery cable ground on top of the fog lamp harness ground.
- Install the negative battery cable ground bolt to the radiator support.
- Install the positive battery cable terminal to the generator.
- Install the positive battery cable terminal nut.
- Position the positive battery cable terminal boot at the generator.
- Install the positive battery cable terminal to the junction block.
- Install the positive battery cable to junction block nut (1).
- Install the junction block cover.
- Install a NEW tie strap (1) attaching the battery cable assembly to the engine harness.
- Position the positive battery cable to the battery.
- Tighten the positive battery cable nut at the battery.
- Connect the negative battery cable. Refer to Battery Negative Cable Disconnection and Connection .

Notice: Refer to Fastener Notice in the Preface section.
Tighten
Tighten the bolt to 25 N·m (18 lb ft).

Tighten
Tighten the nut to 13 N·m (115 lb in).

Tighten
Tighten the bolt to 5 N·m (44 lb in).

Tighten
Tighten the nut to 20 N·m (15 lb ft).

Tighten
Tighten the nut to 10 N·m (89 lb in).

Tighten
Tighten the nut to 16 N·m (12 lb ft).
Battery Positive Cable Replacement RPO LX9
Removal Procedure
- Disconnect the negative battery cable. Refer to Battery Negative Cable Disconnection and Connection .
- Loosen the positive battery cable bolt at the battery.
- Remove the positive battery cable from the battery.
- Remove the junction block cover.
- Remove the positive battery cable to junction block nut (1).
- Remove the positive battery cable terminal from the junction block.
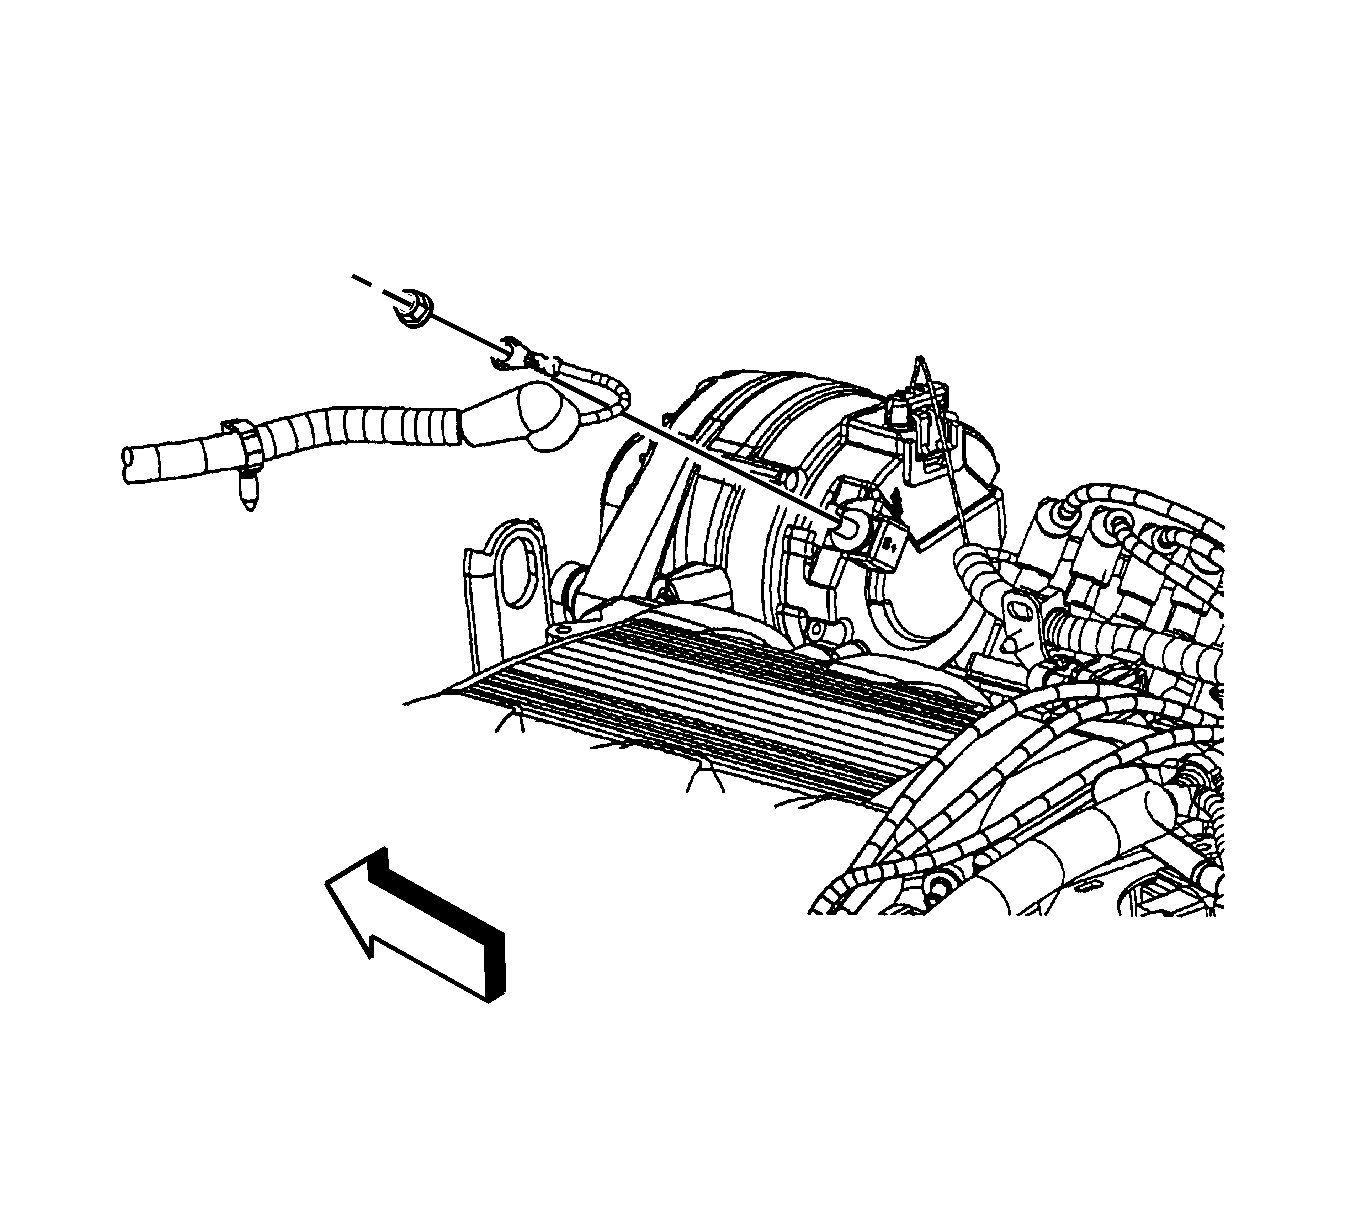
- Reposition the positive battery cable terminal boot at the generator.
- Remove the positive battery cable terminal nut.
- Remove the positive battery cable terminal from the generator.
- Remove the negative battery cable ground bolt from the radiator support.
- Separate the negative battery cable ground from the fog lamp harness ground.
- Raise and support the vehicle. Refer to Lifting and Jacking the Vehicle .
- Remove the lower radiator baffle. Refer to Radiator Air Baffle Assemblies and Deflectors .
- Remove the battery cable from the clips (1) on the side rail and lower radiator support.
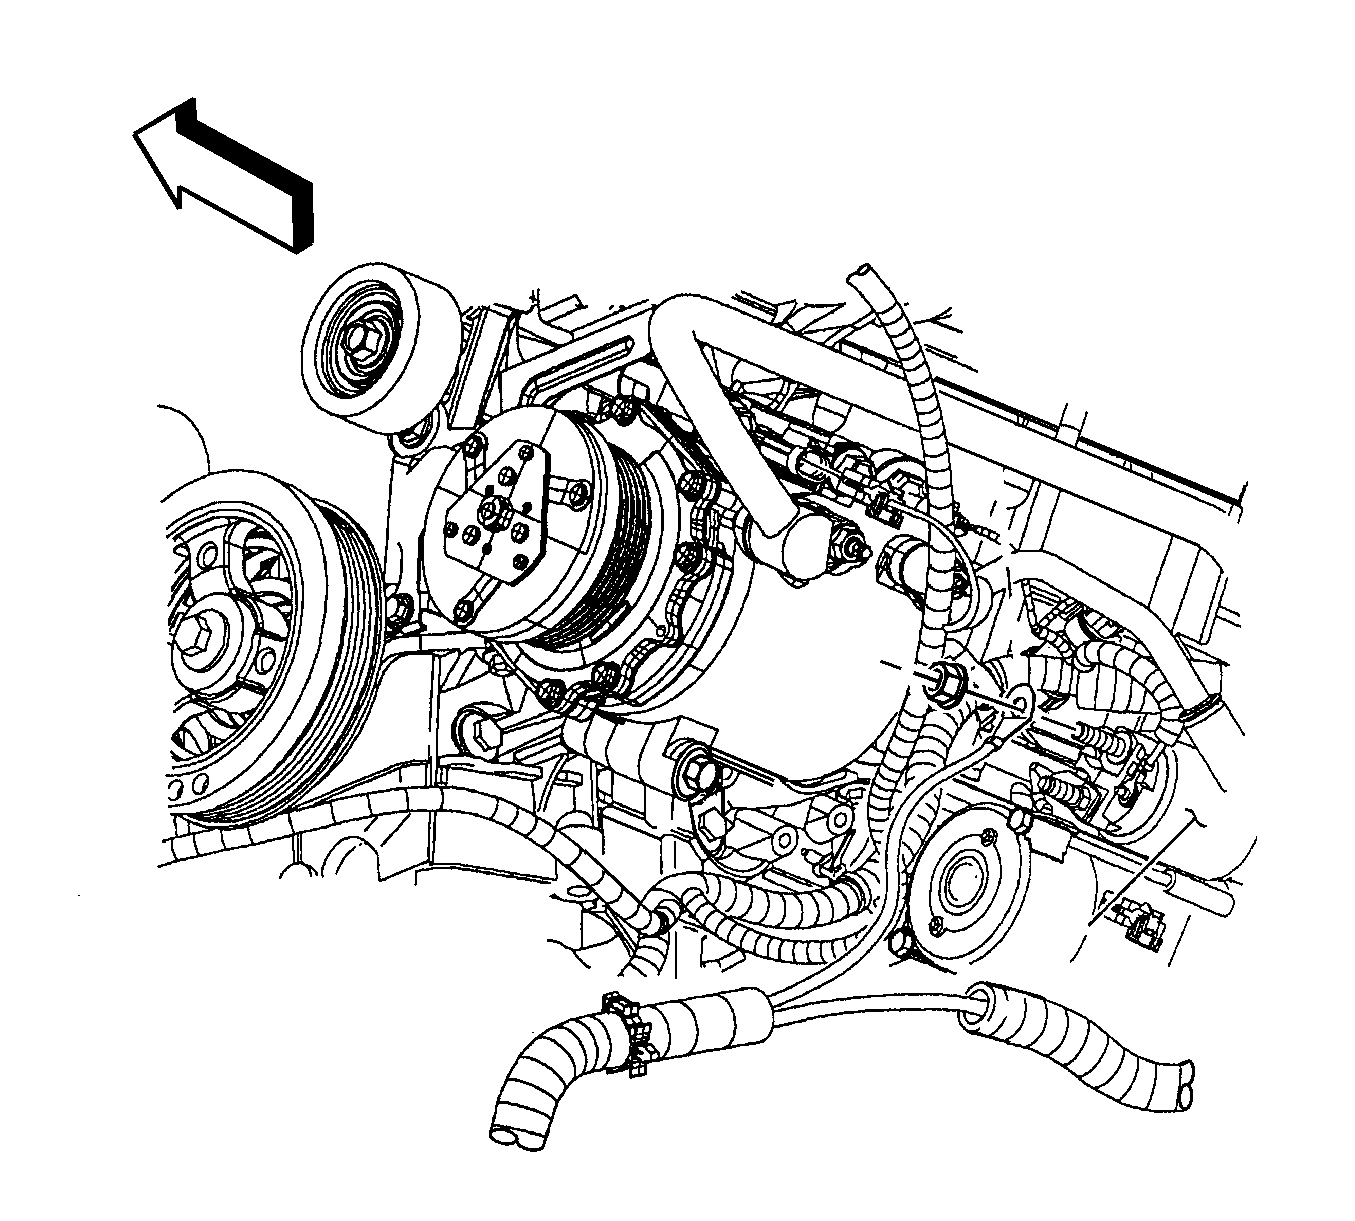
- Remove the starter solenoid nut.
- Remove the positive battery cable terminal from the starter.
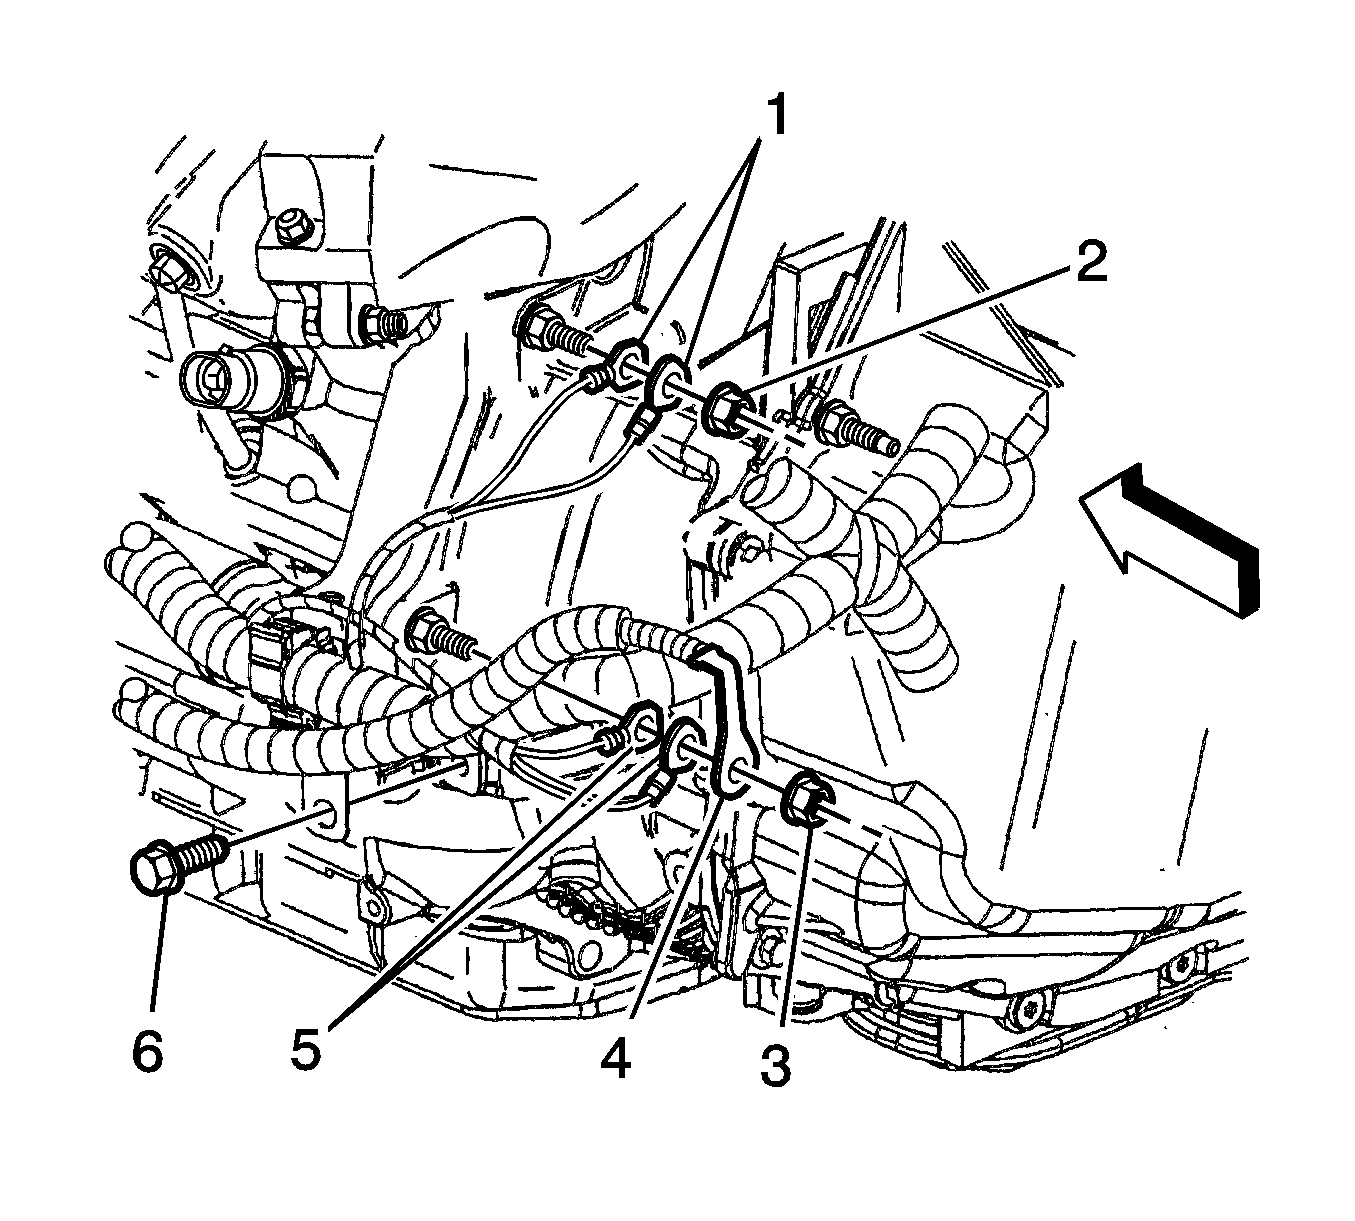
- Remove the negative battery cable nut (3) from the transaxle stud.
- Remove the negative battery cable terminal (4) from the stud.
- Lower the vehicle.
- Remove the battery cable assembly from the vehicle.
- Place the cable assembly on a work bench.
- Cut the tape around the cable conduit.
- Open the conduit and remove the positive battery cable.

Installation Procedure
- Install the positive battery cable to the conduit.
- Tape around the cable conduit.
- Install the battery cable assembly to the vehicle.
- Raise and support the vehicle.
- Install the negative battery cable terminal (4) to the transaxle stud.
- Install the negative battery cable nut to the stud.
- Install the positive battery cable terminal to the starter.
- Install the starter solenoid "BAT" nut.
- Install the battery cable to the clips (1) on the side rail and lower radiator support.
- Install the lower radiator baffle. Refer to Radiator Air Baffle Assemblies and Deflectors .
- Lower the vehicle.
- Position the negative battery cable ground on top of the fog lamp harness ground.
- Install the negative battery cable ground bolt to the radiator support.
- Install the positive battery cable terminal to the generator.
- Install the positive battery cable terminal nut.
- Position the positive battery cable terminal boot at the generator.
- Install the positive battery cable terminal to the junction block.
- Install the positive battery cable to junction block nut (1).
- Install the junction block cover.
- Position the positive battery cable to the battery.
- Tighten the positive battery cable bolt at the battery.
- Connect the negative battery cable. Refer to Battery Negative Cable Disconnection and Connection .

Notice: Refer to Fastener Notice in the Preface section.
Tighten
Tighten the nut to 25 N·m (18 lb ft).

Tighten
Tighten the nut to 13 N·m (115 lb in).

Tighten
Tighten the bolt to 5 N·m (44 lb in).

Tighten
Tighten the nut to 20 N·m (15 lb ft).

Tighten
Tighten the nut to 10 N·m (89 lb in).
Tighten
Tighten the bolt to 16 N·m (12 lb ft).
