For 1990-2009 cars only
Tools Required
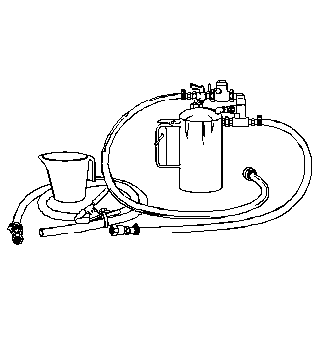
J 35944-A Transmission Oil Cooler Flusher
Removal Procedure
Important: Transmission oil circulates between the transmission assembly and the transfer case. In situations where transmission related failures circulate debris into the transfer case, the transfer case must be disassembled, cleaned, and inspected for damage.
- Raise and support the vehicle. Refer to Lifting and Jacking the Vehicle .
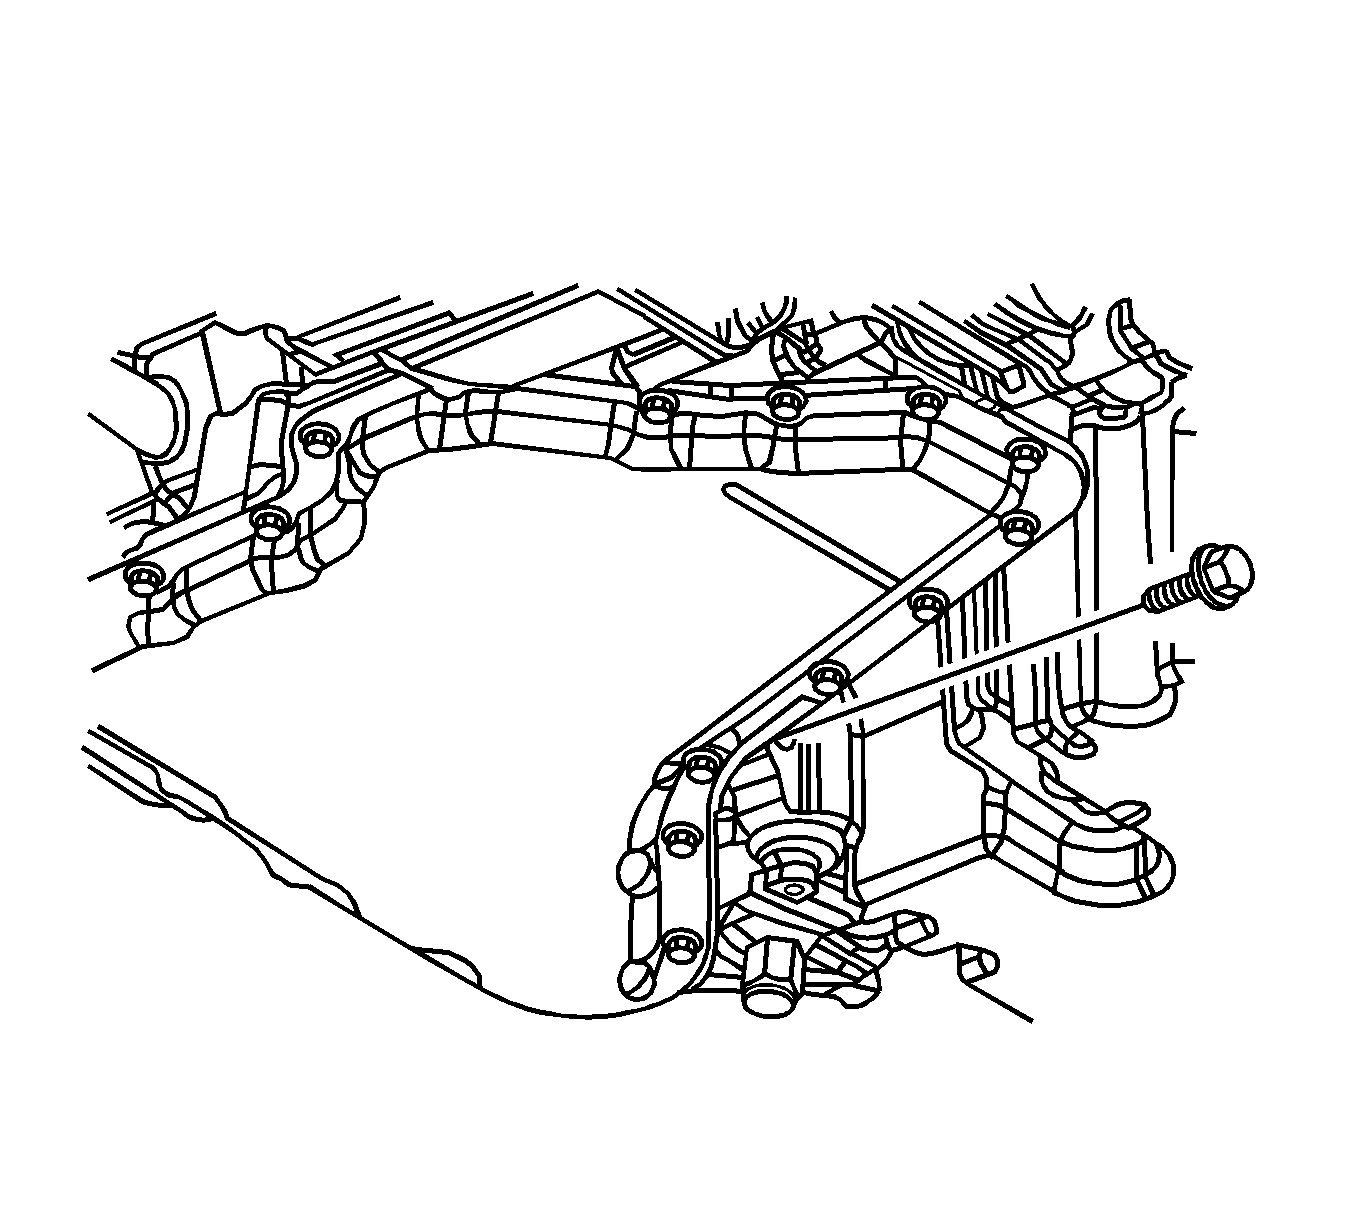
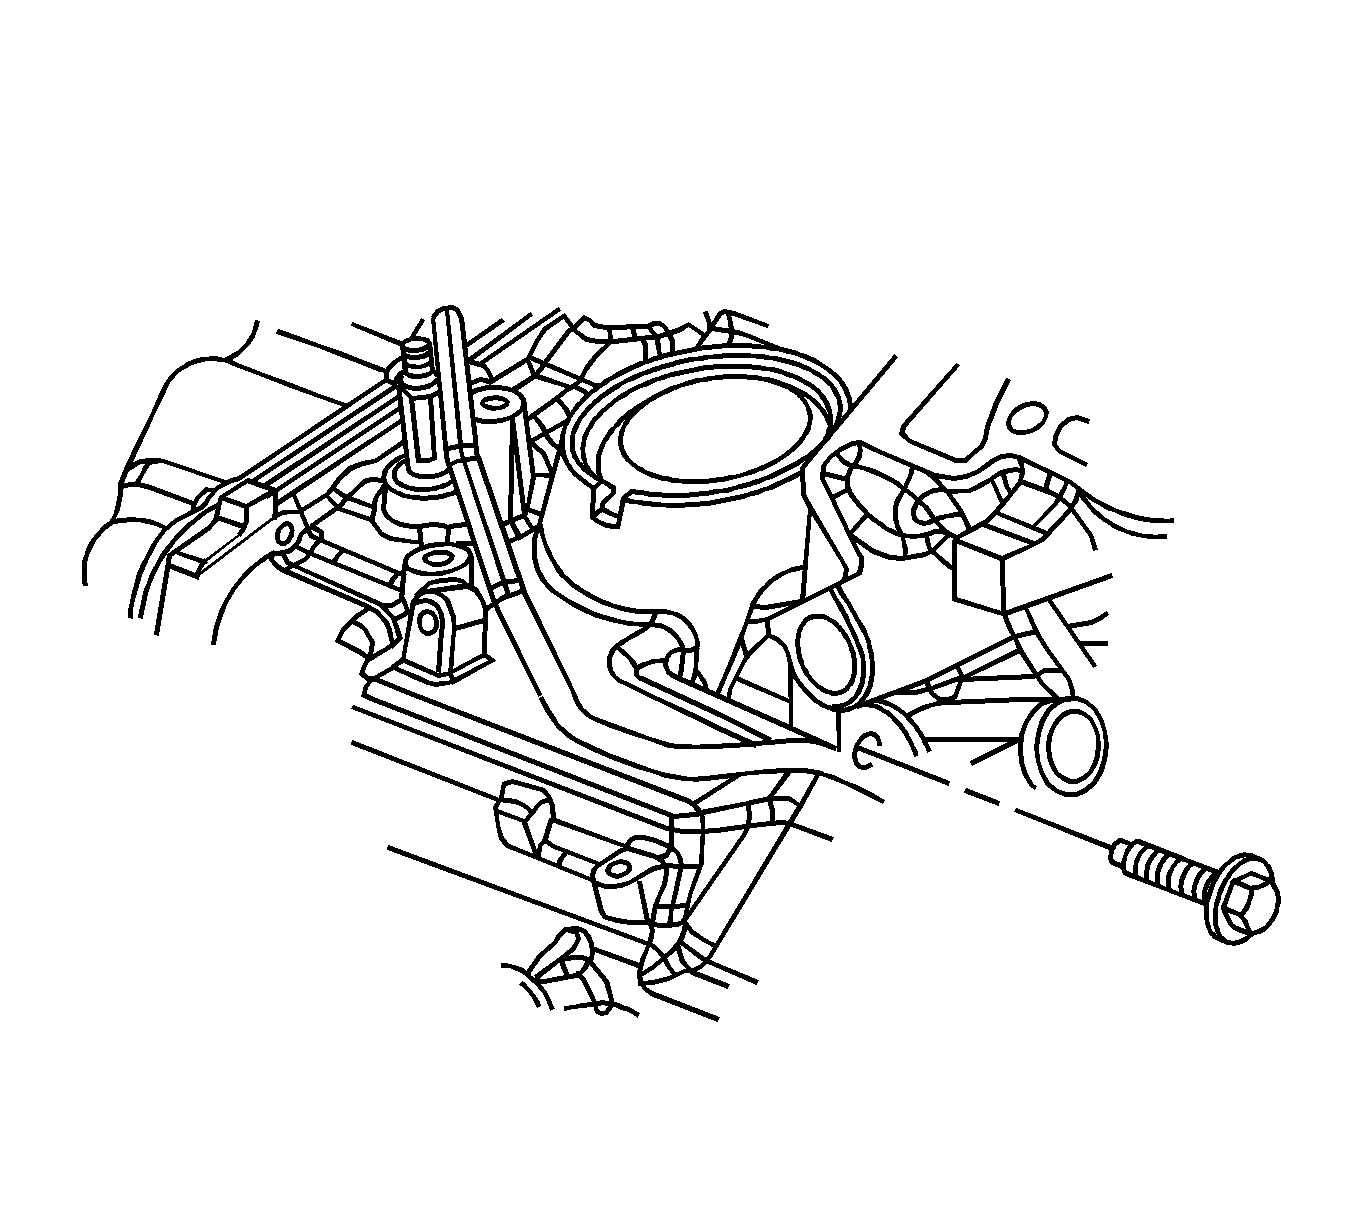
- Remove the transmission lower bell housing bolt located between the engine oil pan and the transmission oil pan.
- Remove the powertrain (engine, transmission, and frame) from the vehicle. Refer to Engine Replacement .
- Remove the filler tube. Refer to Transmission Fluid Filler Tube Replacement .
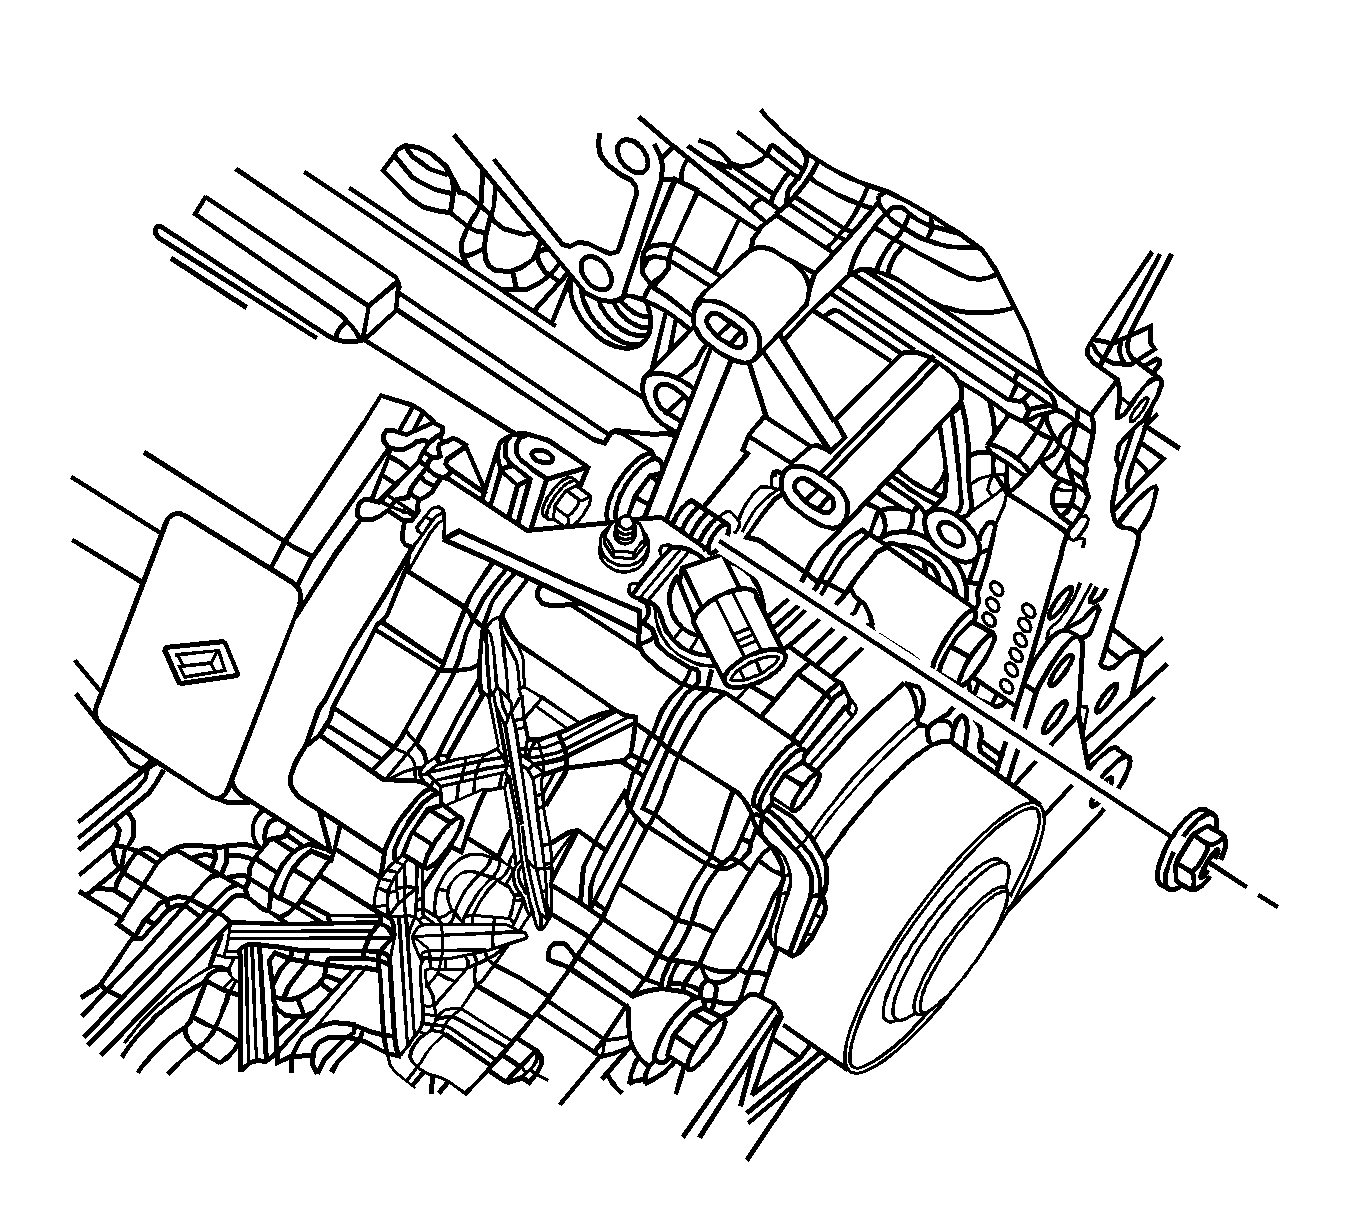
- Remove the transmission bell housing bolts (2).
- Remove the coolant inlet pipe. Refer to Radiator Inlet Hose Replacement .
- Remove the transmission mount with the transmission mount bracket. Refer to Transmission Mount Bracket Replacement .
- Remove the starter motor. Refer to Starter Motor Replacement .
- Remove the torque converter bolts. Refer to Flywheel to Torque Converter Bolt Replacement .
- Remove the transmission lower brace. Refer to Transmission Brace Replacement .
- Remove the transmission upper brace nut located behind the power steering pump and above the transfer case.
- Remove the transmission bolt near the crank sensor and the engine coolant (block) heater.
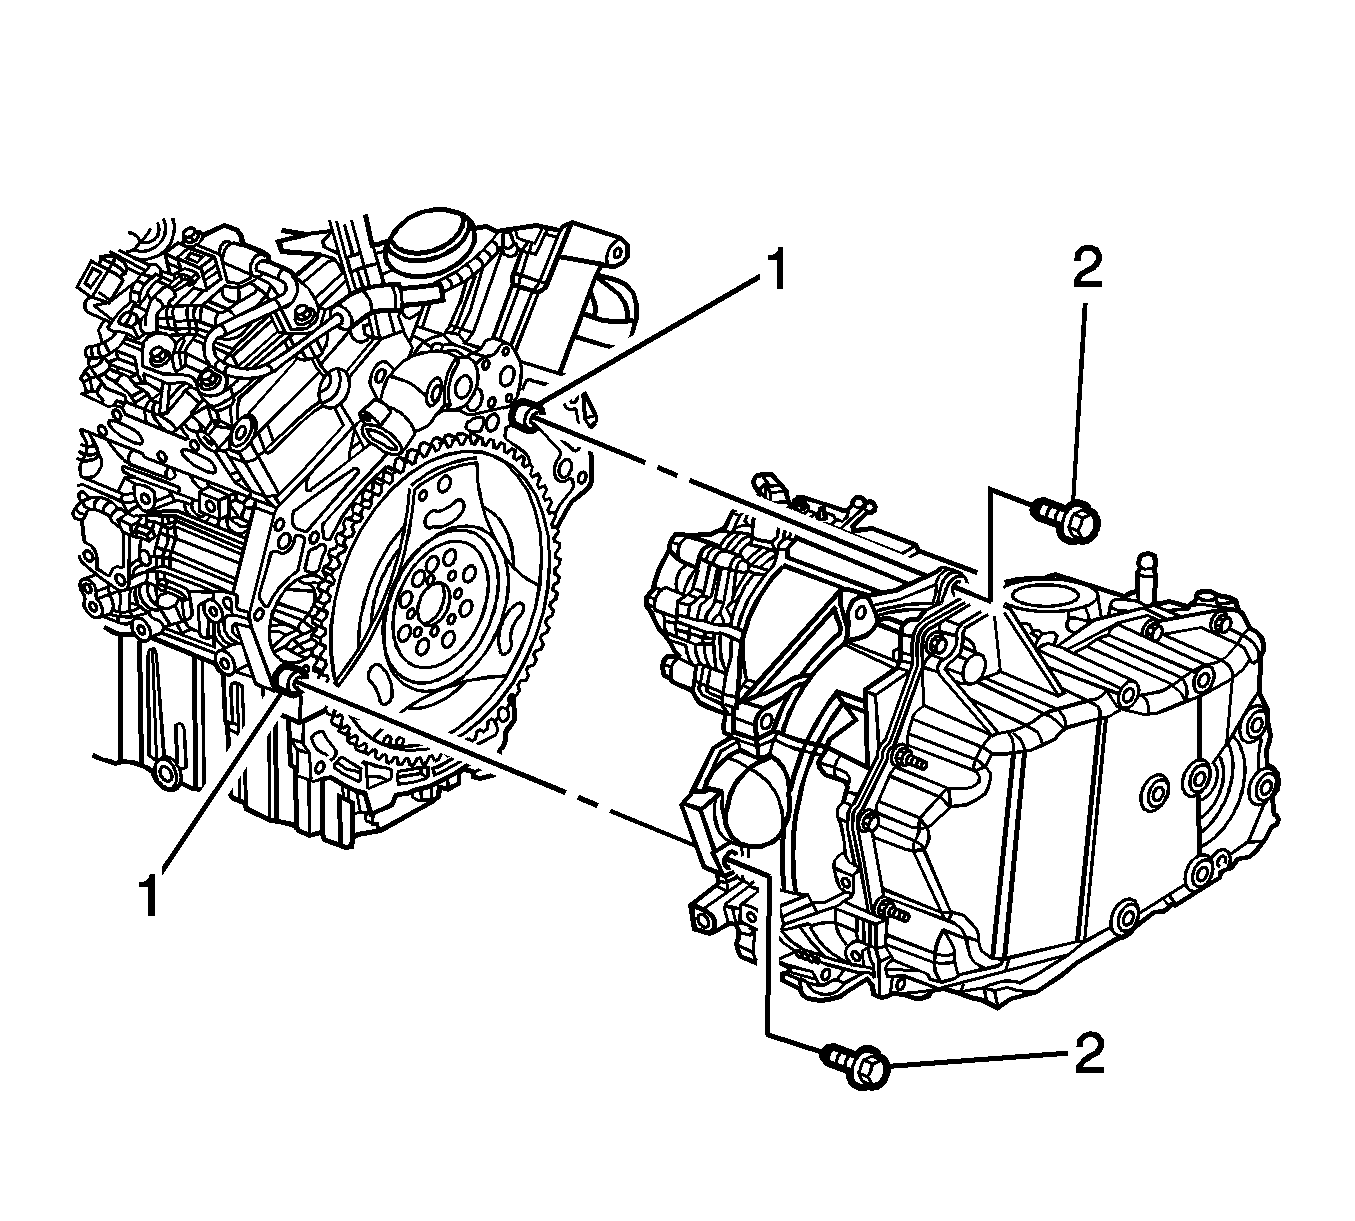
- Separate the transmission from the engine.
- Flush the transaxle oil cooler and the transaxle oil cooler hoses. Refer to Transmission Fluid Cooler Flushing and Flow Test .
Installation Procedure
- Use the dowel locator pins (1) in order to align and install the transmission to the engine.
- Install the transmission bell housing bolts (2).
- Install the transmission bell housing bolt near the crank sensor and the engine coolant (block) heater.
- Install the transmission upper brace nut located behind the power steering pump and above the transfer case.
- Install the transmission lower brace. Refer to Transmission Brace Replacement .
- Install the torque converter bolts. Refer to Flywheel to Torque Converter Bolt Replacement .
- Install the starter motor. Refer to Starter Motor Replacement .
- Install the transmission mount with the transmission mount bracket. Refer to Transmission Mount Bracket Replacement .
- Install the coolant inlet pipe. Refer to Radiator Inlet Hose Replacement .
- Install the filler tube. Refer to Transmission Fluid Filler Tube Replacement .
- Install the powertrain (engine, transmission, and frame) to the vehicle. Refer to Engine Replacement .
- Install the transmission lower bell housing bolt located between the engine oil pan and the transmission oil pan.
- Inspect and adjust the transaxle fluid level as needed. Refer to the following information:
- Reset the TAP values. Refer to Transmission Adaptive Functions .
Notice: Refer to Fastener Notice in the Preface section.
Tighten
Tighten the transmission bell housing bolts to 50 N·m (37 lb ft).
Tighten
Tighten the transmission bell housing bolt to 50 N·m (37 lb ft).
Tighten
Tighten the transmission upper brace nut to 50 N·m (37 lb ft).
Tighten
Tighten the transmission bell housing bolt to 50 N·m (37 lb ft).
Important: It is recommended that transmission adaptive pressure (TAP) information be reset.
Resetting the TAP values using a scan tool will erase all learned values in all cells. As a result, The ECM, PCM or TCM will need to relearn TAP values. Transmission performance may be affected as new TAP values are learned.