Removal Procedure
- Remove the torque axis mount. Refer to Engine Mount Replacement .
- Remove the torque axis mount bracket. Refer to Engine Mount Bracket Replacement .
- Remove the drive belt. Refer to Drive Belt Replacement .
- For Engine Code 1, remove the drive belt idler pulley. Remove the pulley bracket. Refer to Drive Belt Idler Pulley Replacement (VIN 1) .
- Remove the drive belt tensioner assembly. Refer to Drive Belt Tensioner Replacement .
- Remove the crankshaft balancer. Refer to Crankshaft Balancer Replacement .
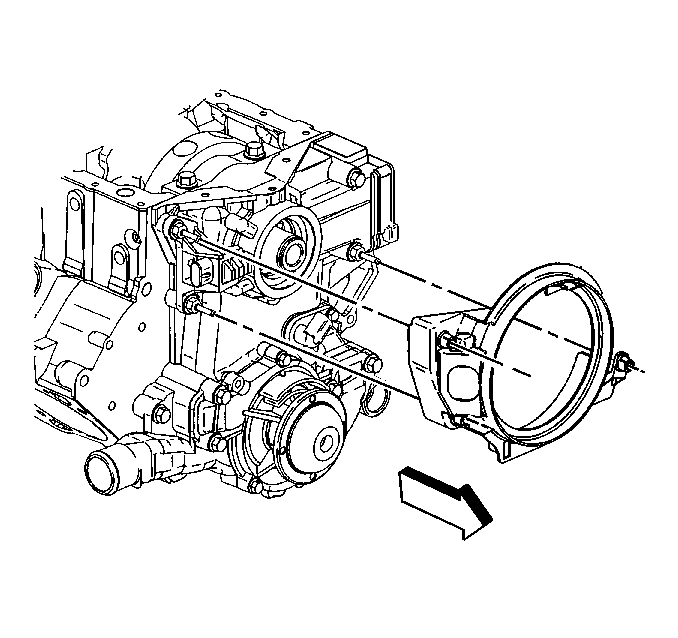
- Remove the crankshaft sensor shield.
- Remove the crankshaft sensor.
- Remove the oil pan to the front cover bolts.
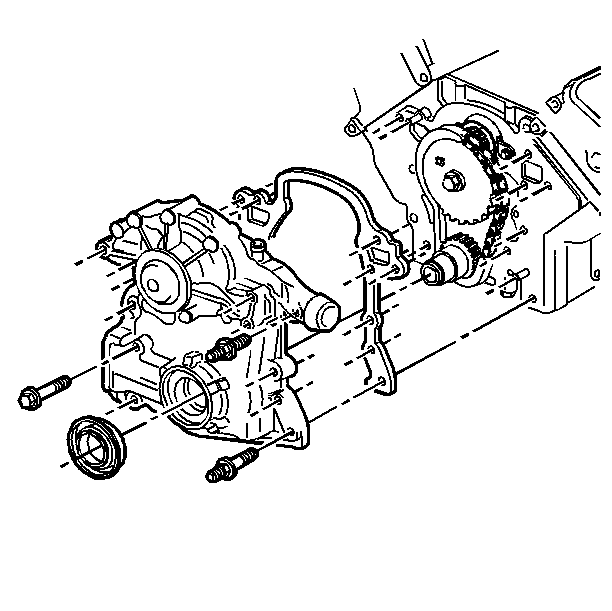
- Remove the front cover attaching bolts.
- Remove the front cover.
- Inspect the timing chain for overall in and out movement. Movement should not exceed 25 mm (1 in).
- Inspect the sprockets for wear.
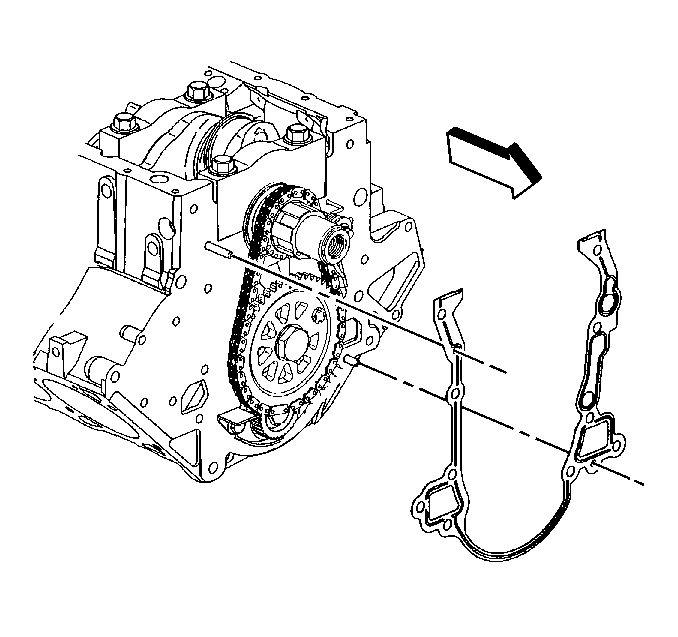
- Clean the gasket mating surfaces at the timing chain cover, and cylinder block.
- If the oil pan gasket is excessively swollen, the oil pan must be removed and the gasket replaced.


Installation Procedure
Tools Required
J 36660-A Torque Angle Meter
- Install the gasket at the cylinder block.
- Install the front cover.
- Apply sealant GM P/N 12346004 or equivalent to the bolt threads.
- Install the front cover attaching bolts.
- Install the oil pan to the front cover bolts.
- Install the drive belt tensioner assembly. Refer to Drive Belt Tensioner Replacement .
- For Engine Code 1, install the drive belt idler pulley. Install the pulley bracket. Refer to Drive Belt Idler Pulley Replacement (VIN 1) .
- Install the crankshaft sensor.
- Install the crankshaft sensor shield.
- Install the crankshaft balancer and bolt. Refer to Crankshaft Balancer Replacement .
- Install the drive belt. Refer to Drive Belt Replacement .
- Install the torque axis mount bracket. Refer to Engine Mount Bracket Replacement .
- Install the torque axis mount. Refer to Engine Mount Replacement .


Tighten
Tighten the bolts to 15 N·m (11 lb ft). Use
the J 36660-A
in order to
rotate the bolts an additional 40°.
Notice: Use the correct fastener in the correct location. Replacement fasteners must be the correct part number for that application. Fasteners requiring replacement or fasteners requiring the use of thread locking compound or sealant are identified in the service procedure. Do not use paints, lubricants, or corrosion inhibitors on fasteners or fastener joint surfaces unless specified. These coatings affect fastener torque and joint clamping force and may damage the fastener. Use the correct tightening sequence and specifications when installing fasteners in order to avoid damage to parts and systems.
Tighten
Tighten the bolts to 14 N·m (125 lb in).
Important: Do not adjust the crankshaft sensor.

Notice: This bolt is designed to permanently stretch when tightened, and therefore MUST be replaced anytime it is removed. The correct part number fastener must be used to replace this type of fastener. Do not use a bolt that is stronger in this application. If the correct bolt is not used, the parts will not be tightened correctly. The system or the components may be damaged.
