For 1990-2009 cars only
Removal Procedure
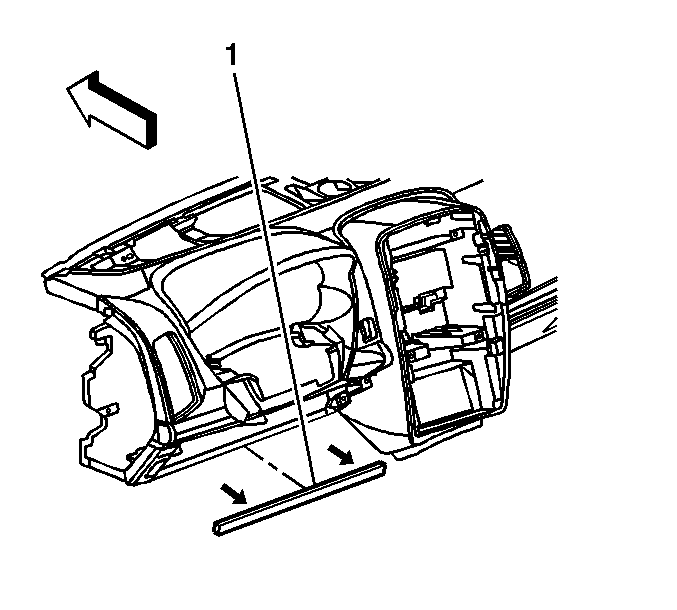
If the retainer is to be replaced with a new retainer, the shipping strap (1) must be cut off the new retainer after installation of the retainer to the instrument panel (I/P) carrier.
- Remove the center console. Refer to Front Floor Console Replacement .
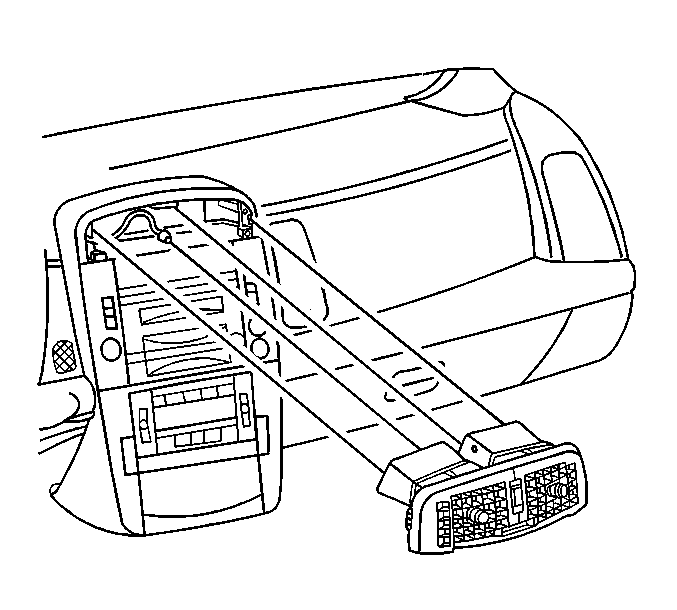
- Remove the upper A/C vents.
- Remove the radio assembly. Refer to Radio Replacement in Entertainment.
- Remove the instrument panel (I/P) compartment assembly. Refer to Instrument Panel Compartment Replacement .
- Remove the I/P cluster. Refer to Instrument Cluster Replacement .
- Remove the defroster grille. Refer to Defroster Grille Replacement .
- Remove the left and right I/P closeout panel. Refer to Instrument Panel Insulator Panel Replacement - Right Side , and Instrument Panel Insulator Panel Replacement - Left Side .
- Lower the steering column. Refer to Steering Column Replacement in Steering Wheel and Column.
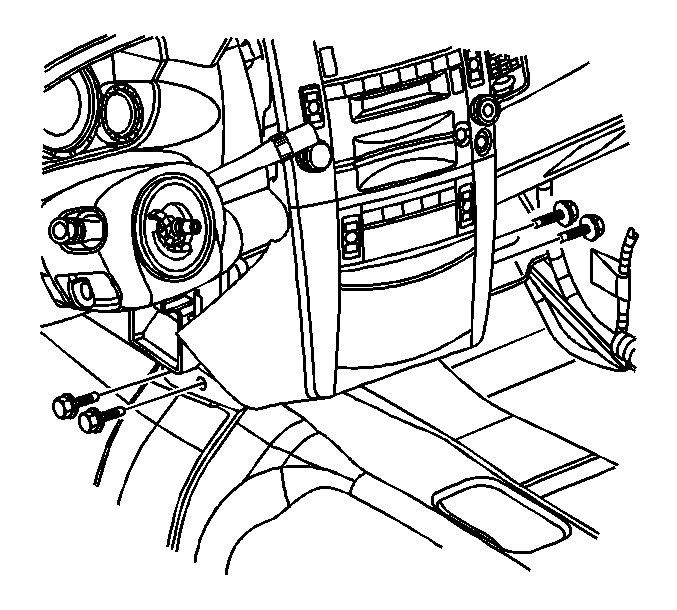
- Remove the bolts securing the lower retainer support bracket.
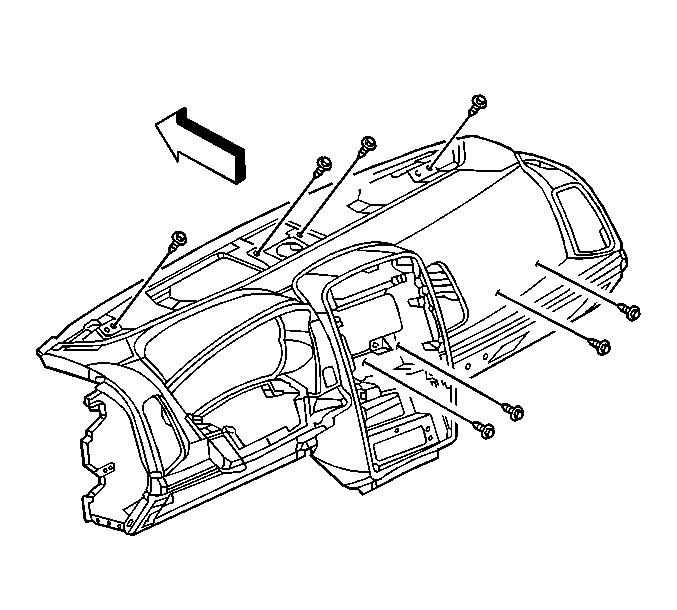
- Remove the screws securing the side of the retainer to the I/P carrier.
- Remove the screws securing the lower center stack.
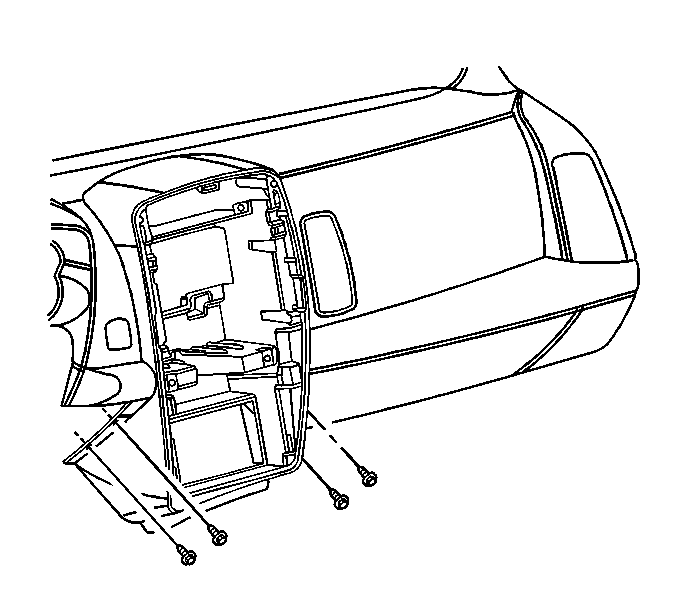
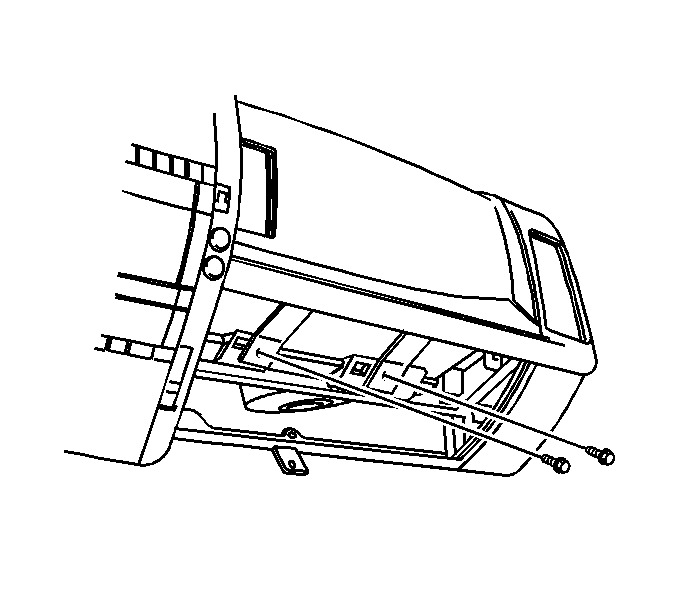
- Remove the screws behind the I/P compartment securing the I/P retainer to the I/P carrier.
- Disconnect the passenger side inline connector.
- Disconnect the air temperature sensor and the aspirator tube.
- Remove the screws securing the retainer to the to I/P carrier.
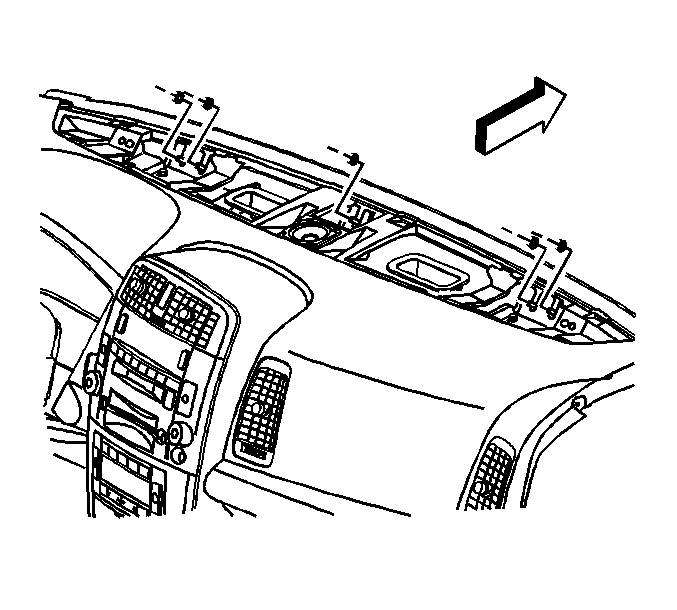
- Remove the upper retainer to carrier screws.
- Remove the I/P retainer.
Installation Procedure
- Install the I/P retainer onto the I/P carrier.
- Install the upper I/P retainer screws.
- Connect the air temperature sensor and the aspirator tube.
- Connect the passenger side inline connector.
- Install the screws securing the retainer to the I/P carrier.
- Install the screws behind the I/P compartment securing the I/P retainer to the I/P carrier.
- Install the screws securing the lower center stack.
- Install the fasteners securing the side of the retainer the center support.
- Install the bolts securing the lower retainer support bracket.
- Raise the steering column. Refer to Steering Column Replacement in Steering Wheel and Column.
- Install the left and right I/P closeout panel. Refer to Instrument Panel Insulator Panel Replacement - Right Side and Instrument Panel Insulator Panel Replacement - Left Side .
- Install the defroster grille. Refer to Defroster Grille Replacement .
- Install the I/P cluster. Refer to Instrument Cluster Replacement .
- Install the I/P compartment assembly. Refer to Instrument Panel Compartment Replacement .
- Install the radio assembly. Refer to Radio Replacement in Entertainment.
- Install the upper A/C vents.
- Install the center console. Refer to Front Floor Console Replacement .

Notice: Refer to Fastener Notice in the Preface section.

Tighten
Tighten the fasteners to 9 N·m (80 lb in).

Tighten
Tighten the screws to 9 N·m (80 lb in).

Tighten
Tighten the screws to 9 N·m (80 lb in).
Tighten
Tighten the fasteners to 9 N·m (80 lb in).

Tighten
Tighten the fasteners to 25 N·m (18 lb ft).

