Rear Seat Back Cushion Replacement 1stDesign
Removal Procedure
- Remove the upper trunk trim. Refer to Rear Compartment Front Trim Panel Replacement in Body Rear End.
- Remove the fasteners and the cable clips from the trunk pass-through release cable.
- Remove the rear seat cushion. Refer to Rear Seat Cushion Replacement .
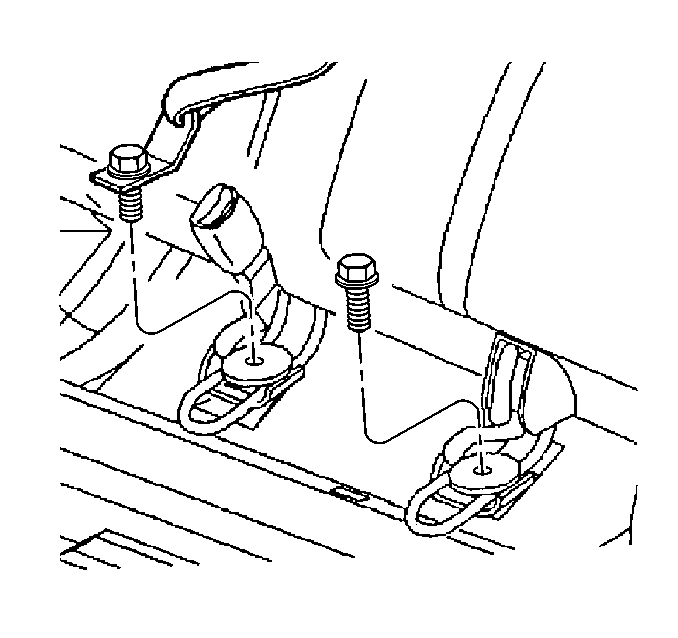
- Remove the center seat belt and shoulder belt buckle/seat back anchor bolts.
- Place the center shoulder belt on the rear shelf panel.
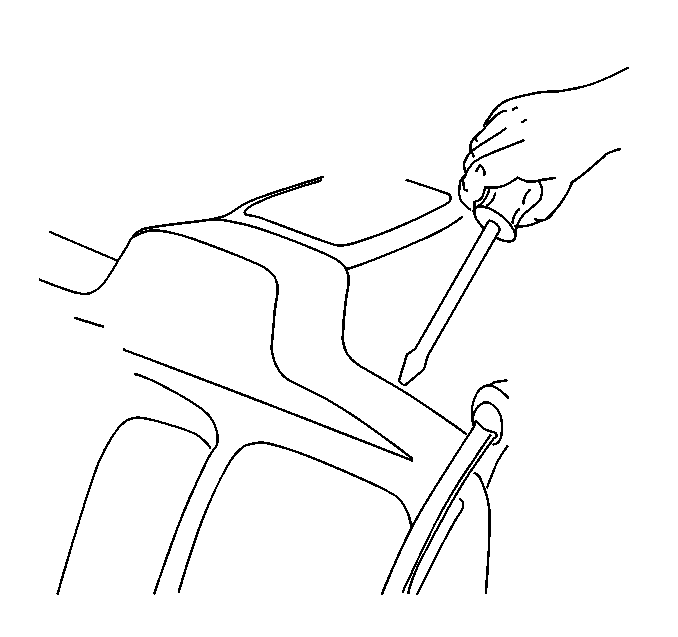
- Using a straight flat-bladed tool, insert the tool between the top of the seat back and rear of the shelf panel.
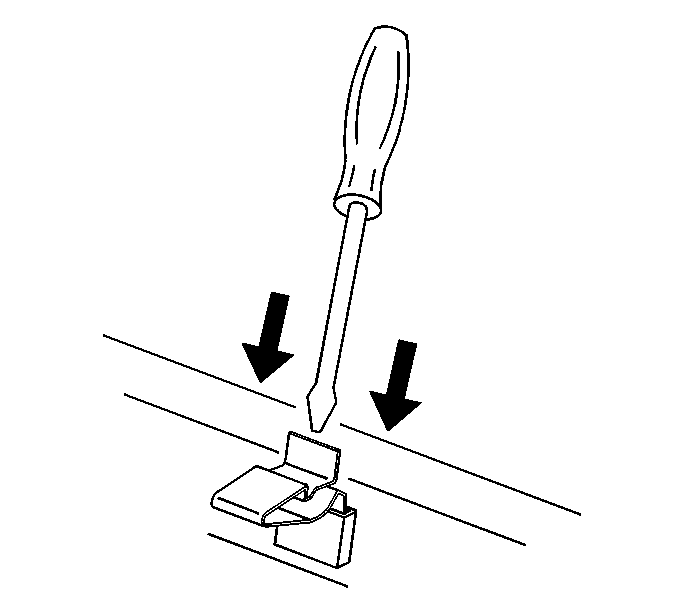
- Push down on the flat-bladed tool in order to release the rear seat back retainers.
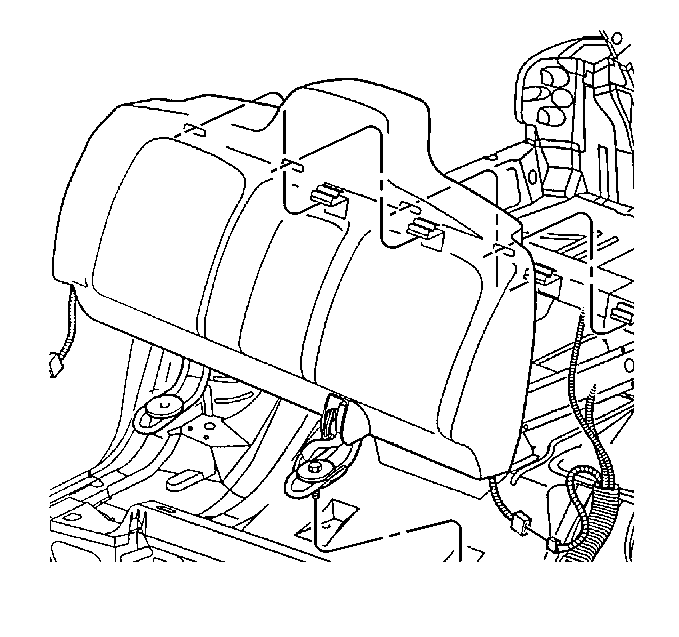
- Release the four retainers and pull the seat back away from the cross car beam.
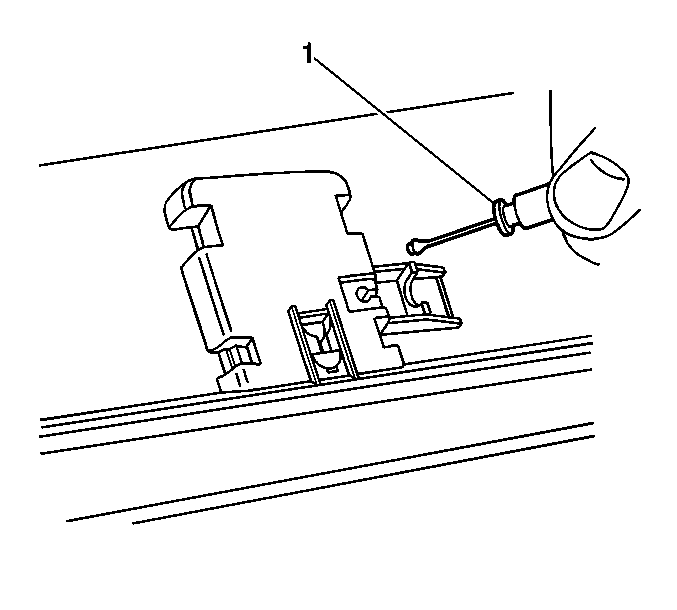
- Remove the pass through cable (1) from the seat back pass through.
- Disconnect the heated seat and rear lumbar electrical connector, if equipped.
- Position the rear shoulder belts in order to clear the rear seat back during removal.
- Remove the rear seat back.
Caution: When you are performing service on or near the SIR components or the SIR wiring, you must disable the SIR system. Refer to Disabling the SIR System. Failure to follow the correct procedure could cause air bag deployment, personal injury, or unnecessary SIR system repairs.
Installation Procedure
- Install the rear seat back into the car.
- Install the pass through cable (1) to the seat back pass through door.
- Install the heated seat electrical and rear lumbar connectors, if equipped.
- Position the rear shoulder belts over the seat back.
- Align the four retainer clips on the seat back with the slots on the cross car beam.
- Push on the seat back firmly , at the top, in order to engage the upper seat back clips.
- Position the center shoulder belt over the seat back.
- Install the center seat belt and outer shoulder belt buckle anchor bolts.
- Install the rear seat cushion. Refer to Rear Seat Cushion Replacement .
- Install the pass-through release cable handle fasteners and cable clips.
- Install the upper trunk trim. Refer to Rear Compartment Front Trim Panel Replacement in Body Rear End.


Notice: Use the correct fastener in the correct location. Replacement fasteners must be the correct part number for that application. Fasteners requiring replacement or fasteners requiring the use of thread locking compound or sealant are identified in the service procedure. Do not use paints, lubricants, or corrosion inhibitors on fasteners or fastener joint surfaces unless specified. These coatings affect fastener torque and joint clamping force and may damage the fastener. Use the correct tightening sequence and specifications when installing fasteners in order to avoid damage to parts and systems.
Important:
• Ensure that the bolt threads and bolt holes are free of any sealer
patch material. • Ensure the seat belt buckles are properly positioned. • Ensure that the seat back frame wire hold downs are properly positioned
between the dimples on the floor pan.
Tighten
Tighten the bolts to 41 N·m (30 lb ft).
Rear Seat Back Cushion Replacement 2nd Design
Removal Procedure
- Remove the upper trunk trim. Refer to Rear Compartment Front Trim Panel Replacement in Body Rear End.
- Remove the nut from the trunk pass-through release cable.
- Remove the rear seat cushion. Refer to Rear Seat Cushion Replacement .
- Remove the center seat belt and shoulder belt buckle/seat back anchor bolts.
- Place the center shoulder belt on the rear shelf panel.
- Using a straight flat-bladed tool, insert the tool between the top of the seat back and the rear shelf panel.
- Push down on the flat-bladed tool in order to release the rear seat back clips.
- Release the four clips and pull the seat back away from the cross car beam.
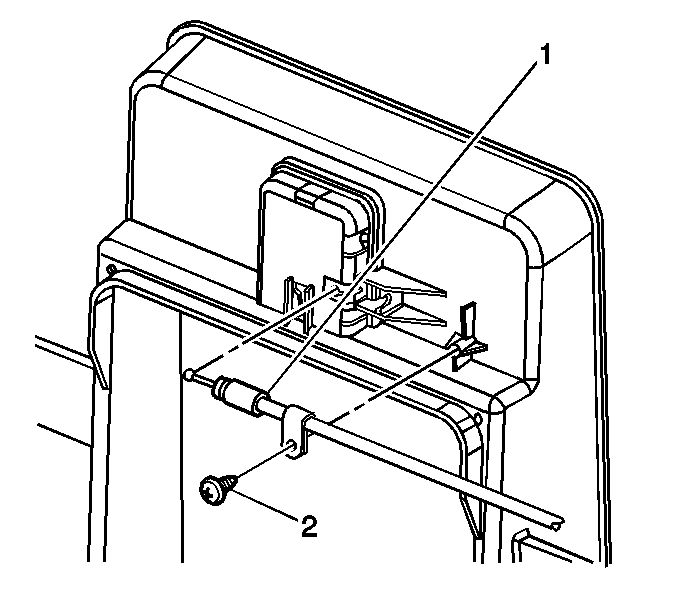
- Remove the pass through cable screw (2) from the seat back pass through.
- Remove the pass through cable (1) from the seat back pass through.
- Disconnect the heated seat and rear lumbar electrical connector, if equipped.
- Position the rear shoulder belts in order to clear the rear seat back during removal.
- Remove the rear seat back.
Caution: Refer to SIR Caution in the Preface section.


Installation Procedure
- Partially install the rear seat back to the vehicle.
- Install the pass through cable (1) to the seat back pass through.
- Install the pass through cable screw (2) to the seat back pass through release cable.
- Install the heated seat electrical and rear lumbar connectors, if equipped.
- Position the rear shoulder belts over the seat back.
- Align the four clips on the seat back with the slots on the cross car beam.
- Push on the seat back firmly , at the top, in order to engage the upper seat back clips.
- Position the center shoulder belt over the seat back.
- Install the center seat belt and outer shoulder belt buckle anchor bolts.
- Install the rear seat cushion. Refer to Rear Seat Cushion Replacement .
- Install the pass-through release cable handle nut.
- Install the upper trunk trim. Refer to Rear Compartment Front Trim Panel Replacement in Body Rear End.


Notice: Use the correct fastener in the correct location. Replacement fasteners must be the correct part number for that application. Fasteners requiring replacement or fasteners requiring the use of thread locking compound or sealant are identified in the service procedure. Do not use paints, lubricants, or corrosion inhibitors on fasteners or fastener joint surfaces unless specified. These coatings affect fastener torque and joint clamping force and may damage the fastener. Use the correct tightening sequence and specifications when installing fasteners in order to avoid damage to parts and systems.
Tighten
Tighten the screw to 2 N·m (18 lb in).

Important:
• Ensure that the bolt threads and bolt holes are free of any sealer patch
material. • Ensure the seat belt buckles are properly positioned. • Ensure that the seat back frame wire hold downs are properly positioned
between the dimples on the floor pan.
Tighten
Tighten the bolts to 41 N·m (30 lb ft).
Tighten
Tighten the bolts to 9 N·m (80 lb in).
