Radio Replacement U1R, UM5, UM9
Removal Procedure
- Remove the instrument panel center trim plate. Refer to Instrument Panel Center Trim Panel Replacement in Instrument Panel, Gages, and Console.
- Remove the heating ventilation and air conditioning (HVAC) control. Refer to HVAC Control Module Replacement in Heating, Ventilation and Air Conditioning.
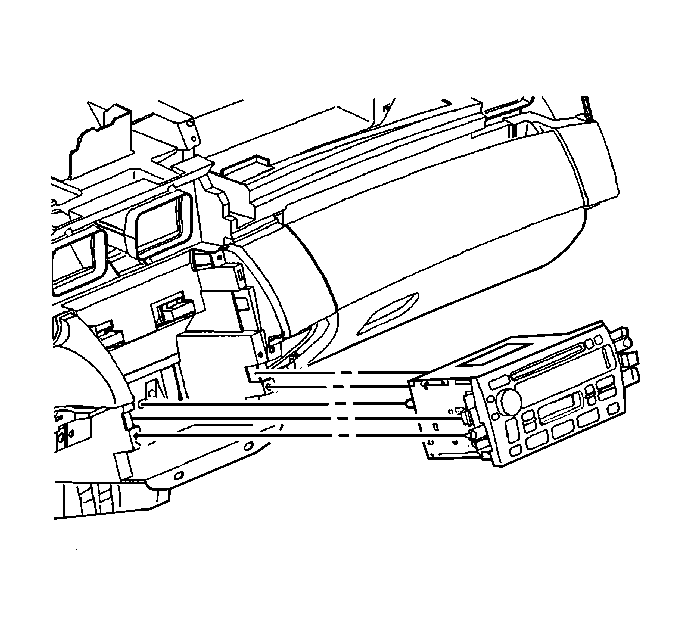
- Push and hold the release tabs on the left and right sides of the radio in order to release the radio from the IP.
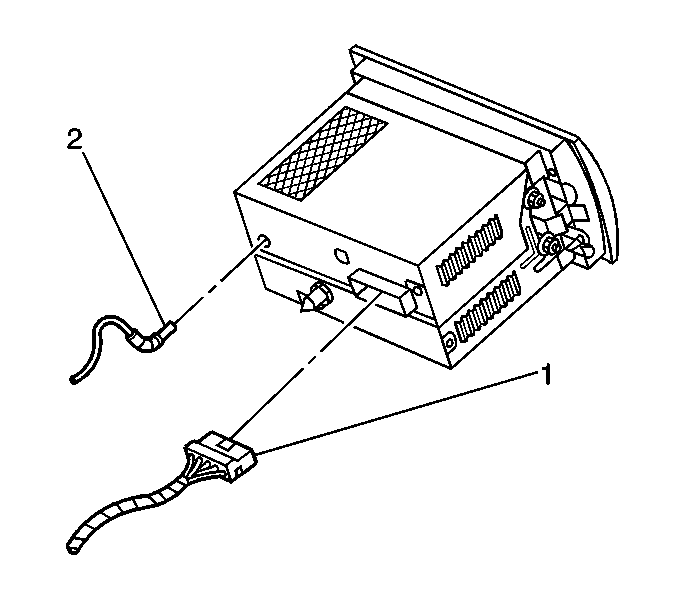
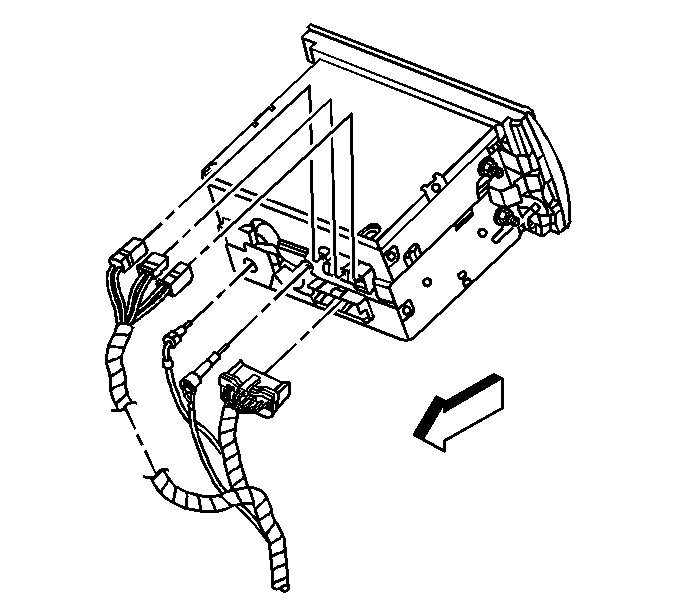
- Partially remove the radio from the IP in order to disconnect the antenna (2) and the electrical connector (1) from the radio.
- Remove the radio from the IP.
- If the radio is to be replaced, remove the hardware (1, 2, 4) from the original radio/navigation data processor (3).
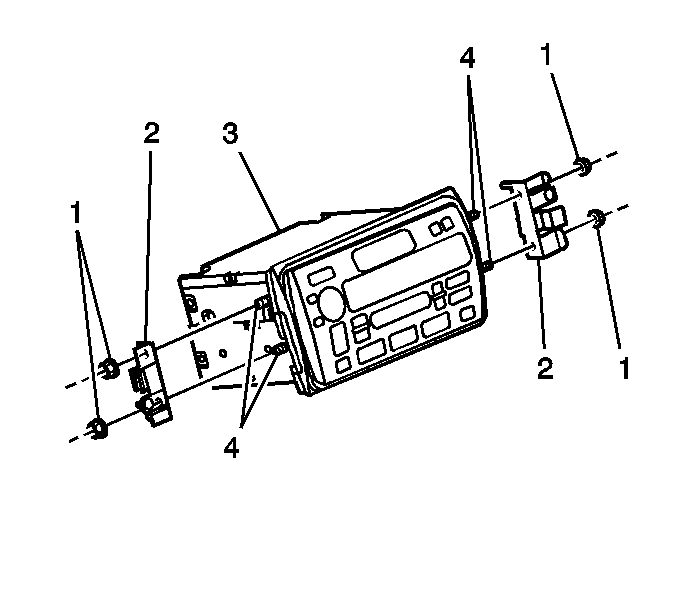
Important: New and remanufactured radio (3) do not include the mounting brackets (2), studs (4) or nuts (1). The hardware will need to be transferred to the replacement radio.
Installation Procedure
- Install the mounting hardware (1, 2, 4) to the radio (3).
- Partially install the radio in order to connect antenna (2) and electrical connector (1).
- Align the radio alignment pins to the IP opening and push the radio towards the front of the vehicle until an audible click is heard.
- Tug on the radio in order to verify the radio is secure.
- Install the HVAC control. Refer to HVAC Control Module Replacement in Heating, Ventilation and Air Conditioning.
- Install the IP center trim plate. Refer to Instrument Panel Center Trim Panel Replacement in Instrument Panel, Gages, and Console.

Notice: Use the correct fastener in the correct location. Replacement fasteners must be the correct part number for that application. Fasteners requiring replacement or fasteners requiring the use of thread locking compound or sealant are identified in the service procedure. Do not use paints, lubricants, or corrosion inhibitors on fasteners or fastener joint surfaces unless specified. These coatings affect fastener torque and joint clamping force and may damage the fastener. Use the correct tightening sequence and specifications when installing fasteners in order to avoid damage to parts and systems.
Tighten
Tighten the radio nuts (1) to 5 N·m (44 lb in).


Radio Replacement U3Q, U3R, U3S
Removal Procedure
- Remove the instrument panel (IP) center trim plate. Refer to Instrument Panel Center Trim Panel Replacement in Instrument Panel, Gages, and Console.
- Remove the heating ventilation and air conditioning (HVAC) control. Refer to HVAC Control Module Replacement in Heating, Ventilation and Air Conditioning.
- Push and hold the release tabs on the left and right sides of the navigation radio in order to release the navigation radio from the IP.
- Partially remove the navigation radio from the IP in order to disconnect the antennas and the electrical connections.
- Remove the navigation radio from the IP.
- If the navigation radio is to be replaced, remove the hardware (1, 2, 4) from the original navigation radio (3).
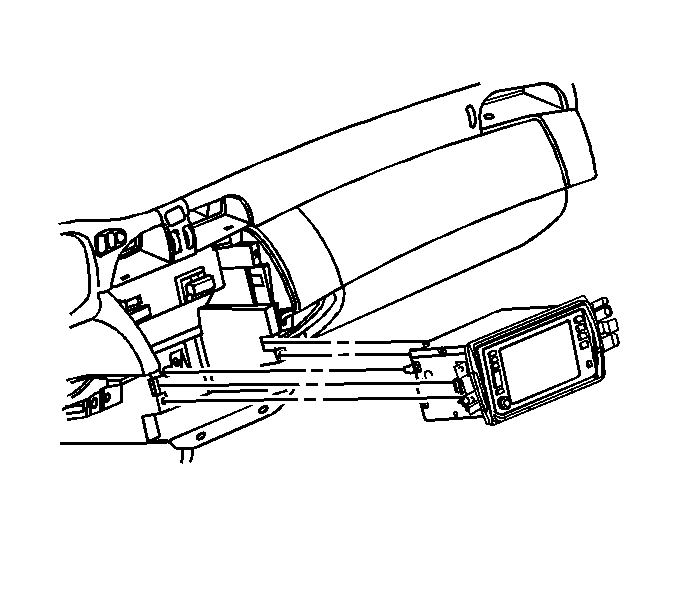
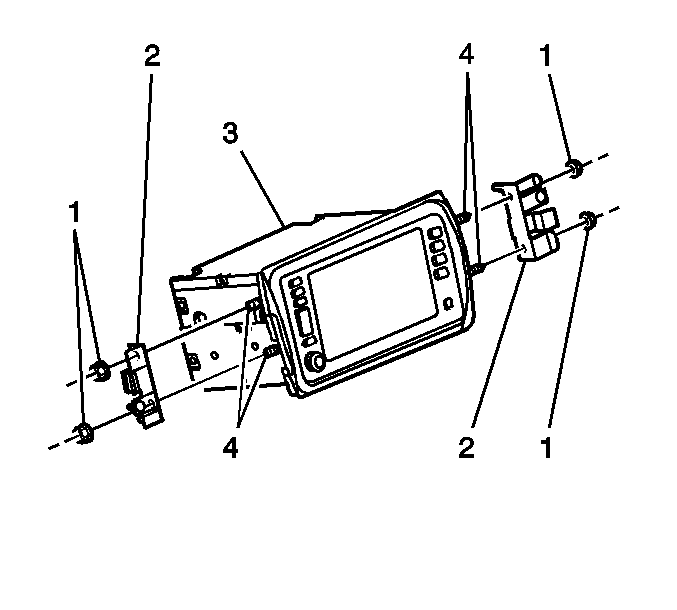
Important: New and remanufactured navigation radio (3) do not include the mounting brackets (2), studs (4) or nuts (1). The hardware will need to be transferred to the replacement navigation radio (3).
Installation Procedure
- Install the mounting hardware (1, 2, 4) to the navigation radio (3).
- Partially install the navigation radio in order to connect antennas and electrical connector.
- Align the navigation radio alignment pins to the IP opening and push the navigation radio towards the front of the vehicle until an audible click is heard.
- Tug on the navigation radio in order to verify the navigation radio is secure.
- Install the HVAC control. Refer to HVAC Control Module Replacement in Heating, Ventilation and Air Conditioning.
- Install the IP center trim plate. Refer to Instrument Panel Center Trim Panel Replacement in Instrument Panel, Gages, and Console.


