Lower Control Arm Replacement FE1, FE3
Tools Required
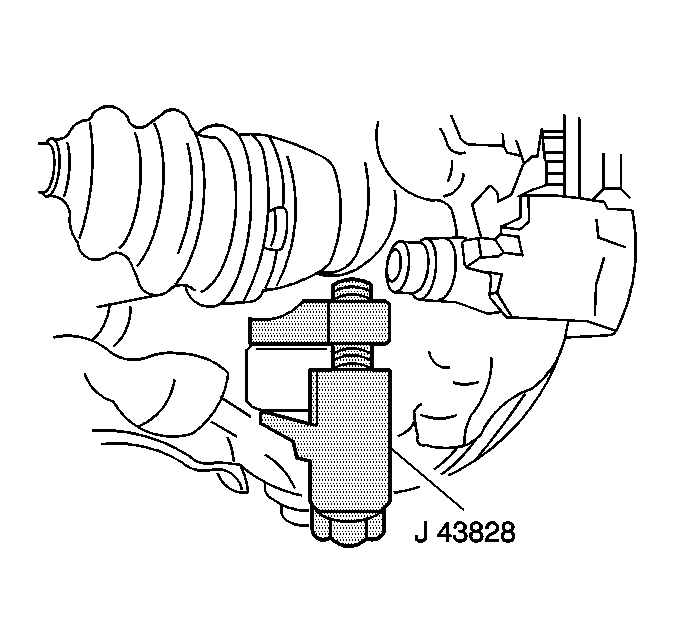
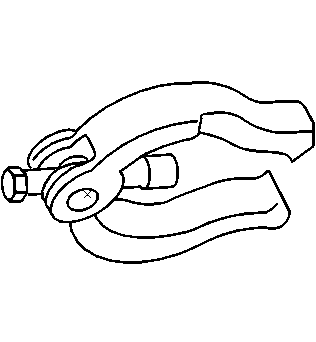
J 43828 Ball Joint Separator
Removal Procedure
- Raise and support the vehicle. Refer to Lifting and Jacking the Vehicle in General Information.
- Remove the tire and wheel. Refer to Tire and Wheel Removal and Installation in Tires and Wheels.
- Remove the stabilizer shaft link. Refer to Stabilizer Shaft Link Replacement .
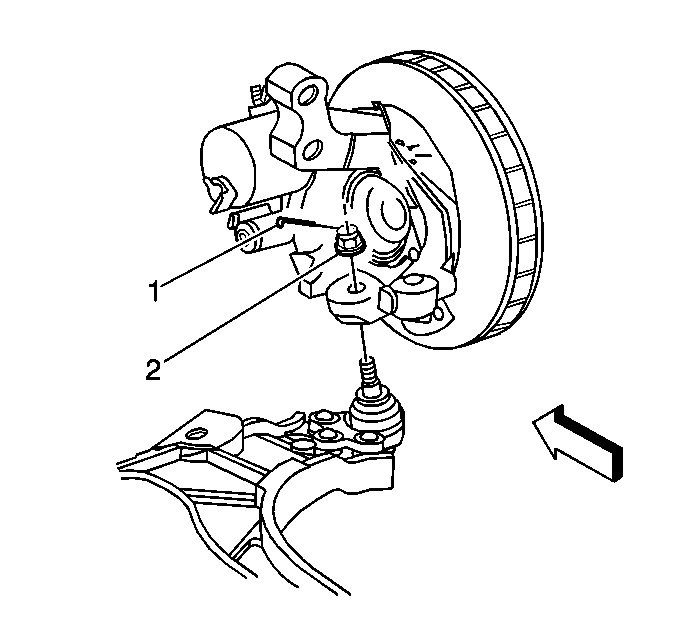
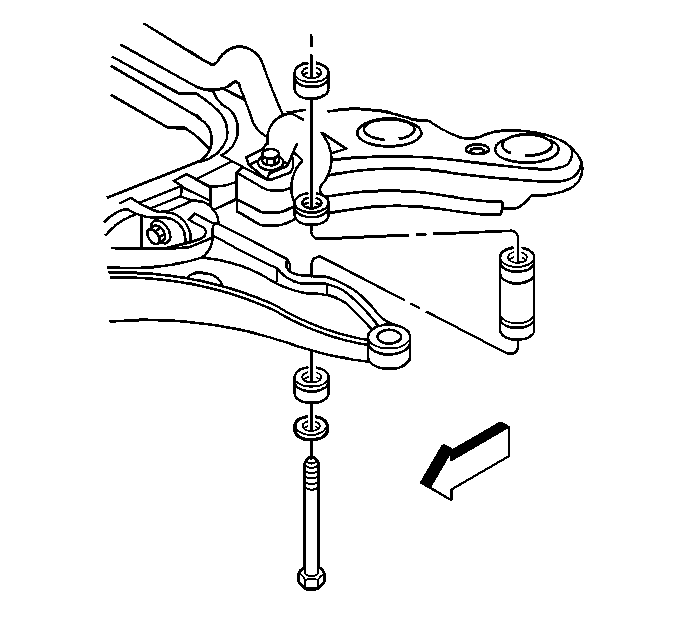
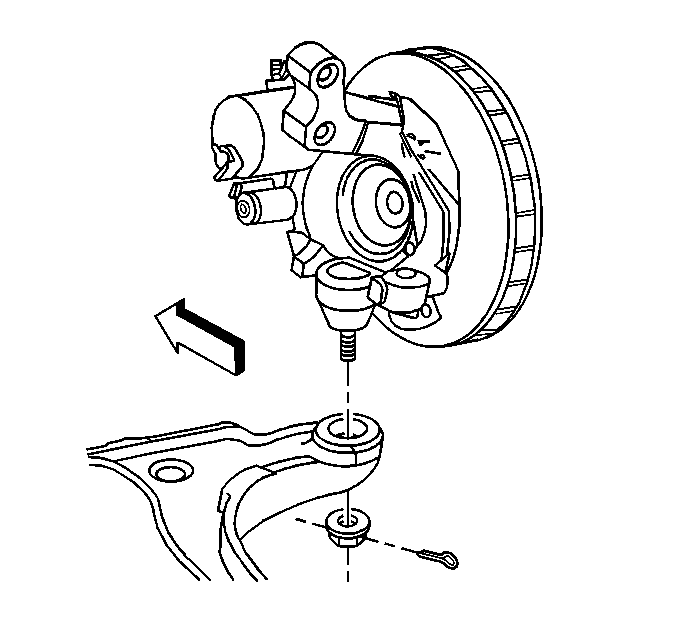
- Remove the cotter pin (1) and hex nut (2) from the lower ball joint stud.
- Using J 43828 separate the lower ball joint from the steering knuckle.
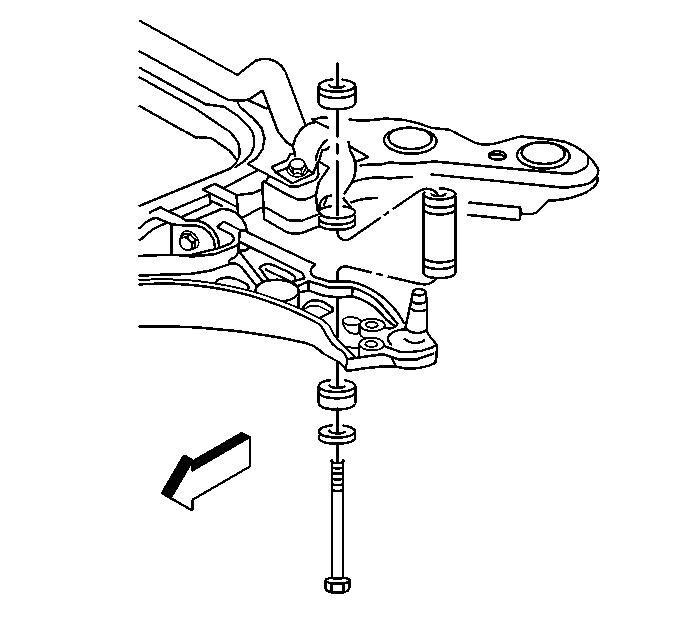
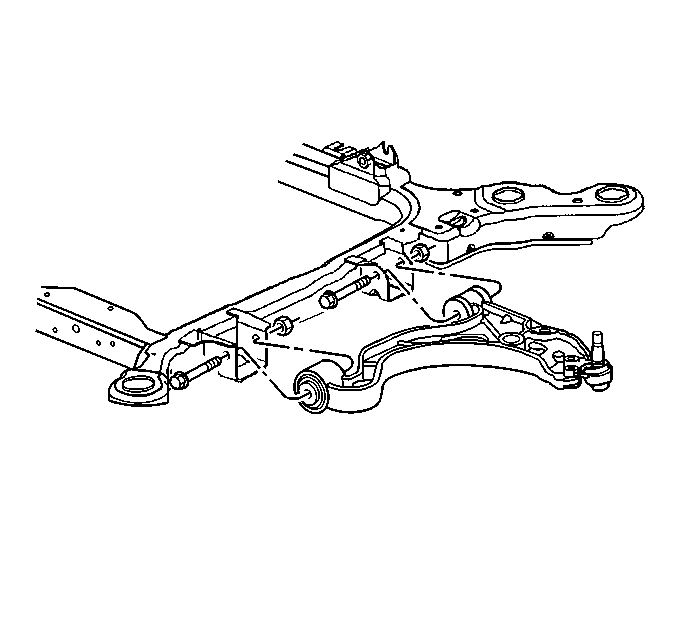
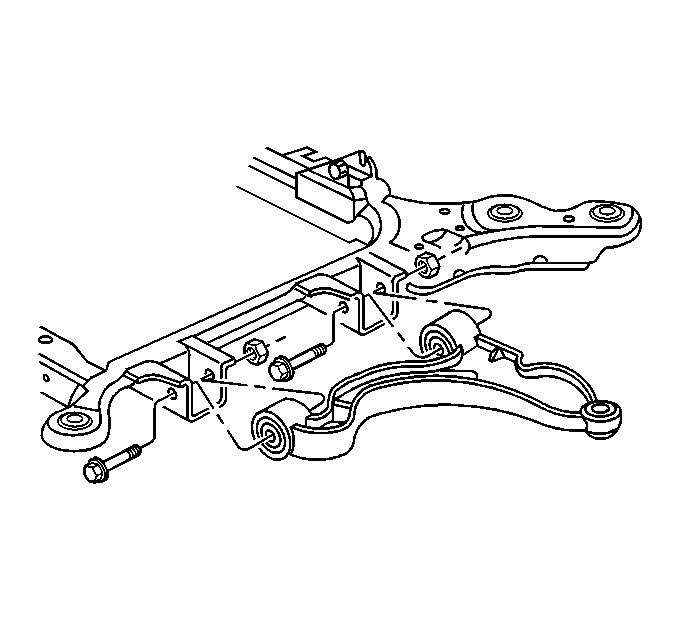
- Remove the lower control arm mounting nuts and bolts.
- Remove the lower control arm.
Installation Procedure
- Install the lower control arm to frame.
- Install the lower control arm bolts, washers and nuts.
- Install the lower ball joint stud to the steering knuckle.
- Install the lower ball joint nut (2).
- Install the cotter pin (1).
- Install the stabilizer shaft link. Refer to Stabilizer Shaft Link Replacement .
- Install the tire and wheel. Refer to Tire and Wheel Removal and Installation in Tires and Wheels.
- Lower the vehicle
- Jounce the vehicle and tighten the lower control arm nuts.
Important: Do not tighten the control arm nuts at this time. The weight of the vehicle must be supported by the control arms so that the vehicle design trim height is obtained before tightening the control arm mounting nuts.
Notice: Use the correct fastener in the correct location. Replacement fasteners must be the correct part number for that application. Fasteners requiring replacement or fasteners requiring the use of thread locking compound or sealant are identified in the service procedure. Do not use paints, lubricants, or corrosion inhibitors on fasteners or fastener joint surfaces unless specified. These coatings affect fastener torque and joint clamping force and may damage the fastener. Use the correct tightening sequence and specifications when installing fasteners in order to avoid damage to parts and systems.
Tighten
Tighten the lower ball joint stud nut to 10 N·m (88 lb in).
Then tighten the nut an additional 150 degrees. Do not tighten more than an
additional 60 degrees for cotter pin insertion. Do not loosen nut to install
cotter pin.
Tighten
| • | Tighten the front lower control arm nut to 157 N·m (116 lb ft). |
| • | Tighten the rear lower control arm nut to 157 N·m (116 lb ft). |
Lower Control Arm Replacement FE7
Tools Required
J 39549 Ball Joint Separator
Removal Procedure
- Raise the vehicle and suitably support by the frame allowing the control arms to hang free. Refer to Lifting and Jacking the Vehicle in General Information.
- Remove the wheel and tire.
- Disconnect the stabilizer link bolt from the control arm. Refer to Stabilizer Shaft Link Replacement .
- Remove the cotter pin and hex nut from the ball joint stud.
- Using the J 39549 separate the ball joint from the lower control arm.
- Remove the control arm mounting nuts and bolts.
- Remove the control arm.
Installation Procedure
- Install the control arm to frame.
- Install the control arm bolts, washers and nuts.
- Install the stabilizer link to control arm.
- Position the ball joint stud in the lower control arm.
- Install the ball joint nut.
- Tighten the stabilizer shaft link assembly nut to 23 N·m (17 lb ft).
- Tighten the ball joint stud nut to 30 N·m (22 lb in). Then tighten the nut an additional 190 degrees.
- Install the cotter pin.
- Install the wheel and tire.
- Lower the vehicle
- Jounce the vehicle and tighten the lower control arm nuts.
Important: Do not tighten the control arm nuts at this time. The weight of the vehicle must be supported by the control arms so that the vehicle design trim height is obtained before tightening the control arm mounting nuts.
Notice: Use the correct fastener in the correct location. Replacement fasteners must be the correct part number for that application. Fasteners requiring replacement or fasteners requiring the use of thread locking compound or sealant are identified in the service procedure. Do not use paints, lubricants, or corrosion inhibitors on fasteners or fastener joint surfaces unless specified. These coatings affect fastener torque and joint clamping force and may damage the fastener. Use the correct tightening sequence and specifications when installing fasteners in order to avoid damage to parts and systems.
Tighten
Tighten
Tighten the wheel nuts to 125 N·m (80 lb ft).
Tighten
| • | Tighten the front lower control arm nut to 162 N·m (120 lb ft). |
| • | Tighten the rear lower control arm nut to 146 N·m (108 lb ft). |
