For 1990-2009 cars only
Removal Procedure
Tools Required
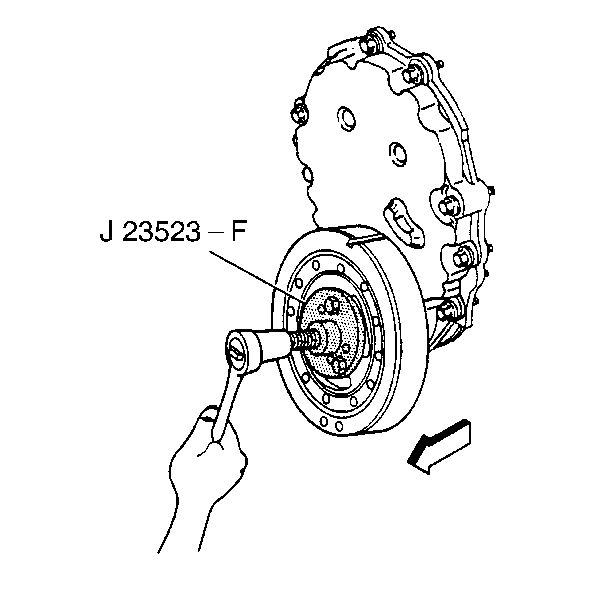
J 23523-F Balancer
Remover and Installer.
- Evacuate the air conditioning system, if equipped. Refer to Refrigerant Recovery and Recharging Recharging the Refrigerant System in Heating, Ventilication and Air Conditioning.
- Disconnect the battery negative cable. Refer to Battery Cable in Engine Electrical.
- Drain the engine oil. Refer to Engine Oil and Oil Filter Replacement .
- Remove the valve lifters. Refer to Valve Lifter Replacement .
- Remove the engine cooling fan and the fan shroud. Refer to Fan Clutch Replacement .
- Remove the radiator grille. Refer to Grille Replacement .
- Remove the hood latch bracket. Refer to Hood Primary and Secondary Latch Replacement .
- Remove the radiator. Refer to Radiator Replacement .
- Remove the A/C condenser, if equipped. Refer to Condenser Replacement in Heating, Ventilication and Air Conditioning.
- Remove the water pump. Refer to Water Pump Replacement in Engine Cooling.
- Remove the three crankshaft pulley bolts and the crankshaft pulley.
- Use the J 23523-F in order to remove the crankshaft balancer.
- Raise the vehicle.
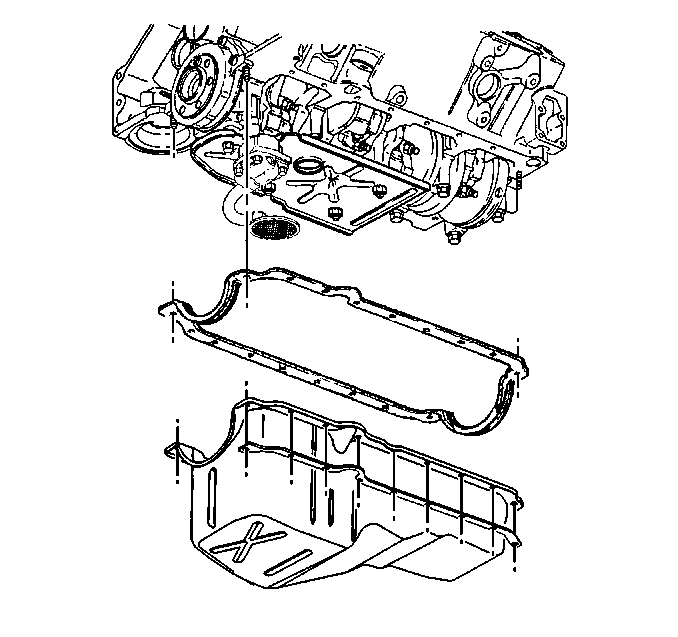
- Remove the fasteners from the oil pan. Do not remove the two nuts at the rear of the engine. Refer to Oil Pan Replacement .
- Lower the vehicle.
- Remove the engine front cover. Refer to Engine Front Cover Replacement .
- Remove the crankshaft position sensor reluctor ring. Refer to Crankshaft Position Sensor Reluctor Ring Replacement in Engine Controls 5.0, 5.7L.
- Rotate the number one piston to Top Dead Center (TDC).
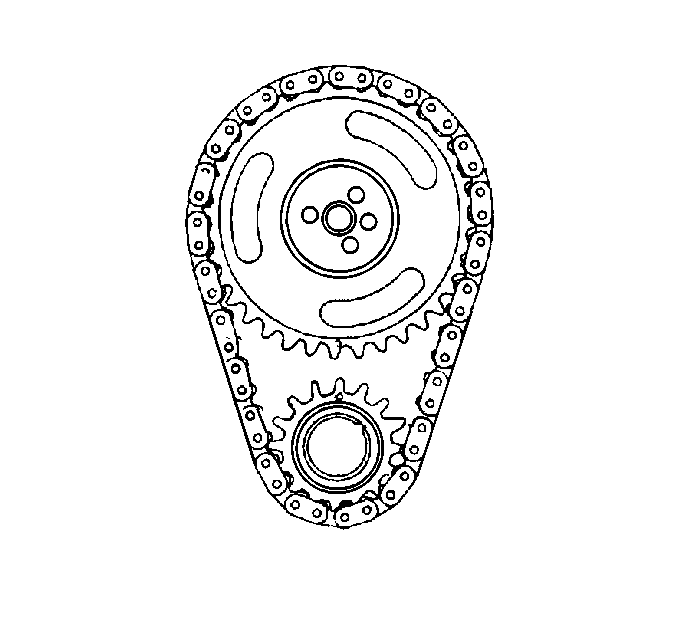
- Align the timing marks on the camshaft and the crankshaft sprockets.
- Remove the camshaft sprocket bolts.
- Remove the camshaft sprocket and the camshaft timing chain. Refer to Timing Chain and Sprocket Replacement .
- Remove the camshaft retainer plate and bolts using a T-30 TORX® socket.
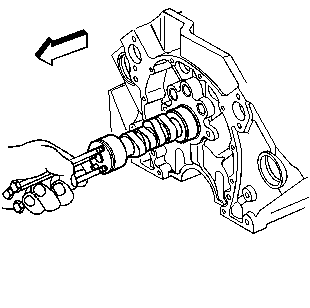
- Remove the engine camshaft.
- Inspect all parts for wear. Refer to Camshaft and Bearings Clean and Inspect .
Refer to Crankshaft Balancer Replacement .
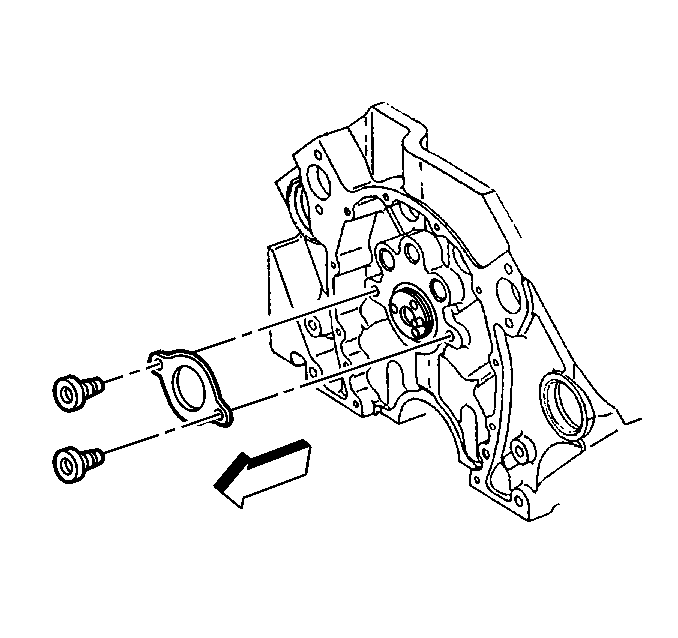
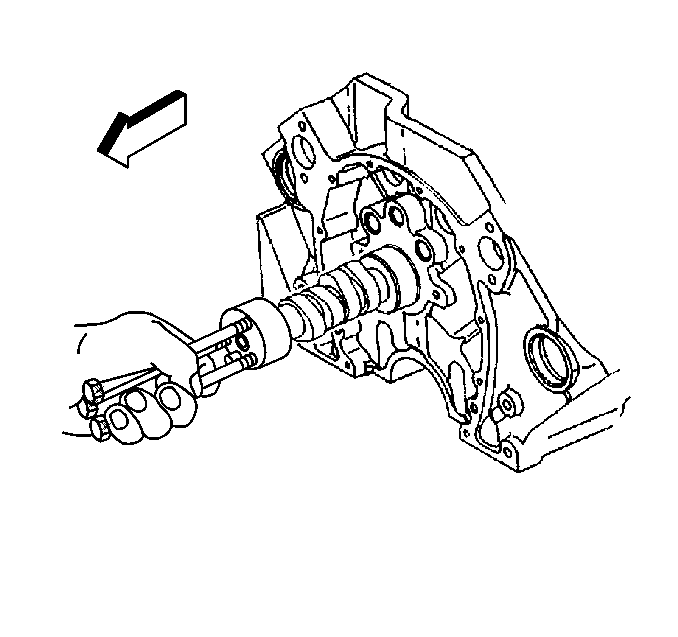
Notice: All camshaft journals are the same diameter, so care must be used in removing or installing the camshaft to avoid damage to the camshaft bearings.
Important: All camshaft journals are the same diameter, so care must be used in removing the camshaft to avoid damage to the bearings.
Installation Procedure
- Install the camshaft. Refer to Camshaft Installation .
- Install the components removed from the front of the engine. Refer to Timing Chain and Sprocket Replacement .
- Install the water pump. Refer to Water Pump Replacement .
- Install the A/C condenser, if equipped. Refer to Condenser Replacement in Heating, Ventilation and Air Conditioning.
- Install the radiator. Refer to Radiator Replacement .
- Install the hood latch bracket. Refer to Hood Primary and Secondary Latch Replacement .
- Install the radiator grille. Refer to Grille Replacement .
- Install the engine cooling fan and the upper fan shroud. Refer to Fan Clutch Replacement in Engine Cooling.
- Connect the battery negative cable. Refer to Battery Cable in Engine Electrical.
- Recharge the air conditioning system, if equipped. Refer to Refrigerant Recovery and Recharging in Heating, Ventilication and Air Conditioning.
- Replace the engine oil filter. Refer to Engine Oil and Oil Filter Replacement .
