For 1990-2009 cars only
Radio Rear Speaker Replacement Outer
Removal Procedure
- Remove the body side trim panel. Refer to Body Side Rear Trim Panel Replacement .
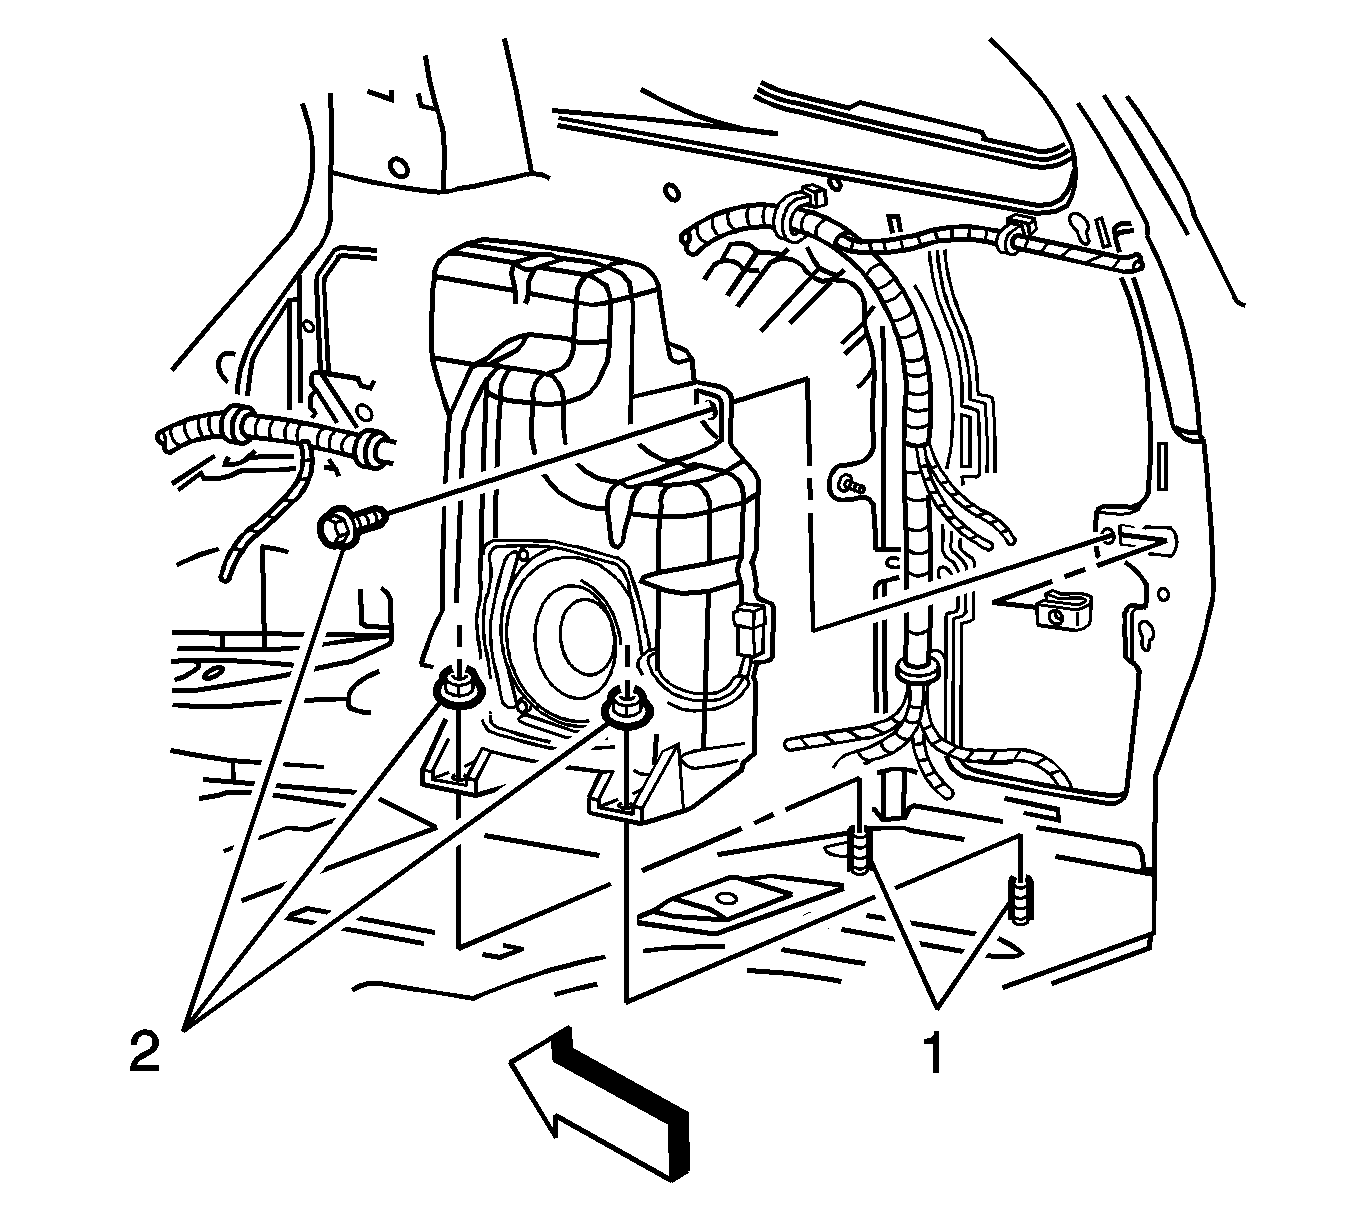
- Remove the fasteners (2) securing the rear speaker.
- Disconnect the electrical connector.
- Remove the speaker.

Installation Procedure
- Locate the speaker onto the studs (1) on the vehicle floor.
- Connect the electrical connector.
- Install the fasteners (2) securing the speaker.
- Install the body side trim panel. Refer to Body Side Rear Trim Panel Replacement .

Notice: Refer to Fastener Notice in the Preface section.
Tighten
Tighten the fasteners to 9 N·m (80 lb in).
Radio Rear Speaker Replacement Upper Pillar

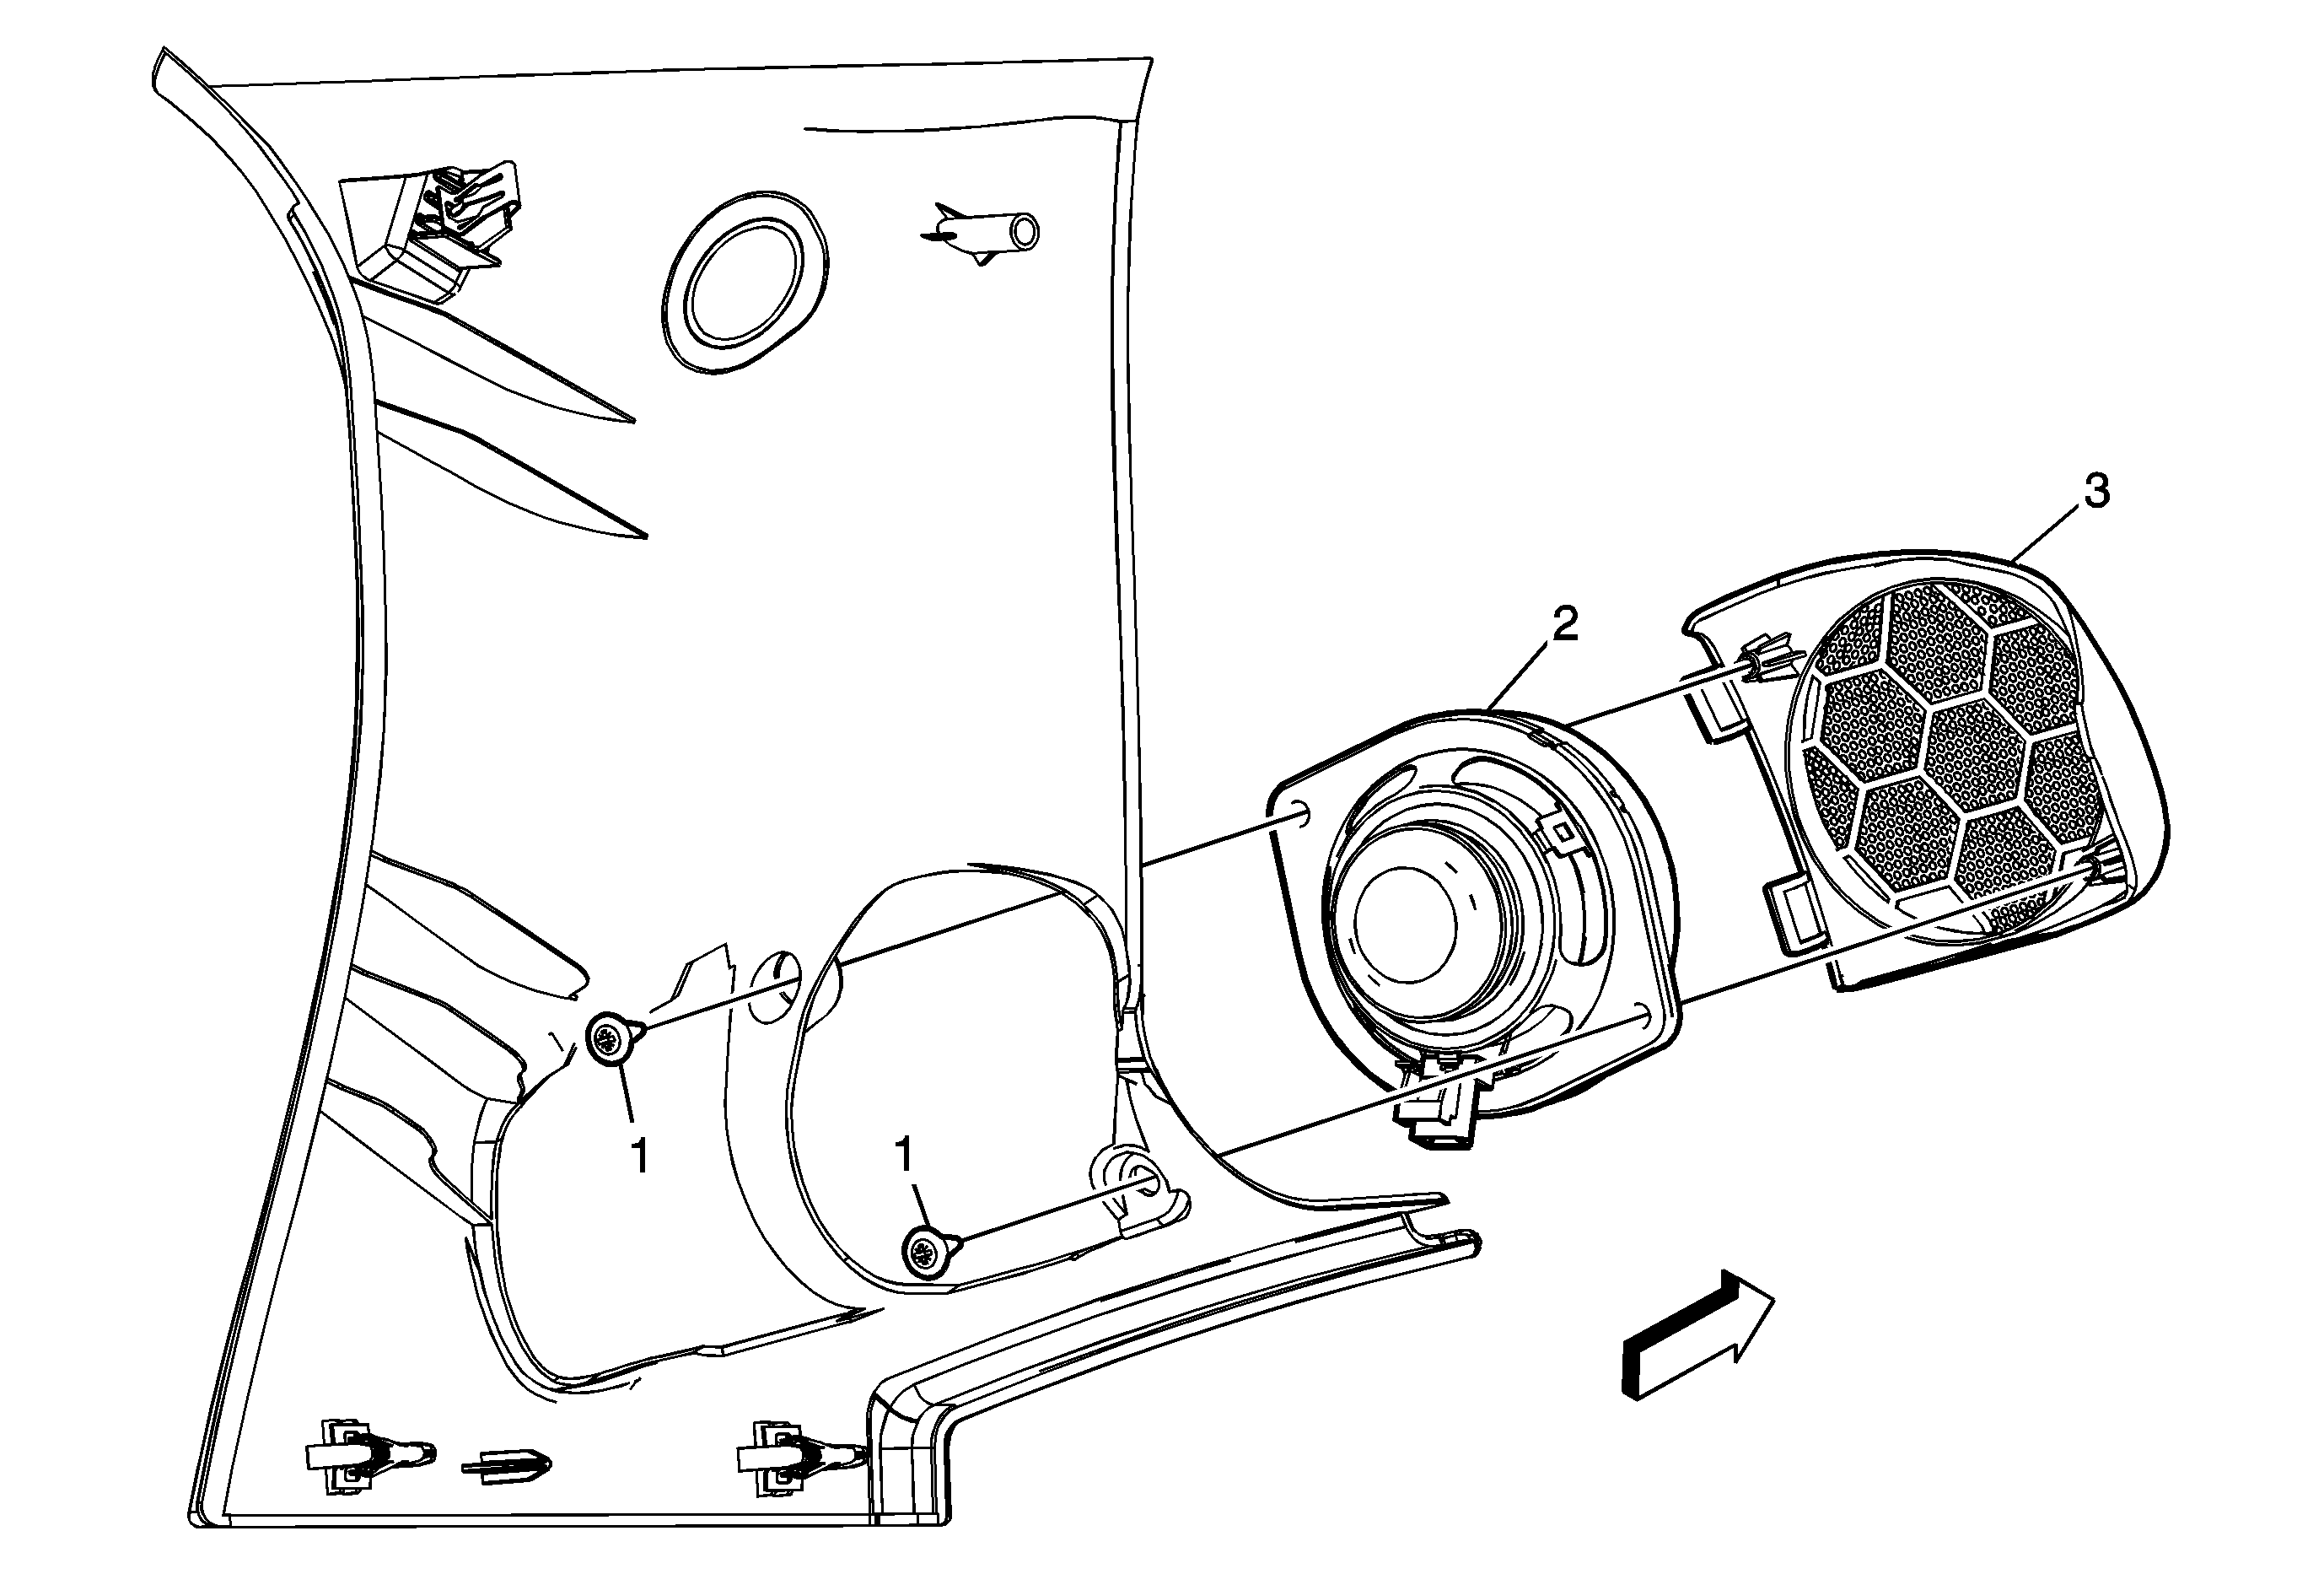
Callout | Component Name |
|---|---|
Preliminary ProcedureRemove the body side rear upper garnish molding. Refer to Body Side Rear Upper Garnish Molding Replacement . | |
1 | Radio Rear Speaker Assembly Screw (Qty: 2) Notice: Refer to Fastener Notice in the Preface section. Tighten |
2 | Radio Rear Speaker Assembly |
3 | Radio Rear Speaker Grille |
Radio Rear Speaker Replacement Console Cover

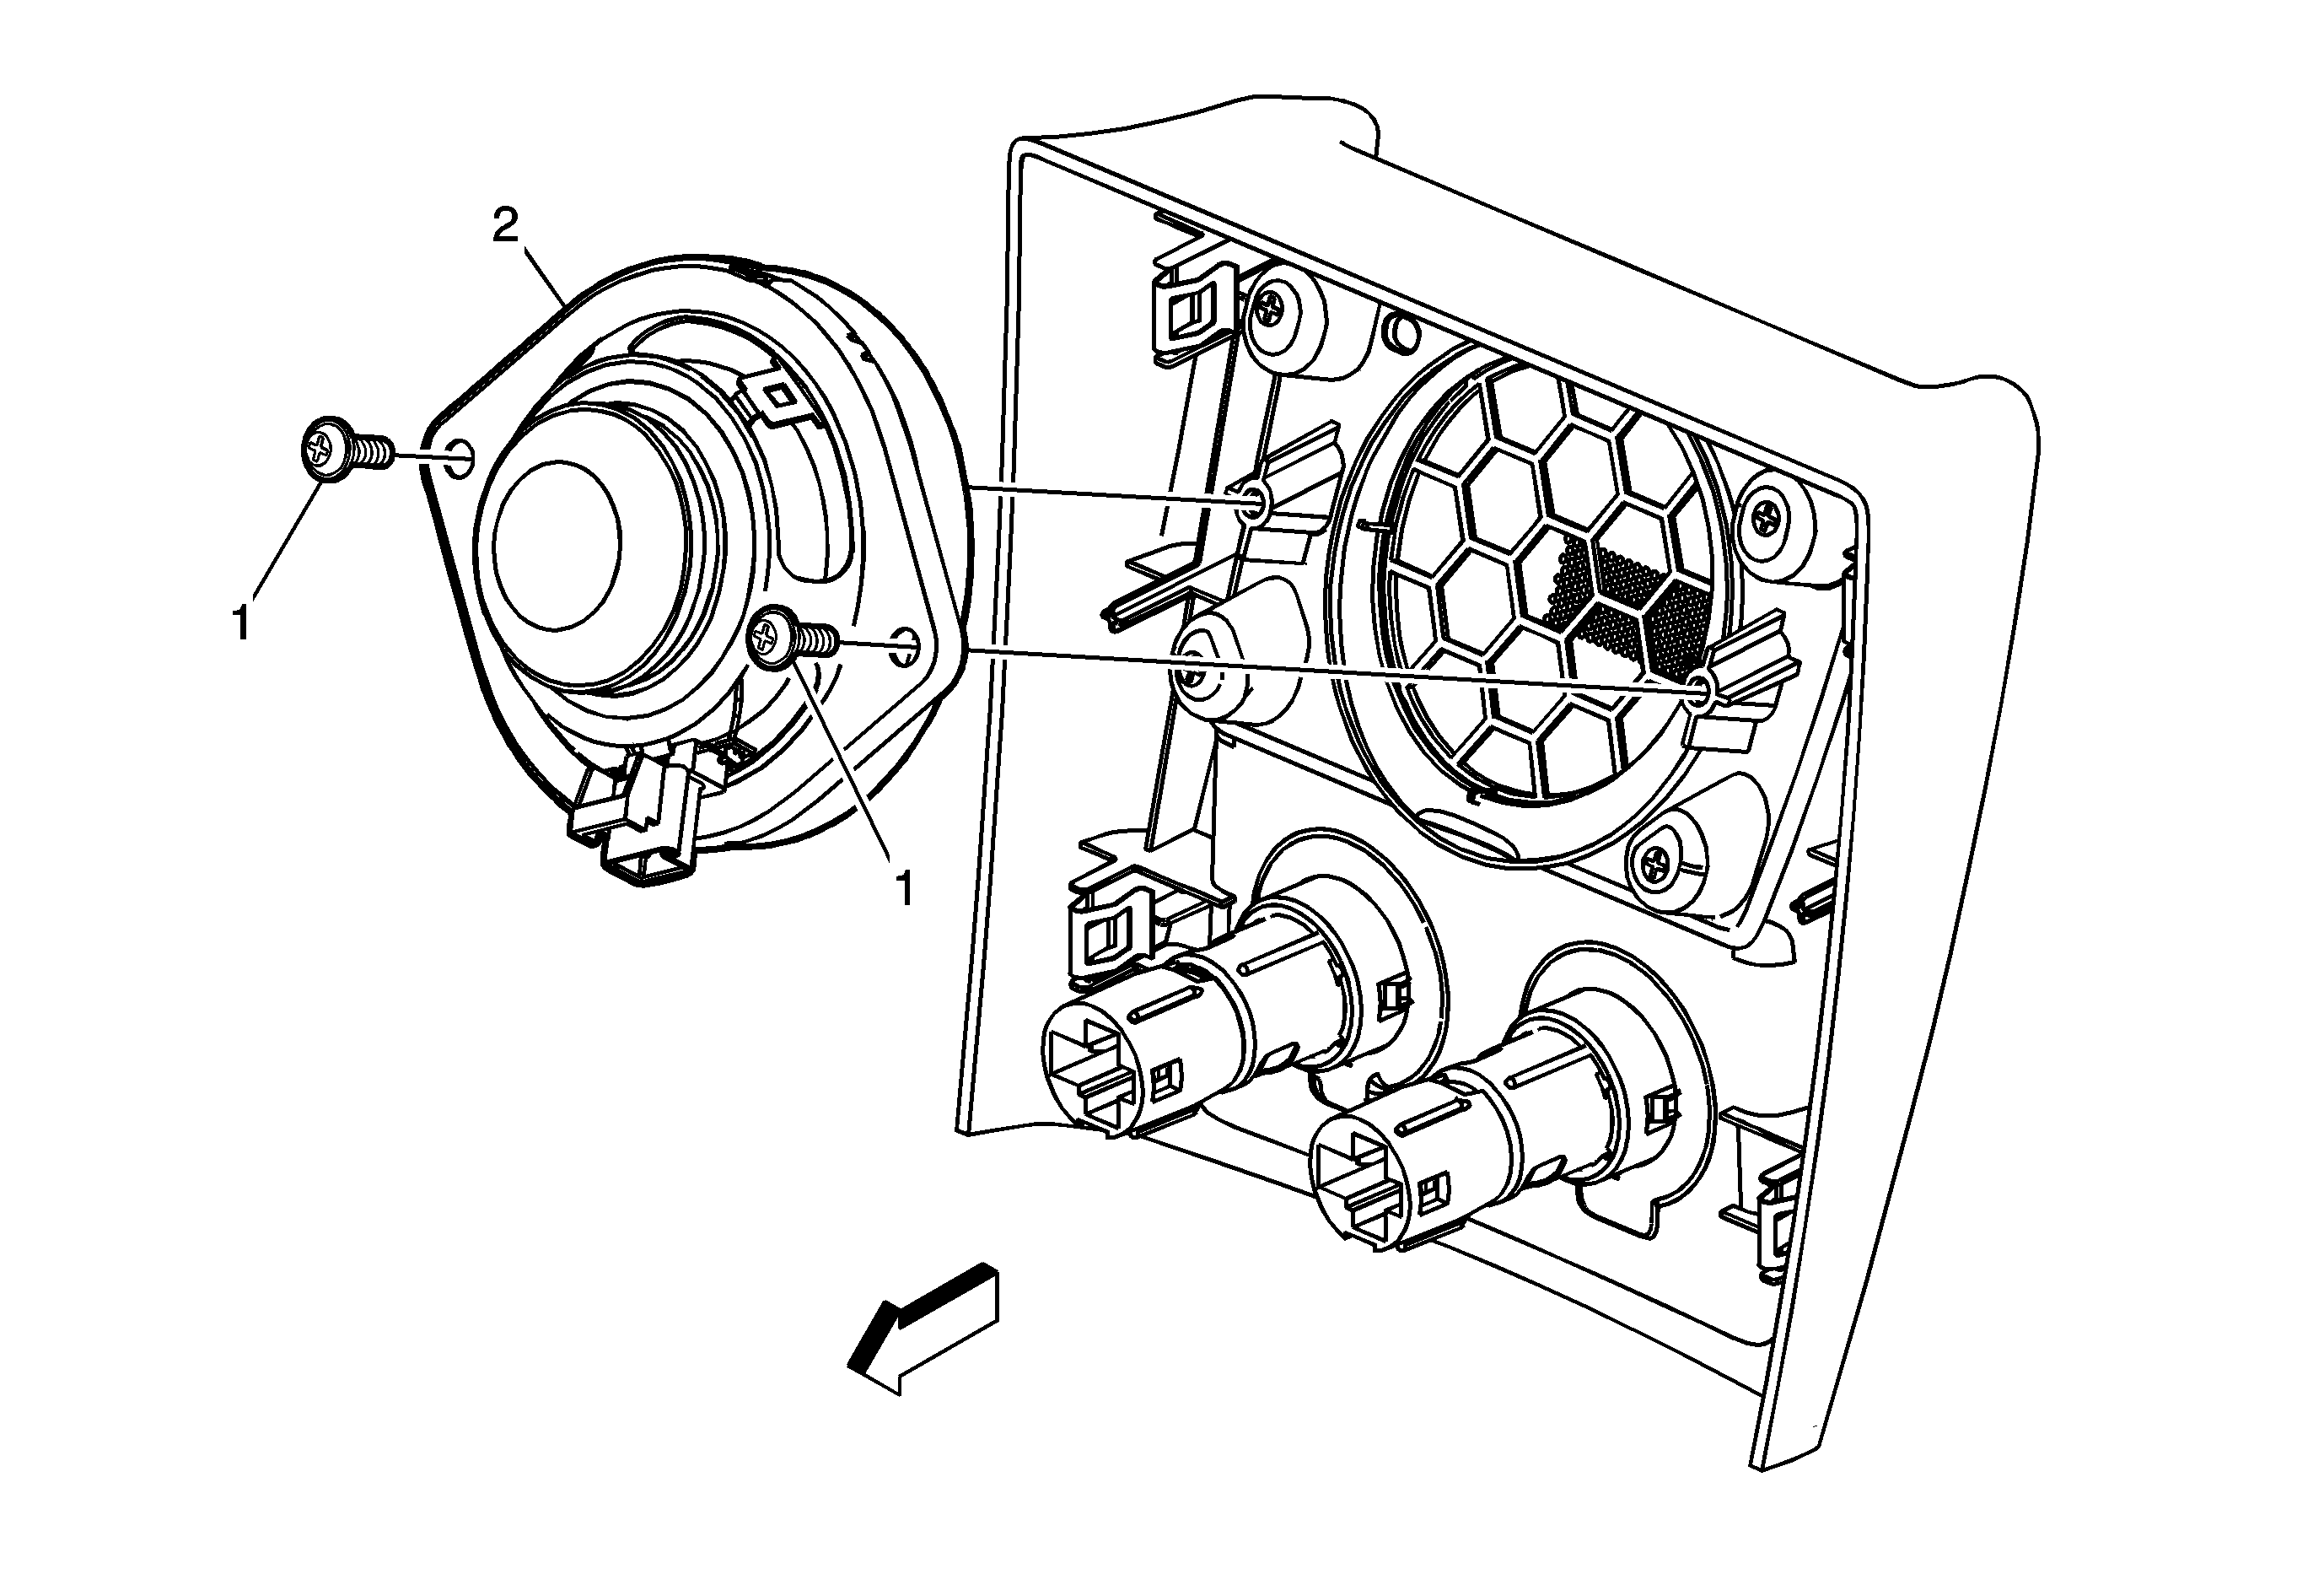
Callout | Component Name |
|---|---|
Preliminary ProcedureRemove the rear console trim plate. Refer to Console Rear Trim Plate Replacement . | |
1 | Radio Rear Speaker Assembly Screw (Qty: 2) Notice: Refer to Fastener Notice in the Preface section. Tighten |
2 | Radio Rear Speaker Assembly |
