Tools Required
Removal Procedure
- Raise and support the vehicle. Refer to
Lifting and Jacking the Vehicle .
- Place a suitable drain pan under the transmission fluid pan.

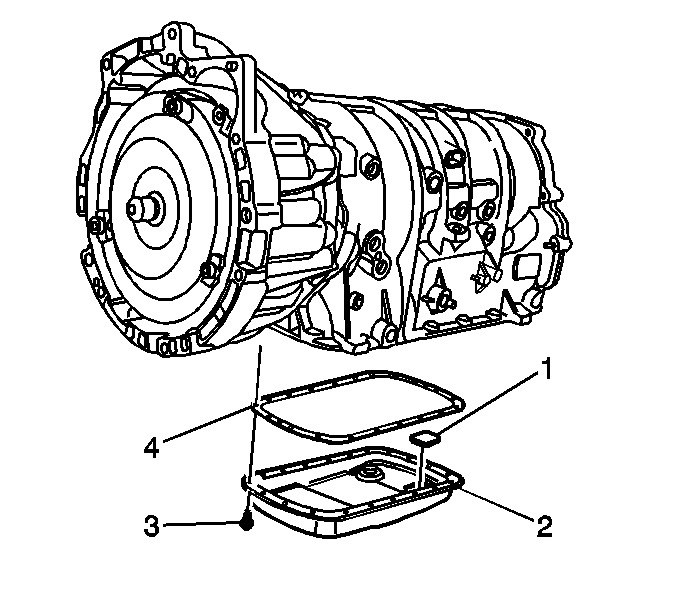
- Loosen the fluid pan bolts (3) on 3 sides of the fluid pan.
- Lightly tap the fluid pan (2) with a rubber mallet if necessary in order to loosen the gasket seal.
- Allow the transmission fluid to drain.
- Inspect the transmission fluid for discoloration and contamination while draining.
- Remove the fluid pan bolts (3).
- Remove the fluid pan (2) and the gasket (4).
- Clean and inspect the following for damage or wear.

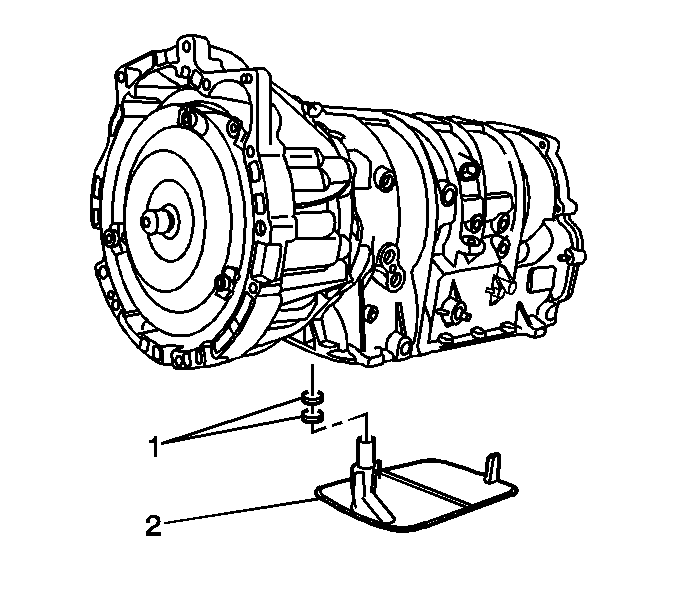
- Remove the fluid filter (2). Use a long screwdriver in order to pry the fluid filter neck out of the seals.
- Remove the 2 fluid filter seals (1) using
J 23129 and
J 6125-1B .
Installation Procedure

- Install 2 NEW fluid filter seals (1), onto the transmission fluid filter neck. Coat the new seals with a small amount of
J 36850 or petroleum jelly before installation.
- Install the transmission fluid filter (2) into the case.

Important: Fluid pan gaskets are reusable. Replace the gasket ONLY if the sealing surface is damaged.
- Install the fluid pan (2) and the gasket (4) at the same time.
Notice: Refer to Fastener Notice in the Preface section.
- Install the fluid pan bolts (3).
Tighten
Tighten the bolts to 11 N·m (97 lb in).
- Fill the transmission to the proper level. Refer to
Transmission Fluid Check .
- Lower the vehicle.
- Inspect the oil pan gasket for leaks.


