For 1990-2009 cars only
HVAC Module Assembly Replacement Right Hand Drive
Special Tools
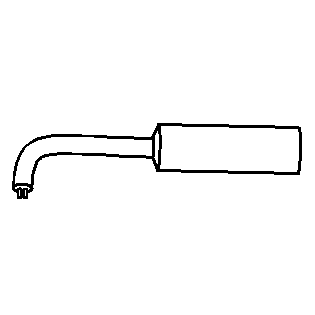
| • | J 39400-A Halogen Leak Detector |
| • | J 45689 A/C Quick Joint Tool |
Removal Procedure
- Recover the refrigerant. Refer to Refrigerant Recovery and Recharging.
- Disconnect the negative battery cable. Refer to Battery Negative Cable Disconnection and Connection.
- Drain the coolant. Refer to Cooling System Draining and Filling.
- Disconnect the inlet heater hose from the heater core. Refer to Heater Inlet Hose Replacement.
- Disconnect the outlet heater hose from the heater core. Refer to Heater Outlet Hose Replacement.
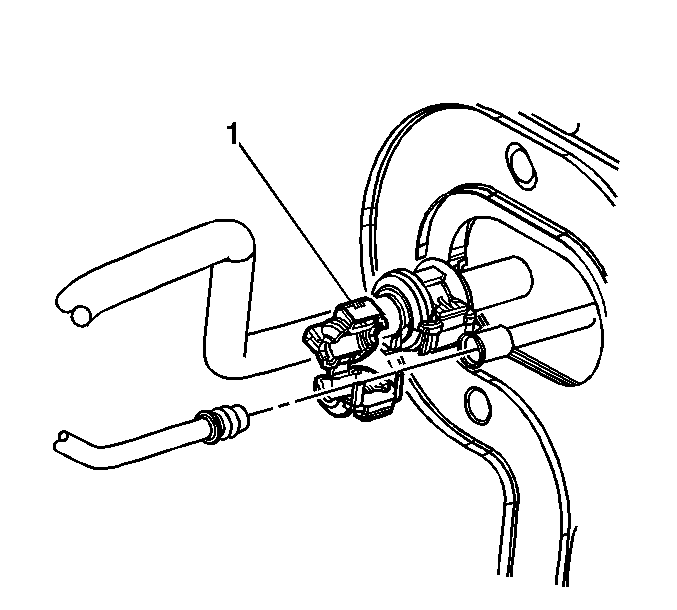
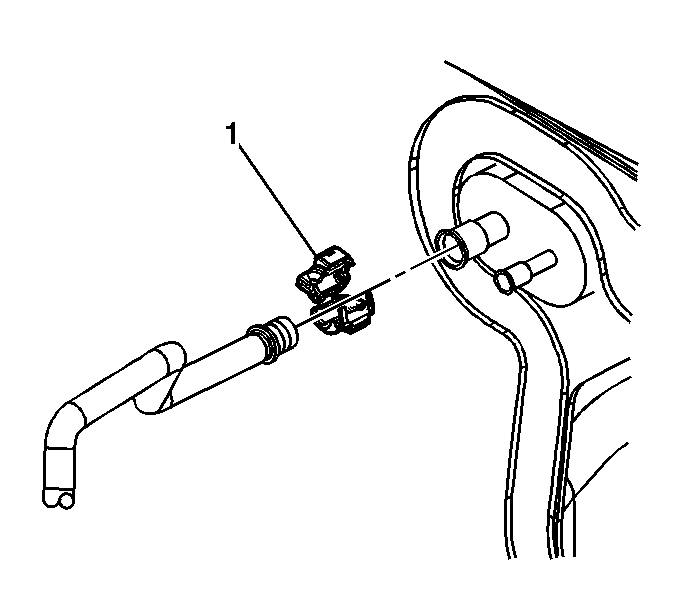
- Remove the quick connect fitting (1) from the liquid line. Refer to Air Conditioning Line/Tube Connector Removal/Replacement.
- Disconnect the A/C liquid line from the evaporator.
- Remove and discard the O-rings.
- Remove the quick connect fitting (1) from the suction line. Refer to Air Conditioning Line/Tube Connector Removal/Replacement.
- Disconnect the A/C suction line from the evaporator.
- Remove and discard the O-rings.
- Remove the instrument panel (I/P) carrier. Refer to Instrument Panel Carrier Replacement.
- Remove the air inlet assembly.
- Disconnect the HVAC module electrical connector.
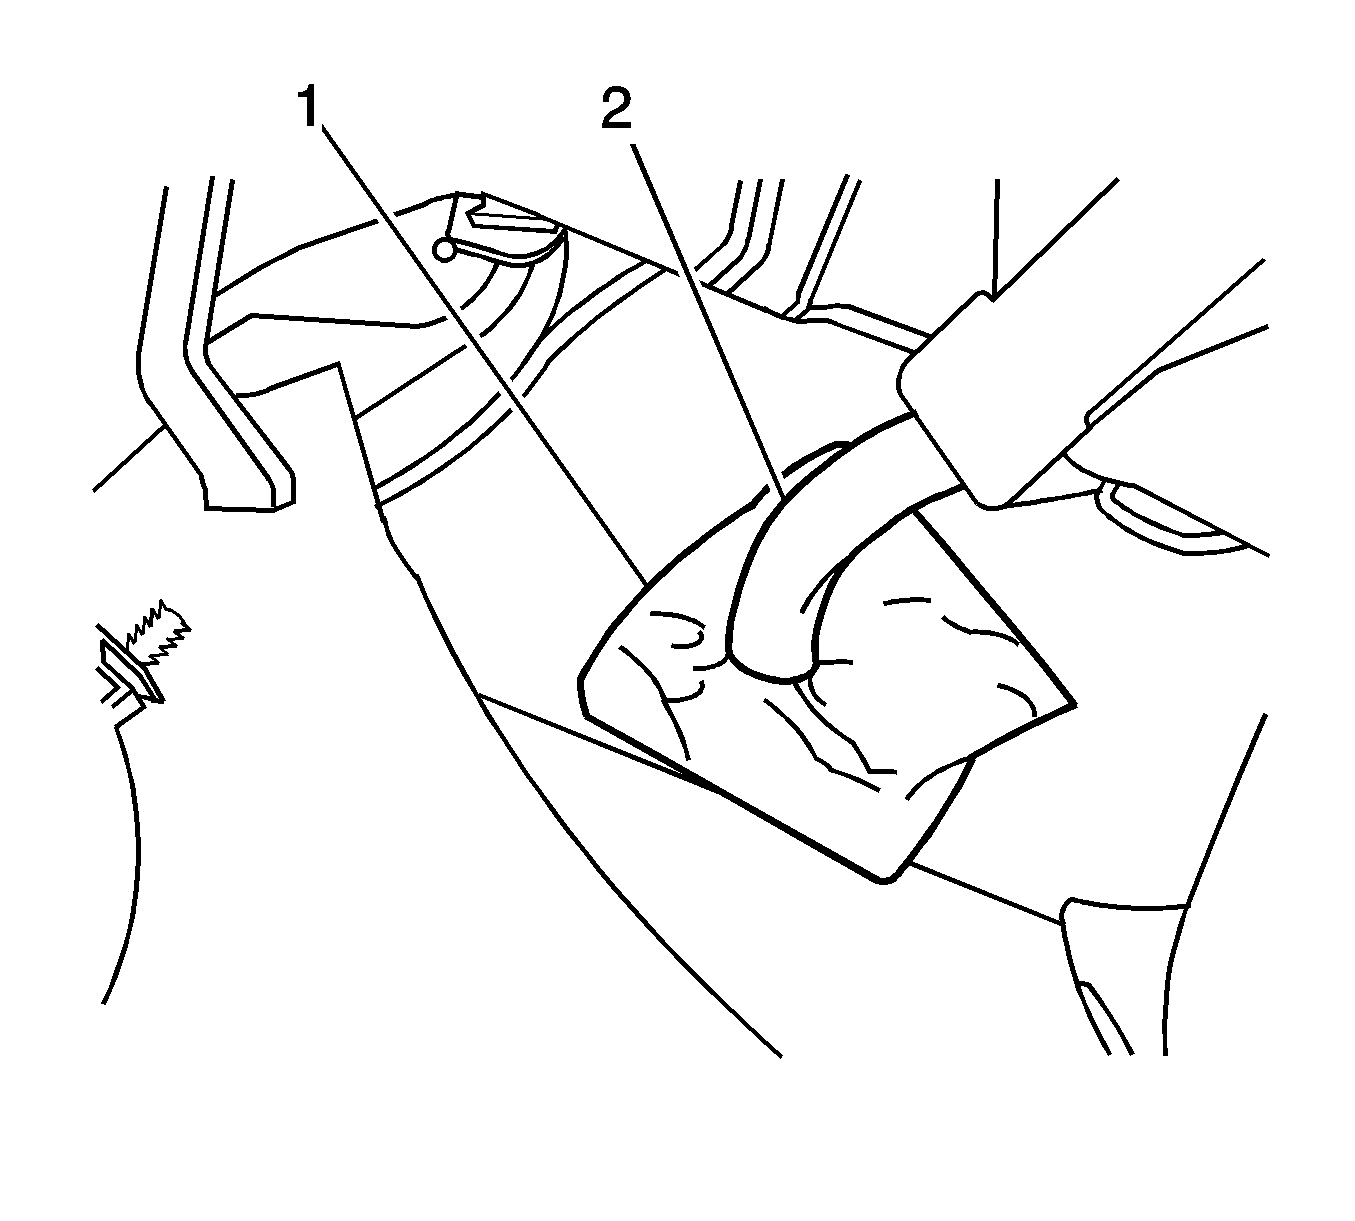
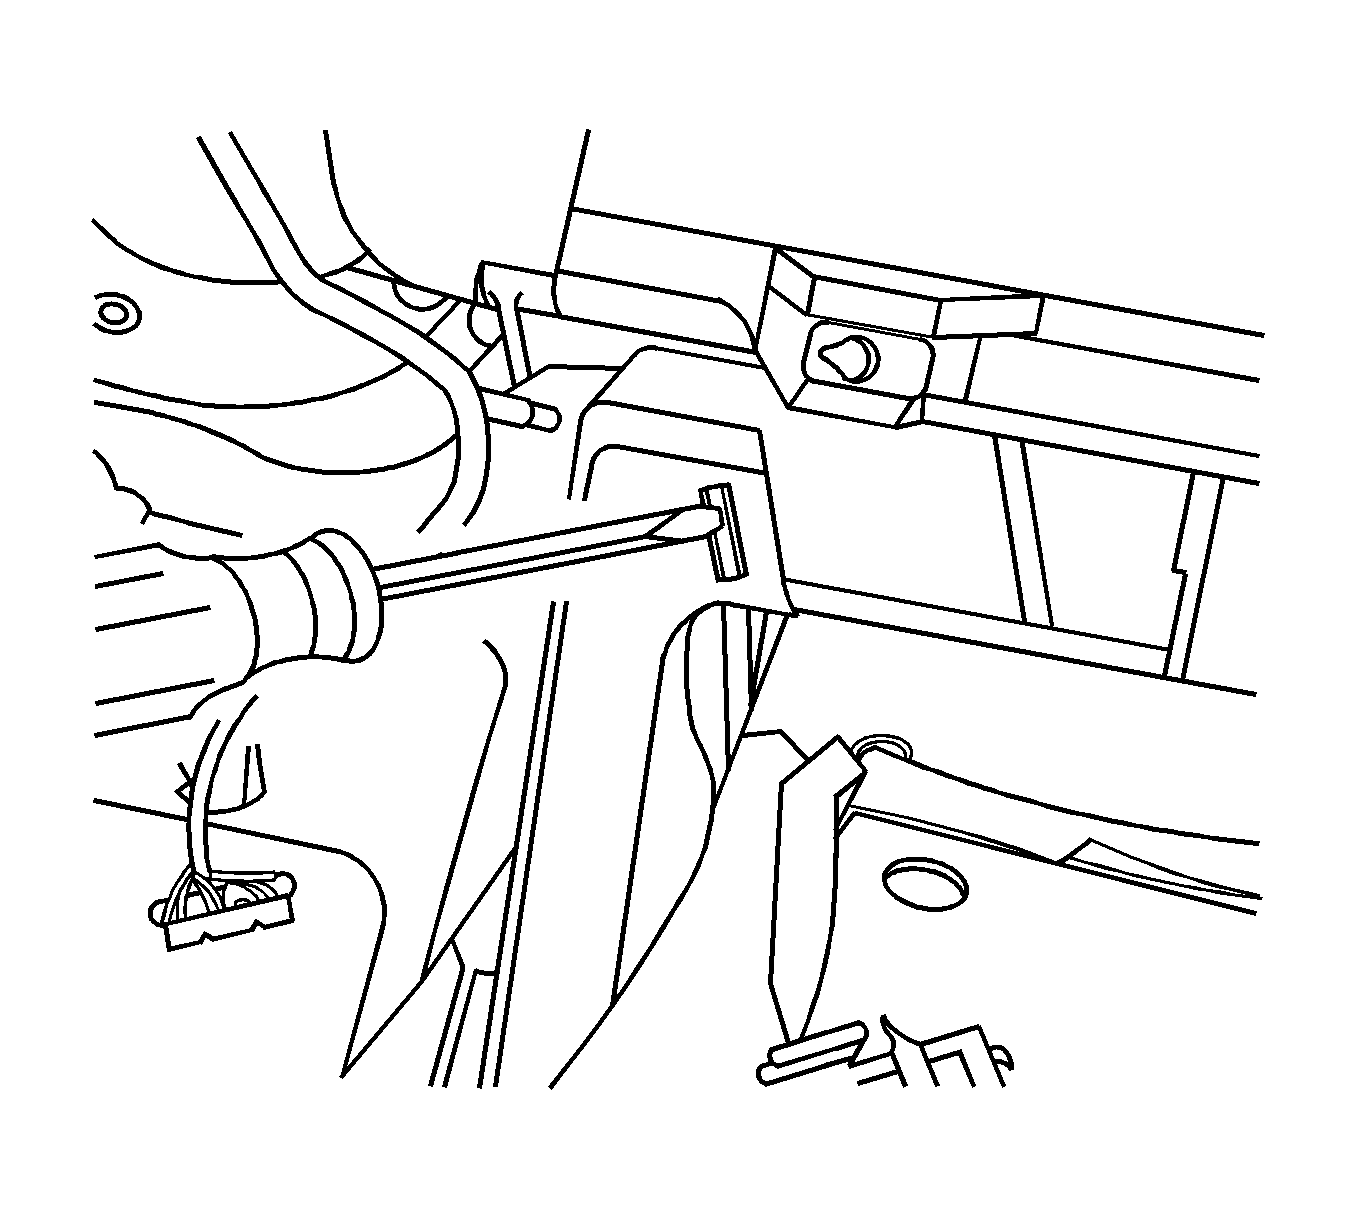
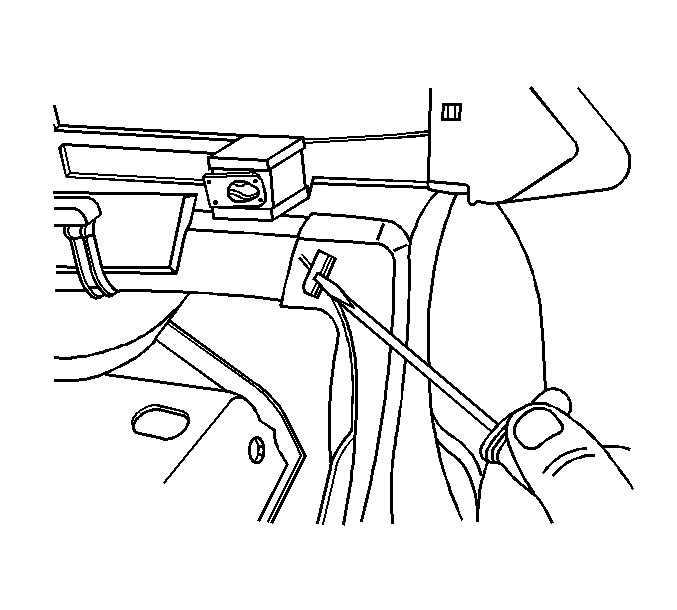
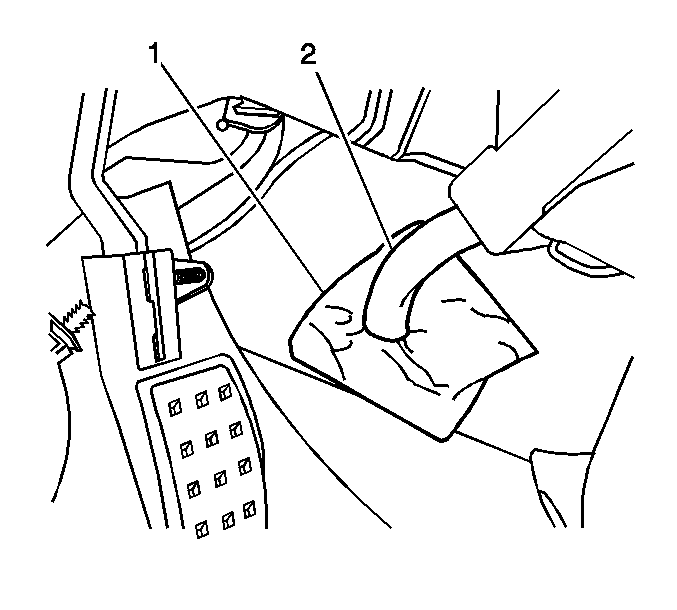
- Disconnect the HVAC module drain tube (2) from the floor.
- Press the tab and release the left rear duct from the HVAC module.
- Position the left rear heater duct away from the HVAC module.
- Press the tab and release the right rear duct from the HVAC module.
- Position the right rear heater duct away from the HVAC module.
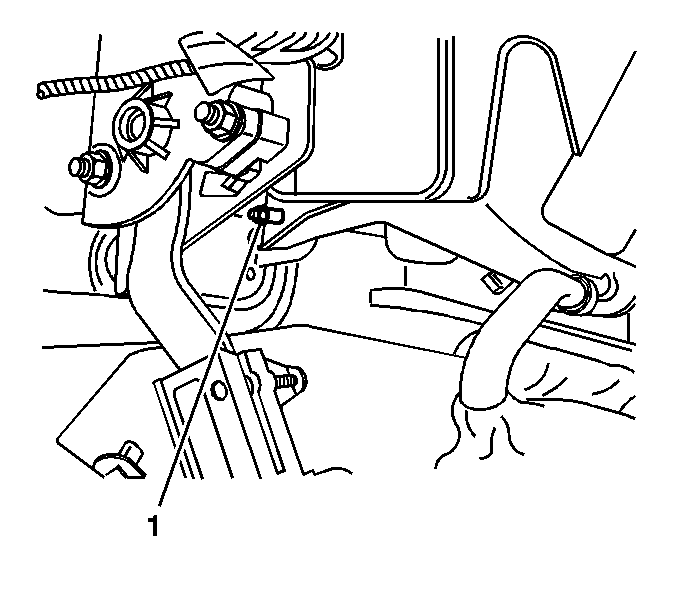
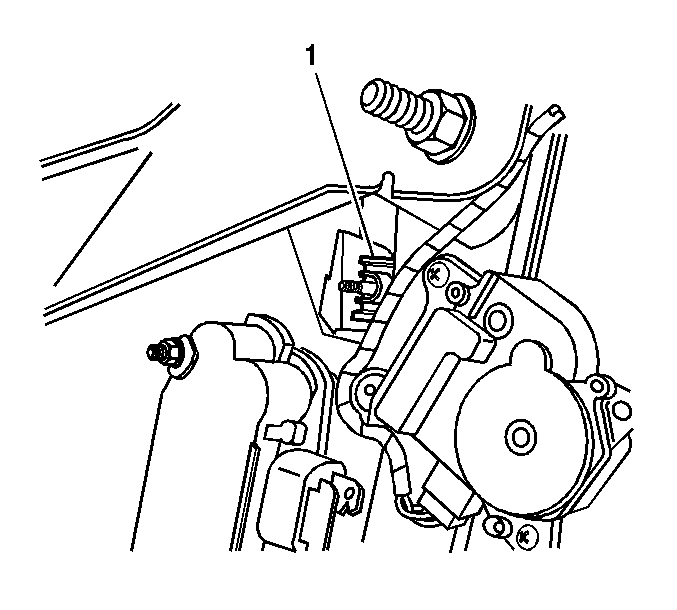
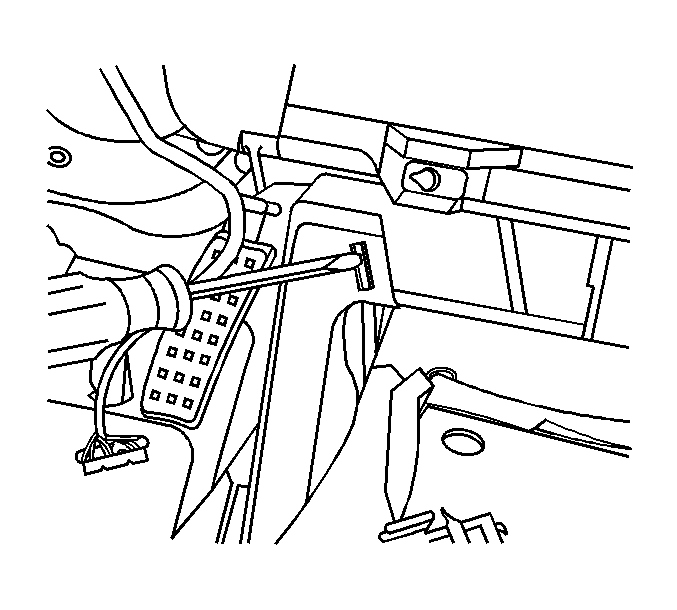
- Remove the lower left HVAC module mounting nut (1).
- Remove the upper left HVAC module mounting nut (1).
- Remove the HVAC module from the vehicle.
- Remove the foam seals from the A/C evaporator lines.
- Remove the foam seals from the heater core pipes.
Installation Procedure
- Install new foam seals onto the heater core pipes.
- Install new foam seals onto the A/C evaporator lines.
- Install the HVAC module into the vehicle.
- Install the upper left HVAC module mounting nut (1) and tighten to 9 N·m (80 lb in).
- Install the lower left HVAC module mounting nut (1) and tighten to 9 N·m (80 lb in).
- Connect the rear heater ducts to the HVAC module.
- Connect the drain tube to the bottom of the HVAC module.
- Connect the drain tube (2) to the floor.
- Connect the HVAC electrical connector.
- Install the air inlet assembly.
- Install the I/P carrier. Refer to Instrument Panel Carrier Replacement.
- Install new O-rings to the suction line. Refer to O-Ring Replacement.
- Install the A/C suction line to the evaporator.
- Install the quick connect fitting (1) to the suction line. Refer to Air Conditioning Line/Tube Connector Removal/Replacement.
- Install new O-rings to the suction line. Refer to O-Ring Replacement.
- Install the A/C liquid line to the evaporator.
- Install the quick connect fitting (1) to the liquid line. Refer to Air Conditioning Line/Tube Connector Removal/Replacement.
- Connect the inlet heater hose to the heater core. Refer to Heater Inlet Hose Replacement.
- Connect the outlet heater hose to the heater core. Refer to Heater Outlet Hose Replacement.
- Connect the negative battery cable. Refer to Battery Negative Cable Disconnection and Connection.
- Fill the coolant. Refer to Cooling System Draining and Filling.
- Evacuate and recharge the A/C system. Refer to Refrigerant Recovery and Recharging.
- Leak test the fittings of the component using J 39400-A .
Caution: Refer to Fastener Caution in the Preface section.
HVAC Module Assembly Replacement Left Hand Drive
Special Tools
| • | J 39400-A Halogen Leak Detector |
| • | J 45689 A/C Quick Joint Tool |
Removal Procedure
- Recover the refrigerant. Refer to Refrigerant Recovery and Recharging.
- Disconnect the negative battery cable. Refer to Battery Negative Cable Disconnection and Connection.
- Drain the coolant. Refer to Cooling System Draining and Filling.
- Disconnect the inlet heater hose from the heater core. Refer to Heater Inlet Hose Replacement.
- Disconnect the outlet heater hose from the heater core. Refer to Heater Outlet Hose Replacement.
- Remove the quick connect fitting (1) from the liquid line. Refer to Air Conditioning Line/Tube Connector Removal/Replacement.
- Disconnect the A/C liquid line from the evaporator.
- Remove and discard the O-rings.
- Remove the quick connect fitting (1) from the suction line. Refer to Air Conditioning Line/Tube Connector Removal/Replacement.
- Disconnect the A/C suction line from the evaporator.
- Remove and discard the O-rings.
- Remove the instrument panel (I/P) carrier. Refer to Instrument Panel Carrier Replacement.
- Remove the air inlet assembly.
- Disconnect the HVAC module electrical connector.
- Disconnect the HVAC module drain tube (2) from the floor.
- Press the tab and release the left rear duct from the HVAC module.
- Position the left rear heater duct away from the HVAC module.
- Press the tab and release the right rear duct from the HVAC module.
- Position the right rear heater duct away from the HVAC module.
- Remove the lower left HVAC module mounting nut (1).
- Remove the upper left HVAC module mounting nut (1).
- Remove the HVAC module from the vehicle.
- Remove the foam seals from the A/C evaporator lines.
- Remove the foam seals from the heater core pipes.
Installation Procedure
- Install new foam seals onto the heater core pipes.
- Install new foam seals onto the A/C evaporator lines.
- Install the HVAC module into the vehicle.
- Install the upper left HVAC module mounting nut (1) and tighten to 9 N·m (80 lb in).
- Install the lower left HVAC module mounting nut (1) and tighten to 9 N·m (80 lb in).
- Connect the rear heater ducts to the HVAC module.
- Connect the drain tube to the bottom of the HVAC module.
- Connect the drain tube (2) to the floor.
- Connect the HVAC electrical connector.
- Install the air inlet assembly.
- Install the I/P carrier. Refer to Instrument Panel Carrier Replacement.
- Install new O-rings to the suction line. Refer to O-Ring Replacement.
- Install the A/C suction line to the evaporator.
- Install the quick connect fitting (1) to the suction line. Refer to Air Conditioning Line/Tube Connector Removal/Replacement.
- Install new O-rings to the suction line. Refer to O-Ring Replacement.
- Install the A/C liquid line to the evaporator.
- Install the quick connect fitting (1) to the liquid line. Refer to Air Conditioning Line/Tube Connector Removal/Replacement.
- Connect the inlet heater hose to the heater core. Refer to Heater Inlet Hose Replacement.
- Connect the outlet heater hose to the heater core. Refer to Heater Outlet Hose Replacement.
- Connect the negative battery cable. Refer to Battery Negative Cable Disconnection and Connection.
- Fill the coolant. Refer to Cooling System Draining and Filling.
- Evacuate and recharge the A/C system. Refer to Refrigerant Recovery and Recharging.
- Leak test the fittings of the component using J 39400-A .
Caution: Refer to Fastener Caution in the Preface section.
