For 1990-2009 cars only
Removal Procedure
- Remove the steering wheel. Refer to Steering Wheel Replacement .
- Remove the front seats. Refer to Bucket Seat Replacement .
- Remove the center floor console. Refer to Front Floor Console Replacement .
- Remove the defroster grille. Refer to Defroster Grille Replacement .
- Remove the front I/P speakers.
- Remove the instrument panel center trim . Refer to Instrument Panel Center Trim Panel Replacement .
- Remove the radio. Refer to Radio Replacement.
- Remove the ashtray/storage bin. Refer to Ashtray Replacement .
- Remove the HVAC control module. Refer to HVAC Control Module Replacement.
- Remove the left and right instrument panel insulator panels. Refer to and Instrument Panel Insulator Panel Replacement - Left Side and Instrument Panel Insulator Panel Replacement - Right Side .
- Remove the knee bolster bracket. Refer to Driver Knee Bolster Reinforcement Replacement .
- Remove the instrument cluster. Refer to Instrument Cluster Replacement .
- Remove the instrument panel storage compartment. Refer to Instrument Panel Compartment Replacement .
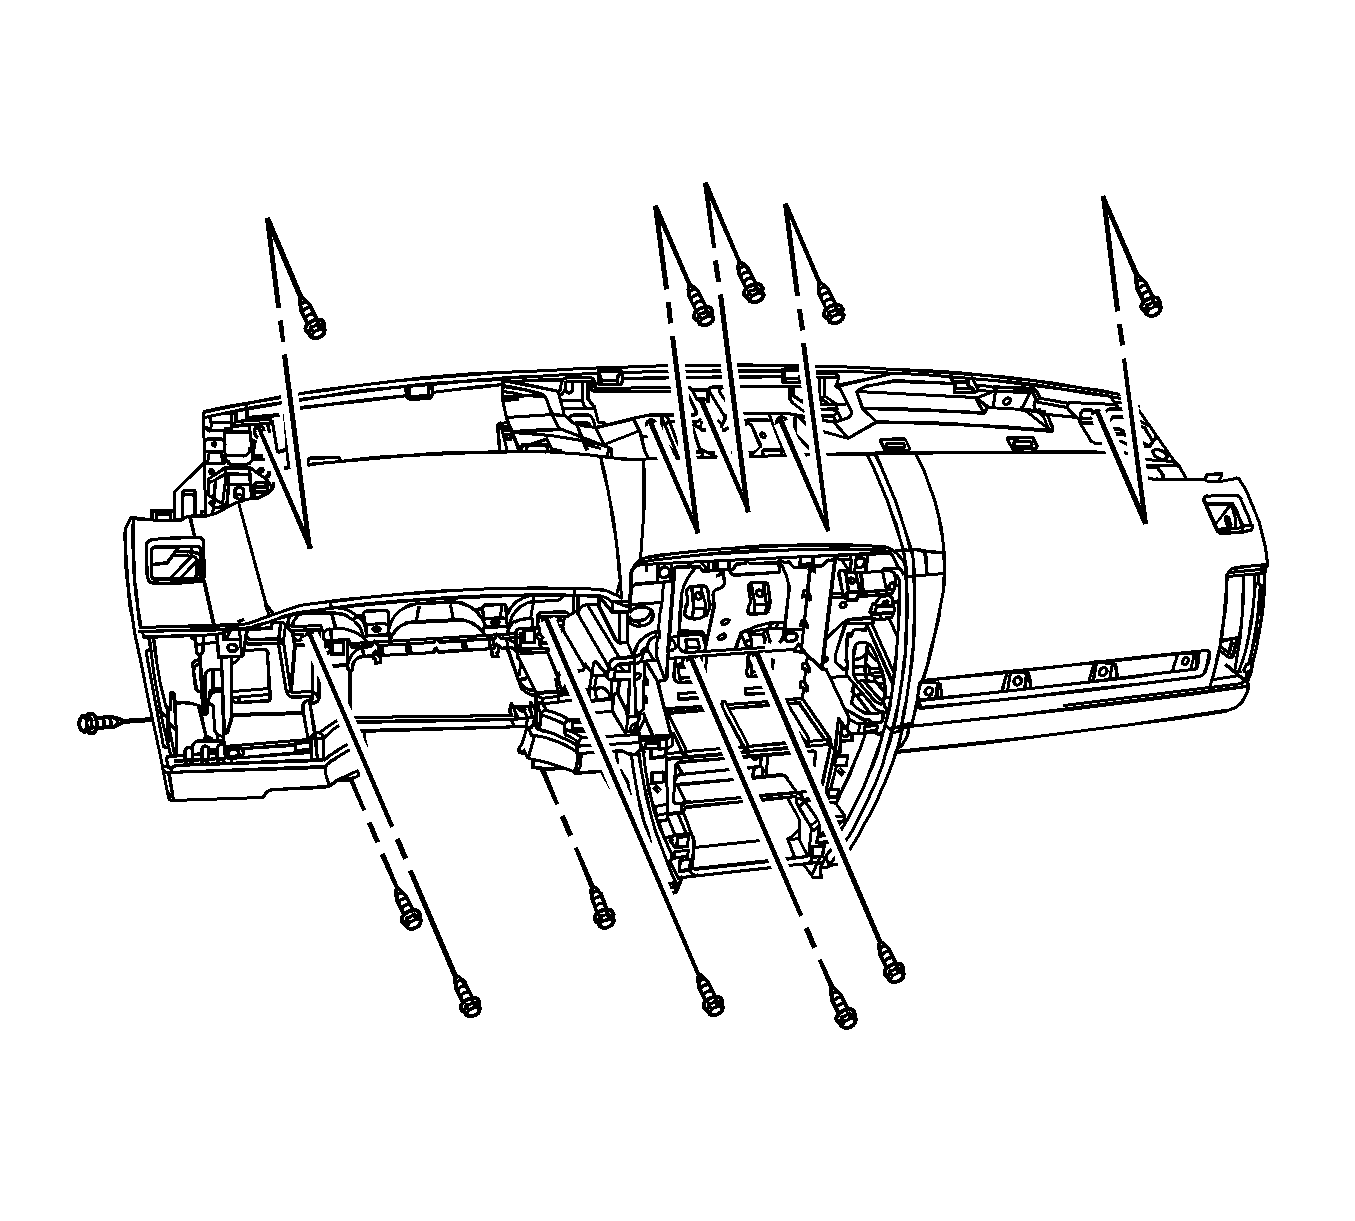
- Remove the screws securing the instrument panel retainer to the carrier.
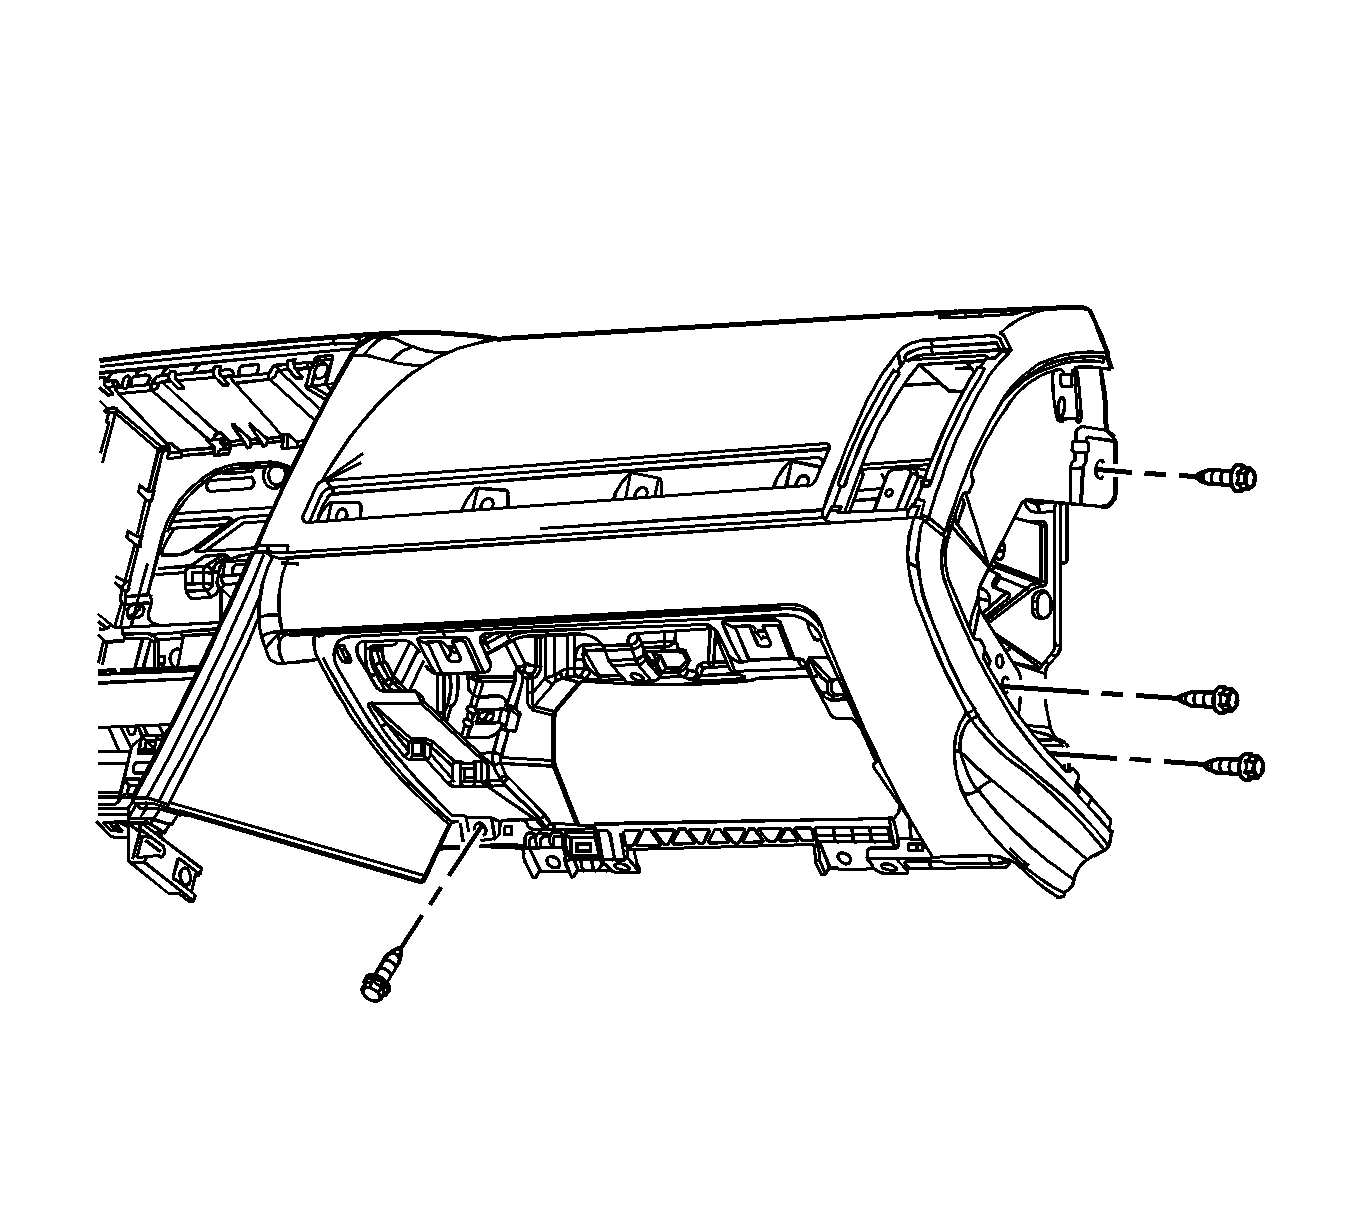
- Remove the screws securing the passenger side of the instrument panel retainer.
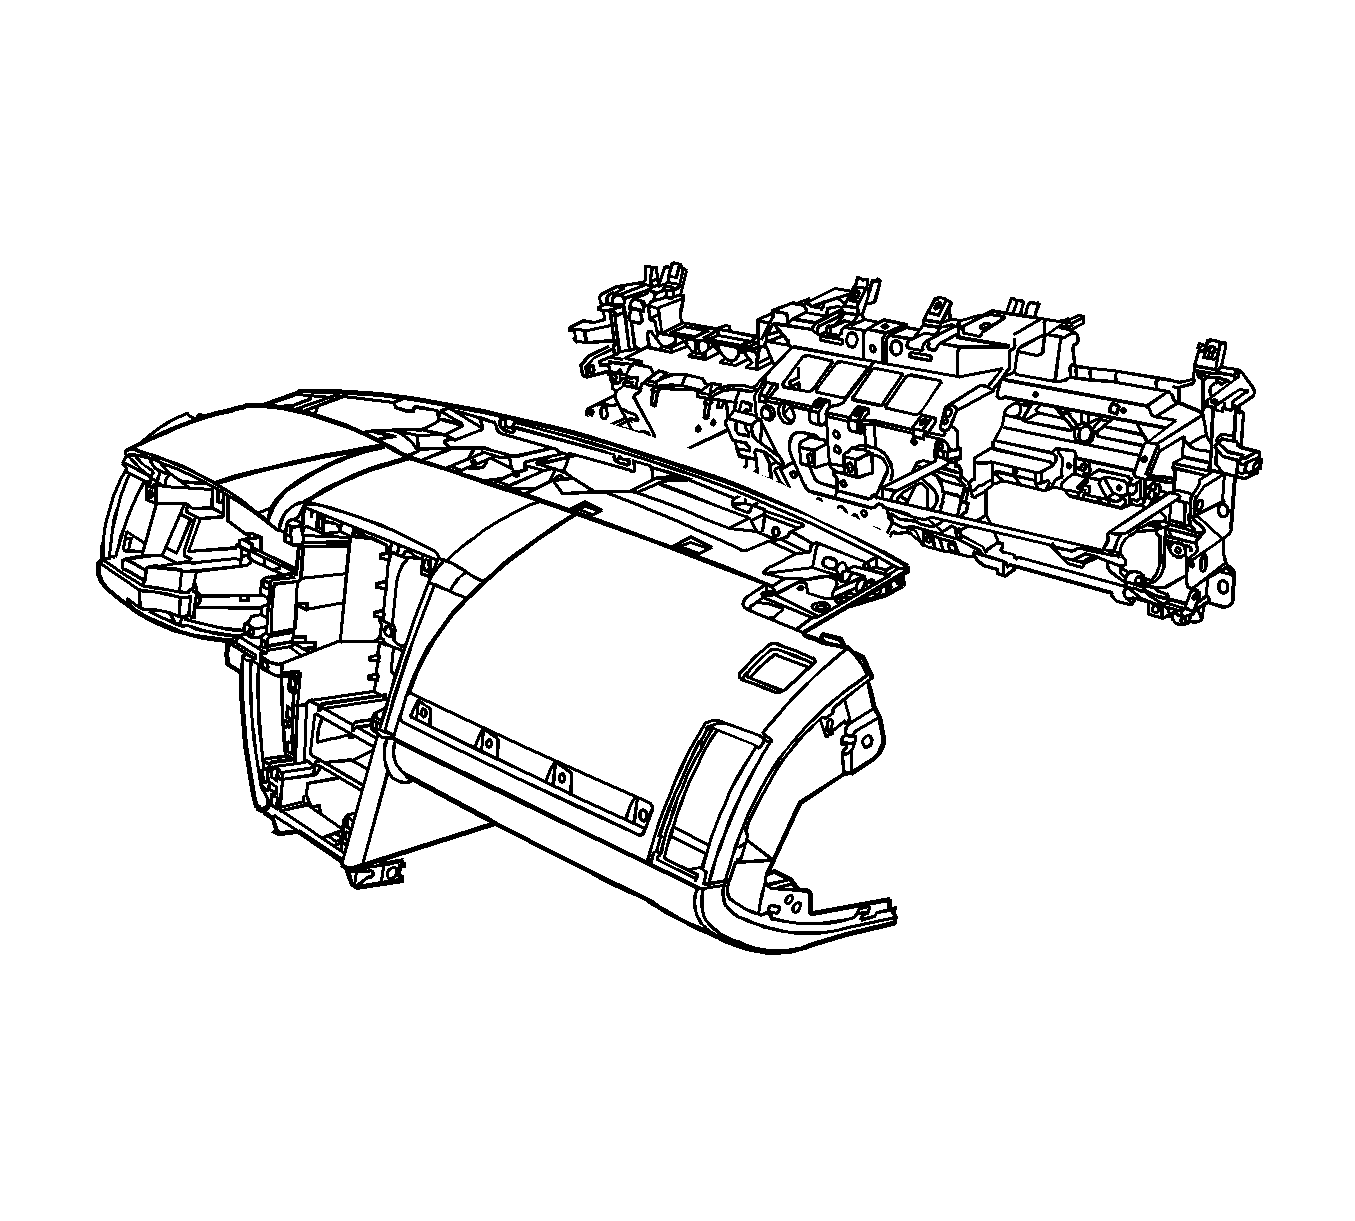
- Remove the instrument panel retainer.


Important: Note the instrument panel wire harness routing.
Two of the screws on the side are concealed by the retainer.

Installation Procedure
- Locate the instrument panel retainer to the carrier.
- Route the instrument panel wire harness in to the previous noted location.
- Install the screws securing the passenger side of the instrument panel retainer.
- Install the screws securing the instrument panel to the carrier.
- Install the instrument panel storage compartment. Refer to Instrument Panel Compartment Replacement .
- Install the instrument cluster. Refer to Instrument Cluster Replacement .
- Install the knee bolster bracket. Refer to Driver Knee Bolster Reinforcement Replacement .
- Install the left and right instrument panel insulator panels. Refer to Instrument Panel Insulator Panel Replacement - Right Side and Instrument Panel Insulator Panel Replacement - Left Side .
- Install the HVAC control module. Refer to HVAC Control Module Replacement .
- Install the ashtray/storage bin. Refer to Ashtray Replacement .
- Install the radio. Refer to Radio Replacement.
- Install the instrument center trim . Refer to Instrument Panel Center Trim Panel Replacement .
- Install the defroster grille. Refer to Defroster Grille Replacement .
- Install the center floor console. Refer to Front Floor Console Replacement .
- Install the front seats. Refer to Bucket Seat Replacement .
- Install the steering wheel. Refer to Steering Wheel Replacement

Notice: Refer to Fastener Notice in the Preface section.

Tighten
Tighten the screws to 9 N·m (18 lb in).

Tighten
Tighten the screws to 9 N·m (18 lb in).
