Upper Intermediate Steering Shaft Replacement with JL7
Removal Procedure
- Turn the steering wheel so that the front wheels are pointing straight ahead.
- Turn the ignition on with the engine off.
- Use the scan tool special functions menu to perform the Pre-Actuator Removal procedure.
- Remove the steering column. Refer to Steering Column Replacement.
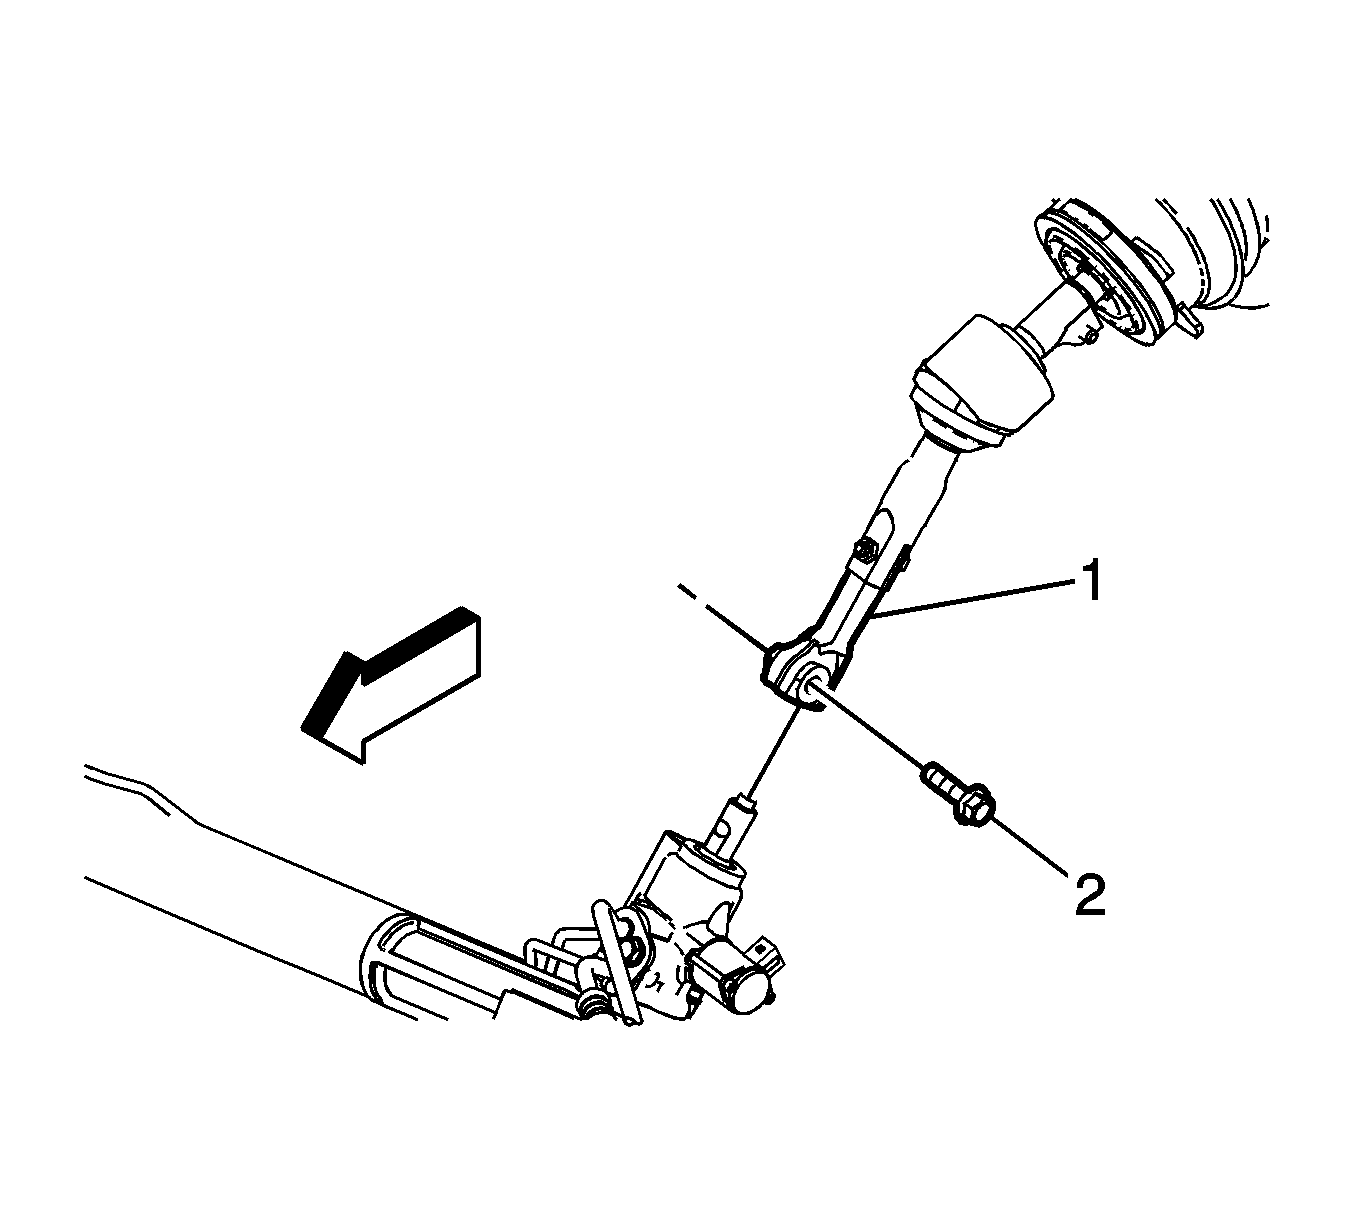
- Remove the lower intermediate steering shaft bolt (2).
- Separate the lower intermediate steering shaft (1) from the steering gear.
- Remove the lower, intermediate, and upper steering shafts as an assembly through the passenger compartment.
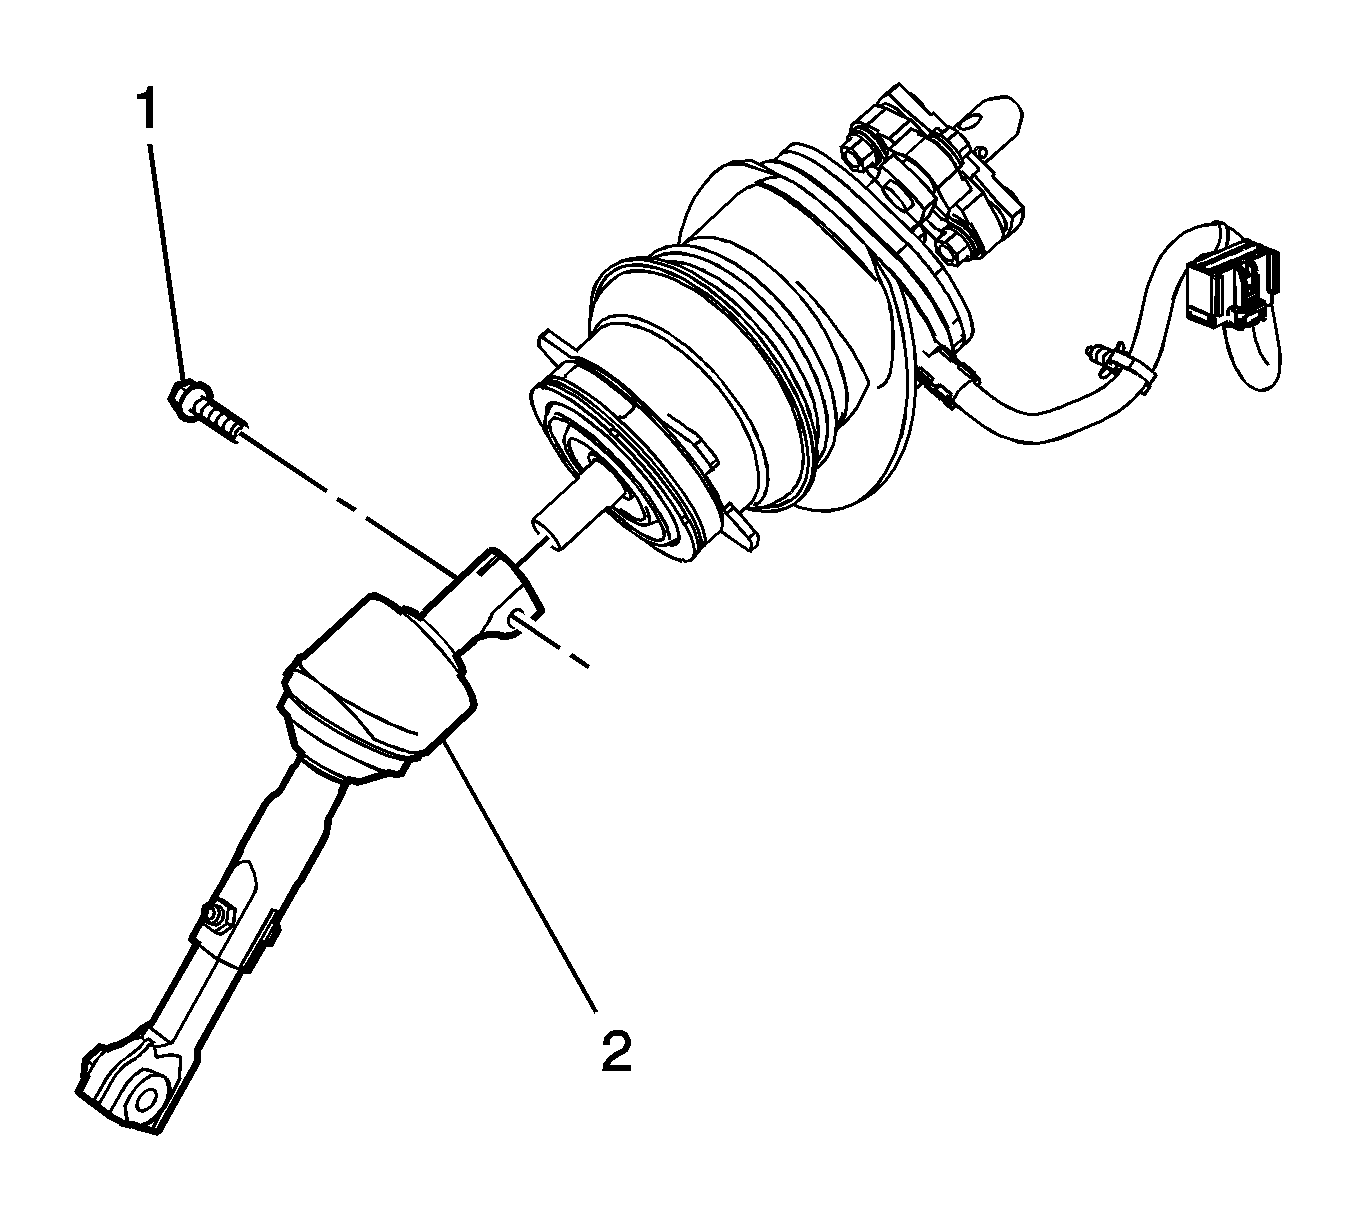
- Remove the intermediate steering shaft bolt (1).
- Separate the center intermediate steering shaft (2) from the upper intermediate steering shaft.


Note: Corrosion can cause difficulty in separating the steering shafts from each other. Do not strike the shafts at any point. Use the appropriate lubricant, rust release, or equivalent only to help loosen the shafts for separation.
Installation Procedure
- Connect the upper intermediate steering shaft to the center intermediate steering shaft (2).
- Install the intermediate steering shaft bolt (1).
- Install the lower, intermediate, and upper steering shafts as an assembly through the passenger compartment with the white anti-rotation tab pointing down.
- Connect the lower intermediate steering shaft (1) to the steering gear.
- Install the lower intermediate steering shaft bolt (2).
- Install the steering column. Refer to Steering Column Replacement.
- Turn the ignition on with the engine off.
- Use the scan tool special functions menu to perform the Set Up New actuator procedure.
- Remove the white anti-rotation tab from the upper intermediate steering shaft.
- Turn the ignition off.
- Ensure all vehicle doors are closed and wait for 30 seconds in order to let the vehicle modules re-enter sleep mode.
- Perform the diagnostic system check. Refer to Diagnostic System Check - Vehicle.

Note: Leave the white anti-rotation tab on the upper intermediate steering shaft in place until the repair is completed.
Caution: Refer to Fastener Caution in the Preface section.
Tighten
Tighten the bolt to 30 N·m (22 lb ft).
Note: Vehicles with JL7 have an intermediate steering shaft seal that contains a double lip design. It must be installed correctly or unwanted noise and resistance in the steering could occur. After positioning the steering shafts in place inspect the passenger compartment side for proper installation. The lip of the seal should be visible completely around the entire circumference with no wrinkles or folds.

Note: Inspect the engine compartment side for proper intermediate steering shaft seal installation. The lip of the seal should be visible completely around the entire circumference with no wrinkles or folds. It must be installed correctly or unwanted noise and resistance in the steering could occur.
Tighten
Tighten the bolt to 50 N·m (37 lb ft).
