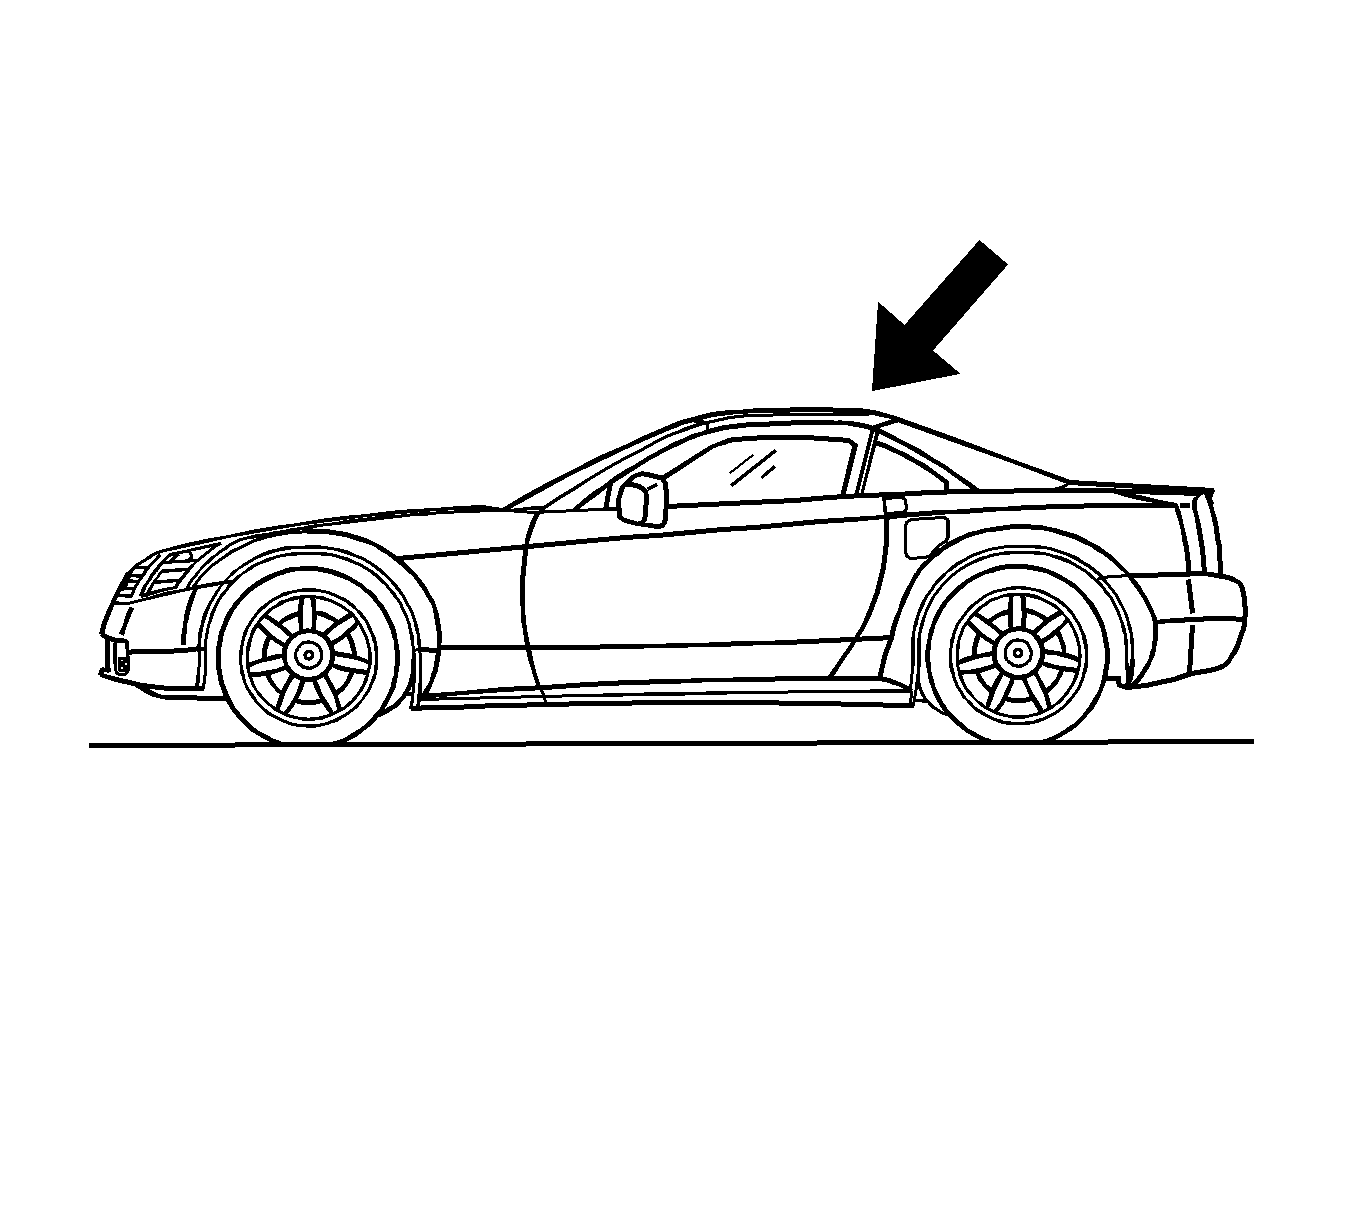
For 1990-2009 cars only
Removal Procedure
- Place the folding top in the up position.
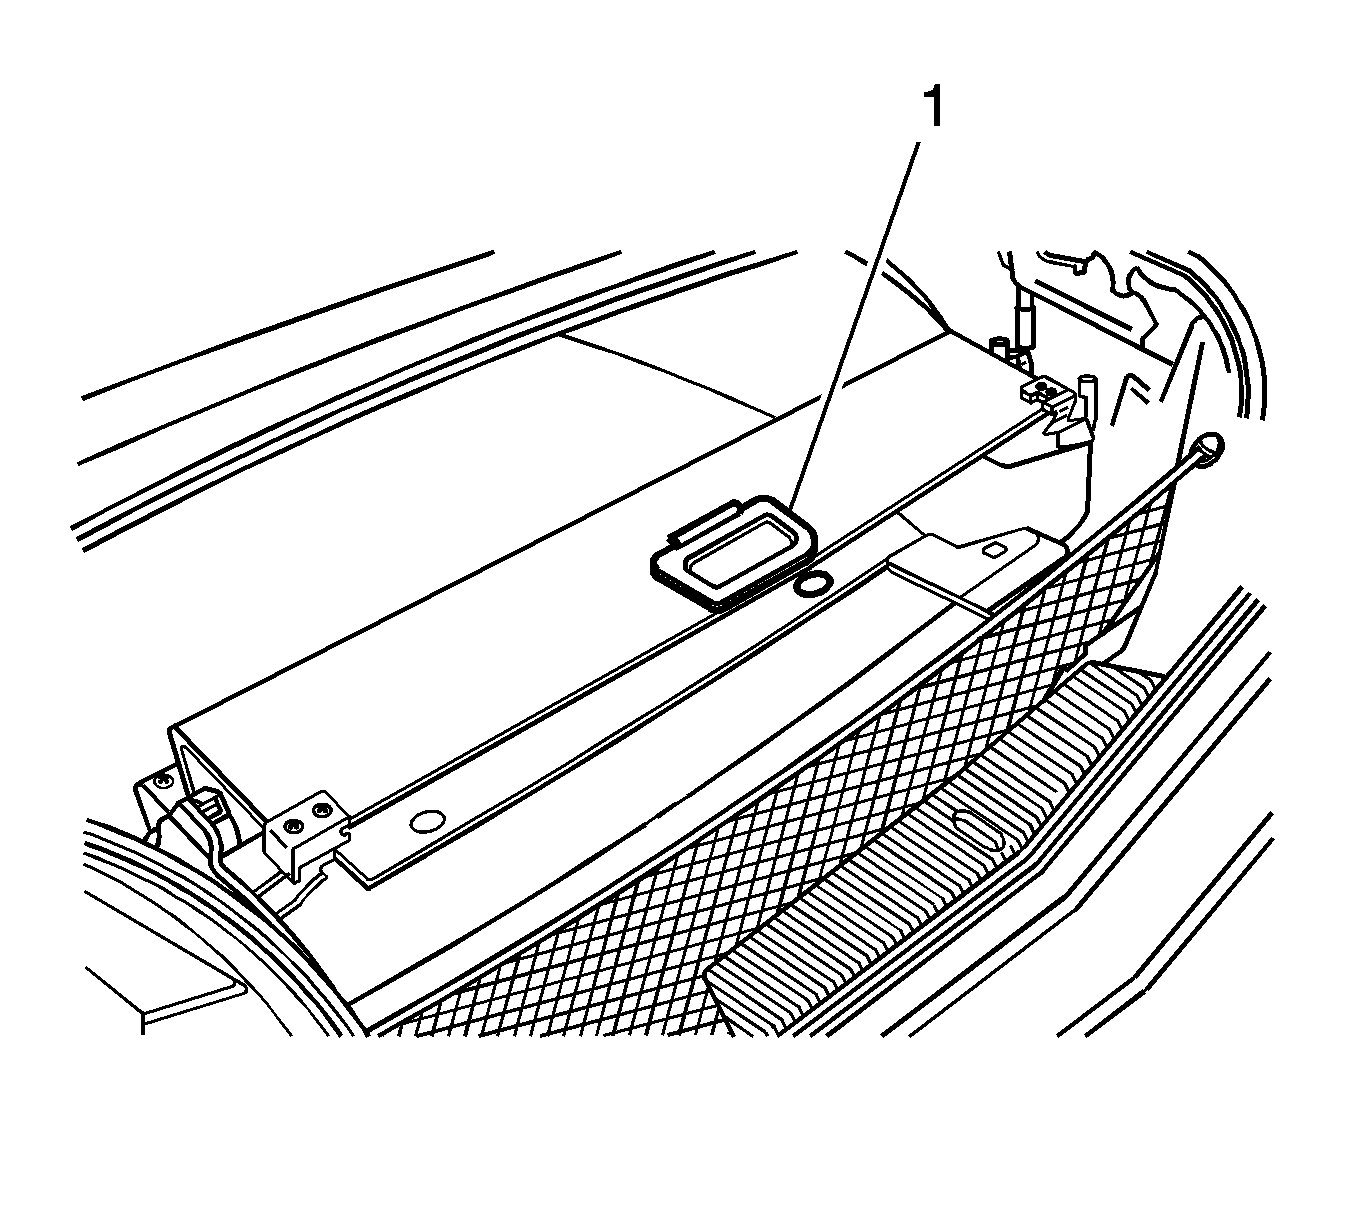
- Open the rear compartment.
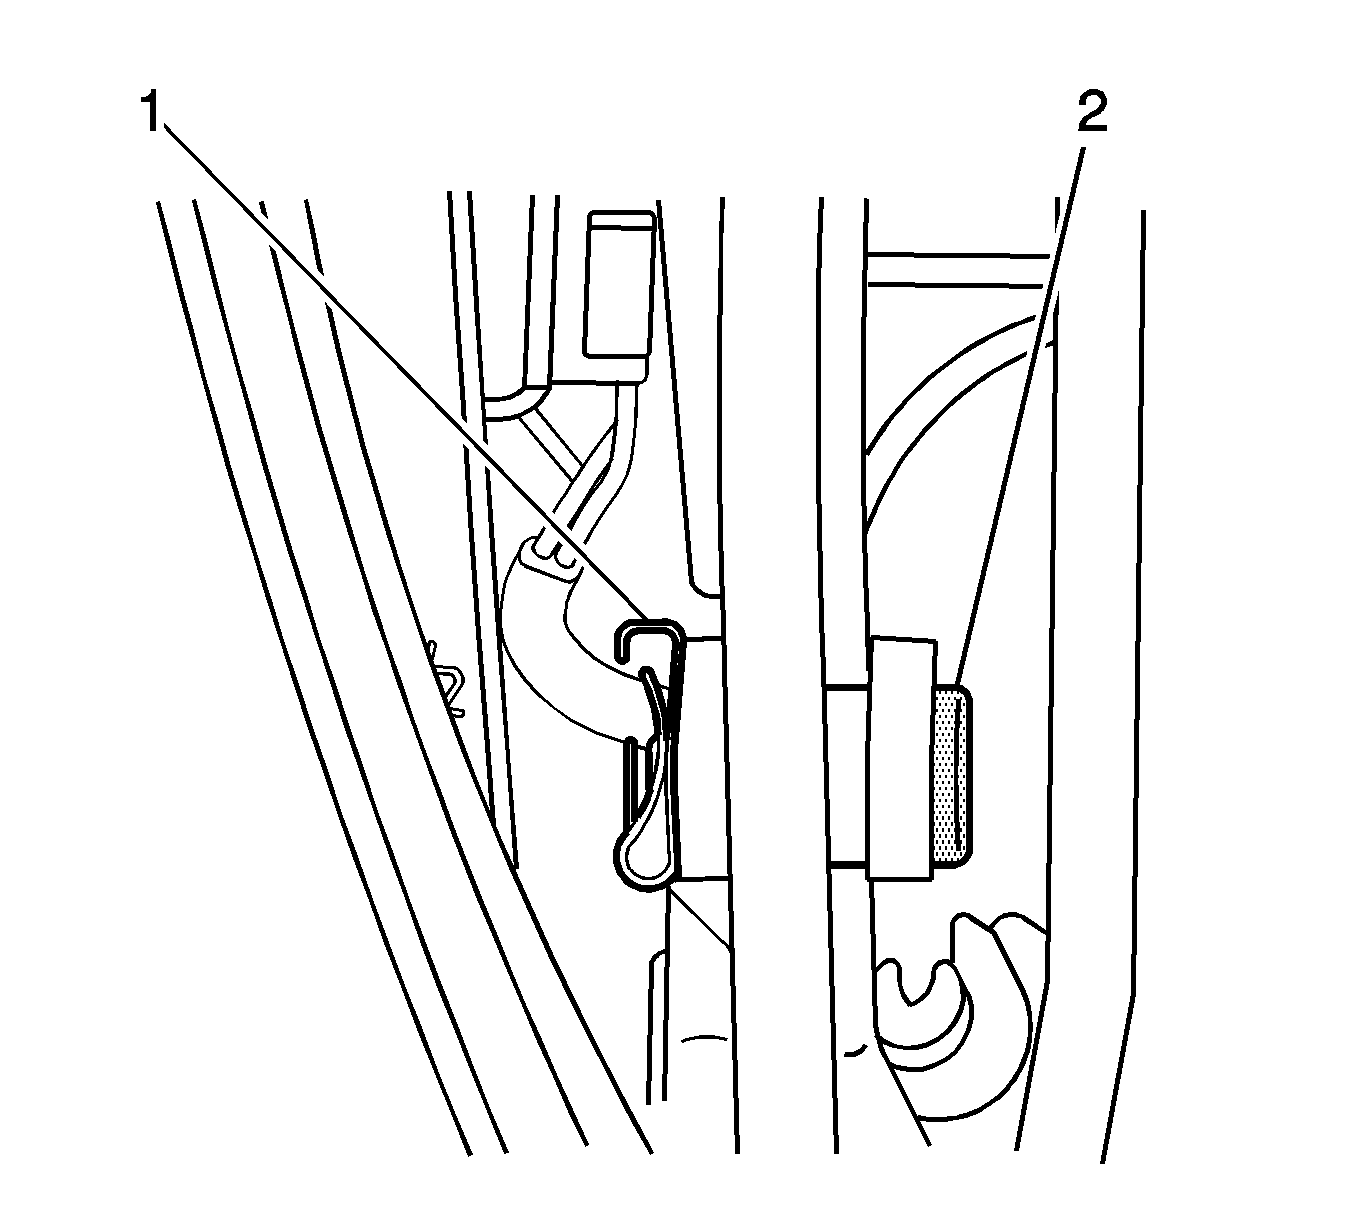
- Lower the rear compartment partition (1).
- Place a protective covering over the interior and the adjacent body panels.
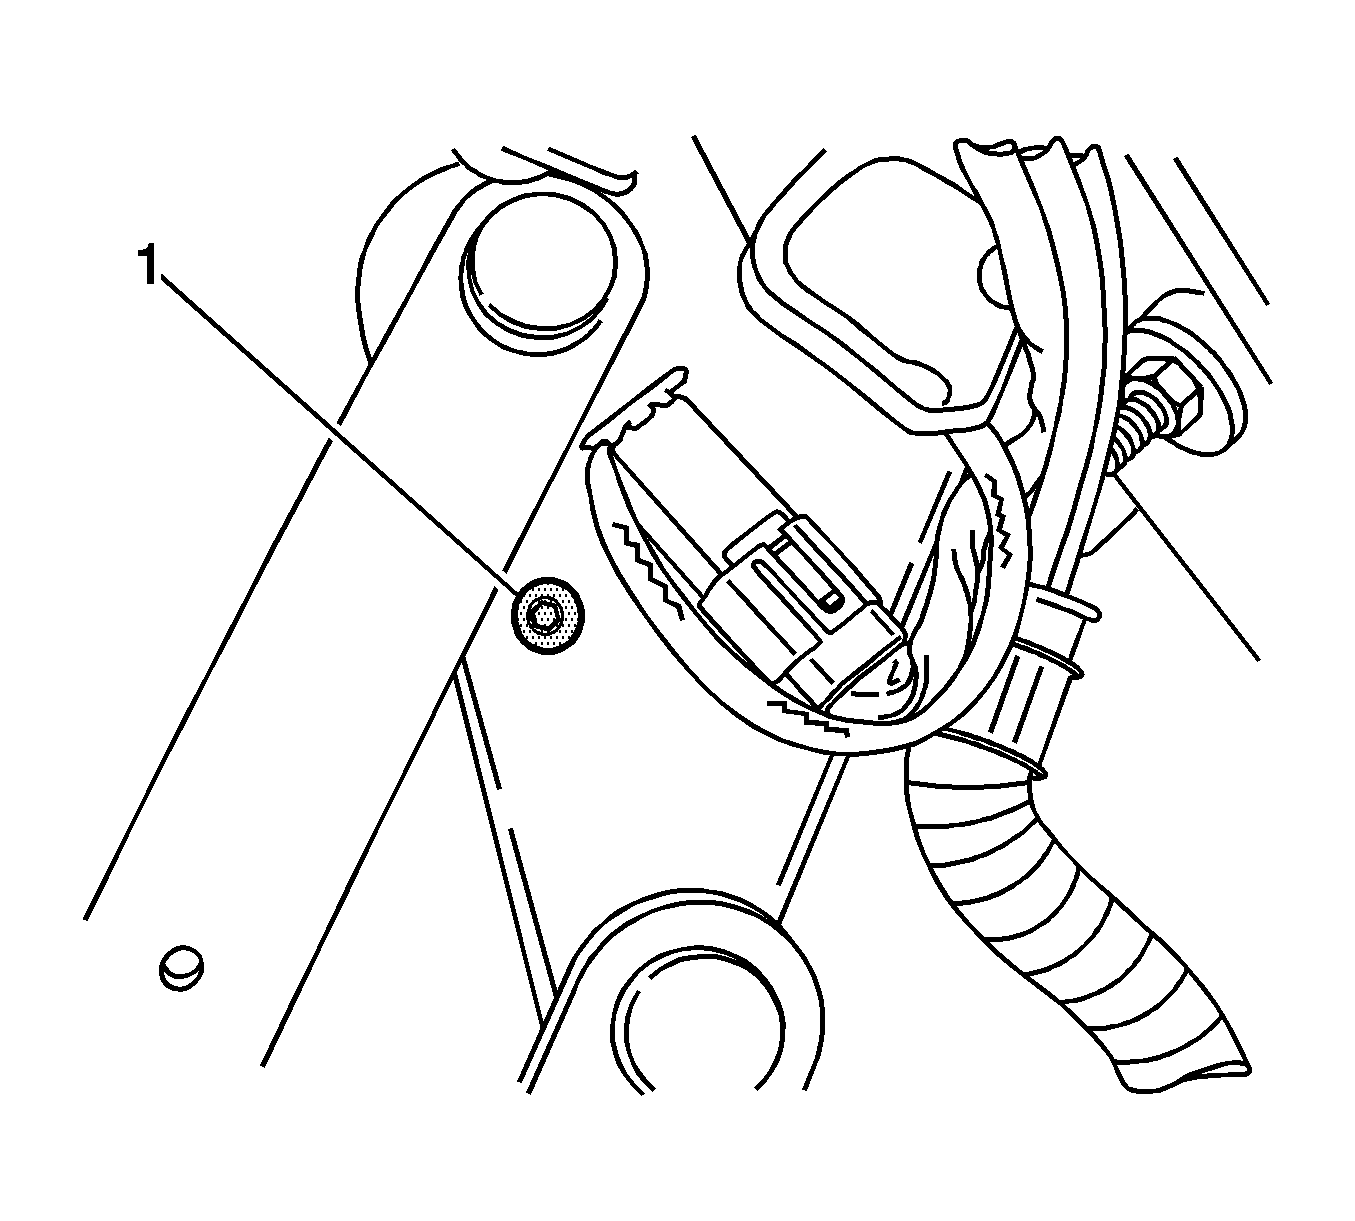
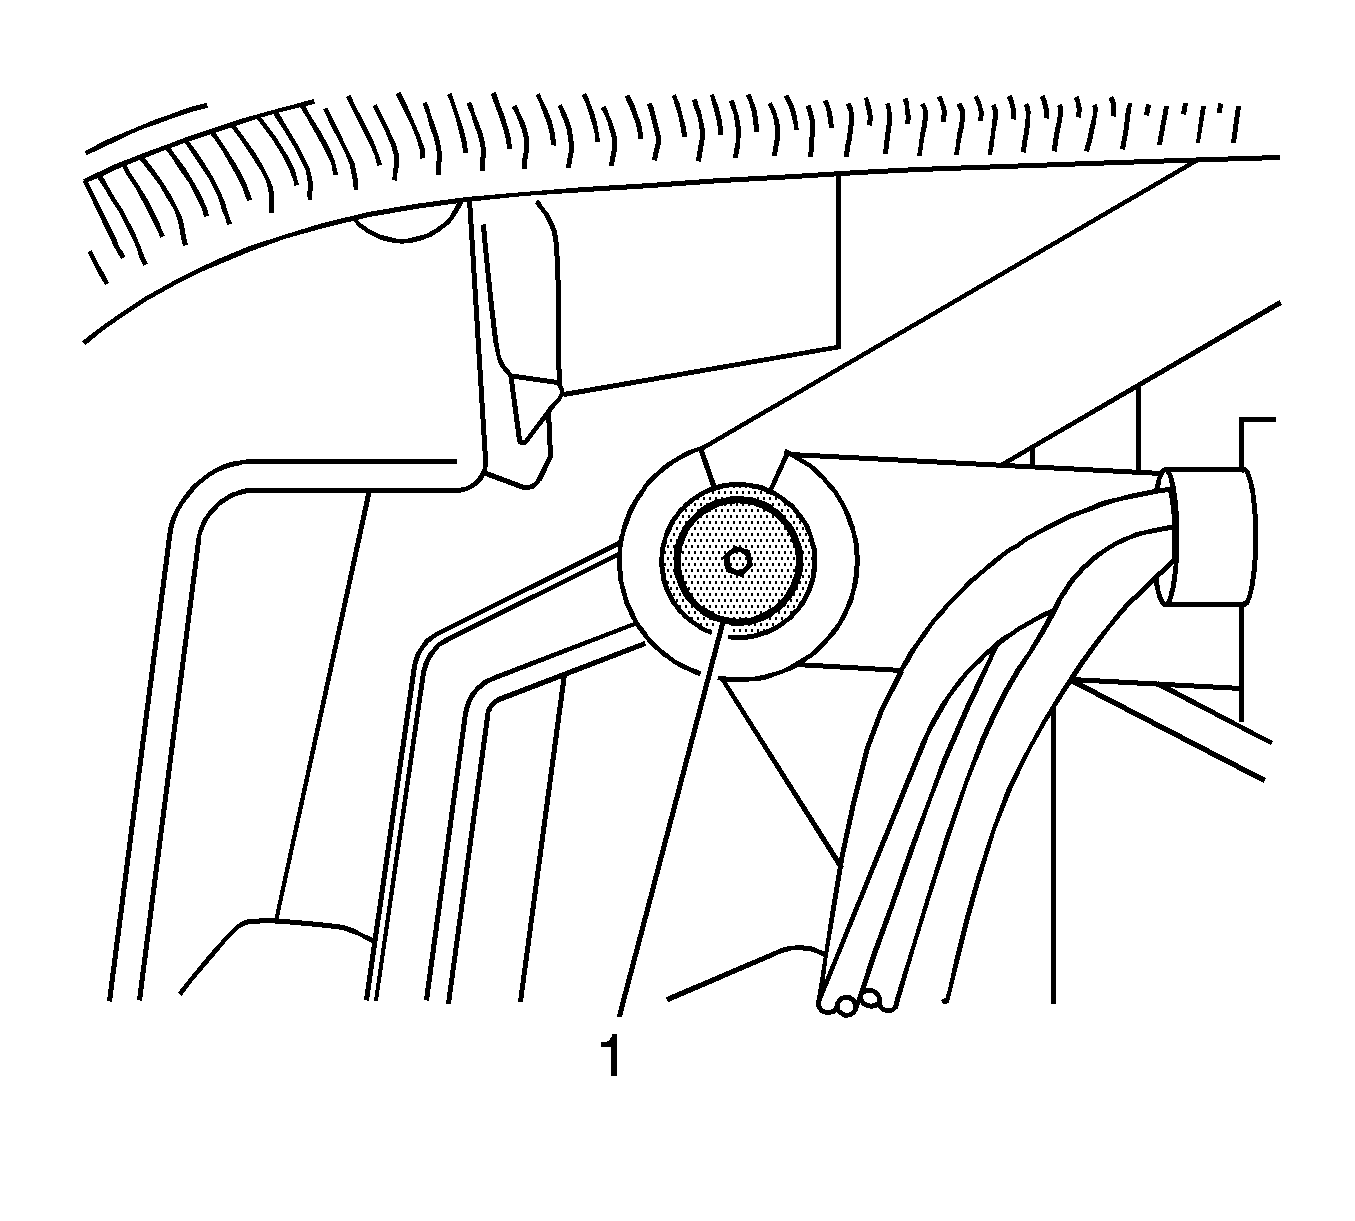
- Locate the hydraulic pump beneath the carpet in the storage compartment on the driver side of the trunk.
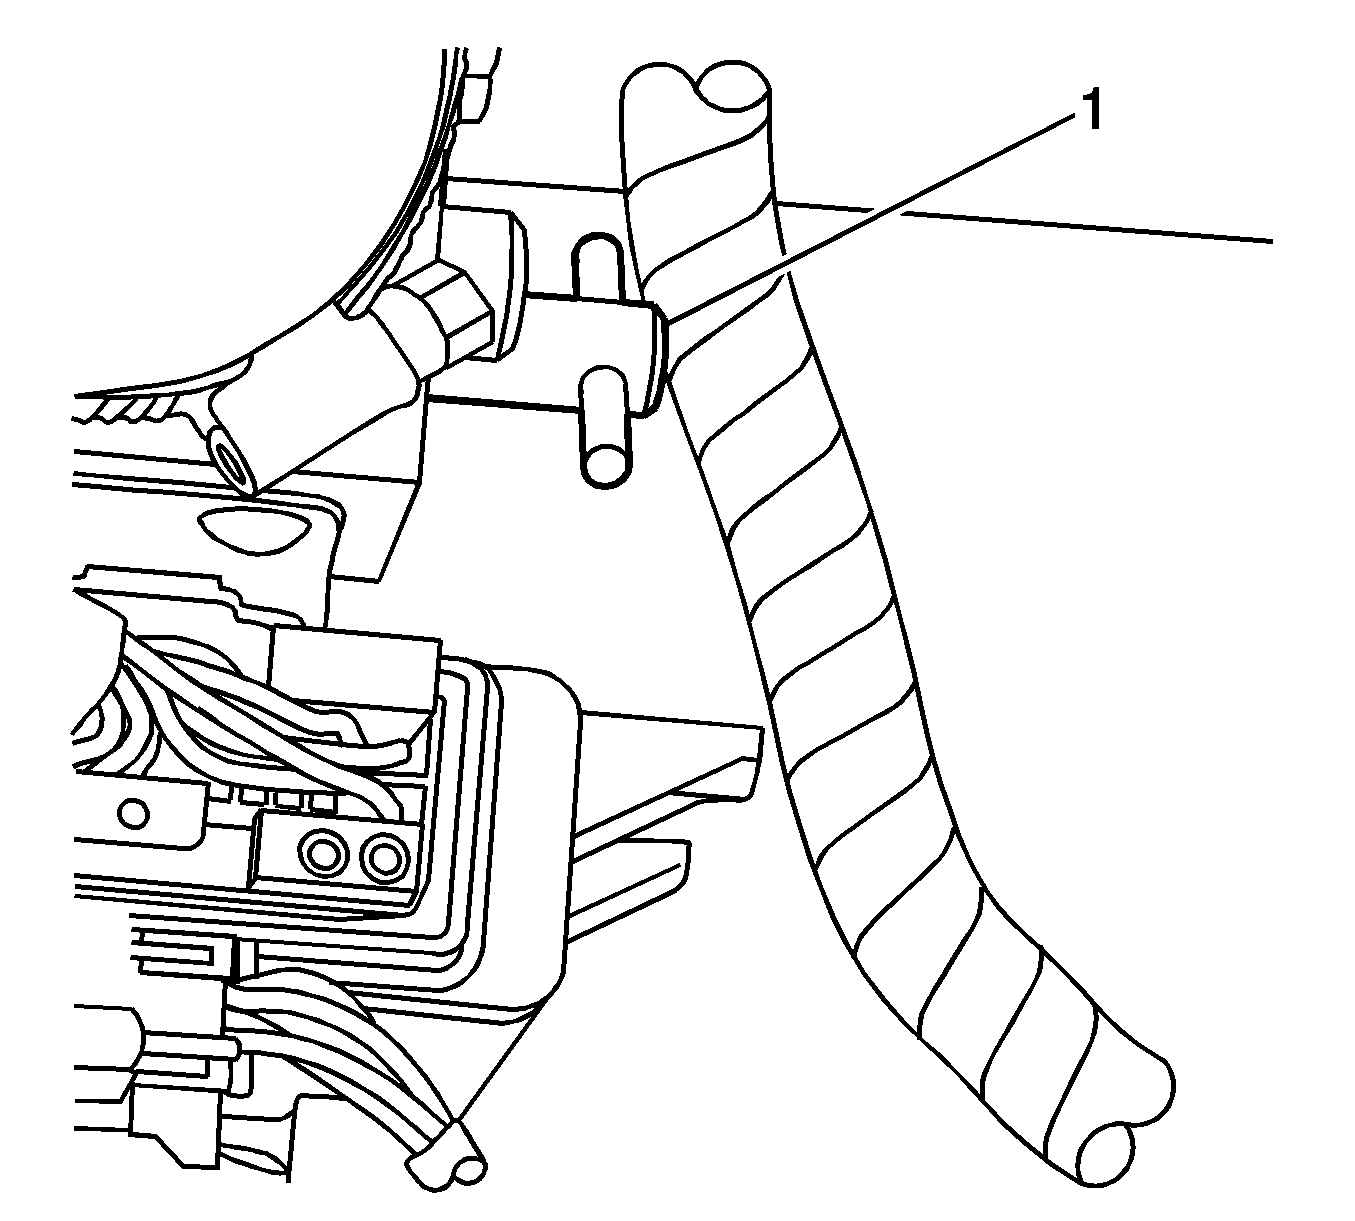
- Turn the pump bypass valve (1) counterclockwise until the valve stops turning.
- Remove the side compartment trim. Refer to Rear Compartment Side Trim Replacement - Left Side or Rear Compartment Side Trim Replacement - Right Side in Body Rear End.
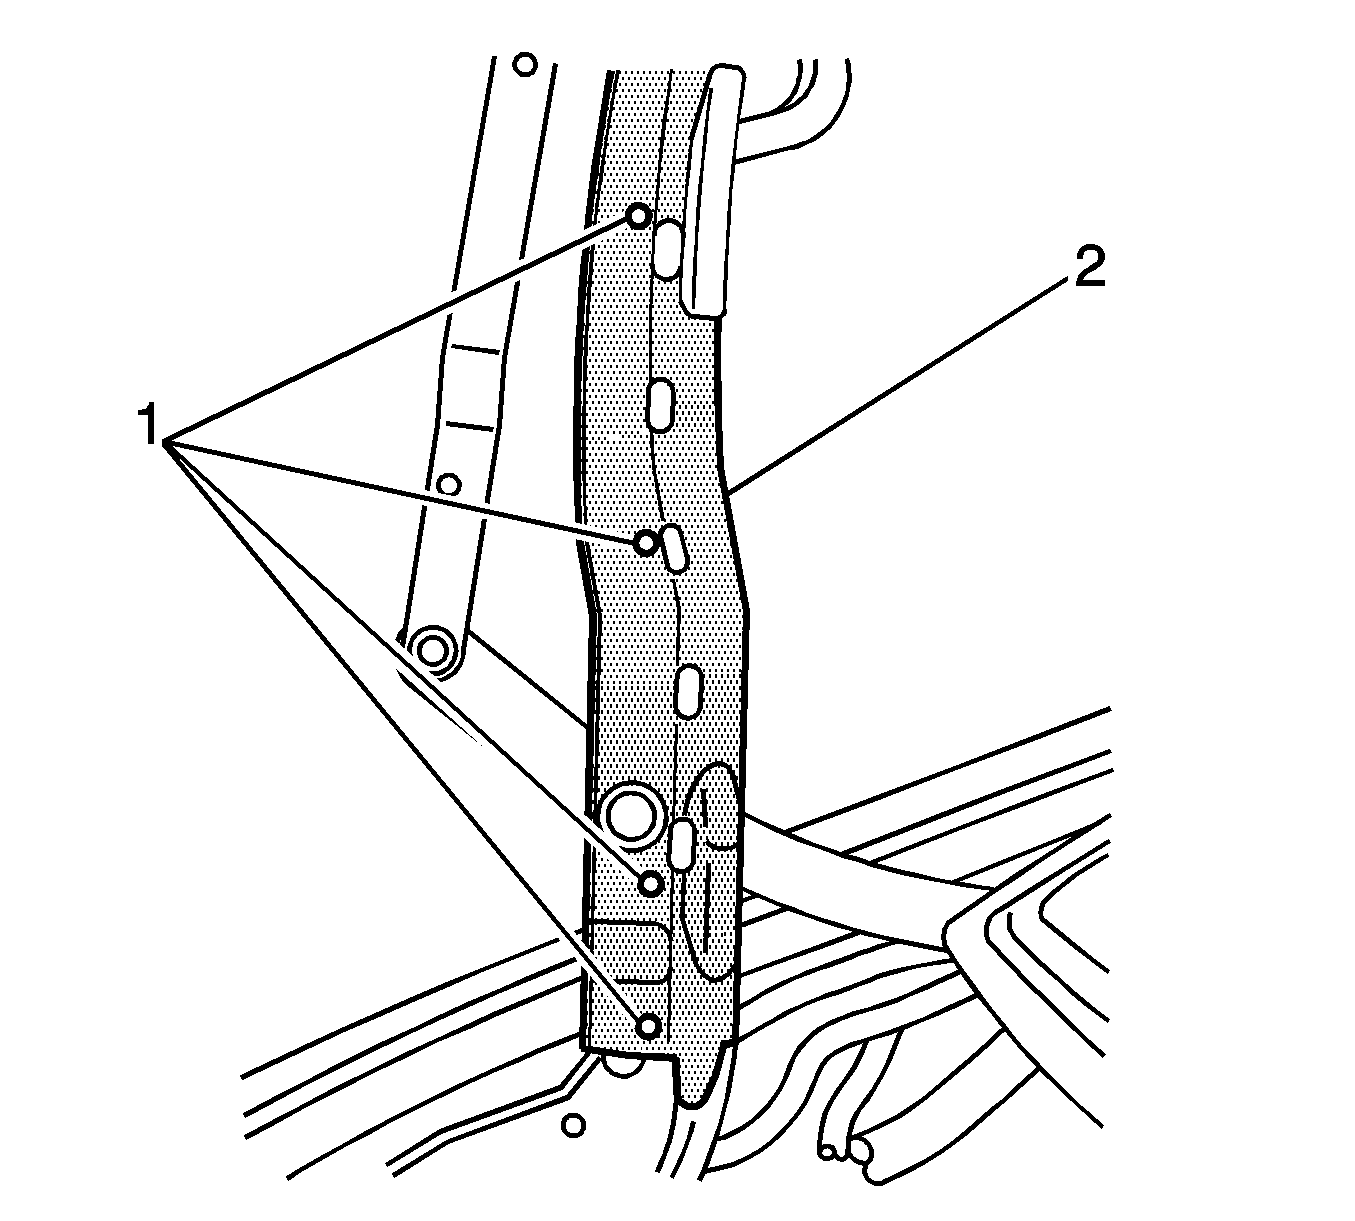
- Using a grease pencil, mark the location of the P-clips to the hydraulic cylinder hoses and electrical wires.
- Remove the closeout panel position switch. Refer to Folding Top Stowage Compartment Rear Panel Position Switch Replacement .
- Remove the rear storage compartment panel. Refer to Folding Top Stowage Compartment Rear Panel Replacement .
- Remove the rear compartment lid. Refer to Folding Top Stowage Compartment Lid Replacement .
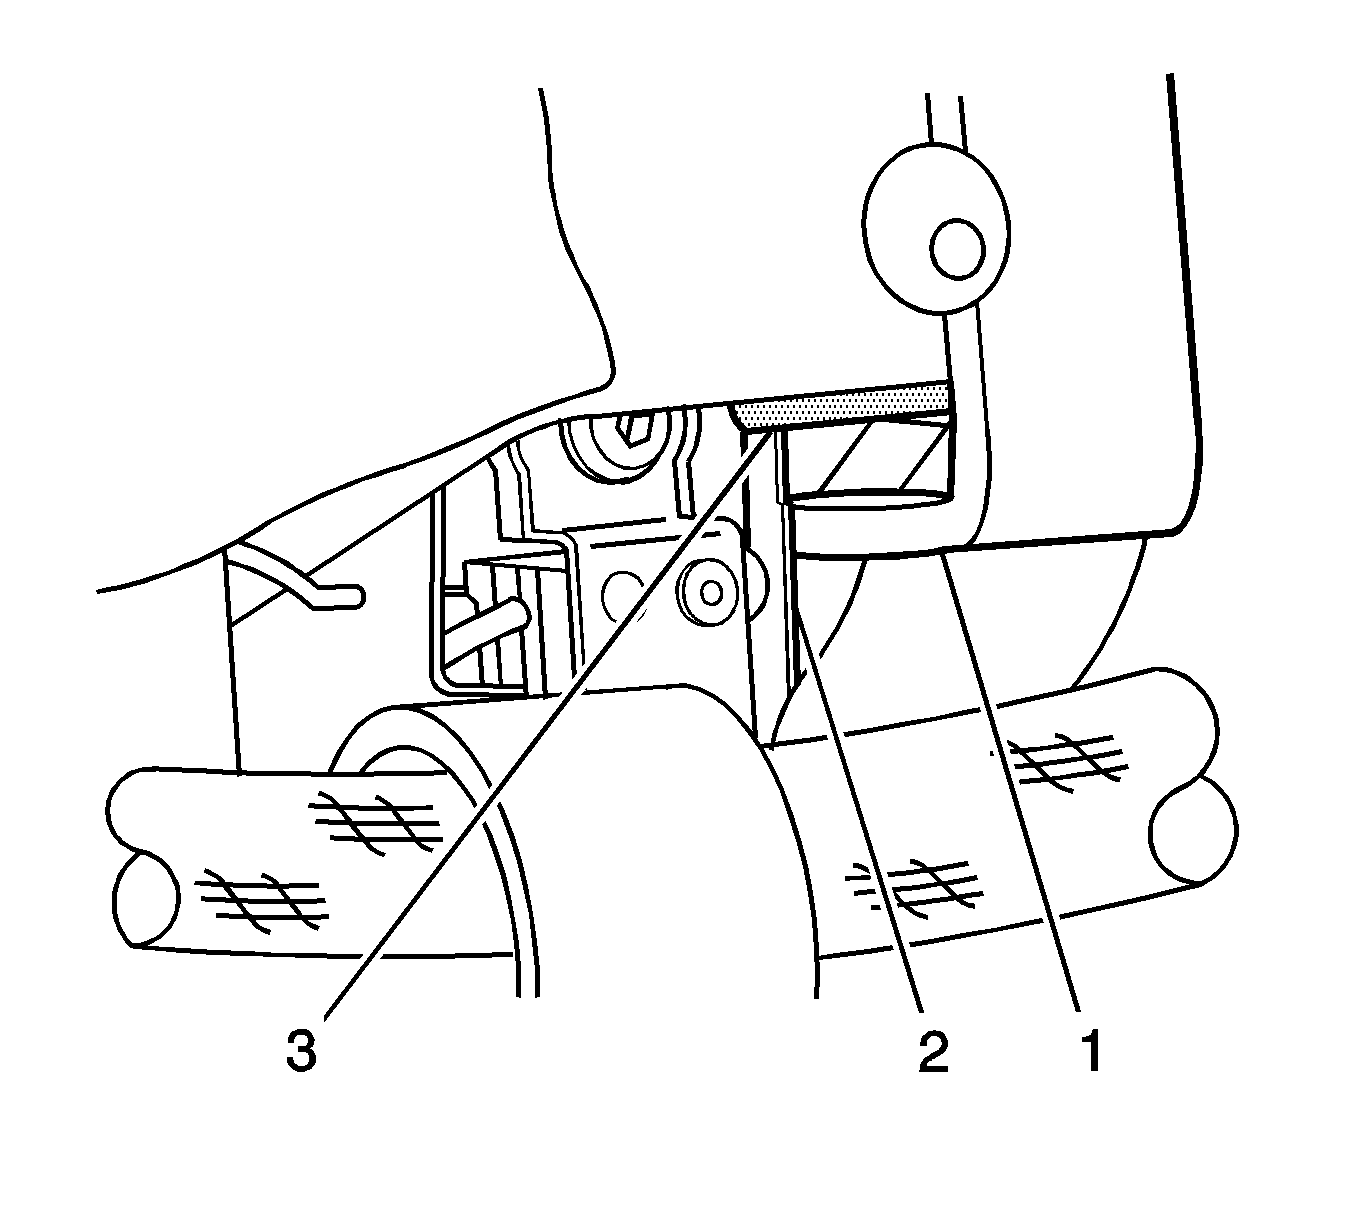
- Remove the P-clip screws (1) that attach the hoses and the wires to the link.
- Remove the link conduit screws (1).
- Remove the link conduit (2).
- Remove the hydraulic cylinder from the storage compartment closeout panel. Do NOT disconnect the hoses. Refer to Folding Top Storage Compartment Panel Hydraulic Cylinder Replacement - Rear .
- Remove the spring-clip (1) from the hydraulic cylinder retainer pin.
- Remove the retainer pin (2).
- While pushing up on the link, remove the travel limit screw (1) from the link.
- Support the link to prevent the link from swinging down when you remove the strut actuator.
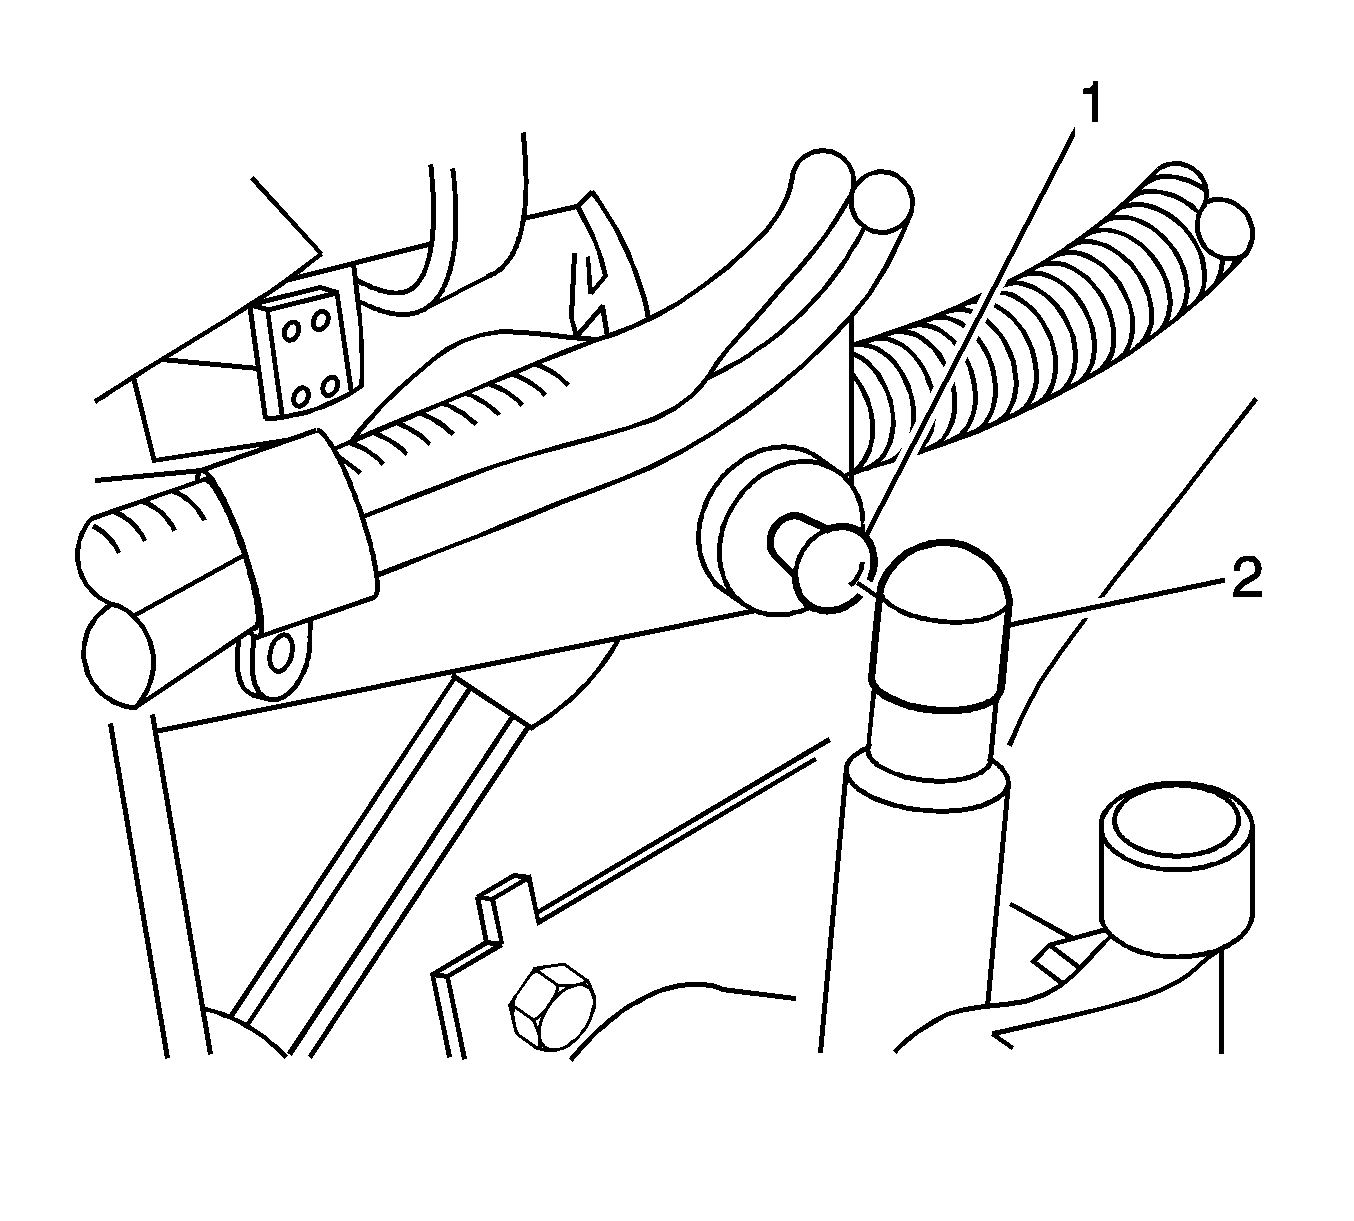
- Use a flat-bladed tool to lift up on the retainer clip (2) on the link side of the strut actuator.
- Remove the strut actuator (2) from the ball joint (1) on the link.
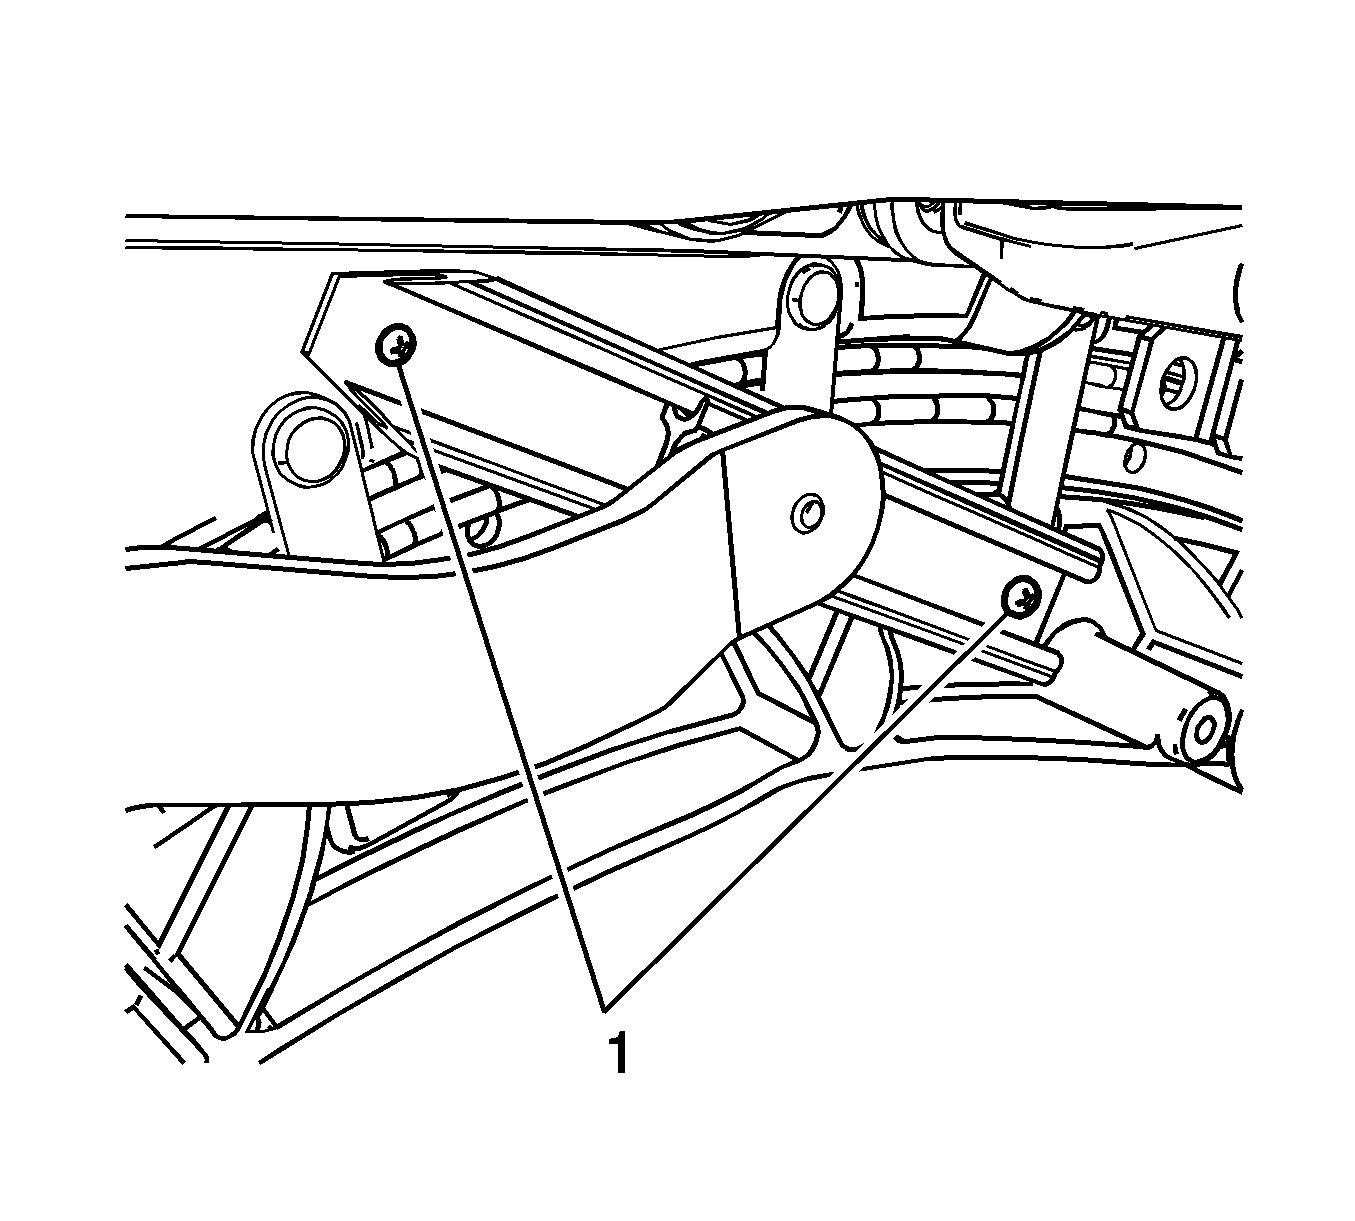
- Remove the front link bolts (1).
- Remove the rear link shoulder bolt (1).
- Remove the link from the vehicle.

Notice: Apply pressure only at the end of the strut actuator that you are removing or attaching. DO NOT apply pressure to the middle of the rod because damage or bending will result.
Installation Procedure
- Position the link to the vehicle. Verify that the switch pin (2) is positioned between the bracket (3) and the link (1).
- Apply LOCTITE™ Blue, GM P/N 12345382 (Canadian P/N 10953489) or equivalent to the bolts.
- Install the rear link shoulder bolt (1).
- Apply LOCTITE™ Blue, GM P/N 12345382 (Canadian P/N 10953489) or equivalent to the bolts.
- Install the front link bolts (1).
- Lift the link to the full upright position and install the strut actuator (2) to the ball joint (1) on the link.
- While pushing up on the link, install the travel limit screw (1) to the link.
- Install the retainer pin (2) to the hydraulic cylinder.
- Install the spring clip (1) to the hydraulic cylinder retainer pin.
- Install the hydraulic cylinder to the closeout panel in the rear storage compartment. Refer to Folding Top Storage Compartment Panel Hydraulic Cylinder Replacement - Rear .
- Apply LOCTITE™ Blue, GM P/N 12345382 (Canadian P/N 10953489) or equivalent to the bolts.
- Position the link conduit (2) to the link. Install the link conduit screws (1).
- Align the P-clips to the grease marks on the hydraulic cylinder hoses and the electrical wires.
- Apply LOCTITE™ Blue, GM P/N 12345382 (Canadian P/N 10953489) or equivalent to the bolts.
- Install the P-clip screws (1) that attach the hoses and the wires to the link.
- Install the rear compartment lid. Refer to Folding Top Stowage Compartment Lid Replacement .
- Install the rear storage compartment panel. Refer to Folding Top Stowage Compartment Rear Panel Replacement .
- Install the position switch to the storage compartment closeout panel. Refer to Folding Top Stowage Compartment Rear Panel Position Switch Replacement .
- Install the side compartment trim. Refer to Rear Compartment Side Trim Replacement - Left Side or Rear Compartment Side Trim Replacement - Right Side in Body Rear End.
- Turn the pump bypass valve (1) clockwise until the valve stops.
- Remove the protective covering.
- Install the support and the carpet over the hydraulic pump.
- Raise the rear compartment partition (1).
- Close the rear compartment.
- Cycle the folding top under power through one complete cycle in both directions.
- Inspect the folding top for proper operation. Refer to Power Folding Top Description and Operation .
Notice: Refer to Fastener Notice in the Preface section.
Tighten
Tighten the bolt to 36 N·m (27 lb ft).
Tighten
Tighten the bolts to 8 N·m (71 lb in).
Notice: Apply pressure only at the end of the strut actuator that you are removing or attaching. DO NOT apply pressure to the middle of the rod because damage or bending will result.
Tighten
Tighten the screw to 3 N·m (27 lb in).
Tighten
Tighten the screws to 6 N·m (53 lb in).
Tighten
Tighten the screws to 6 N·m (53 lb in).
