Removal Procedure
- Drain the coolant from the radiator. Refer to
Cooling System Draining and Filling
.
- Remove the upper fan shroud. Refer to
Fan Shroud Replacement
.
- Disconnect the radiator hoses from the radiator. Refer to
Radiator Hose Replacement
.

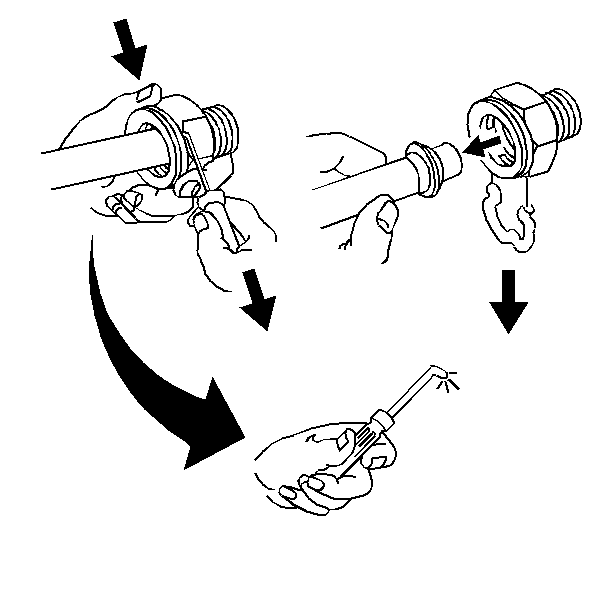
- Disconnect the transmission oil cooler lines from the radiator. Refer to Transmission
Oil Cooler Line Replacement in Automatic Transmission.
| • | Use a small pick-type tool or screwdriver to release one of the
open ends of the retaining clip. |
| • | Discard the retaining clips. |
- Disconnect the engine oil cooler lines from the radiator. Refer
to
Oil Cooler Hose/Pipe Replacement
.
| • | Use a small pick-type tool or screwdriver to release one of the
open ends of the retaining clip. |
| • | Discard the retaining clips. |

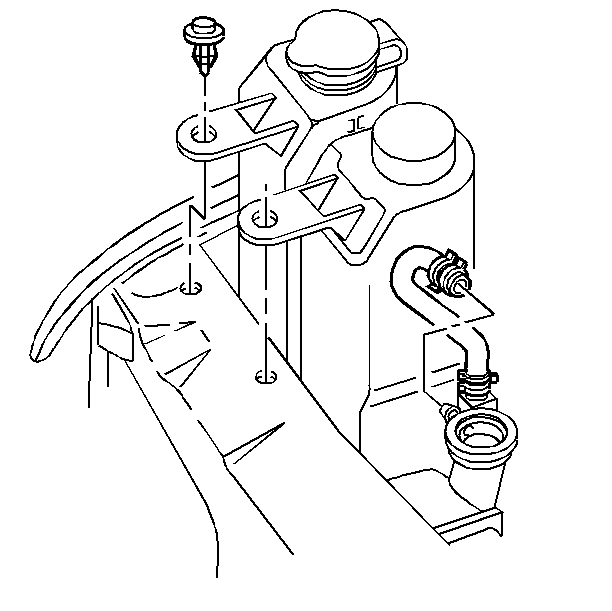
- Disconnect the coolant recovery reservoir hose (1) from the radiator filler
neck.
- Remove the radiator.
Installation Procedure

- Install the radiator.
- Connect the coolant recovery reservoir hose (1) to the radiator
filler neck.

Notice: Do not reuse the existing retaining clips removed from the cooler line
connector fittings. The retaining clips being put into the cooler line connector
fittings must be new.
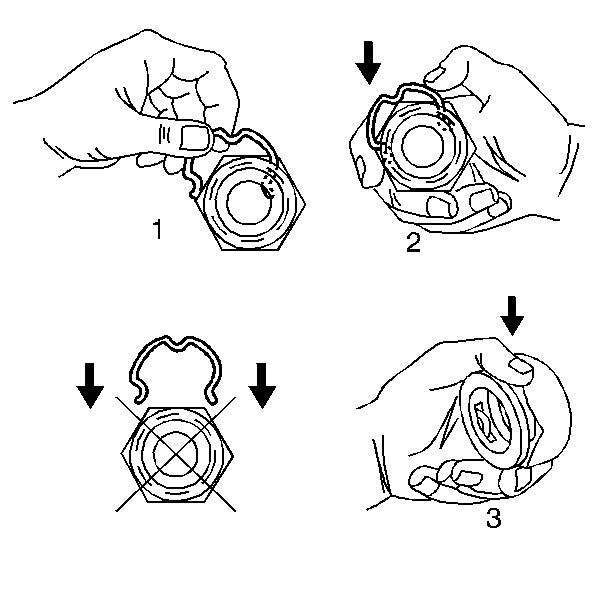
Notice: Make sure the retaining clip engages all three slots in the connector
fittings. Failure to properly install the connector clips could cause the
cooler lines to come loose and cause damage to the engine and/or the transmission.
- Install the retaining clips into the cooler line connector
fittings.
| 3.1. | Using your thumb and forefinger, insert a new retaining clip into
one of the three recesses in the connector fitting. |
| 3.2. | With one end of the retaining clip engaged in the connector fitting
slot, use your thumb to rotate the retaining clip around the connector fitting. |
| 3.3. | Snap the retaining clip into place around the connector fitting. |
- Connect the engine oil cooler lines to the connector fittings.
| • | Verify that a click is heard or felt. |
| • | Pull back sharply on the pipe in order to assure that the pipe
fastens into the connector fitting. |
- Connect the transmission oil cooler lines into the connector fittings.
Refer to Transmission Oil Cooler Line Replacement in Automatic Transmission.
| • | Verify that a click is heard or felt. |
| • | Pull back sharply on the pipe to assure that the pipe fastens
into the connector fitting. |
Notice: Two sealant pellets GMSPO part no. 3634621 must be added to the radiator
whenever the cooling system is drained or refilled with fresh coolant. Failure
to use the correct sealant pellets may result in premature coolant pump leakage.
Do not add the pellets to the coolant recovery bottle, this may prevent the
coolant recovery system from operating properly.
- Connect the radiator inlet hose and the outlet hose to the radiator.
Refer to
Radiator Hose Replacement
.
- Install the upper fan shroud bolts and the upper fan shroud. Refer
to
Fan Shroud Replacement
.
- Refill the coolant. Refer to
Cooling System Draining and Filling
.
- Leak test the cooling system. Refer to
Cooling System Leak Testing
.
- Check the transmission oil level. Add additional transmission
oil if necessary.
- Check the engine oil level. Add additional engine oil if necessary.


