Accessory Mounting Brackets Replacement PS Pump
Removal Procedure
- Remove the engine cooling fan. Refer to Fan Replacement in Engine Cooling.
- Remove the drive belt. Refer to Drive Belt Replacement .
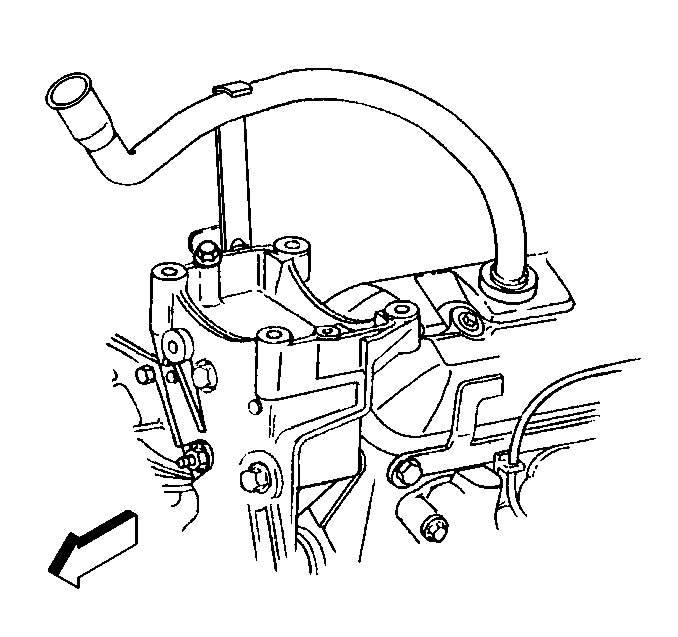
- Remove the oil filler tube bolt.
- Remove the oil filler tube from the valve rocker arm cover.
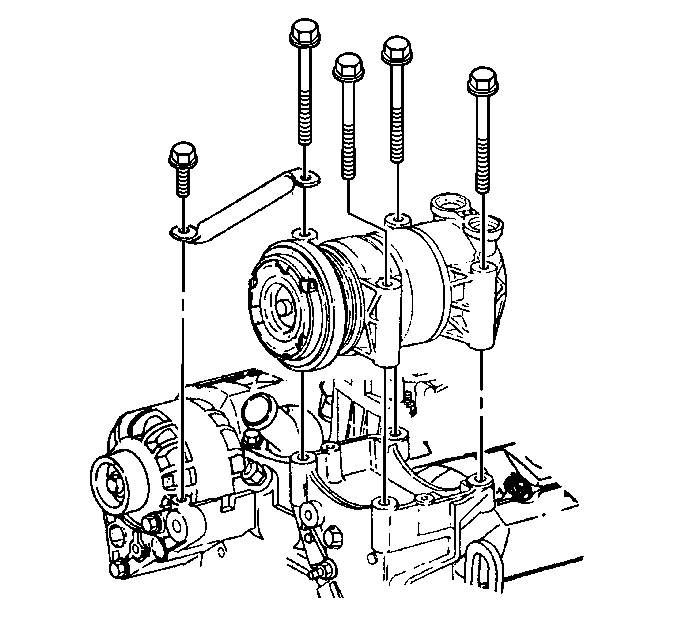
- Remove the mounting bolts for the air conditioning (A/C) compressor, if equipped.
- Move the A/C compressor aside and support.
- Remove the drive belt idler pulley if not equipped with A/C. Refer to Drive Belt Idler Pulley Replacement .
- Remove the power steering pump pulley. Refer to Power Steering Pump Replacement in Power Steering Systems.
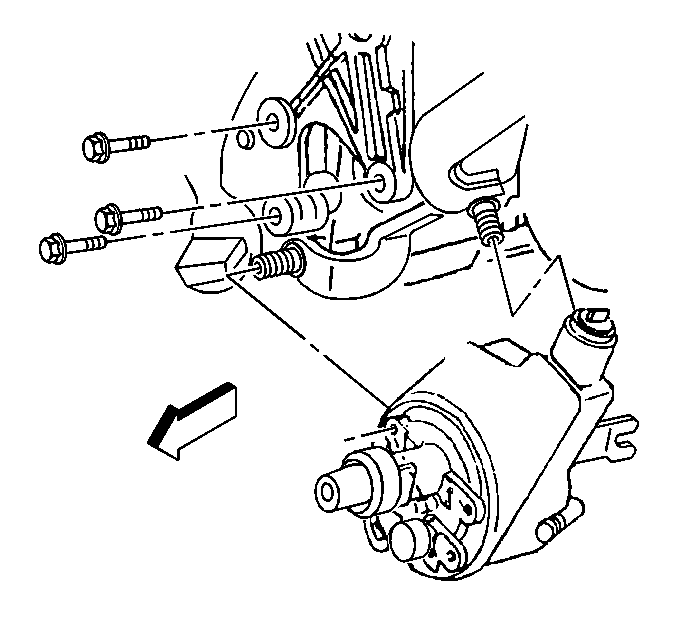
- Remove the three bolts holding the power steering pump to the power steering pump mounting bracket.
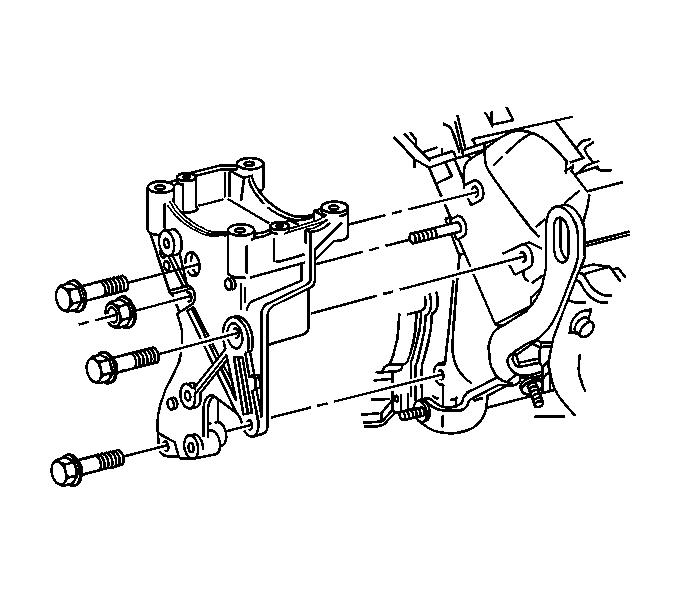
- Remove the three bolts and nut holding the power steering pump mounting bracket to the engine.
- Slide the power steering pump mounting bracket off the stud and the power steering pump.
Important: Do not evacuate the air conditioning system.
Installation Procedure
- Slide the power steering pump mounting bracket on the stud and the power steering pump.
- Install the power steering pump mounting bracket three bolts and the nut.
- Install the power steering pump mounting bracket to the power steering pump.
- Install the power steering pump pulley. Refer to Power Steering Pump Replacement in Power Steering Systems.
- Install the air conditioning compressor, if equipped. Refer to Air Conditioning Compressor Replacement in HVAC Systems with A/C - Manual.
- Install the drive belt idler pulley if not equipped with A/C. Refer to Drive Belt Idler Pulley Replacement .
- Install the oil filler tube in the valve rocker arm cover.
- Install the oil filler tube bolt.
- Install the drive belt. Refer to Drive Belt Replacement .
- Install the engine cooling fan. Refer to Fan Replacement in Engine Cooling.

Notice: Use the correct fastener in the correct location. Replacement fasteners must be the correct part number for that application. Fasteners requiring replacement or fasteners requiring the use of thread locking compound or sealant are identified in the service procedure. Do not use paints, lubricants, or corrosion inhibitors on fasteners or fastener joint surfaces unless specified. These coatings affect fastener torque and joint clamping force and may damage the fastener. Use the correct tightening sequence and specifications when installing fasteners in order to avoid damage to parts and systems.
Tighten
Tighten the power steering pump mounting bracket bolts and nut to 41 N·m
(30 lb ft).

Tighten
Tighten the power steering pump bolts to 50 N·m (37 lb ft).

Tighten
Tighten the oil filler tube bolt to 25 N·m (18 lb ft).
Accessory Mounting Brackets Replacement Generator
Removal Procedure
- Disconnect the battery negative cable. Refer to Battery Replacement in Engine Electrical.
- Remove the engine cooling fan. Refer to Fan Replacement in Engine Cooling.
- Remove the drive belt. Refer to Drive Belt Replacement .
- Remove the generator. Refer to Generator Replacement in Engine Electrical.
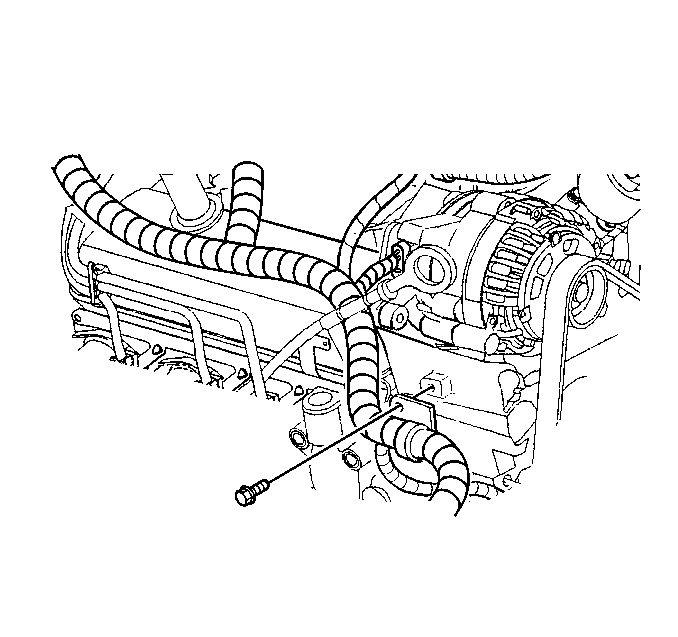
- Remove the engine wiring harness bracket from the generator mounting bracket.
- Remove the drive belt tensioner. Refer to Drive Belt Tensioner Replacement .
- Remove the drive belt idler pulley. Refer to Drive Belt Idler Pulley Replacement .
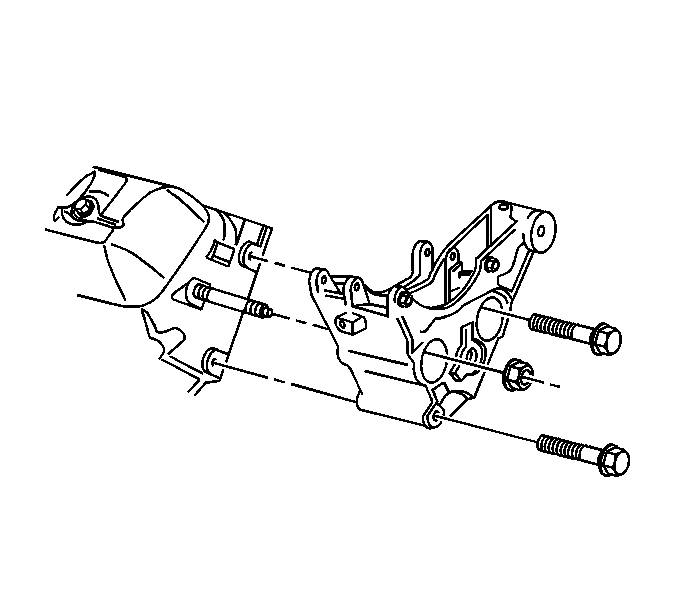
- Remove the two bolts and nut holding the generator mounting bracket to the engine.
- Slide the generator mounting bracket off of the stud.
Installation Procedure
- Slide the generator mounting bracket on the stud.
- Instal the generator mounting bracket two bolts and the nut.
- Install the drive belt idler pulley. Refer to Drive Belt Idler Pulley Replacement .
- Install the drive belt tensioner. Refer to Drive Belt Tensioner Replacement .
- Install the engine wiring harness bracket and bolt to the generator mounting bracket.
- Install the generator. Refer to Generator Replacement in Engine Electrical.
- Install the drive belt. Refer to Drive Belt Replacement .
- Install the engine cooling fan. Refer to Fan Replacement in Engine Cooling.
- Connect the battery negative cable. Refer to Battery Replacement in Engine Electrical.

Notice: Use the correct fastener in the correct location. Replacement fasteners must be the correct part number for that application. Fasteners requiring replacement or fasteners requiring the use of thread locking compound or sealant are identified in the service procedure. Do not use paints, lubricants, or corrosion inhibitors on fasteners or fastener joint surfaces unless specified. These coatings affect fastener torque and joint clamping force and may damage the fastener. Use the correct tightening sequence and specifications when installing fasteners in order to avoid damage to parts and systems.
Tighten
Tighten the generator mounting bracket bolts and the nut to 41 N·m
(30 lb ft).

Tighten
Tighten the engine wiring harness bracket bolt to 25 N·m
(18 lb ft).
