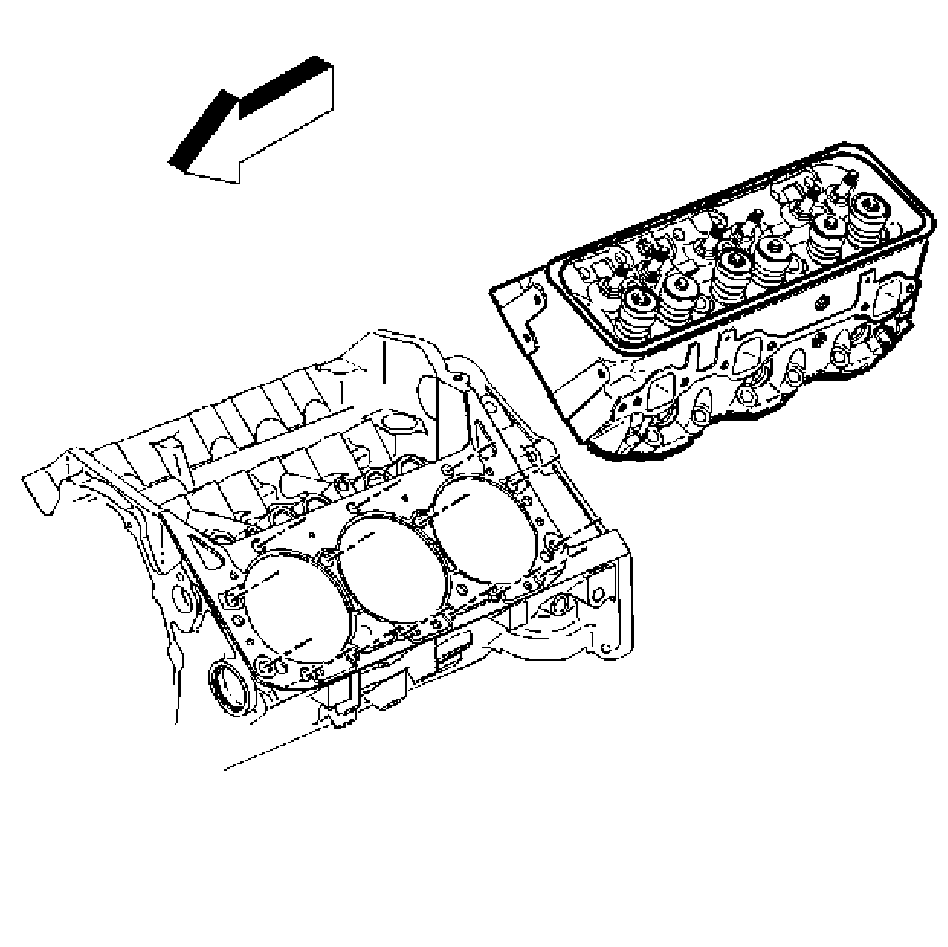
Cylinder Head Replacement Left Side
Removal Procedure
- Disconnect the battery negative cable. Refer to Battery Replacement .
- Remove the engine cover. Refer to Engine Cover Replacement .
- Remove the engine cooling fan. Refer to Fan Replacement .
- Remove the drive belt. Refer to Drive Belt Replacement
- Remove the air conditioning compressor, if equipped. Refer to Air Conditioning Compressor Replacement .
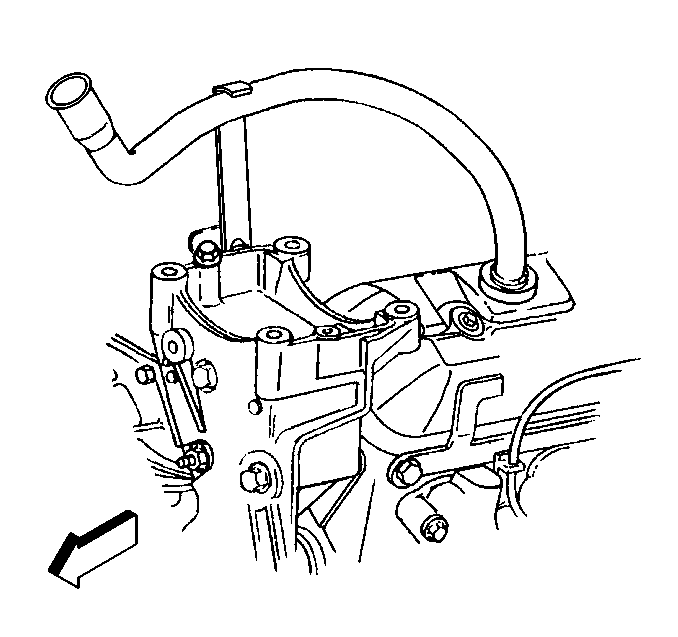
- Remove the oil filler tube bolt.
- Remove the oil filler tube from the valve rocker arm cover.
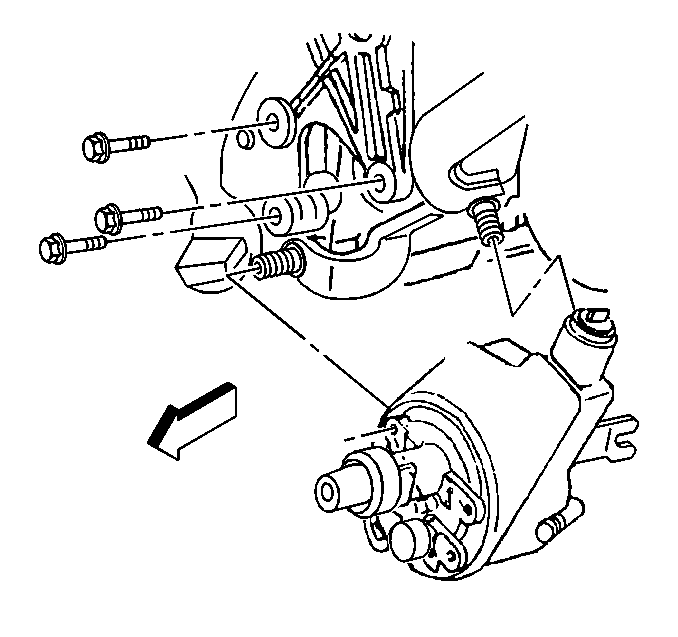
- Remove the power steering pump pulley. Refer to Power Steering Pump Replacement .
- Remove the three bolts holding the power steering pump to the power steering pump mounting bracket.
- Slide the power steering pump mounting bracket off of the stud and the power steering pump.
- Remove the power steering pump mounting bracket stud from the cylinder head.
- Remove the intake manifold. Refer to Intake Manifold Replacement .
- Remove the exhaust manifold. Refer to Exhaust Manifold Replacement .
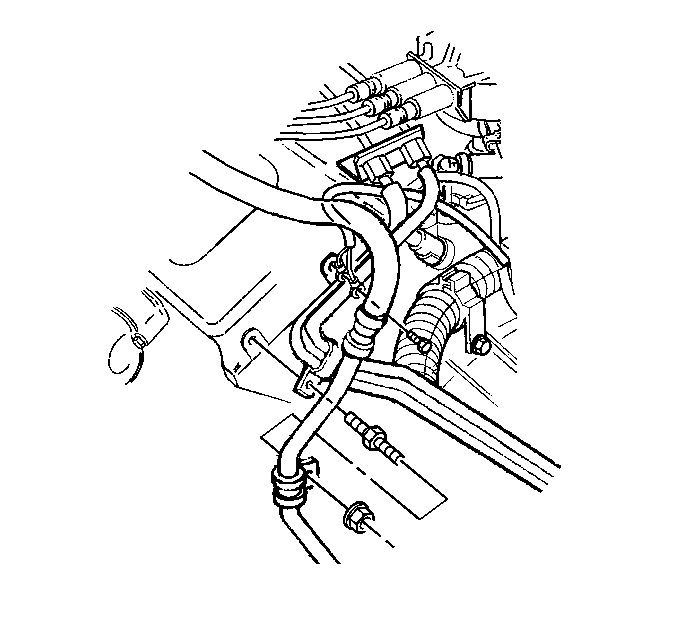
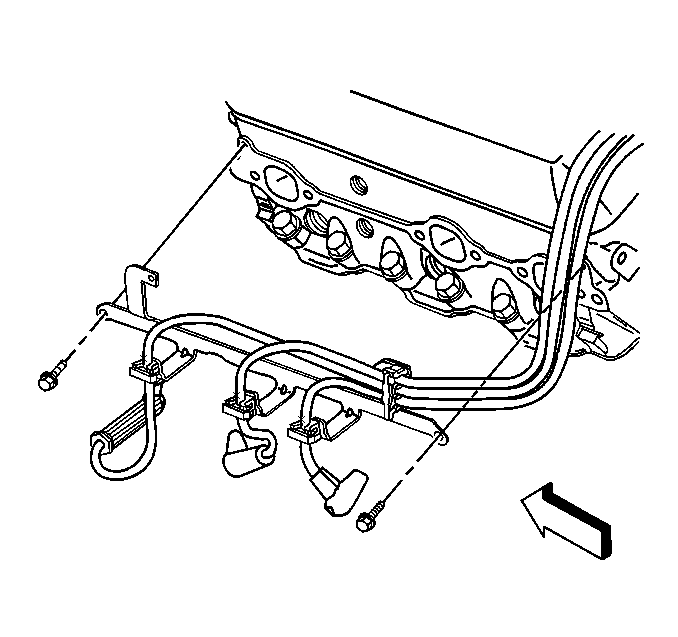
- Remove the ground wires at the rear of the left cylinder head.
- Remove the A/C pipe bracket nut, if equipped.
- Remove the fuel pipe bracket bolt at the rear of the cylinder head.
- Remove the valve pushrods. Refer to Valve Rocker Arm and Push Rod Replacement .
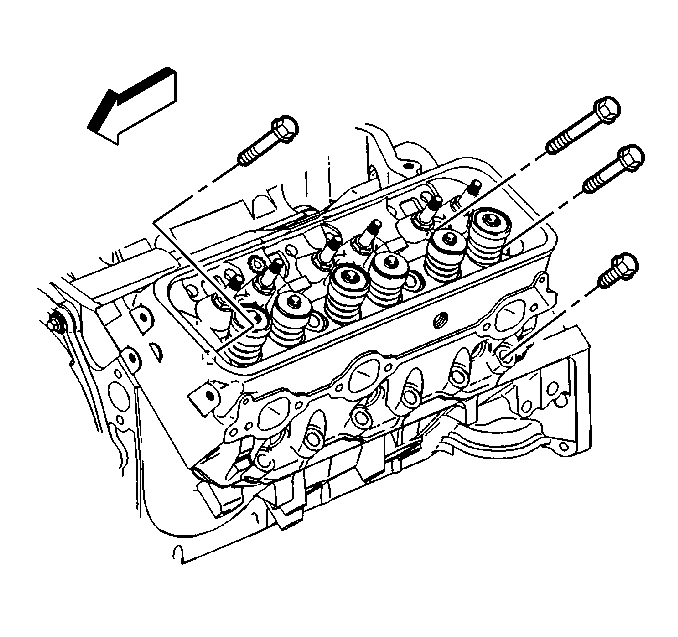
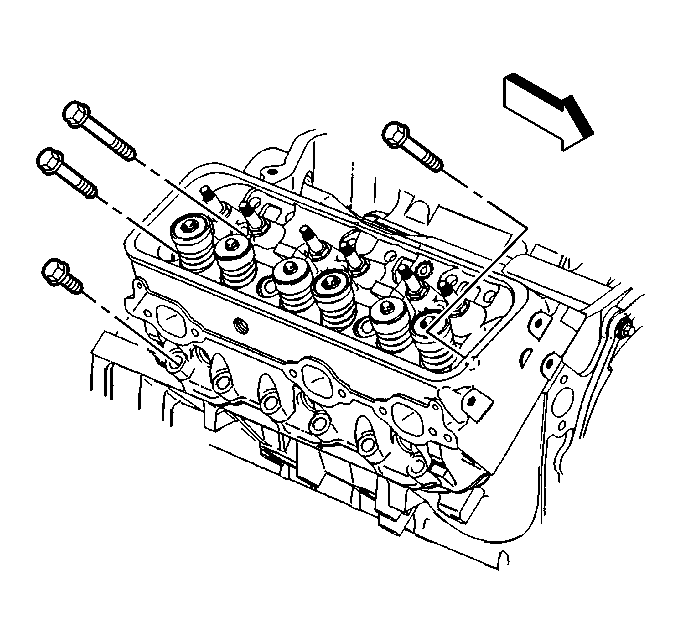
- Remove and discard the cylinder head bolts.
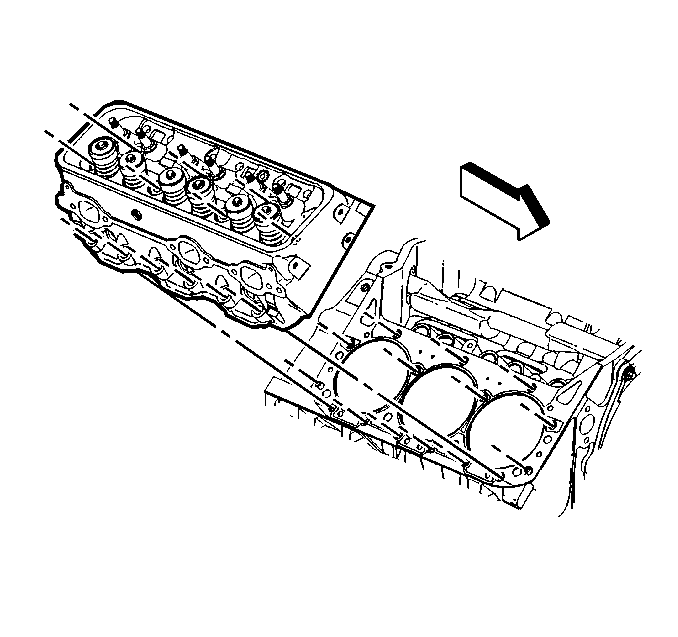
- Remove the cylinder head.
- Clean all sealing surfaces. Refer to Cylinder Head Cleaning and Inspection .
Caution: Unless directed otherwise, the ignition and start switch must be in the OFF or LOCK position, and all electrical loads must be OFF before servicing any electrical component. Disconnect the negative battery cable to prevent an electrical spark should a tool or equipment come in contact with an exposed electrical terminal. Failure to follow these precautions may result in personal injury and/or damage to the vehicle or its components.
Installation Procedure
- Install the cylinder head. Refer to Cylinder Head Installation .
- Install the valve pushrods. Refer to Valve Rocker Arm and Push Rod Replacement .
- Install the ground wires and bolt at the rear of the left cylinder head.
- Install the fuel pipe bracket and bolt at the rear of the cylinder head.
- Install the A/C pipe bracket and nut, if equipped.
- Install the exhaust manifold. Refer to Exhaust Manifold Replacement .
- Install the intake manifold. Refer to Intake Manifold Replacement .
- Install the stud for the power steering pump mounting bracket to the cylinder head.
- Slide the power steering pump mounting bracket on the stud and the power steering pump.
- Install the power steering pump mounting bracket three bolts and the nut.
- Install the power steering pump mounting bracket to the power steering pump.
- Install the power steering pump pulley. Refer to Power Steering Pump Replacement .
- Install the oil filler tube in the valve rocker arm cover.
- Install the oil filler tube bolt.
- Install the air conditioning compressor. Refer to Air Conditioning Compressor Replacement .
- Install the drive belt. Refer to Drive Belt Replacement .
- Install the engine cooling fan. Refer to Fan Replacement .
- Connect the battery negative cable. Refer to Battery Replacement .
- Install the engine cover. Refer to Engine Cover Replacement .
Notice: Refer to Fastener Notice in the Preface section.
Tighten
Tighten the ground wire bolt to 35 N·m (26 lb ft).
Tighten
Tighten the fuel pipe bracket bolt to 30 N·m (22 lb ft).
Tighten
Tighten the A/C pipe bracket nut to 35 N·m (26 lb ft).
Tighten
Tighten the power steering pump mounting bracket stud to 20 N·m (15 lb ft).
Tighten
Tighten the power steering pump mounting bracket bolts and nut to 41 N·m (30 lb ft).
Tighten
Tighten the power steering pump bolts to 50 N·m (37 lb ft).
Tighten
Tighten the oil filler tube bolt to 25 N·m (18 lb ft).
Cylinder Head Replacement Right Side
Removal Procedure
- Disconnect the battery negative cable. Refer to Battery Replacement .
- Remove the engine cover. Refer to Engine Cover Replacement .
- Remove the drive belt. Refer to Drive Belt Replacement .
- Remove the engine cooling fan. Refer to Fan Replacement .
- Remove the intake manifold. Refer to Intake Manifold Replacement .
- Remove the spark plug wire harness support.
- Remove the exhaust manifold. Refer to Exhaust Manifold Replacement .
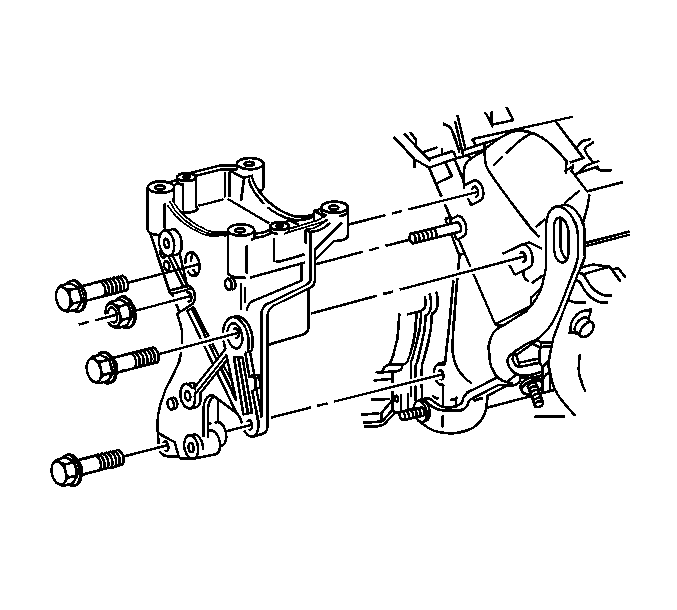
- Remove the generator. Refer to Generator Replacement .
- Remove the engine wiring harness bracket from the generator mounting bracket.
- Remove the two bolts and nut holding the generator mounting bracket to the engine.
- Remove the generator mounting bracket.
- Remove the generator mounting bracket stud from the cylinder head.
- Remove the engine wiring harness bolt from the rear of the right cylinder head.
- Remove the valve pushrods. Refer to Valve Rocker Arm and Push Rod Replacement .
- Remove and discard the cylinder head bolts.
- Remove the cylinder head.
- Clean all sealing surfaces. Refer to Cylinder Head Cleaning and Inspection .

Installation Procedure
- Install the cylinder head. Refer to Cylinder Head Installation .
- Install the valve pushrods. Refer to Valve Rocker Arm and Push Rod Replacement .
- Install the exhaust manifold. Refer to Exhaust Manifold Replacement .
- Install the spark plug wire harness and support.
- Install the intake manifold. Refer to Intake Manifold Replacement .
- Install the bolt holding the engine wiring harness to the rear of the right cylinder head.
- Install the stud for the generator mounting bracket.
- Slide the generator mounting bracket on the stud.
- Instal the generator mounting bracket two bolts and the nut.
- Install the engine wiring harness bracket and bolt to the generator mounting bracket.
- Install the generator. Refer to Generator Replacement .
- Install the engine cooling fan. Refer to Fan Replacement .
- Install the drive belt. Refer to Drive Belt Replacement
- Connect the battery negative cable. Refer to Battery Replacement .
- Install the engine cover. Refer to Engine Cover Replacement .
Notice: Refer to Fastener Notice in the Preface section.
Tighten
Tighten the spark plug wire support bolts to 12 N·m (106 lb in).
Tighten
Tighten the engine wiring harness bolt to 36 N·m (27 lb ft).
Tighten
Tighten the generator mounting bracket stud to 20 N·m (15 lb ft).
Tighten
Tighten the generator mounting bracket bolts and the nut to 41 N·m (30 lb ft).
Tighten
Tighten the engine wiring harness bracket bolt to 25 N·m (18 lb ft).
