For 1990-2009 cars only
Removal Procedure
- Disconnect the negative battery cable.
- Remove the front wheels.
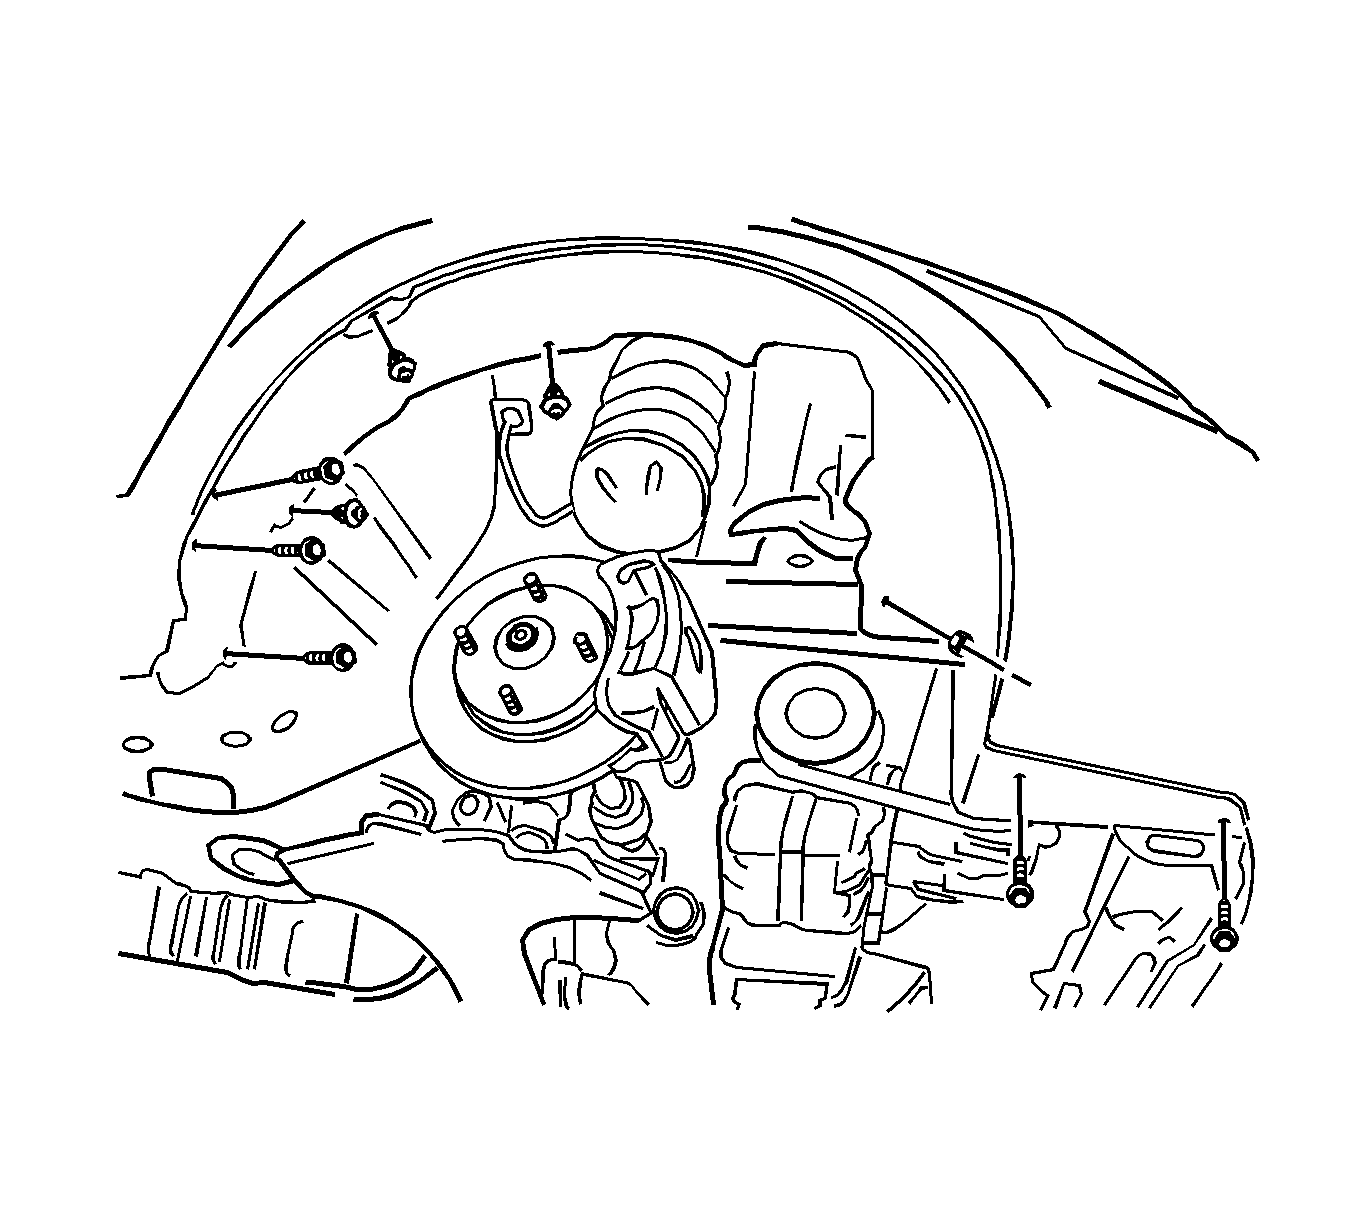
- Remove the screws, the bolts, the nuts, and the front wheel well splash shields.
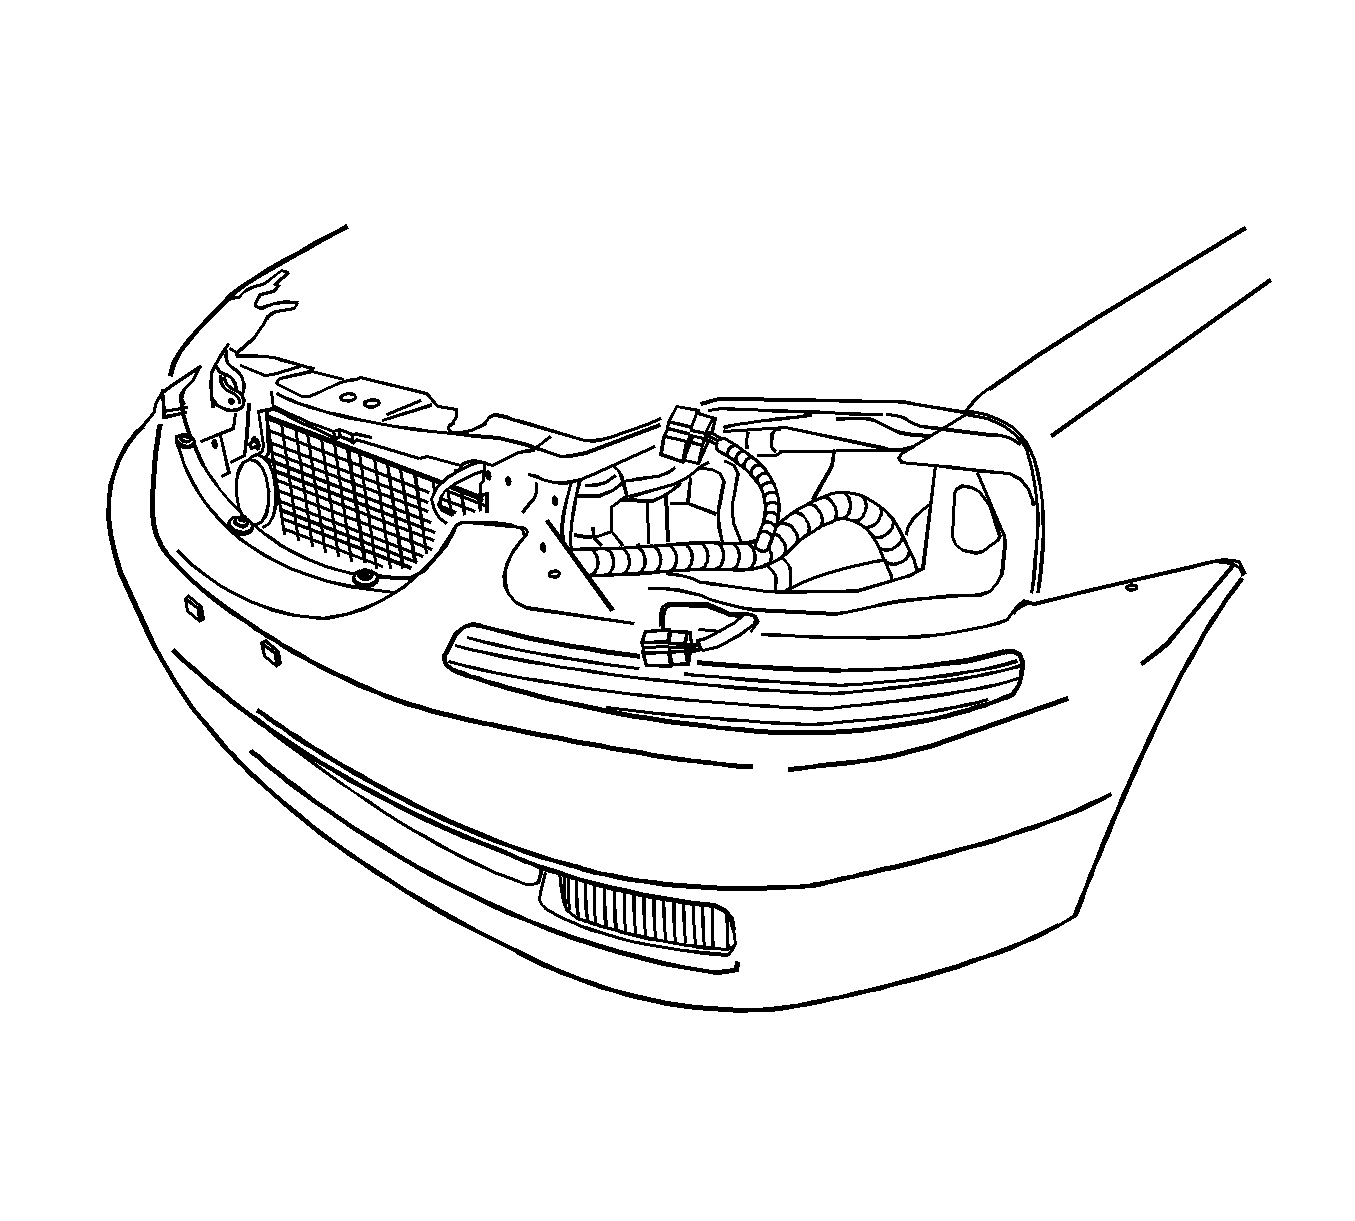
- Remove the headlamps, the turn signal lamps, the side turn signal lamps and the front fog lamps.
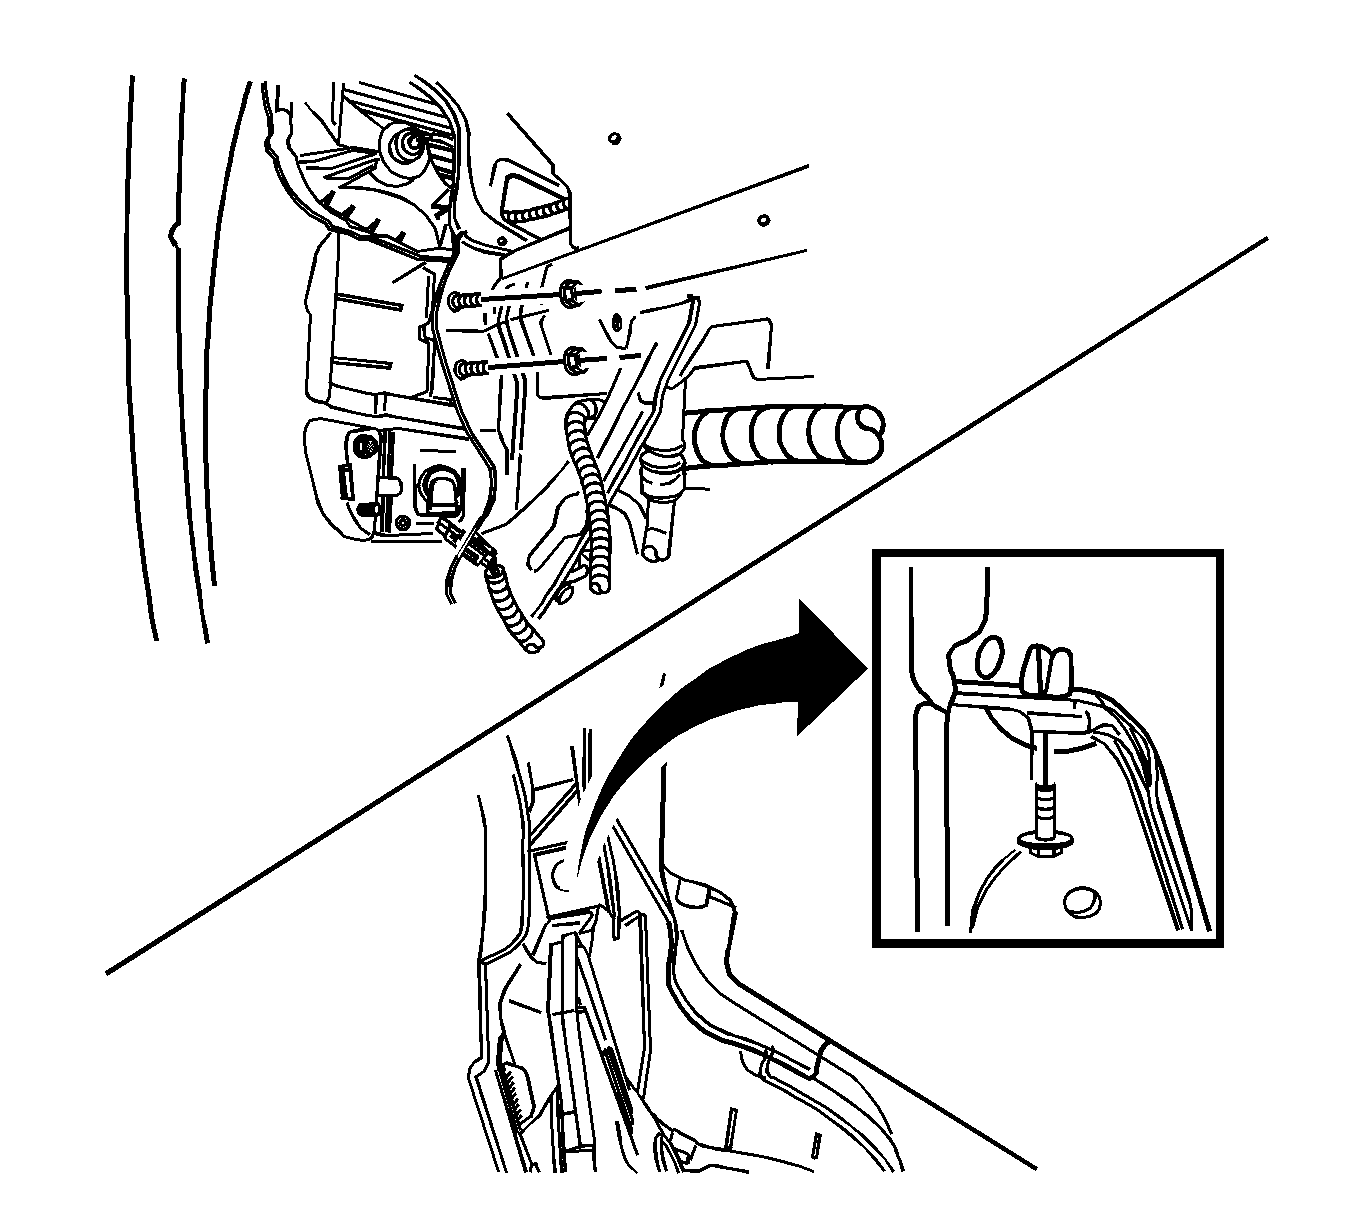
- Remove the screws from the wheel wells.
- Remove the nuts from the fascia.
- Remove the screws from underneath the fascia.
- Remove the screws on the top of the fascia.
- Remove the front bumper fascia.
Caution: Refer to Battery Disconnect Caution in the Preface section.

Refer to Tire and Wheel Removal and Installation in Tires and Wheels.
Caution: Refer to Battery Disconnect Caution in the Preface section.

Refer to Headlamp Replacement , Turn Signal Lamp Replacement and Front Fog Lamp Replacement in Lighting Systems.

Installation Procedure
- Install the bumper fascia.
- Install the screws on the top of the fascia.
- Install the screws underneath the fascia.
- Install the nuts behind the fascia.
- Install the screws in the wheel wells.
- Install the headlamps, the turn signal lamp, the side turn signal lamps, and the front fog lamps.
- Install the front wheel well splash shields with the screws, the bolts, and the nuts.
- Install the front wheels.
- Connect the negative battery cable.

Notice: Refer to Fastener Notice in the Preface section.

Tighten
Tighten the front bumper impact beam nuts to 27 N·m (20 lb ft).
Tighten
Tighten the front wheel well screws to 1.5 N·m (13 lb in).
Refer to Headlamp Replacement , Turn Signal Lamp Replacement and Front Fog Lamp Replacement in Lighting Systems.

Refer to Tire and Wheel Removal and Installation in Tires and Wheels.
Tighten
| • | Tighten the splash shield screws to 1.5 N·m (13 lb in). |
| • | Tighten the splash shield bolts to 1.5 N·m (13 lb in) |
| • | Tighten the splash shield nuts to 1.5 N·m (13 lb in). |
