For 1990-2009 cars only
Removal Procedure
- Remove the door trim panel. Refer to Rear Side Door Trim Panel Replacement .
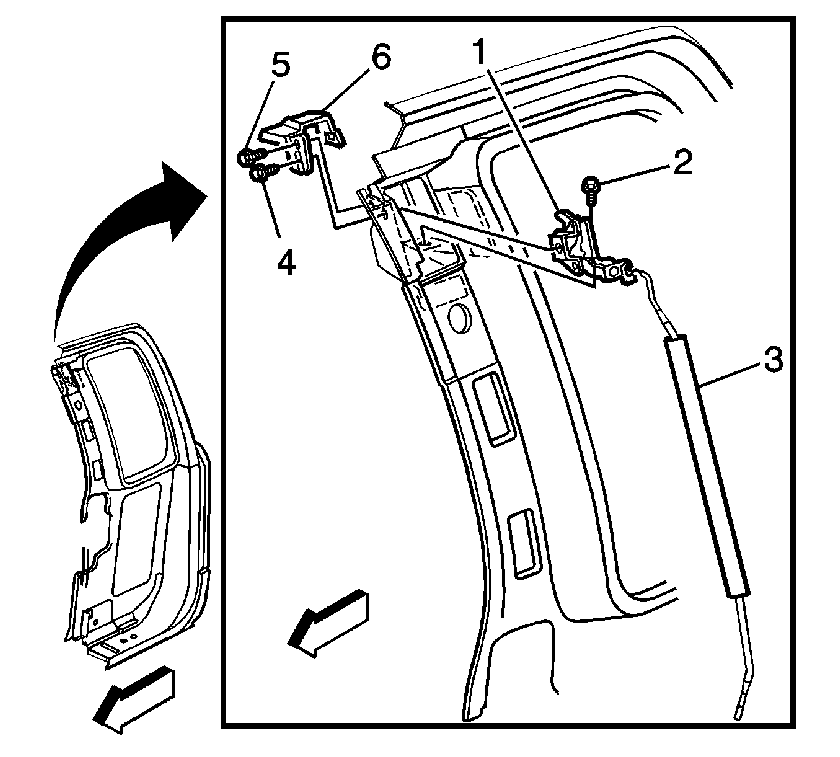
- Disconnect the latch rod (3) from the retainer on the latch control handle.
- Remove the upper latch bolt (4).
- Remove the anti-rotation screw (5).
- Remove the wedge (6) from the door.
- Remove the lower latch bolt (2).
- Remove the latch (1) and rod (2) from the door.
- Remove the latch rod (3) from the retainer on the latch.

Installation Procedure
- Install the latch rod (3) to the retainer on the latch.
- Install the latch (1) and rod to the door.
- Loose start the upper latch bolt. (4).
- Install the lower latch bolt (2).
- Install the wedge (6) to the door.
- Install the anti-rotation screw (5) retaining the wedge to the door.
- Complete installation of the upper latch bolt (4).
- Connect the latch rod (3) to the retainer on the latch control handle.
- Install the door trim panel. Refer to Rear Side Door Trim Panel Replacement .

Notice: Refer to Fastener Notice in the Preface section.
Tighten
Tighten the lower latch bolt (2) to 10 N·m (89 lb in).
Tighten
Tighten the anti-rotation screw (5) to 2 N·m (18 lb in).
Tighten
Tighten the upper latch bolt (4) to 10 N·m (89 lb in).
