Cooling System Draining and Filling 5.7L VIN P
Engine Coolant Recycling
Tools Required
GM approved Recycling System such as Pro Clean (Available in the GM
Dealer Equipment Program)
Whenever the cooling system needs maintenance or repairs, remove and
replace the coolant with qualified new or recycled coolant.
If you only drain the radiator, up to 50 percent of the used, contaminated
coolant can remain in the cooling system.
Use any of the following methods in order to remove the coolant:
| • | Use a waterless coolant evacuation system, available in the GM
Dealer Equipment program, or equivalent, that removes the used coolant and
replaces the coolant with new or recycled coolant. |
| • | Use a GM approved coolant recycling system, available in the GM
Dealer Equipment program, or equivalent, that recycles the coolant on the
vehicle. This eliminates the need for coolant evacuation. |
| | Important: Do not recycle coolant on vehicles manufactured with GM Goodwrench Dex-Cool.
|
| • | Recover the used coolant. Store the coolant in a used coolant holding
tank. Submit the used coolant for recycling on a regular basis. |
Draining Procedure 5.7L (VIN P)
- Park the vehicle on a level surface.
- Remove the coolant recovery reservoir fill cap.
- Remove the radiator pressure cap.
| 3.1. | Slowly rotate the cap counter clockwise until the cap reaches
the stop. Do not press down while turning the pressure cap. |
| 3.2. | Wait until any remaining pressure, indicated by a hissing sound,
is relieved. |
| 3.3. | After all the pressure is relieved, press down on the pressure
cap and continue to rotate the pressure cap counter clockwise. |
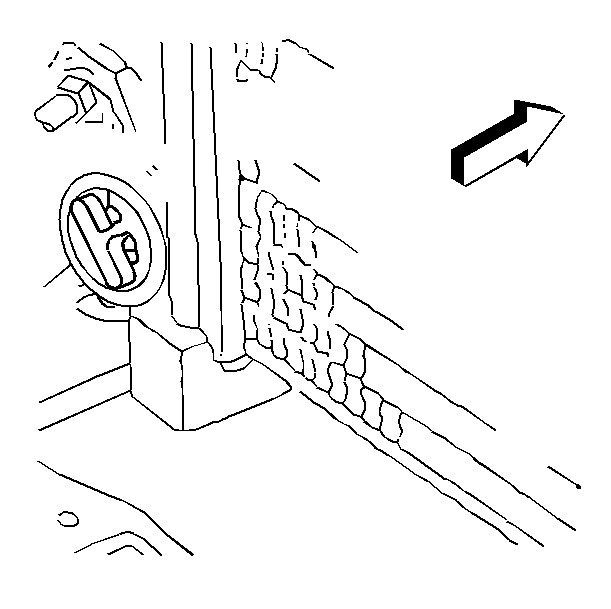
- Open the radiator drain cock.
- Open the heater air bleed vents just above the water pump on the
thermostat housing and the heater outlet hose pipe. Open the air bleed vents
two or three turns. Place a shop towel under the bleed valve in order to prevent
coolant from splashing onto the distributor.
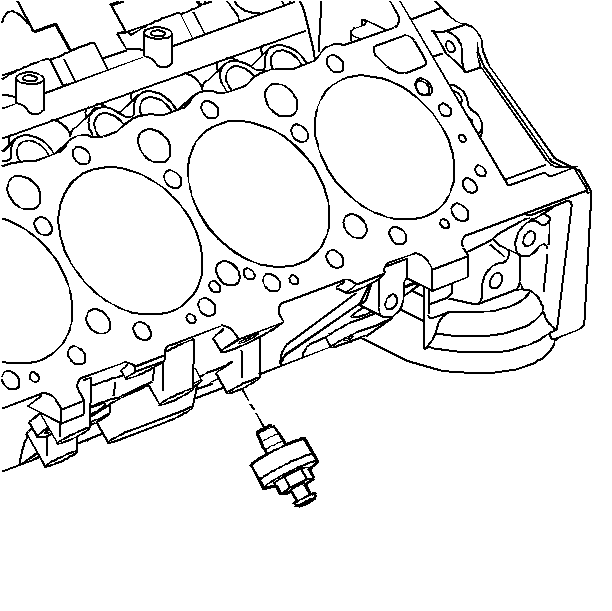
- Remove the engine block coolant drain hole plug from the left side of
the engine. Remove the knock sensor from the right side of the engine.
Important: Store used engine coolant in the proper manner, such as in a used engine
coolant holding tank. Do not pour used engine coolant down a drain. Ethylene
glycol antifreeze is a very toxic chemical. Do not dispose of the coolant
in to the sewer system or ground water. This is illegal and ecologically unsound.
- Allow the system to completely drain.
Filling Procedure

- Close the radiator drain cock.

- Install the knock sensor and the engine block coolant drain hole plug.
Tighten
| • | Tighten the radiator drain cock to 1.5 N·m (15 lb in). |
| • | Tighten the knock sensor to 20 N·m (15 lb ft). |
| • | Tighten the engine block coolant drain hole plug to 18 N·m
(13 lb ft). |
Notice: Use the correct fastener in the correct location. Replacement fasteners
must be the correct part number for that application. Fasteners requiring
replacement or fasteners requiring the use of thread locking compound or sealant
are identified in the service procedure. Do not use paints, lubricants, or
corrosion inhibitors on fasteners or fastener joint surfaces unless specified.
These coatings affect fastener torque and joint clamping force and may damage
the fastener. Use the correct tightening sequence and specifications when
installing fasteners in order to avoid damage to parts and systems.
- Add enough water to fill the cooling system.
- Run the engine until the thermostat opens.
- Stop the engine. Repeat the steps in the draining procedure until
the drained fluid is nearly colorless.
- Remove, clean, and reinstall the coolant recovery reservoir. Refer
to
Coolant Recovery Reservoir Replacement
.
Important: Use only DEX-COOL™ engine coolant meeting the GM specification
6277M in order to provide the required freezing and corrosion protection.
- Add enough water and DEX-COOL™ engine coolant, meeting the GM
specification 6277M in order to provide a solution that is at least 50% antifreeze,
but no more than 70% antifreeze.
| 7.1. | Close the air bleed vent when the bubbles disappear and only the
coolant is visible. |
| 7.2. | Fill the radiator to just below the filler neck. |
| 7.3. | Fill the coolant recovery reservoir to the FULL HOT mark. |
| 7.4. | Add two cooling system sealer pellets, GM P/N 3634621. |
| 7.5. | Install the reservoir cap. |
Important: All 5.7L (VIN P) engines are equipped with a coolant level "latching"
circuit. Read the circuit description under Section 8A-81, Low Coolant Indicator.
Cycle the ignition from OFF to RUN before completing this procedure.
- With the radiator pressure cap removed, run the engine until the engine
reaches normal operating temperature.
Caution: Under some conditions, the ethylene glycol engine coolant is combustible.
In order to help avoid being burned, do not spill the antifreeze or the coolant
on the exhaust system or the hot engine parts.
- With the engine idling, add engine coolant to the radiator until the
coolant level reaches the bottom of the filler neck.
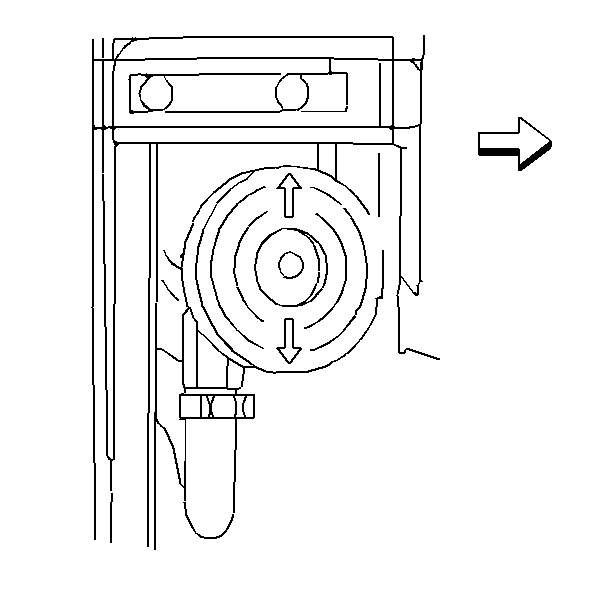
- Install the radiator pressure cap. The arrows (1) on the cap must line
up with the vent tube (2).
Notice: The Low Coolant warning/indicator lamp may come on after this procedure.
After operating the vehicle so that the engine heats up and cools down three
times, the Low Coolant warning/indicator lamp does NOT go out, or fails to
come on at the ignition check, and the coolant is at the level indicated in
step 3, refer to SECTION 8A-90 or 8A-81. If at any time the TEMP warning/indicator
lamp comes on, immediate action is required.
- After the engine reaches normal operating temperature, inspect for coolant
leaks.
Cooling System Draining and Filling 3800 VIN K
Engine Coolant Recycling
Tools Required
GM approved Recycling System such as Pro Clean (Available in the GM
Dealer Equipment Program)
Whenever the cooling system needs maintenance or repairs, remove and
replace the coolant with qualified new or recycled coolant.
If you only drain the radiator, up to 50 percent of the used, contaminated
coolant can remain in the cooling system.
Use any of the following methods in order to remove the coolant:
| • | Use a waterless coolant evacuation system, available in the GM
Dealer Equipment program, or equivalent, that removes the used coolant and
replaces the coolant with new or recycled coolant. |
| • | Use a GM approved coolant recycling system, available in the GM
Dealer Equipment program, or equivalent, that recycles the coolant on the
vehicle. This eliminates the need for coolant evacuation. |
| | Important: Do not recycle coolant on vehicles manufactured with GM Goodwrench Dex-Cool.
|
| • | Recover the used coolant. Store the coolant in a used coolant holding
tank. Submit the used coolant for recycling on a regular basis. |
Draining Procedure 3800 (VIN K)
- Park the vehicle on a level surface.
- Remove the coolant recovery reservoir fill cap.
- Remove the radiator pressure cap.
| 3.1. | Slowly rotate the cap counter clockwise until the cap reaches
the stop. |
| 3.2. | Wait until any remaining pressure, indicated by a hissing sound,
is relieved. |
| 3.3. | After all the pressure is relieved, press down on the pressure
cap and continue to rotate the pressure cap counter clockwise. |

- Open the radiator drain cock .
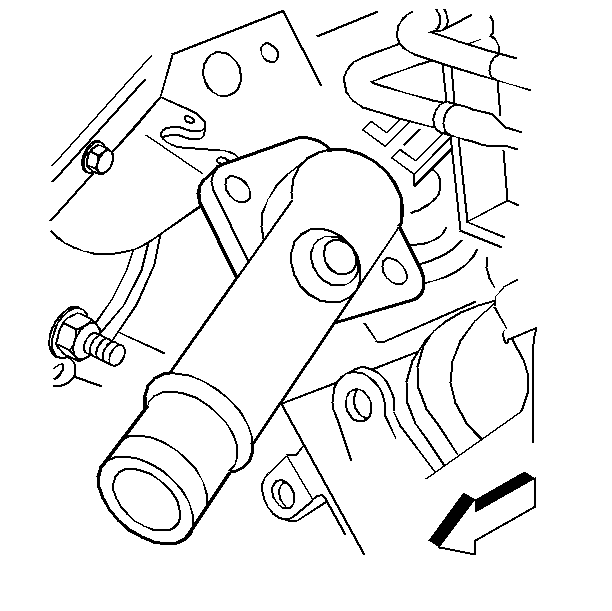
- Open the air bleed vent located on top of the water outlet. Open the air bleed
vent two or three turns.
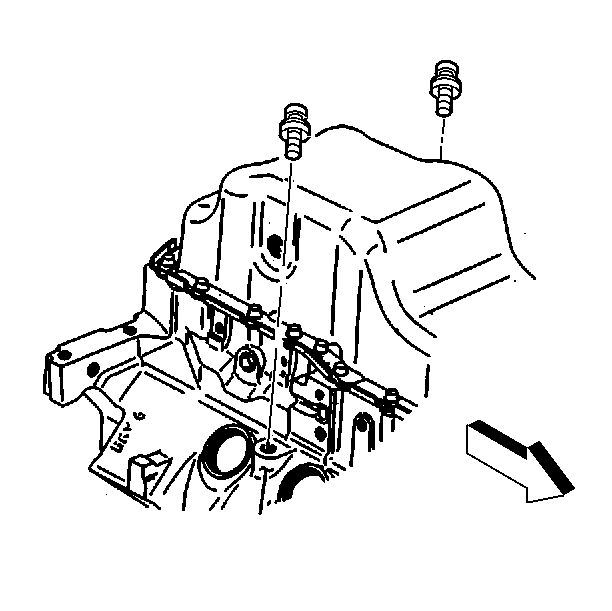
- Remove the engine knock sensors, located on either side of the engine block.
Important: Store used engine coolant in the proper manner, such as in a used engine
coolant holding tank. Do not pour used engine coolant down a drain. Ethylene
glycol antifreeze is a very toxic chemical. Do not dispose of coolant into
the sewer system or ground water. This is illegal and ecologically unsound.
- Allow the system to drain completely.
Filling Procedure

- Close the radiator drain cock.

- Install the engine knock sensors.
Tighten
| • | Tighten the knock sensor to 20 N·m (15 lb ft). |
| • | Tighten the radiator drain cock to 1.5 N·m (13 lb in). |
Notice: Use the correct fastener in the correct location. Replacement fasteners
must be the correct part number for that application. Fasteners requiring
replacement or fasteners requiring the use of thread locking compound or sealant
are identified in the service procedure. Do not use paints, lubricants, or
corrosion inhibitors on fasteners or fastener joint surfaces unless specified.
These coatings affect fastener torque and joint clamping force and may damage
the fastener. Use the correct tightening sequence and specifications when
installing fasteners in order to avoid damage to parts and systems.
- Add enough water to fill the cooling system.
- Run the engine until the thermostat opens.
- Stop the engine. Repeat the draining procedure until the drained
fluid is nearly colorless.
- Remove, clean, and then reinstall the coolant recovery reservoir.
Refer to
Coolant Recovery Reservoir Replacement
.

- Add enough water and DEX-COOL™ engine coolant, meeting the GM specification
6277M in order to provide a solution that is at least 50% antifreeze, but
no more than 70% antifreeze.
| 7.1. | Close the air bleed vent when the bubbles disappear and only the
coolant is visible. |
| 7.2. | Fill the radiator to below the fill neck. |
| 7.3. | Fill the coolant recovery reservoir to the FULL HOT mark. |
| 7.4. | Add two engine coolant supplement sealant pellets, GM P/N 3634621. |
| 7.5. | Install the coolant recovery reservoir cap. |
- With the radiator pressure cap removed, run the engine until the
engine reaches normal operating temperature.
Caution: Under some conditions, the ethylene glycol engine coolant is combustible.
In order to help avoid being burned, do not spill the antifreeze or the coolant
on the exhaust system or the hot engine parts.
- With the engine idling, add coolant to the radiator until the coolant
level reaches the bottom of the filler neck.

- Install the pressure cap. The arrows (1) on the cap must line up with
the vent tube (2).
- After the engine reaches normal operating temperature, check for
coolant leaks.


