Removal Procedure
Notice: Twist the spark plug boot one-half turn in order to release the boot.
Pull on the spark plug boot only. Do not pull on the spark plug wire or the
wire could be damaged.
- Remove the left bank spark plug wire boots from the spark plugs.
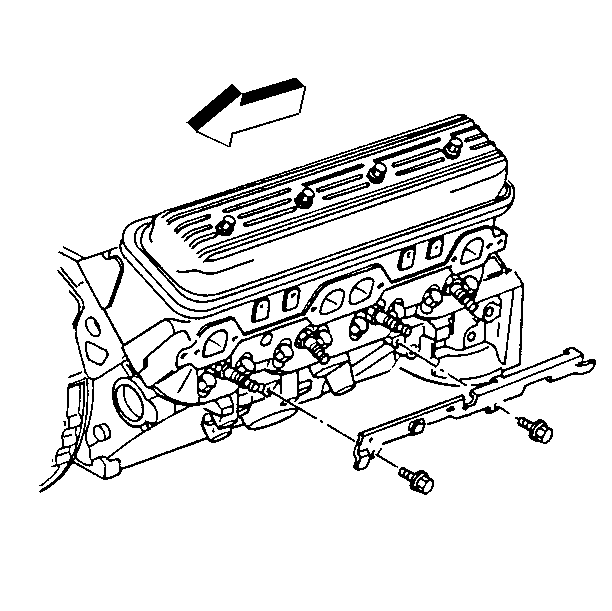
- Remove the left bank spark plug wire harness support channel bolts and the
channel.
The rear bolt is located behind the exhaust manifold takedown. Loosen
this bolt using a 10 mm wrench, then slide the channel upward to disengage
the channel from the bolt.
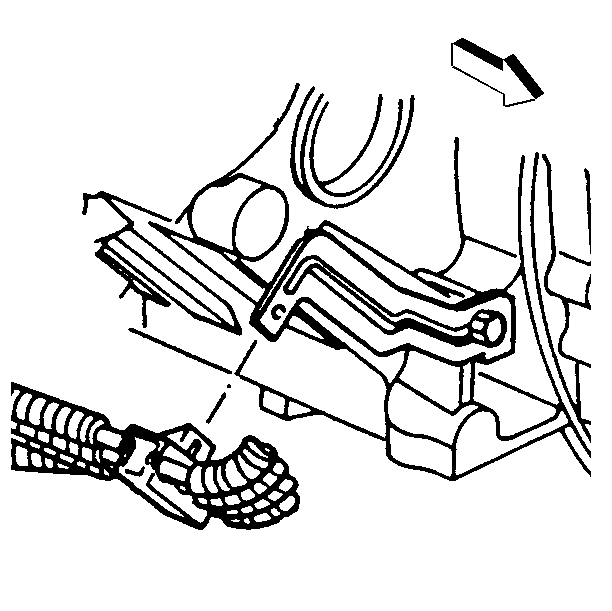
- Remove the left bank spark plug wire harness from the clip located behind
the air pump.
- Remove the right bank spark plug wire boots from the spark plugs.
- For vehicles equipped with a mechanical cooling fan, remove the
following components:
| 5.1. | Air intake resonator. Refer to Engine Controls. |
| 5.3. | Loosen the fan pulley nuts. |
| 5.4. | Remove the fan belt. |
| 5.5. | Remove the mechanical fan and the pulley. |
| 5.6. | Remove the mechanical fan pulley brackets nuts. |
| 5.7. | Remove the mechanical fan pulley bracket. |
| 5.8. | Remove the radiator outlet pipe nuts from the A/C compressor mounting
studs. |
- Remove the accessory drive belt. Refer to
Drive Belt Replacement
.
- Raise and suitably support the vehicle. Refer to General Information.
- Remove the transmission oil cooler line support bolt/screw from
the accessory drive bracket.
- Remove the accessory drive belt tensioner. Refer to
Drive Belt Tensioner Replacement
.
- Remove the A/C compressor attaching bolts/screws and the rear
bracket nut.
- Reposition the A/C compressor to provide access to the front wire
harness support.
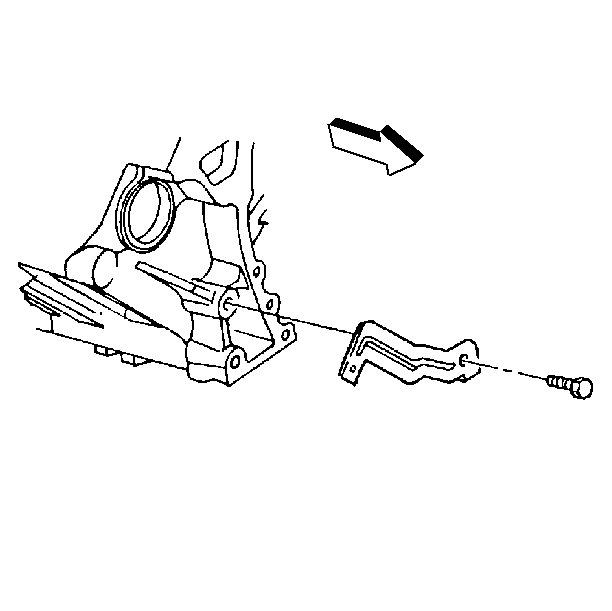
- Remove the right wire harness support bolt.
- Remove the right wire harness support.
- Remove the left and the right bank spark plug wire harnesses from
the distributor.
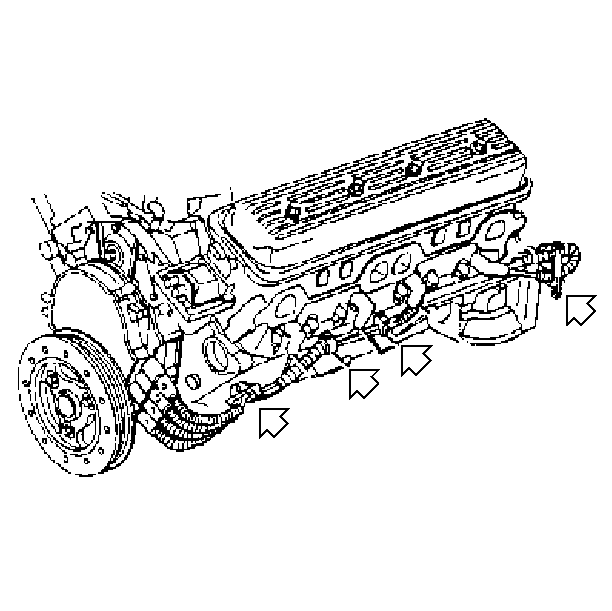
- Remove the left wire harness from the clips.
Insert a screwdriver into the tab on top of the clip to disengage.
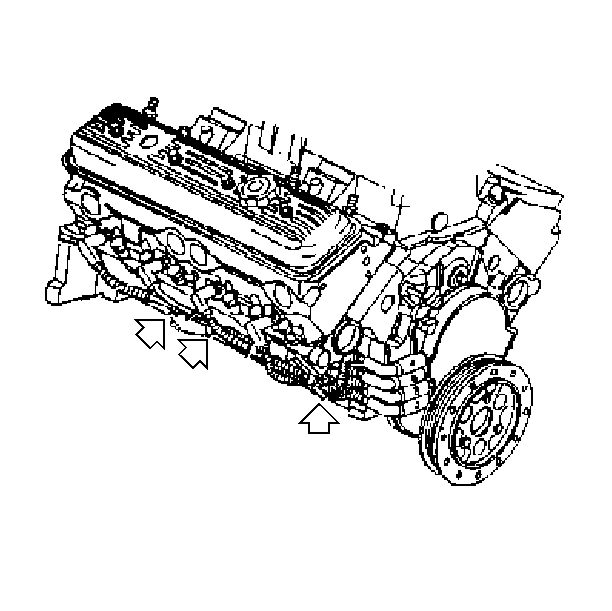
- Remove the right wire harness from the clips.
Insert a screwdriver into the tab on top of the clip to disengage.
Installation Procedure

- Install the right wire harness to the clips.

- Install the left wire harness to the clips.
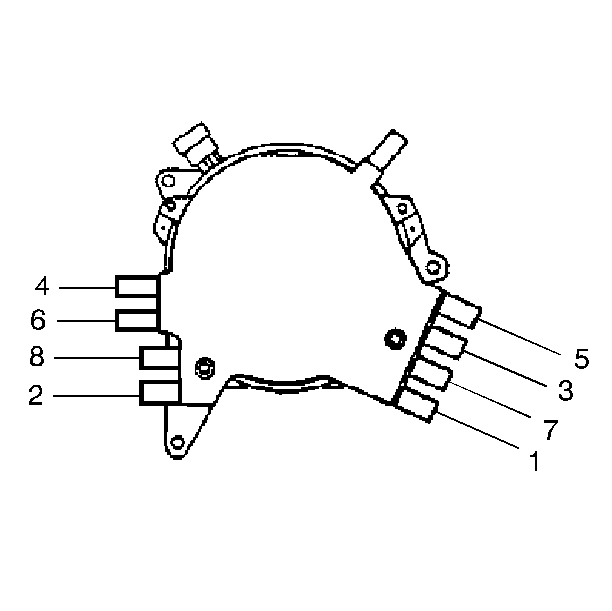
- Connect the left and right spark plug
wire harness to the distributor as shown.
- Install the right wire harness to the harness support.
- Install the right wire harness support.

- Install the right wire harness support bolt/screw.
Tighten
Tighten the harness support bolt/screw to 40 N·m (30 lb ft).
Notice: Use the correct fastener in the correct location. Replacement fasteners
must be the correct part number for that application. Fasteners requiring
replacement or fasteners requiring the use of thread locking compound or sealant
are identified in the service procedure. Do not use paints, lubricants, or
corrosion inhibitors on fasteners or fastener joint surfaces unless specified.
These coatings affect fastener torque and joint clamping force and may damage
the fastener. Use the correct tightening sequence and specifications when
installing fasteners in order to avoid damage to parts and systems.
- Install the A/C compressor to the bracket.
- Install the A/C compressor fasteners.
Tighten
| • | Tighten the A/C compressor bolts/screws to 50 N·m
(37 lb ft). |
| • | Tighten the A/C compressor rear bracket nut to 41 N·m
(30 lb ft). |
- Install the accessory drive belt tensioner. Refer to
Drive Belt Tensioner Replacement
.
- Install the transmission oil cooler line support bolt/screw.
Tighten
Tighten the oil cooler line support bolt/screw to 1.9 N·m
(17 lb in).
- Lower the vehicle.
- Install the accessory drive belt. Refer to
Drive Belt Replacement
.
- If the vehicle is equipped with a mechanical fan, install the
following components:
| 13.1. | Install the radiator outlet pipe nuts. |
Tighten
Tighten the radiator outlet pipe nuts to 16 N·m (12 lb ft).
| 13.2. | Install the mechanical fan pulley bracket nuts. |
Tighten
Tighten the mechanical fan pulley bracket nuts to 50 N·m
(37 lb ft).
| 13.3. | Install the mechanical fan pulley. |
| 13.4. | Install the mechanical fan. |
| 13.5. | Install the mechanical fan nuts. Finger tighten the nuts. |
| 13.6. | Install the mechanical fan belt. |
Tighten
Tighten the mechanical fan nuts to 26 N·m (19 lb ft).
| 13.8. | Install the air intake resonator. Refer to Engine Controls. |
- Install the right bank spark plug wire boots to the spark plugs.
- Install the left bank sparkplug harness clip located behind the
AIR pump.

- Install the left bank spark plug wire harness support channel.
The rear bolt/screw is located behind the exhaust manifold takedown.
Slide the channel onto the bolt/screw and then tighten using a 10 mm
wrench.
- Install the left bank spark plug wire harness boots to the spark
plugs.


