Removal Procedure
Tools Required
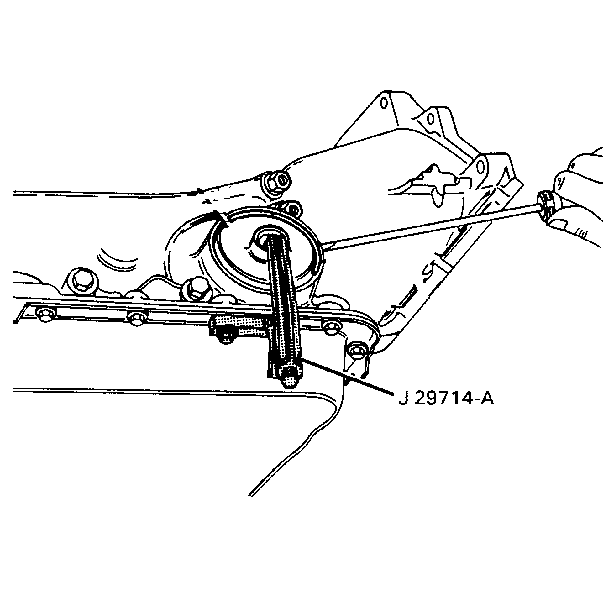
J 29714-A Servo Cover Depressor
- Raise the vehicle. Suitably support the vehicle. Refer to General Vehicle Lifting and Jacking in General Information.
- Remove the right side warm-up three way catalytic converter and catalytic converter heat shield. Refer to Catalytic Converter Replacement in Exhaust.
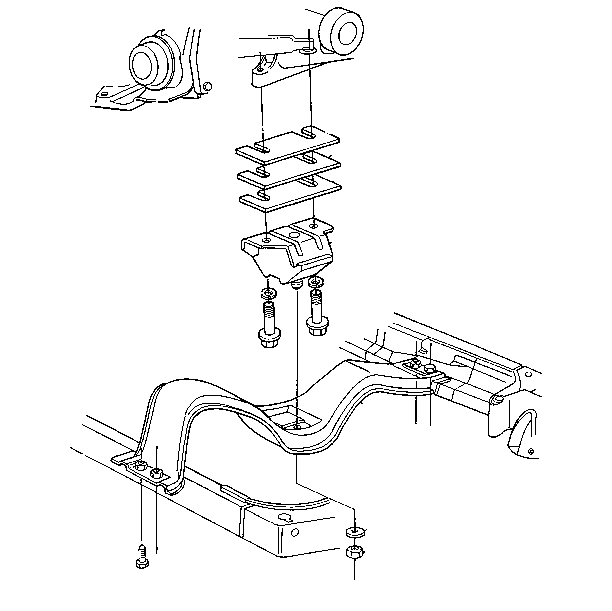
- Remove the transmission mount nut.
- Support and raise the transmission slightly, using the transmission jack.
- Remove the transmission support bolts.
- Remove the transmission support.
- Lower the transmission in order to access the servo cover.
- Remove the transmission oil pan bolt in order to access the transmission oil pan rail.
- Install the J 29714-A to the transmission oil pan rail.
- Depress the servo cover.
- Remove the servo cover retaining ring, using a suitable tool.
- Remove the J 29714-A from the transmission support rail.
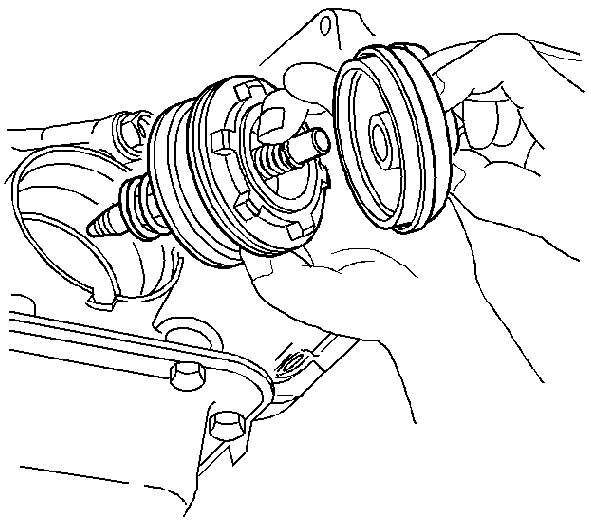
- Remove the servo cover.
- Remove the servo.
- Inspect the servo. Refer to 2-4 Servo Disassemble and 2-4 Band Servo Piston Pin Length Check for inspection, disassembly and servo pin measurement procedures.
| • | If unable to remove the servo cover by hand, use slip joint pliers. |
| • | The O-ring seal may remain in the transmission case. |
Installation Procedure
Tools Required
J 29714-A Servo Cover Depressor
- Install the servo.
- Replace the O-ring seal on the servo cover, if removed.
- Install the servo cover.
- Install the J 29714-A to the transmission oil pan rail.
- Depress the servo cover.
- Install the servo cover retaining ring.
- Remove the J 29714-A .
- Replace the transmission oil pan bolt.
- Raise the transmission.
- Install the transmission support.
- Install the transmission support bolts.
- Lower the transmission into position.
- Install the transmission mount nut and washer.
- Install the warm up three way catalytic converter and catalytic converter heat shield. Refer to Catalytic Converter Replacement in Exhaust.
- Lower the vehicle.
- Adjust the transmission fluid level. Refer to Transmission Fluid Check .
Tighten
Tighten the transmission oil pan bolt to 16 N·m (12 lb ft).
Refer to
Notice: Use the correct fastener in the correct location. Replacement fasteners must be the correct part number for that application. Fasteners requiring replacement or fasteners requiring the use of thread locking compound or sealant are identified in the service procedure. Do not use paints, lubricants, or corrosion inhibitors on fasteners or fastener joint surfaces unless specified. These coatings affect fastener torque and joint clamping force and may damage the fastener. Use the correct tightening sequence and specifications when installing fasteners in order to avoid damage to parts and systems.
in General Information.
Tighten
Tighten the transmission support bolts to 34 N·m (25 lb ft).
Tighten
Tighten the transmission mount nut to 41 N·m (30 lb ft).
