For 1990-2009 cars only
High Mount Stop Lamp Replacement Sedan
Removal Procedure
- Disconnect the battery ground cable. Refer to Battery Negative Cable Disconnection and Connection .
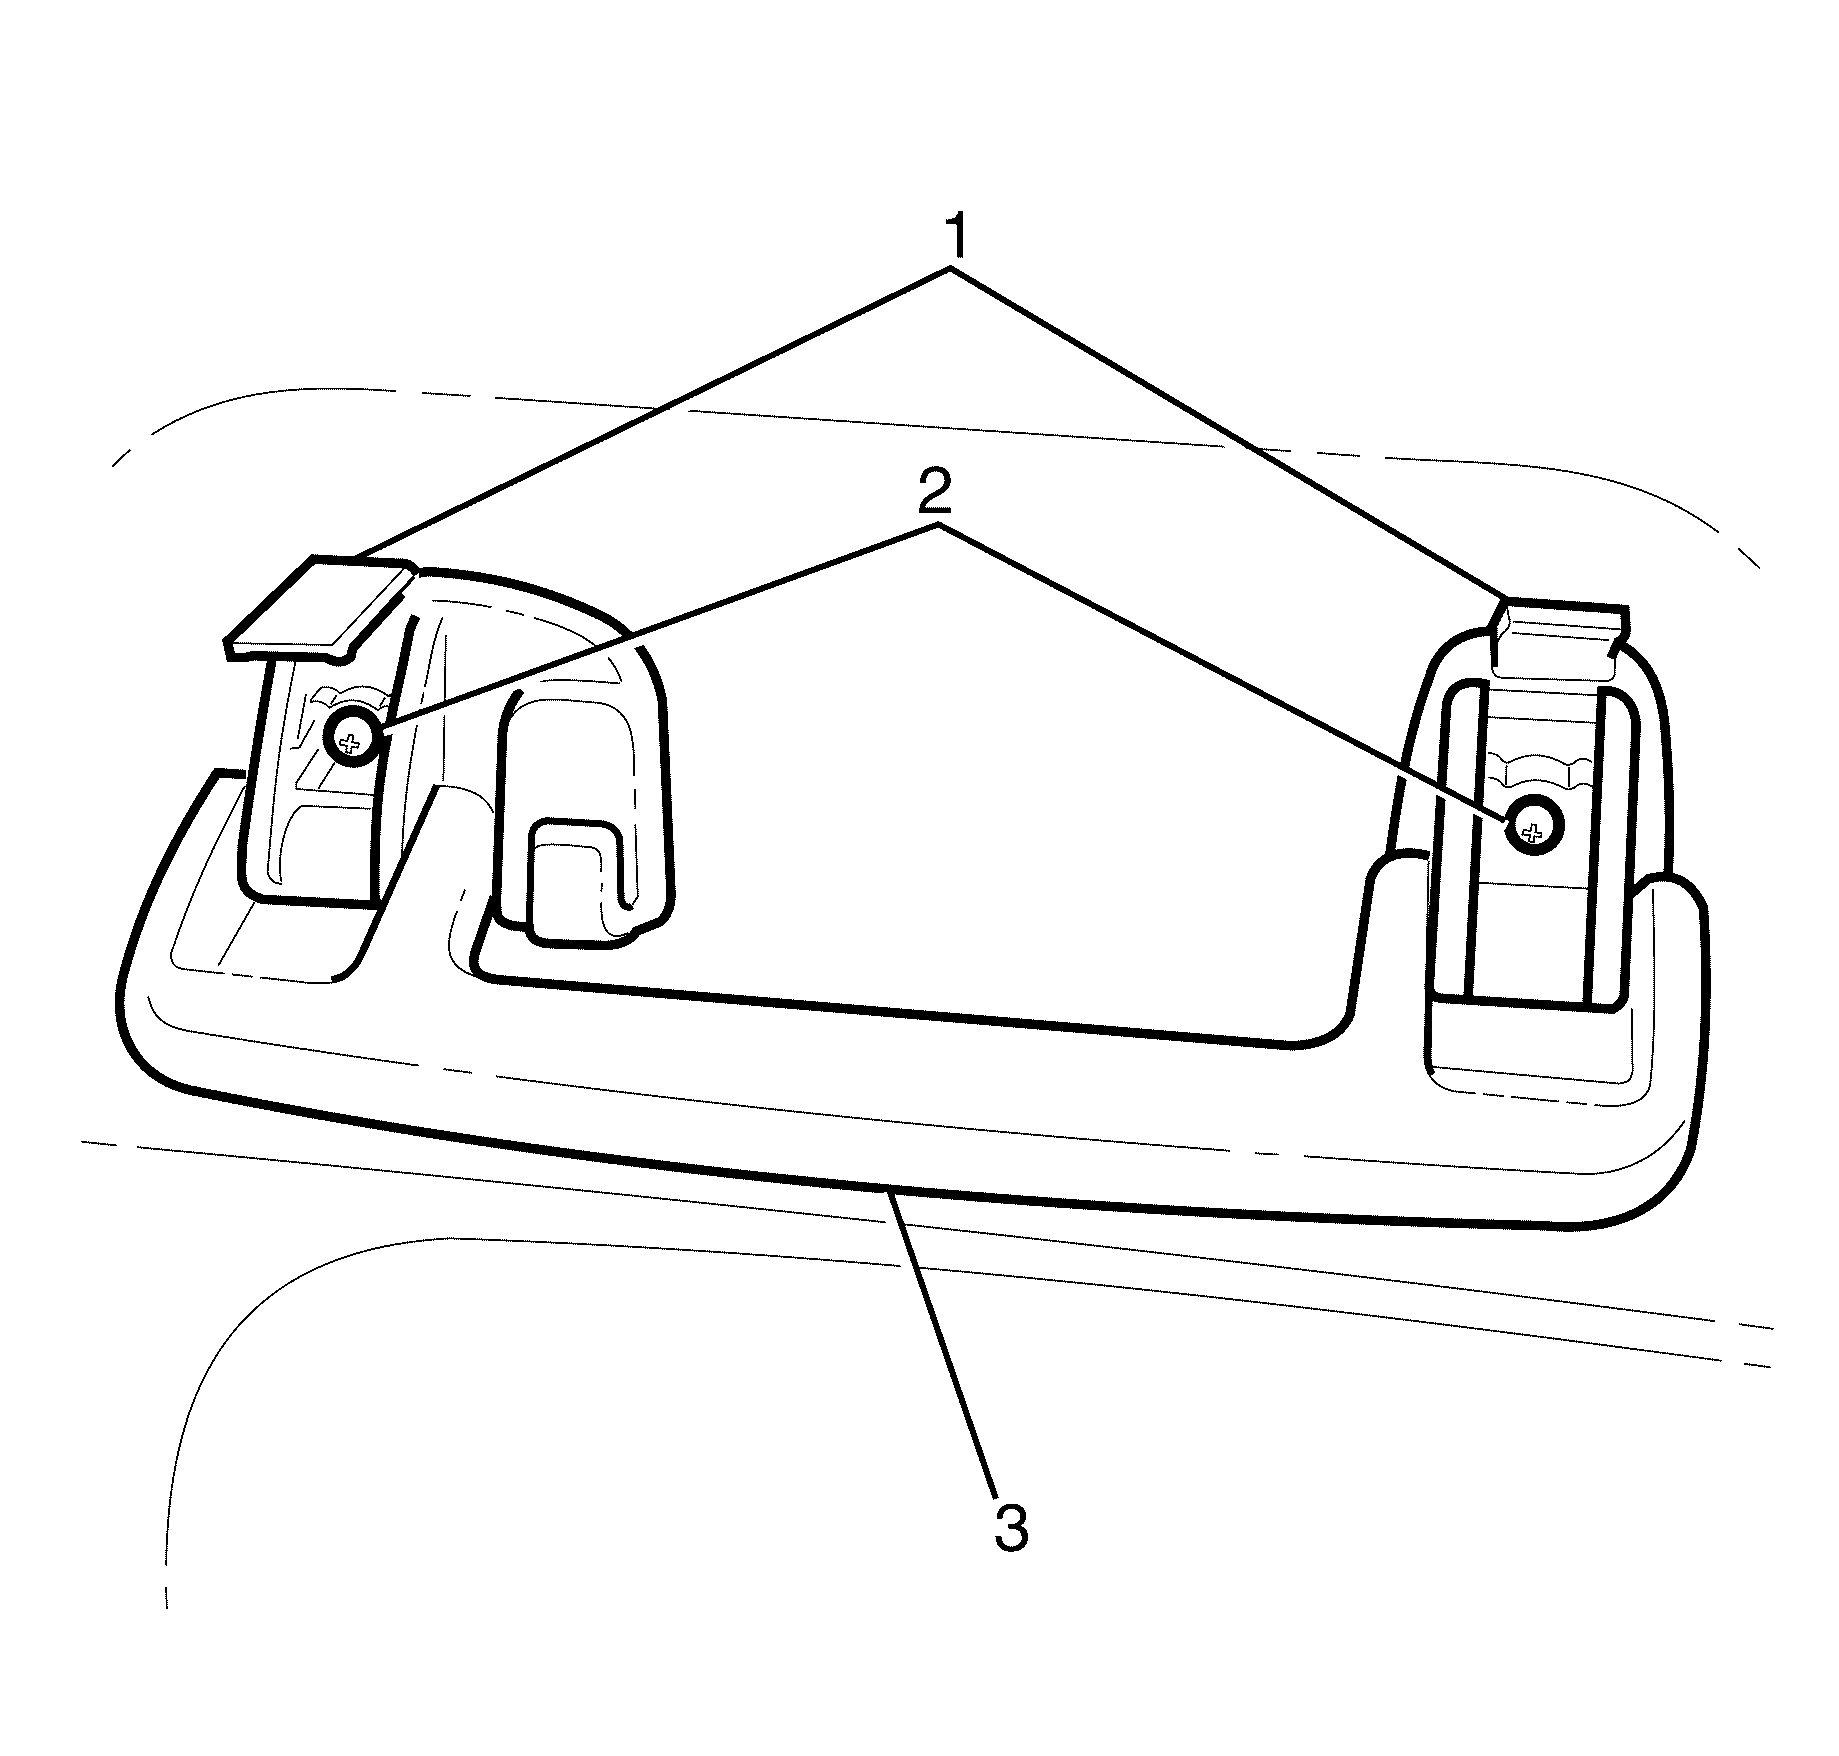
- Pry open the assist handle retaining screw covers (1).
- Remove the assist handle to headliner retaining screws (2).
- Remove the assist handles (3) from the headliner.
- Remove the high mounted stop lamp bulb. Refer to High Mount Stop Lamp Bulb Replacement
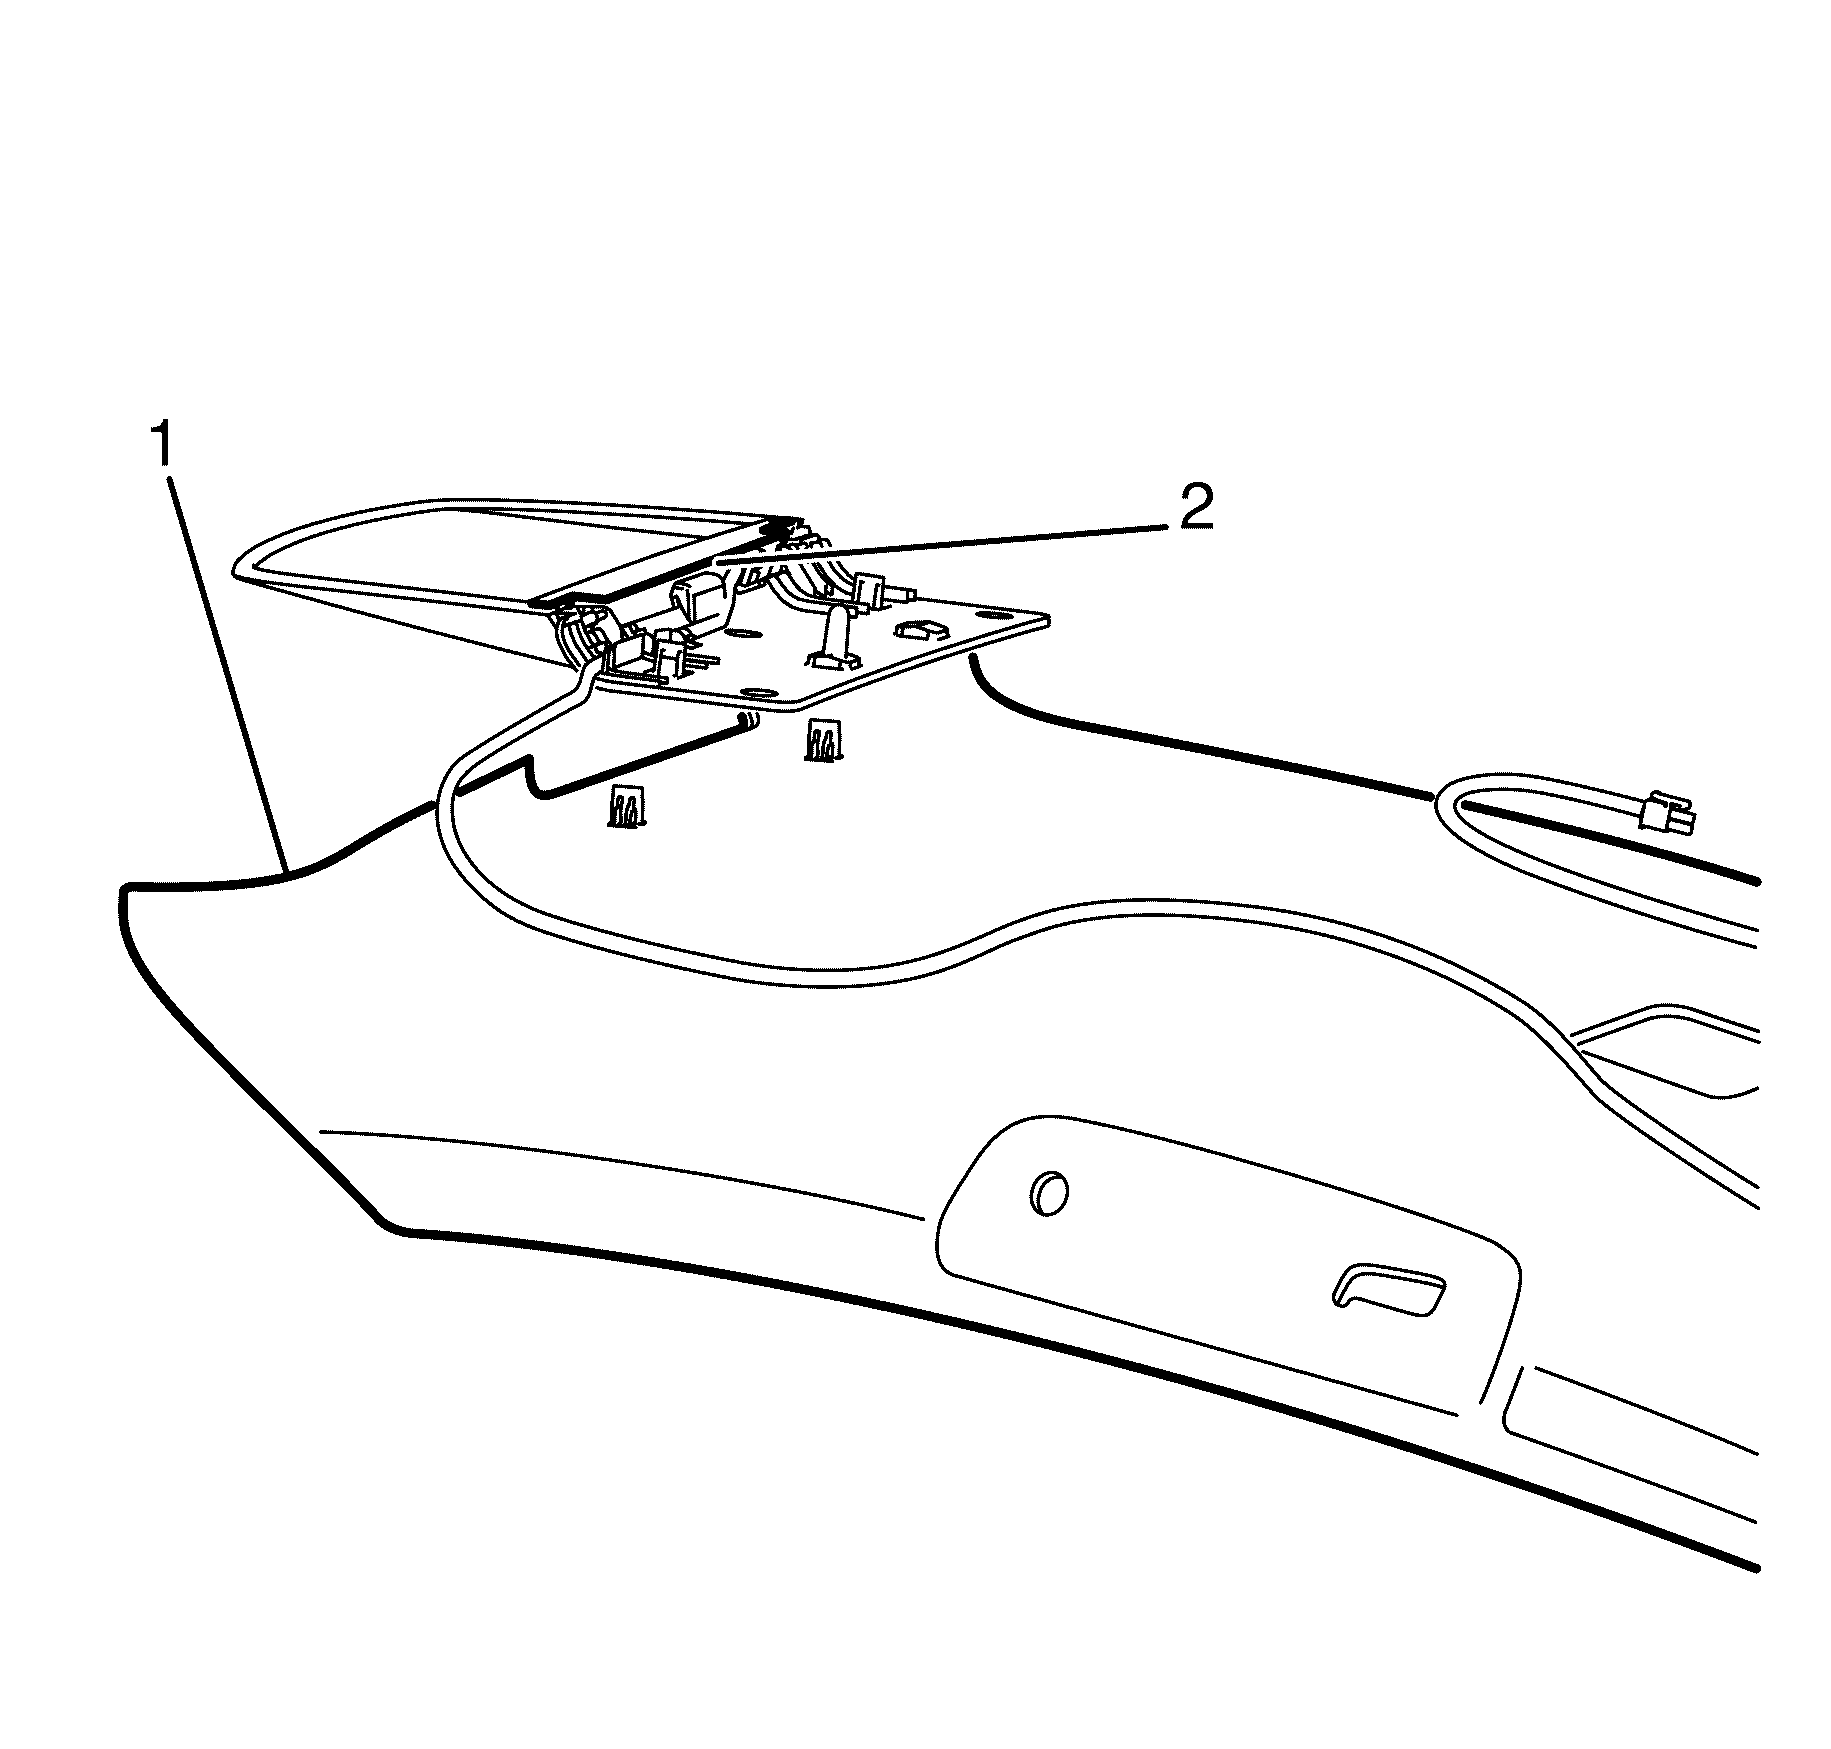
- Unclip the high mounted stop lamp assembly (2) from the headliner (1).
Caution: Refer to Battery Disconnect Caution in the Preface section.
Important: If the high mounted stop lamp LED's are faulty and do not illuminate, the high mounted stop lamp PCB assembly must be replaced.

Important: Carry out for the two rear assist handles

Installation Procedure
- Install the new high mounted stop lamp assembly (2) to the headliner (1).
- Install the high mounted stop lamp bulb. Refer to High Mount Stop Lamp Bulb Replacement
- Install the assist handles (3) to the headliner.
- Install the assist handle to headliner retaining screws (2).
- Close the assist handle retaining screw covers (1).
- Connect the battery ground cable. Refer to Battery Negative Cable Disconnection and Connection .
- Check all vehicle lights for correct operation.


Important: Carry out for the two rear assist handles
Tighten
Tighten the assist handle retaining screws to 2.0 N·m
(18 lb in).
High Mount Stop Lamp Replacement Sportwagon
Removal Procedure
- Disconnect the battery ground cable. Refer to Battery Negative Cable Disconnection and Connection.
- Remove the liftgate upper moulding. Refer to Liftgate Upper Molding Replacement.
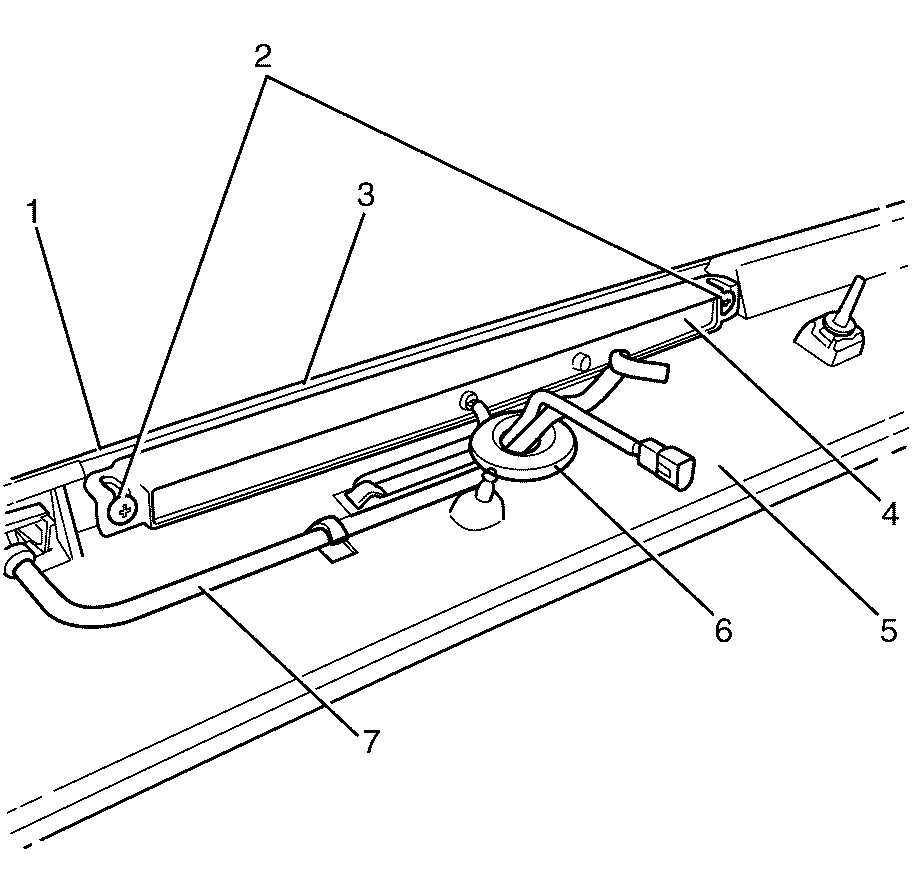
- Remove the high mounted stop lamp to liftgate upper moulding retaining screws (2).
- Peel back adhesive tape (3) from top surface of the high mounted stop lamp (4), leaving the tape attached to moulding in the area under foam gasket (1).
- Remove the high mounted stop lamp (4) from the liftgate upper moulding (5).
- Cut cable tie on grommet (6), and slide washer hose (7) through grommet.
Caution: Refer to Battery Disconnect Caution in the Preface section.

Installation Procedure
- Position the NEW high mounted stop lamp (4) on the liftgate upper moulding (5).
- Re-apply adhesive tape (3) to top surface of the high mounted stop lamp (4).
- Insert hose (7) through grommet (6), and attach new cable tie to grommet.
- Install the high mounted stop lamp (4) to liftgate upper moulding retaining screws (2).
- Install the liftgate upper moulding. Refer to Liftgate Upper Molding Replacement.
- Connect the battery ground cable. Refer to Battery Negative Cable Disconnection and Connection.

Important: Take care to ensure that the plastic rib is correctly positioned relative to visual lamp face when re-applying tape.
Notice: Refer to Fastener Notice in the Preface section.
Tighten
Tighten the bolts to 2 N·m (18 lb in).
