Body Side Window Replacement LWB
Removal Procedure
- Remove the roof drip moulding. Refer to Body Side Roof Drip Molding Replacement.
- Remove the rear quarter inner garnish panel.
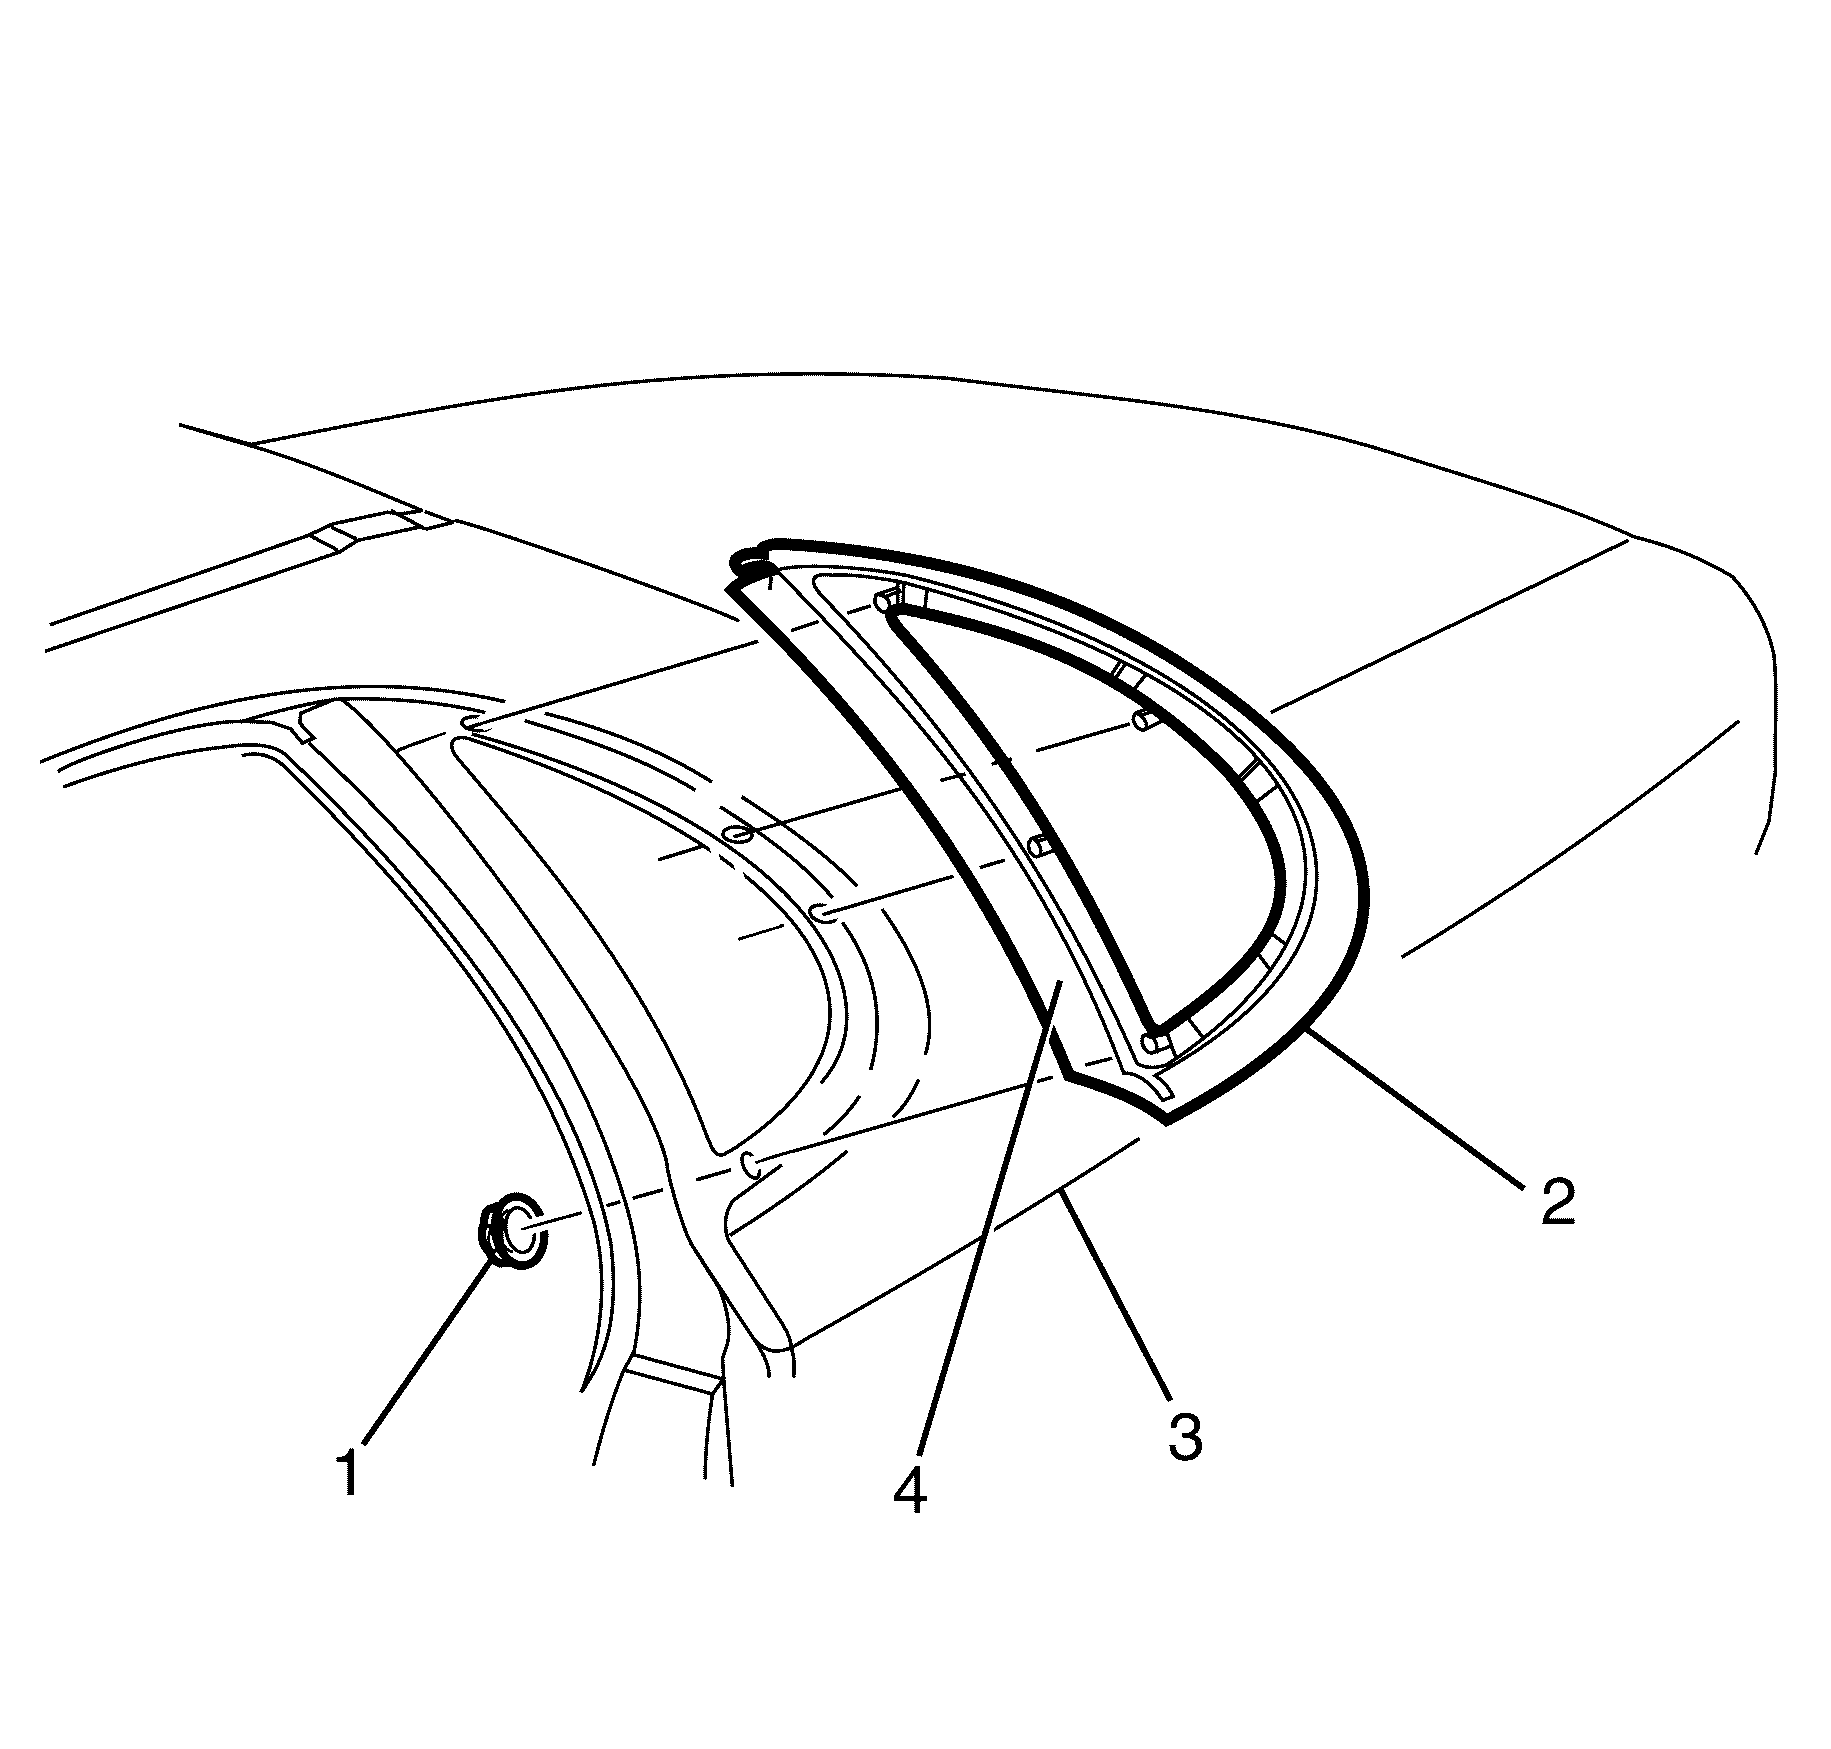
- Remove the rear quarter window retaining nuts (1) from the rear quarter window (2).
- Remove the rear quarter window (2) from the vehicle (3).
- Inspect the rear quarter window seal (4) for excessive wear and/or damage. Replace if necessary.
Caution: When working with any type of glass or sheet metal with exposed or rough edges, wear approved safety glasses and gloves in order to reduce the chance of personal injury.
Caution: If a window is cracked but still intact, crisscross the window with masking tape in order to reduce the risk of damage or personal injury.

Important: Nuts with micro-encapsulated thread sealant are single use parts and must be discarded after removal.
Discard the nuts.
Installation Procedure
- Install the rear quarter window seal (4) to the rear quarter window (2).
- Install the rear quarter window (2) to the vehicle (3).
- Install the rear quarter window retaining nuts (1) to the rear quarter window (2).
- Install the roof drip moulding. Refer to Body Side Roof Drip Molding Replacement.
- Install the rear quarter inner garnish panel. Refer to Quarter Upper Trim Panel Replacement.

Important: Inspect the rear quarter window seal (4) for excessive wear and/or damage. Replace if necessary.
Notice: Refer to Fastener Notice in the Preface section.
Tighten
Tighten to 3 N·m (27 lb in).
Body Side Window Replacement Sportwagon
Removal Procedure
- Install a suitable liftgate brace to the vehicle.
- Remove the rear end trim finish panel. Refer to Rear End Trim Finish Panel Replacement.
- Remove the rear compartment floor panel carpet. Refer to Rear Compartment Floor Panel Carpet Replacement.
- Remove the load floor stationary panel carpet. Refer to Load Floor Stationary Panel Carpet Replacement.
- Remove the load floor front panel carpet. Refer to Load Floor Front Panel Carpet Replacement.
- Remove the quarter inner trim finish panel. Refer to Quarter Inner Trim Finish Panel Replacement.
- Remove the headlining rear trim panel retainer. Refer to Headlining Rear Trim Panel Retainer Replacement.
- Remove the body side window rear garnish moulding. Refer to Body Side Window Rear Garnish Molding Replacement.
- Remove the body lock pillar lower trim panel. Refer to Body Lock Pillar Lower Trim Panel Replacement.
- Remove the body lock pillar trim panel. Refer to Body Lock Pillar Trim Panel Replacement.
- Remove the body lock pillar upper trim panel. Refer to Body Lock Pillar Upper Trim Panel Replacement.
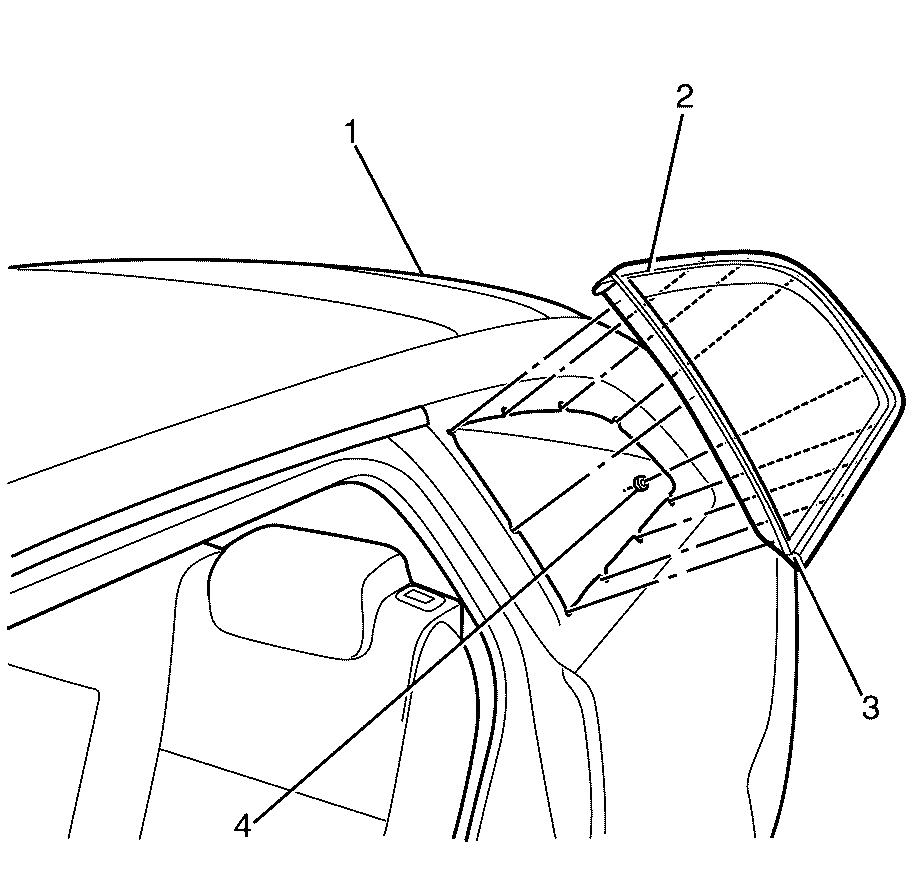
- Remove the body side stationary window to body retaining nuts (4).
- Remove the body side stationary window (2) from the vehicle (1).
- Inspect the body side stationary window seal (3) for excessive wear and/or damage. Replace if necessary.
Important: When a suitable hold open device is being removed or installed, provide alternate support to avoid the possibility of damage to the vehicle or personal injury.

Discard the nuts.
Installation Procedure
- Install the body side stationary window seal (3) to the body side stationary window (2).
- Install the body side stationary window (2) to the vehicle (1).
- Install the NEW body side stationary window to body retaining nuts (4).
- Install the body lock upper pillar trim panel. Refer to Body Lock Pillar Upper Trim Panel Replacement.
- Install the body lock pillar trim panel. Refer to Body Lock Pillar Trim Panel Replacement.
- Install the body lock pillar lower trim panel. Refer to Body Lock Pillar Lower Trim Panel Replacement
- Install the body side window rear garnish moulding. Refer to Body Side Window Rear Garnish Molding Replacement.
- Install the headlining rear trim panel retainer. Refer to Headlining Rear Trim Panel Retainer Replacement.
- Install the quarter inner trim finish panel. Refer to Quarter Inner Trim Finish Panel Replacement.
- Install the load floor front panel carpet. Refer to Load Floor Front Panel Carpet Replacement.
- Install the load floor stationary panel carpet. Refer to Load Floor Stationary Panel Carpet Replacement.
- Install the rear compartment floor panel carpet. Refer to Rear Compartment Floor Panel Carpet Replacement.
- Install the rear end trim finish panel. Refer to Rear End Trim Finish Panel Replacement.
- Remove the suitable liftgate brace to the vehicle.

Important: Inspect the body side stationary window seal (3) for excessive wear and/or damage. Replace if necessary.
Notice: Refer to Fastener Notice in the Preface section.
Tighten
Tighten the nuts to 2 N·m (18 lb in).
Important: When a suitable hold open device is being removed or installed, provide alternate support to avoid the possibility of damage to the vehicle or personal injury.
