Special Tools
Removal Procedure

- Remove the engine assembly. Refer to
Engine Replacement .
- Remove the transmission. Refer to
Transmission Replacement for the Aisin 55-51 LE Transaxle or
Transmission Replacement for the D33 Transaxle.
- Remove the starter motor.
- Install
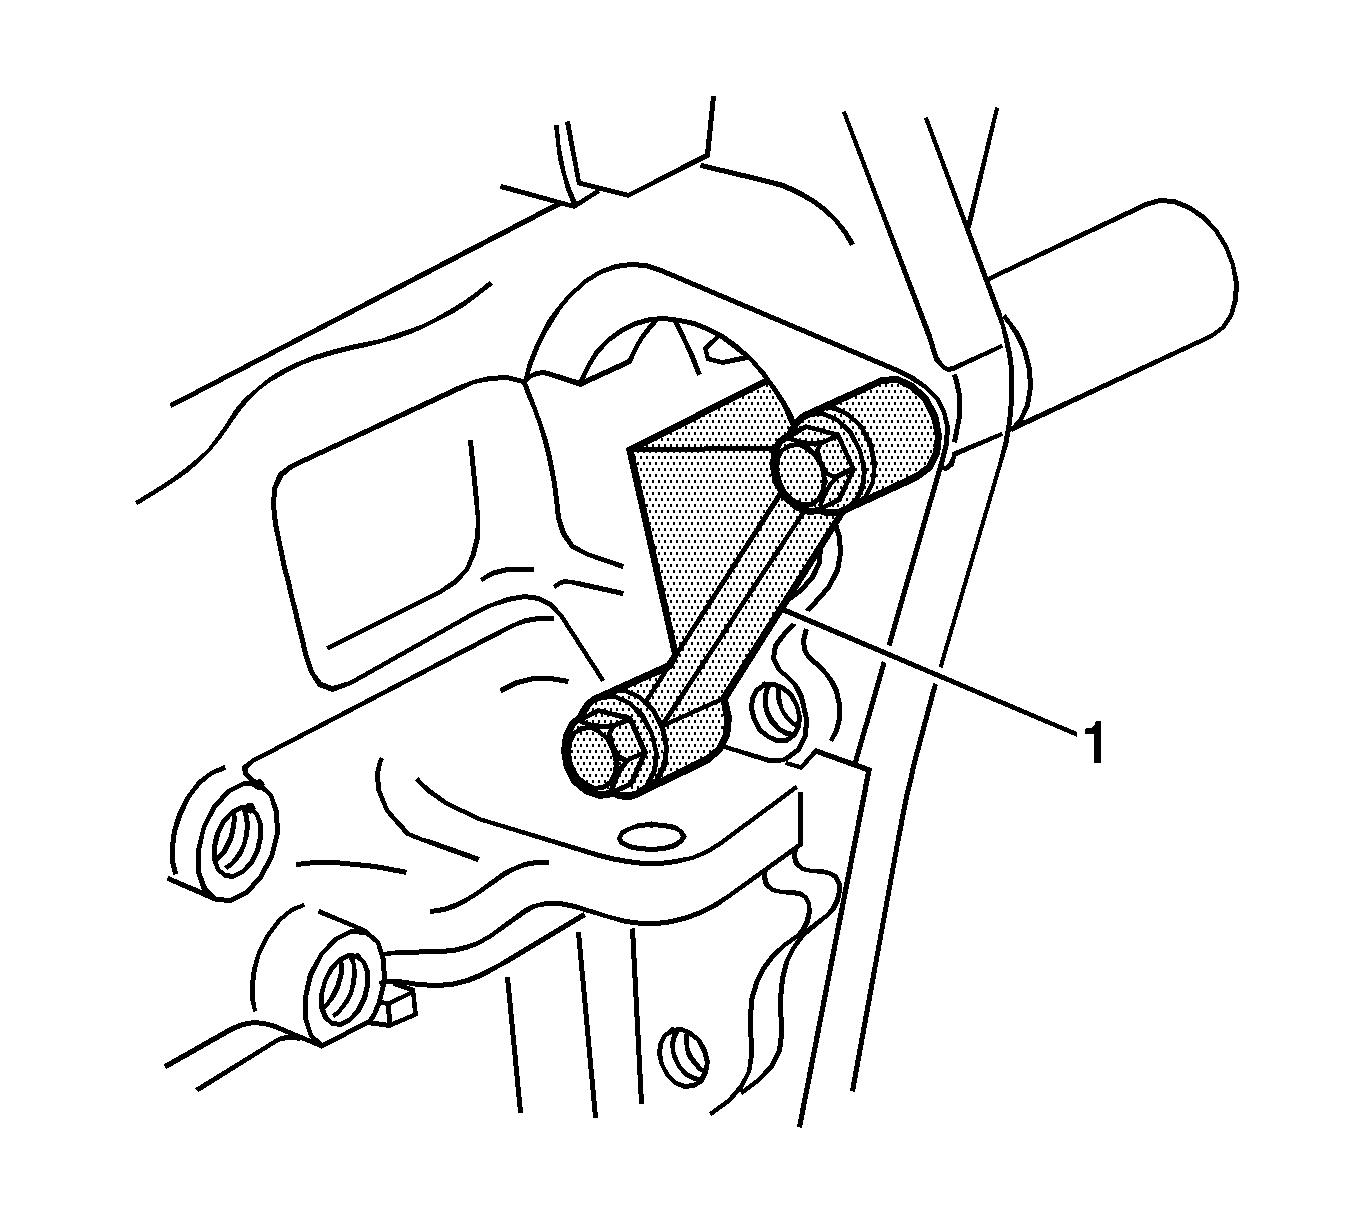
EN 46106 (1) into the starter motor mounting location.

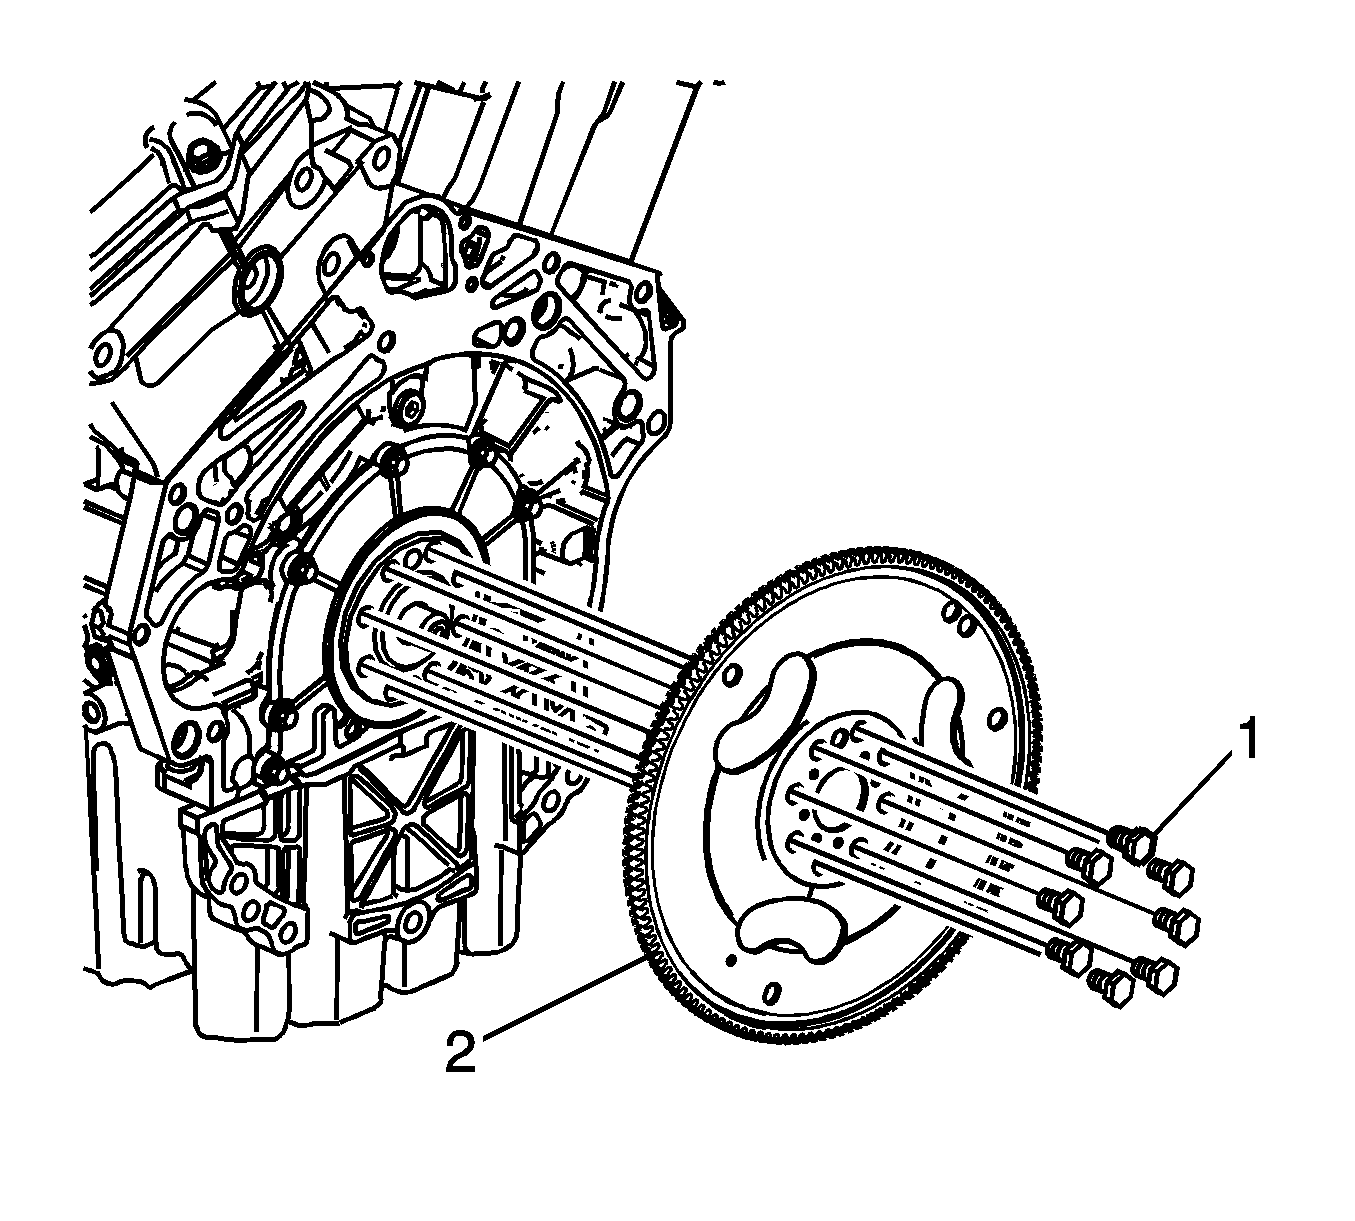
- Loosen the eight flexplate attaching bolts (1).
- Remove the flexplate holding tool.
- Using a suitable permanent marker or paint pen, mark the flexplate assembly (2) to crankshaft relationship.
- Remove the eight flexplate attaching bolts and discard.
- Remove the flexplate assembly.
Inspection Procedure

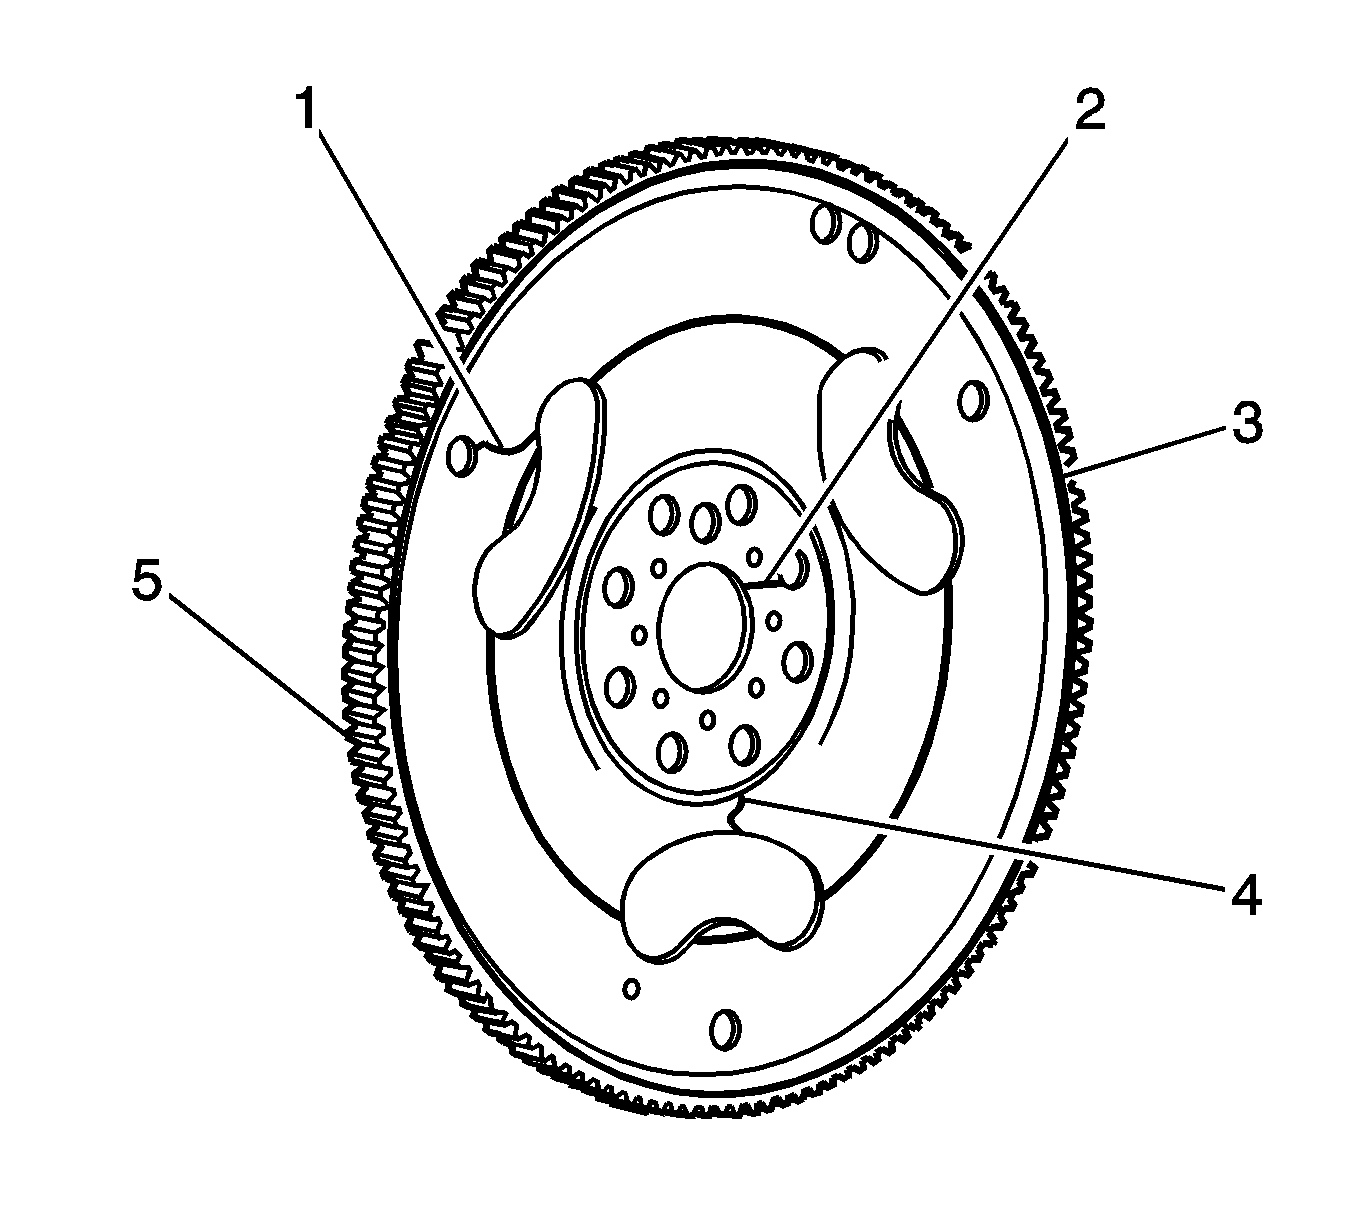
- Inspect the flexplate assembly for the following conditions:
| • | Stress cracks around the flexplate to torque converter mounting bolt hole locations (1). |
| • | Stress cracks around the flexplate to crankshaft mounting bolt hole locations (2 and 4). |
| | Important: Do not repair the welded areas that retain the ring gear to the flexplate. The flexplate must be replaced.
|
| • | Stress cracks around the flexplate to torque converter mounting bolt hole locations (1). |
| • | Damaged or missing ring gear teeth (5). |
Important: The flexplate ring gear is not serviced separately and cannot be repaired. If found to be faulty or damaged, the flexplate assembly must be replaced.
- Replace the flexplate assembly as required.
Installation Procedure

Important: The bolt holes are unevenly spaced to enable flexplate fitment in the one position only.
- Place the flexplate assembly (2) in position on the crankshaft.
- Install new flexplate attaching bolts (1) and hand tighten.

- Install the flexplate holding tool,
EN 46106 (1) into the starter motor mounting location.
Notice: Refer to Fastener Notice in the Preface section.
- Install the flexplate attaching bolts.
Tighten
Tighten the flexplate attaching bolt to 30 N·m (22 lb ft) and turn the bolt another 45 degrees using
KM-470-B .
- Remove the flexplate holding tool.
- Install the starter motor.
- Install the transmission. Refer to
Transmission Replacement For the Aisin 55-51 LE Transaxle or
Transmission Replacement for the D33 Transaxle.
- Install the engine assembly. Refer to
Engine Replacement .


