For 1990-2009 cars only
Special Tools
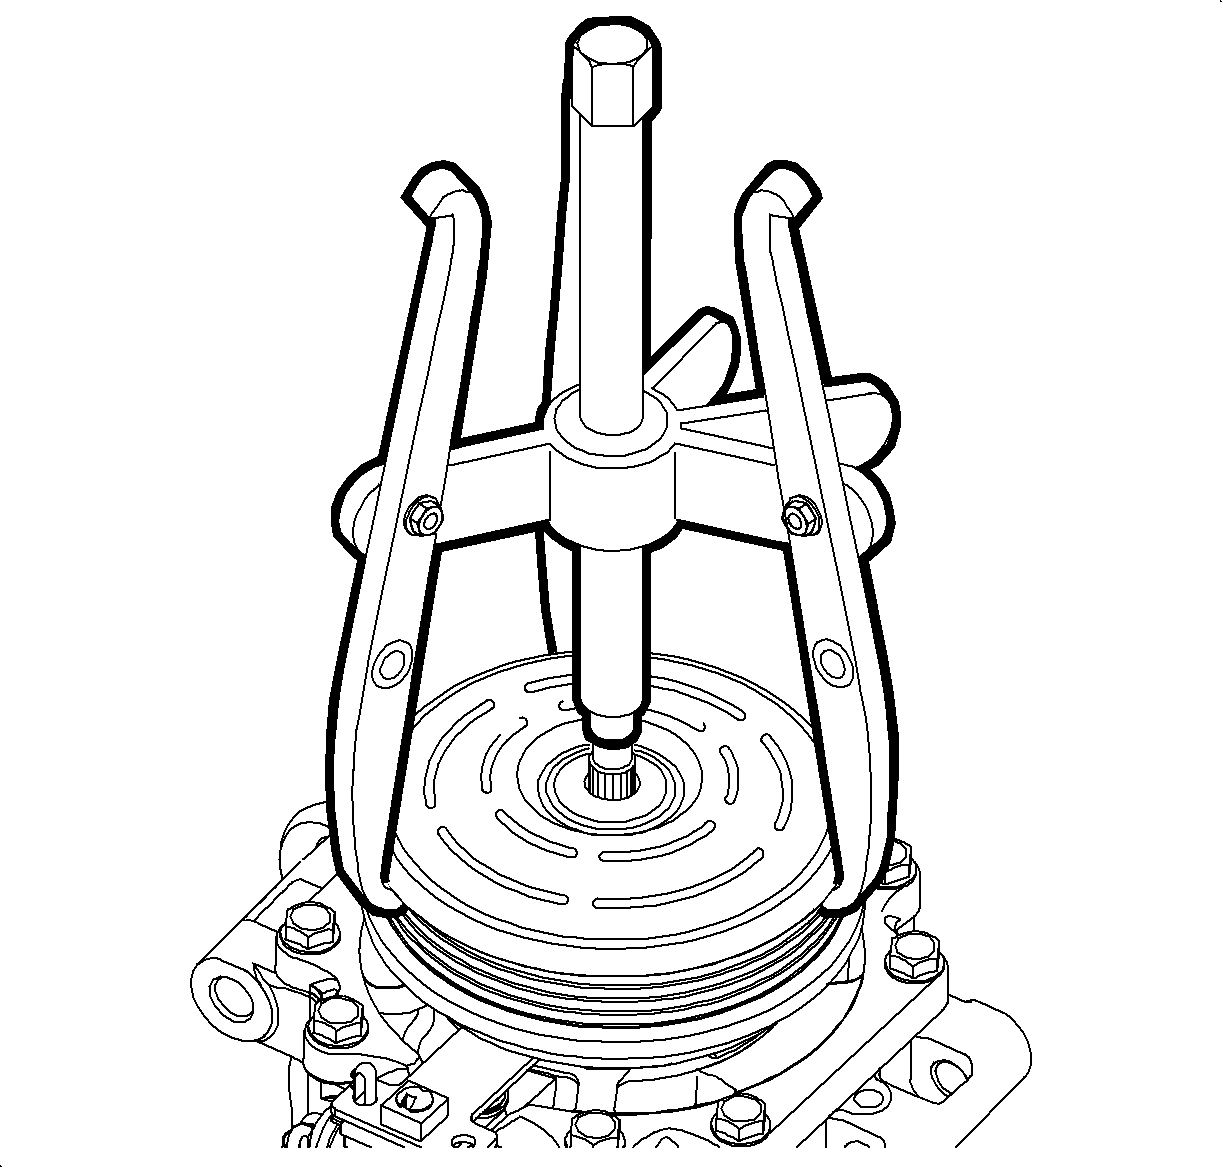
| • | J 25031-A Three Jaw Puller |
| • | J 39400-A Halogen Leak Detector |
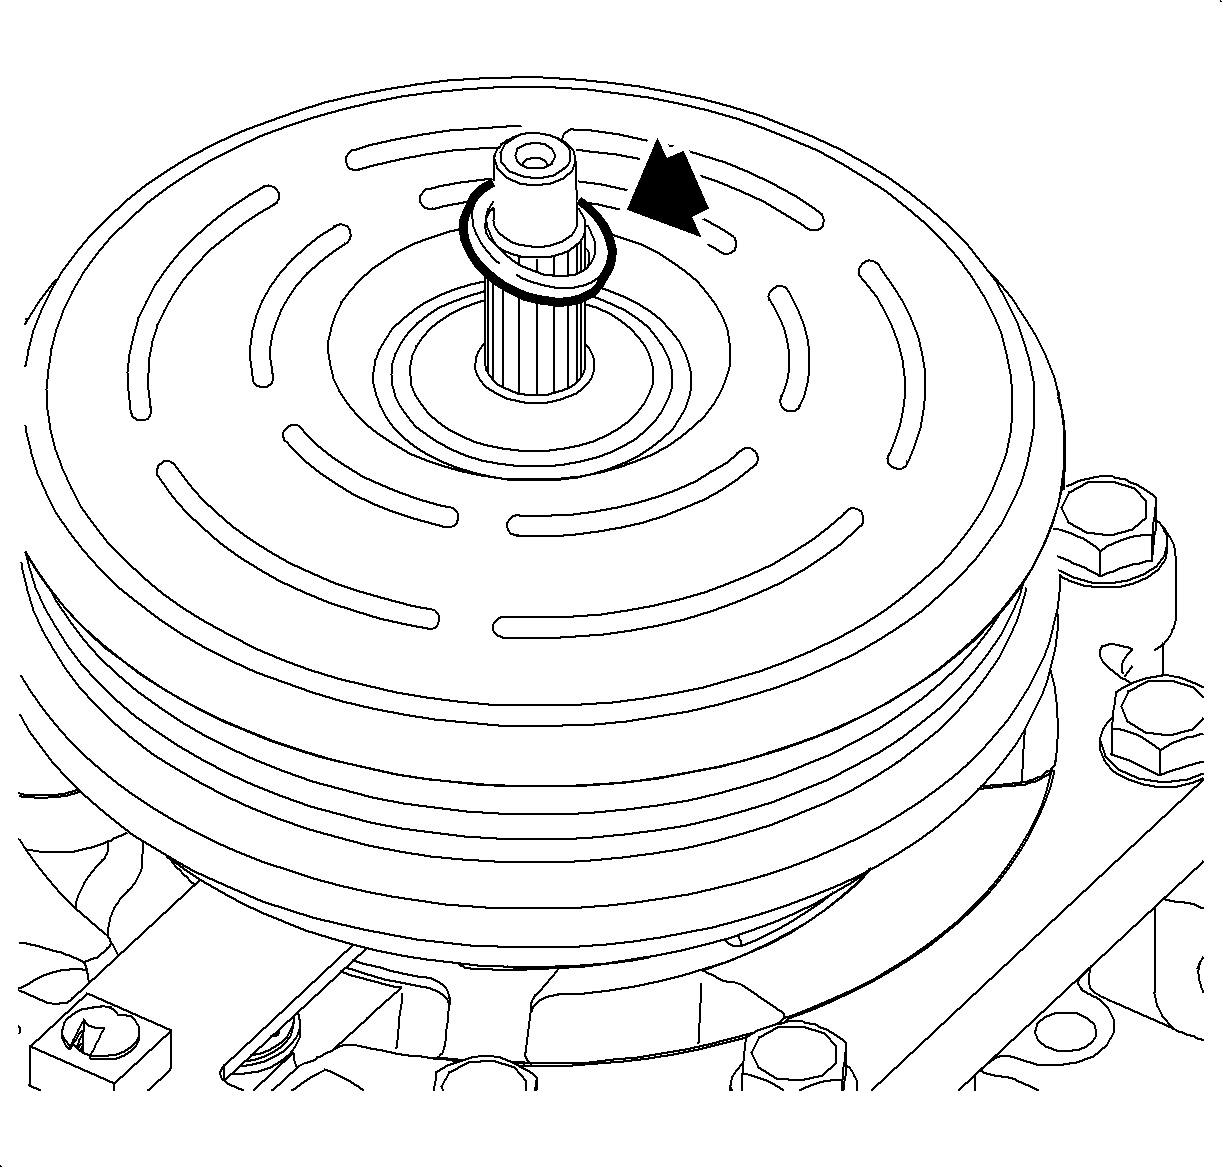
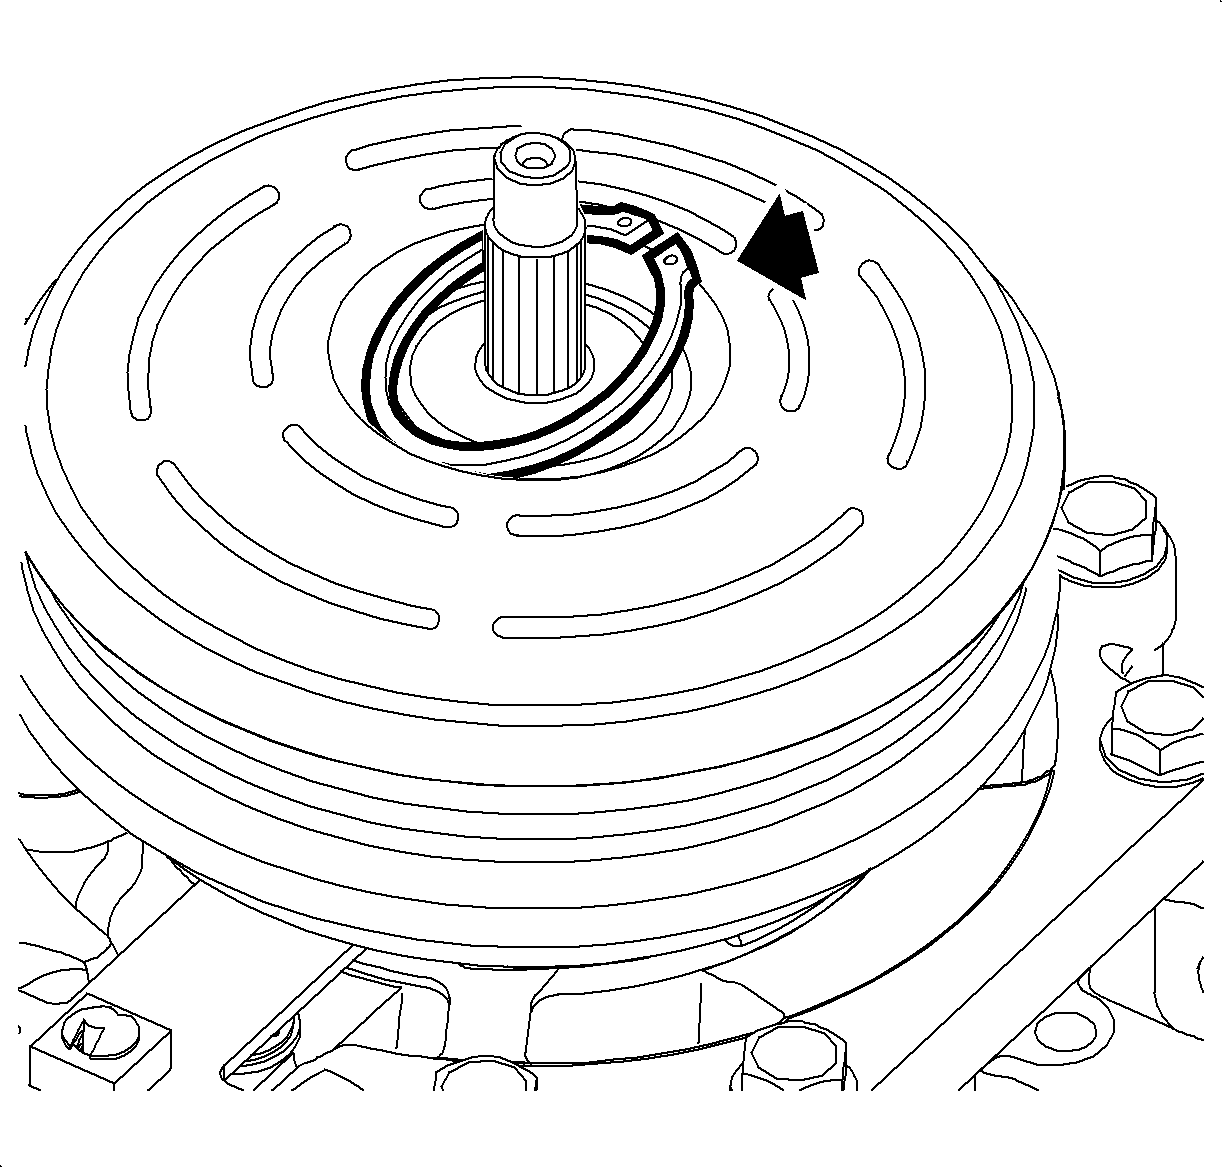
| • | SA9149AC-8 Snap Ring Pliers |
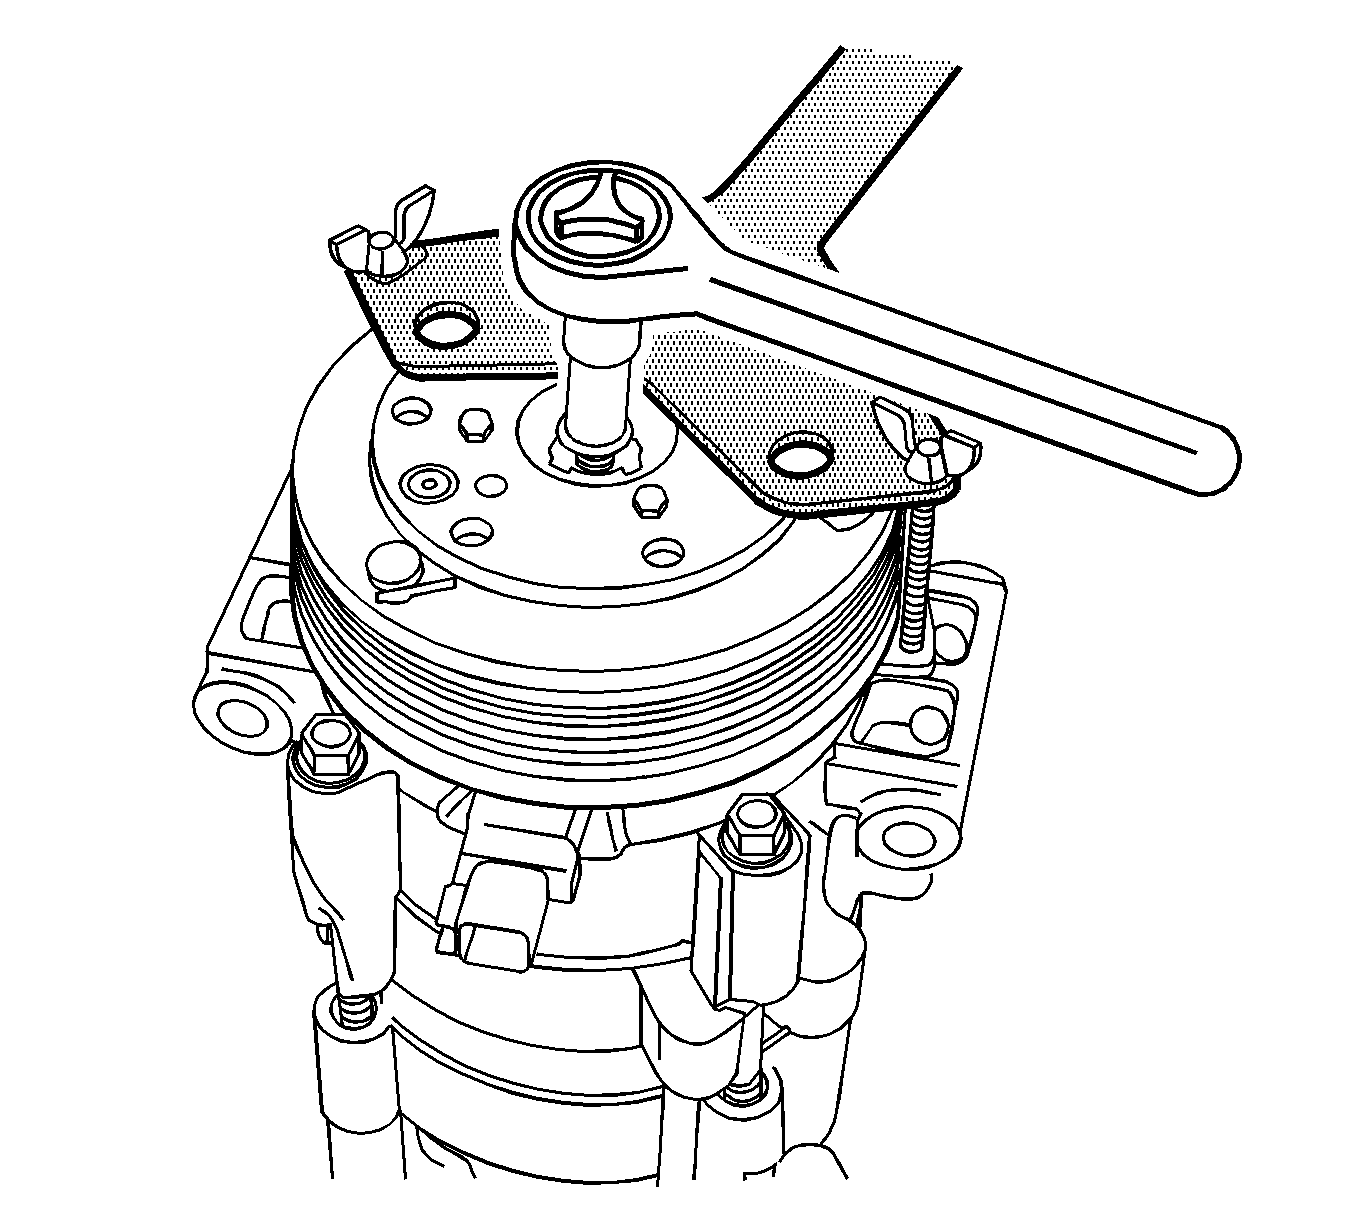
| • | SA9510AC Clutch Drive Plate Holder |
Removal Procedure
- Remove the compressor. Refer to Air Conditioning Compressor Replacement .
- Use SA9510AC to hold the disk and hub assembly. Remove the clutch bolt and drive plate assembly.
- Remove the shim(s).
- Use SA9149AC-8 to remove the pulley snap ring.
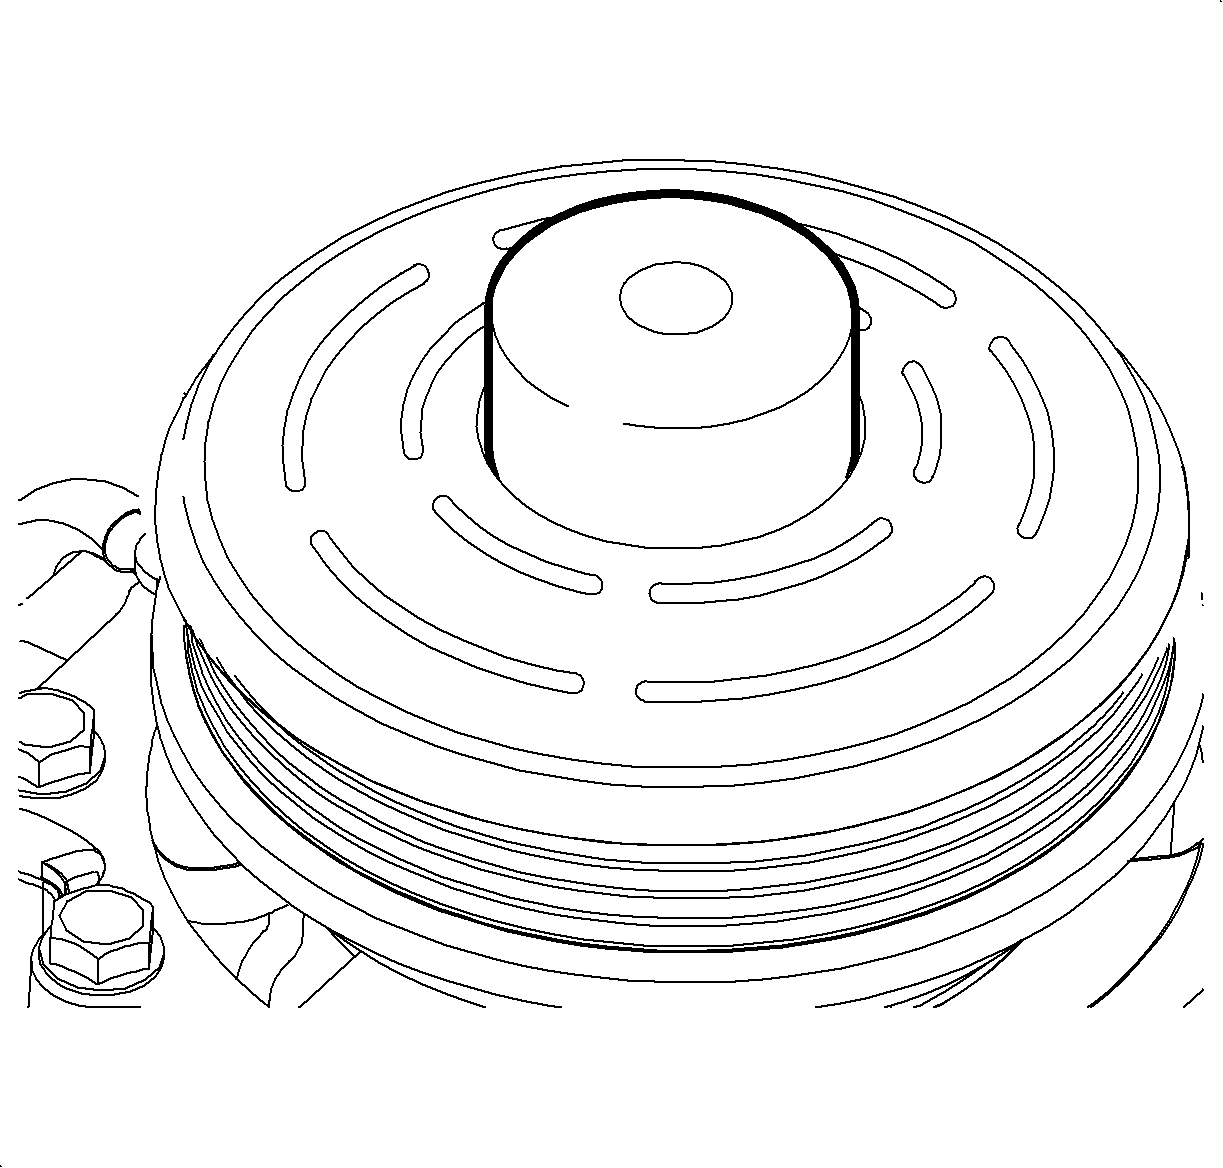
- Grasp the air conditioning (A/C) clutch pulley and bearing assembly and remove from compressor.
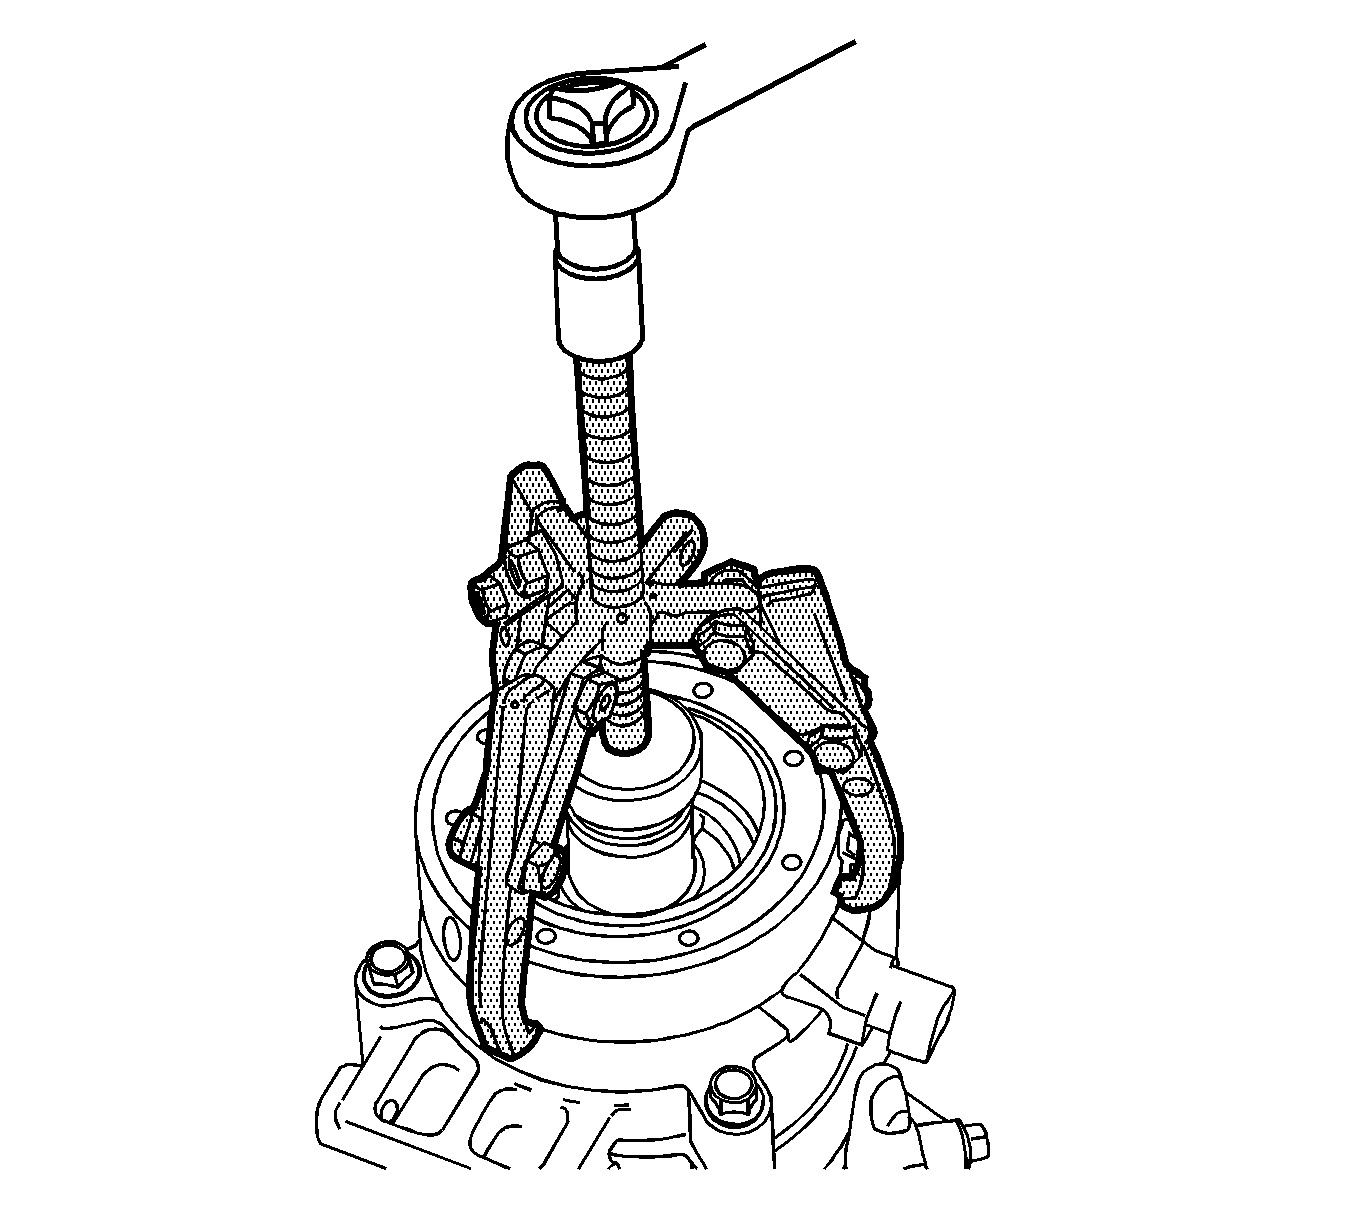
- Use J 25031-A to remove the field coil.
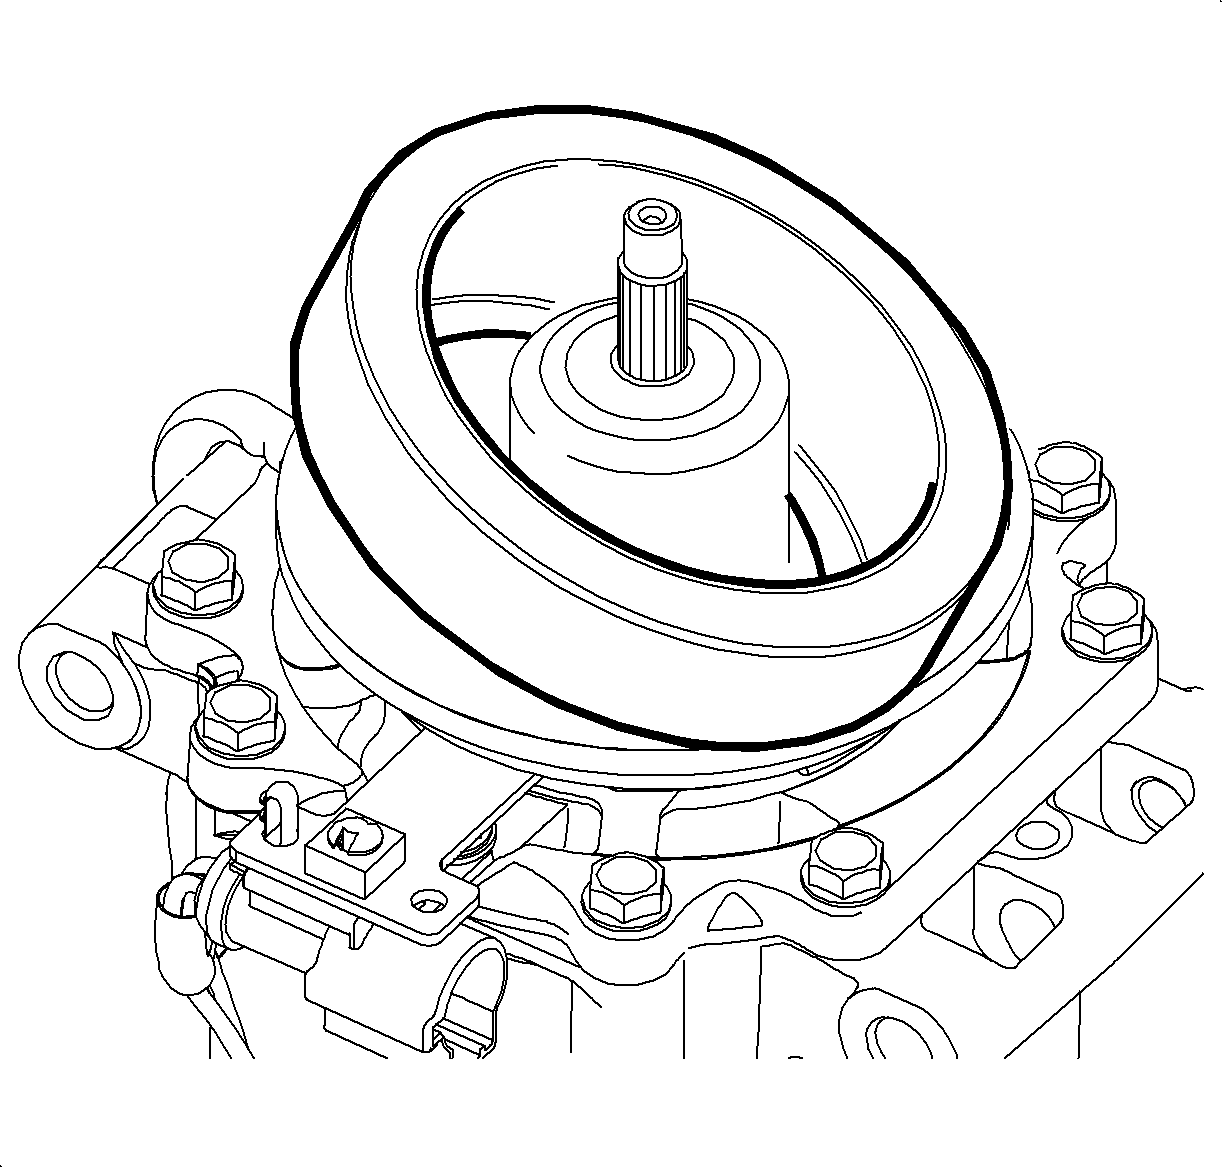
- Remove the A/C clutch field coil.
Installation Procedure
- Clean the mounting surfaces on the A/C clutch field coil and pulley.
- Install the A/C clutch field coil.
- The A/C clutch bearing and pulley is a slip fit on the compressor. If correctly aligned the pulley should slip on easily.
- Use SA9149AC-8 to install the pulley snap ring with the bevel side out.
- Install the shim(s).
- Install the drive plate and bolt.
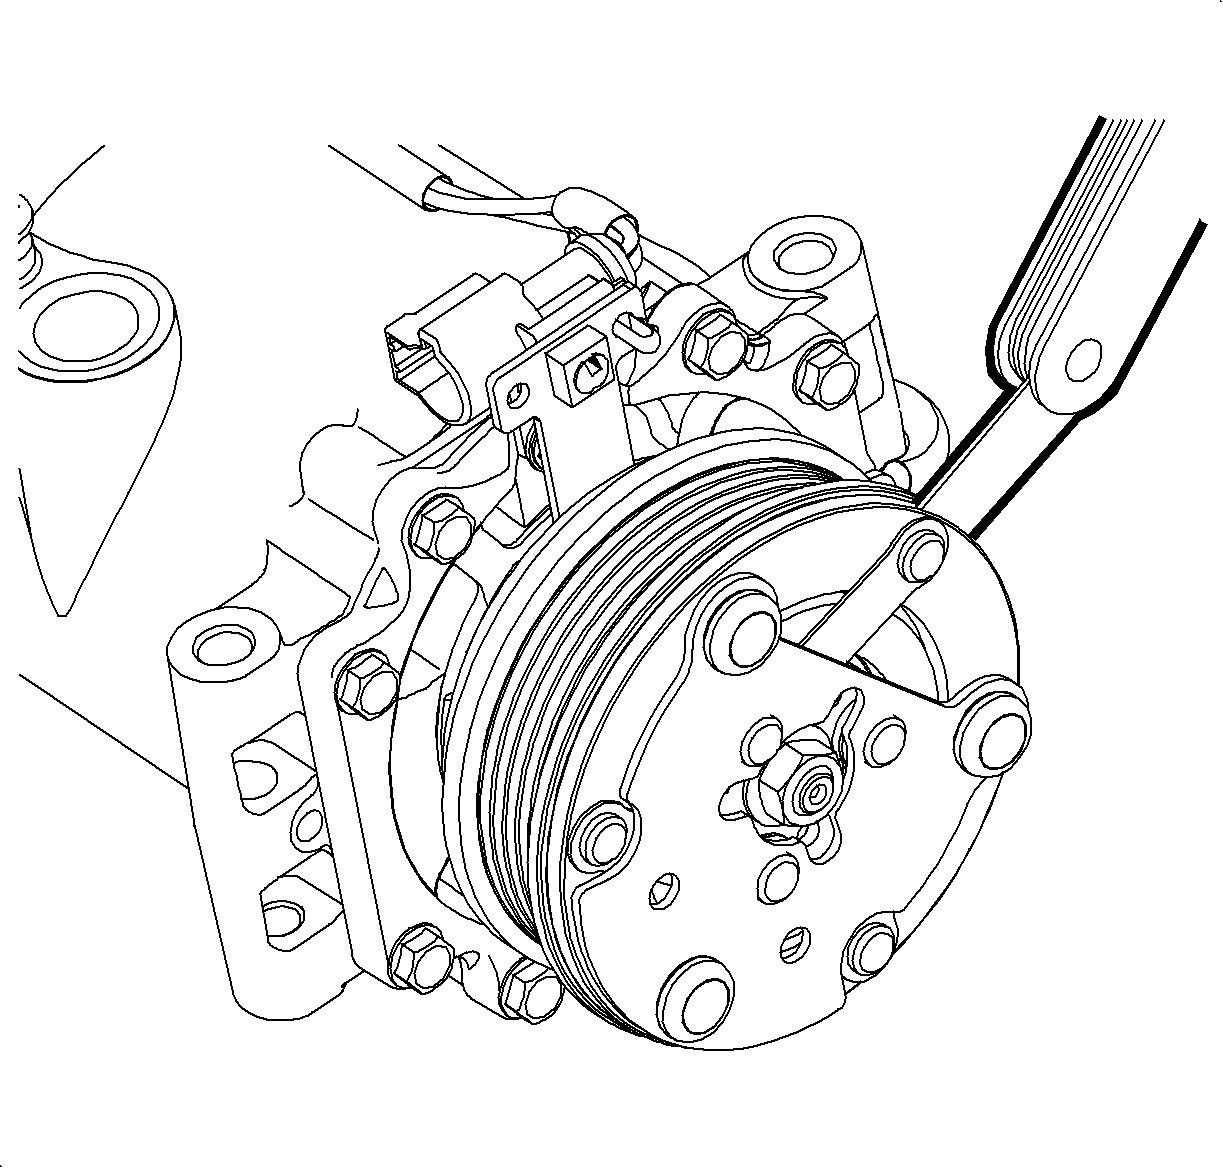
- Using a feeler gage, measure the clearance between the pulley and the drive plate.
- If necessary, adjust the clearance by adding or removing clutch hub shim(s).
- Once the correct air gap is obtained, install a new clutch bolt. Use SA9510AC to hold the disk and hub assembly while tightening.
- Install the compressor. Refer to Air Conditioning Compressor Replacement .
- Evacuate and charge the A/C system. Refer to Refrigerant Recovery and Recharging .
- Test the affected A/C joints for leaks using J 39400-A .



Measure
The clearance should be 0.35-0.65 mm (0.014-0.025 in).
Notice: Refer to Fastener Notice in the Preface section.

Tighten
Tighten the nut to 12 N·m (106 lb in).
Special Tools
| • | J 25031-A Three Jaw Puller |
| • | J 39400-A Halogen Leak Detector |
| • | SA9149AC-8 Snap Ring Pliers |
| • | SA9510AC Clutch Drive Plate Holder |
Removal Procedure
- Remove the compressor. Refer to Air Conditioning Compressor Replacement.
- Use SA9510AC to hold the disk and hub assembly. Remove the clutch bolt and drive plate assembly.
- Remove the shim(s).
- Use SA9149AC-8 to remove the pulley snap ring.
- Grasp the air conditioning (A/C) clutch pulley and bearing assembly and remove from compressor.
- Use J 25031-A to remove the field coil.
- Remove the A/C clutch field coil.


Installation Procedure
- Clean the mounting surfaces on the A/C clutch field coil and pulley.
- Install the A/C clutch field coil.
- The A/C clutch bearing and pulley is a slip fit on the compressor. If correctly aligned the pulley should slip on easily.
- Use SA9149AC-8 to install the pulley snap ring with the bevel side out.
- Install the shim(s).
- Install the drive plate and bolt.
- Using a feeler gage, measure the clearance between the pulley and the drive plate.
- If necessary, adjust the clearance by adding or removing clutch hub shim(s).
- Once the correct air gap is obtained, install a new clutch bolt. Use SA9510AC to hold the disk and hub assembly while tightening.
- Install the compressor. Refer to Air Conditioning Compressor Replacement.
- Evacuate and charge the A/C system. Refer to Refrigerant Recovery and Recharging.
- Test the affected A/C joints for leaks using J 39400-A .


Measure
The clearance should be 0.35-0.65 mm (0.014-0.025 in).
Caution: Refer to Fastener Caution in the Preface section.

Tighten the nut to 12 N·m (106 lb in).
