Air Conditioning Compressor Replacement LAT/LE5
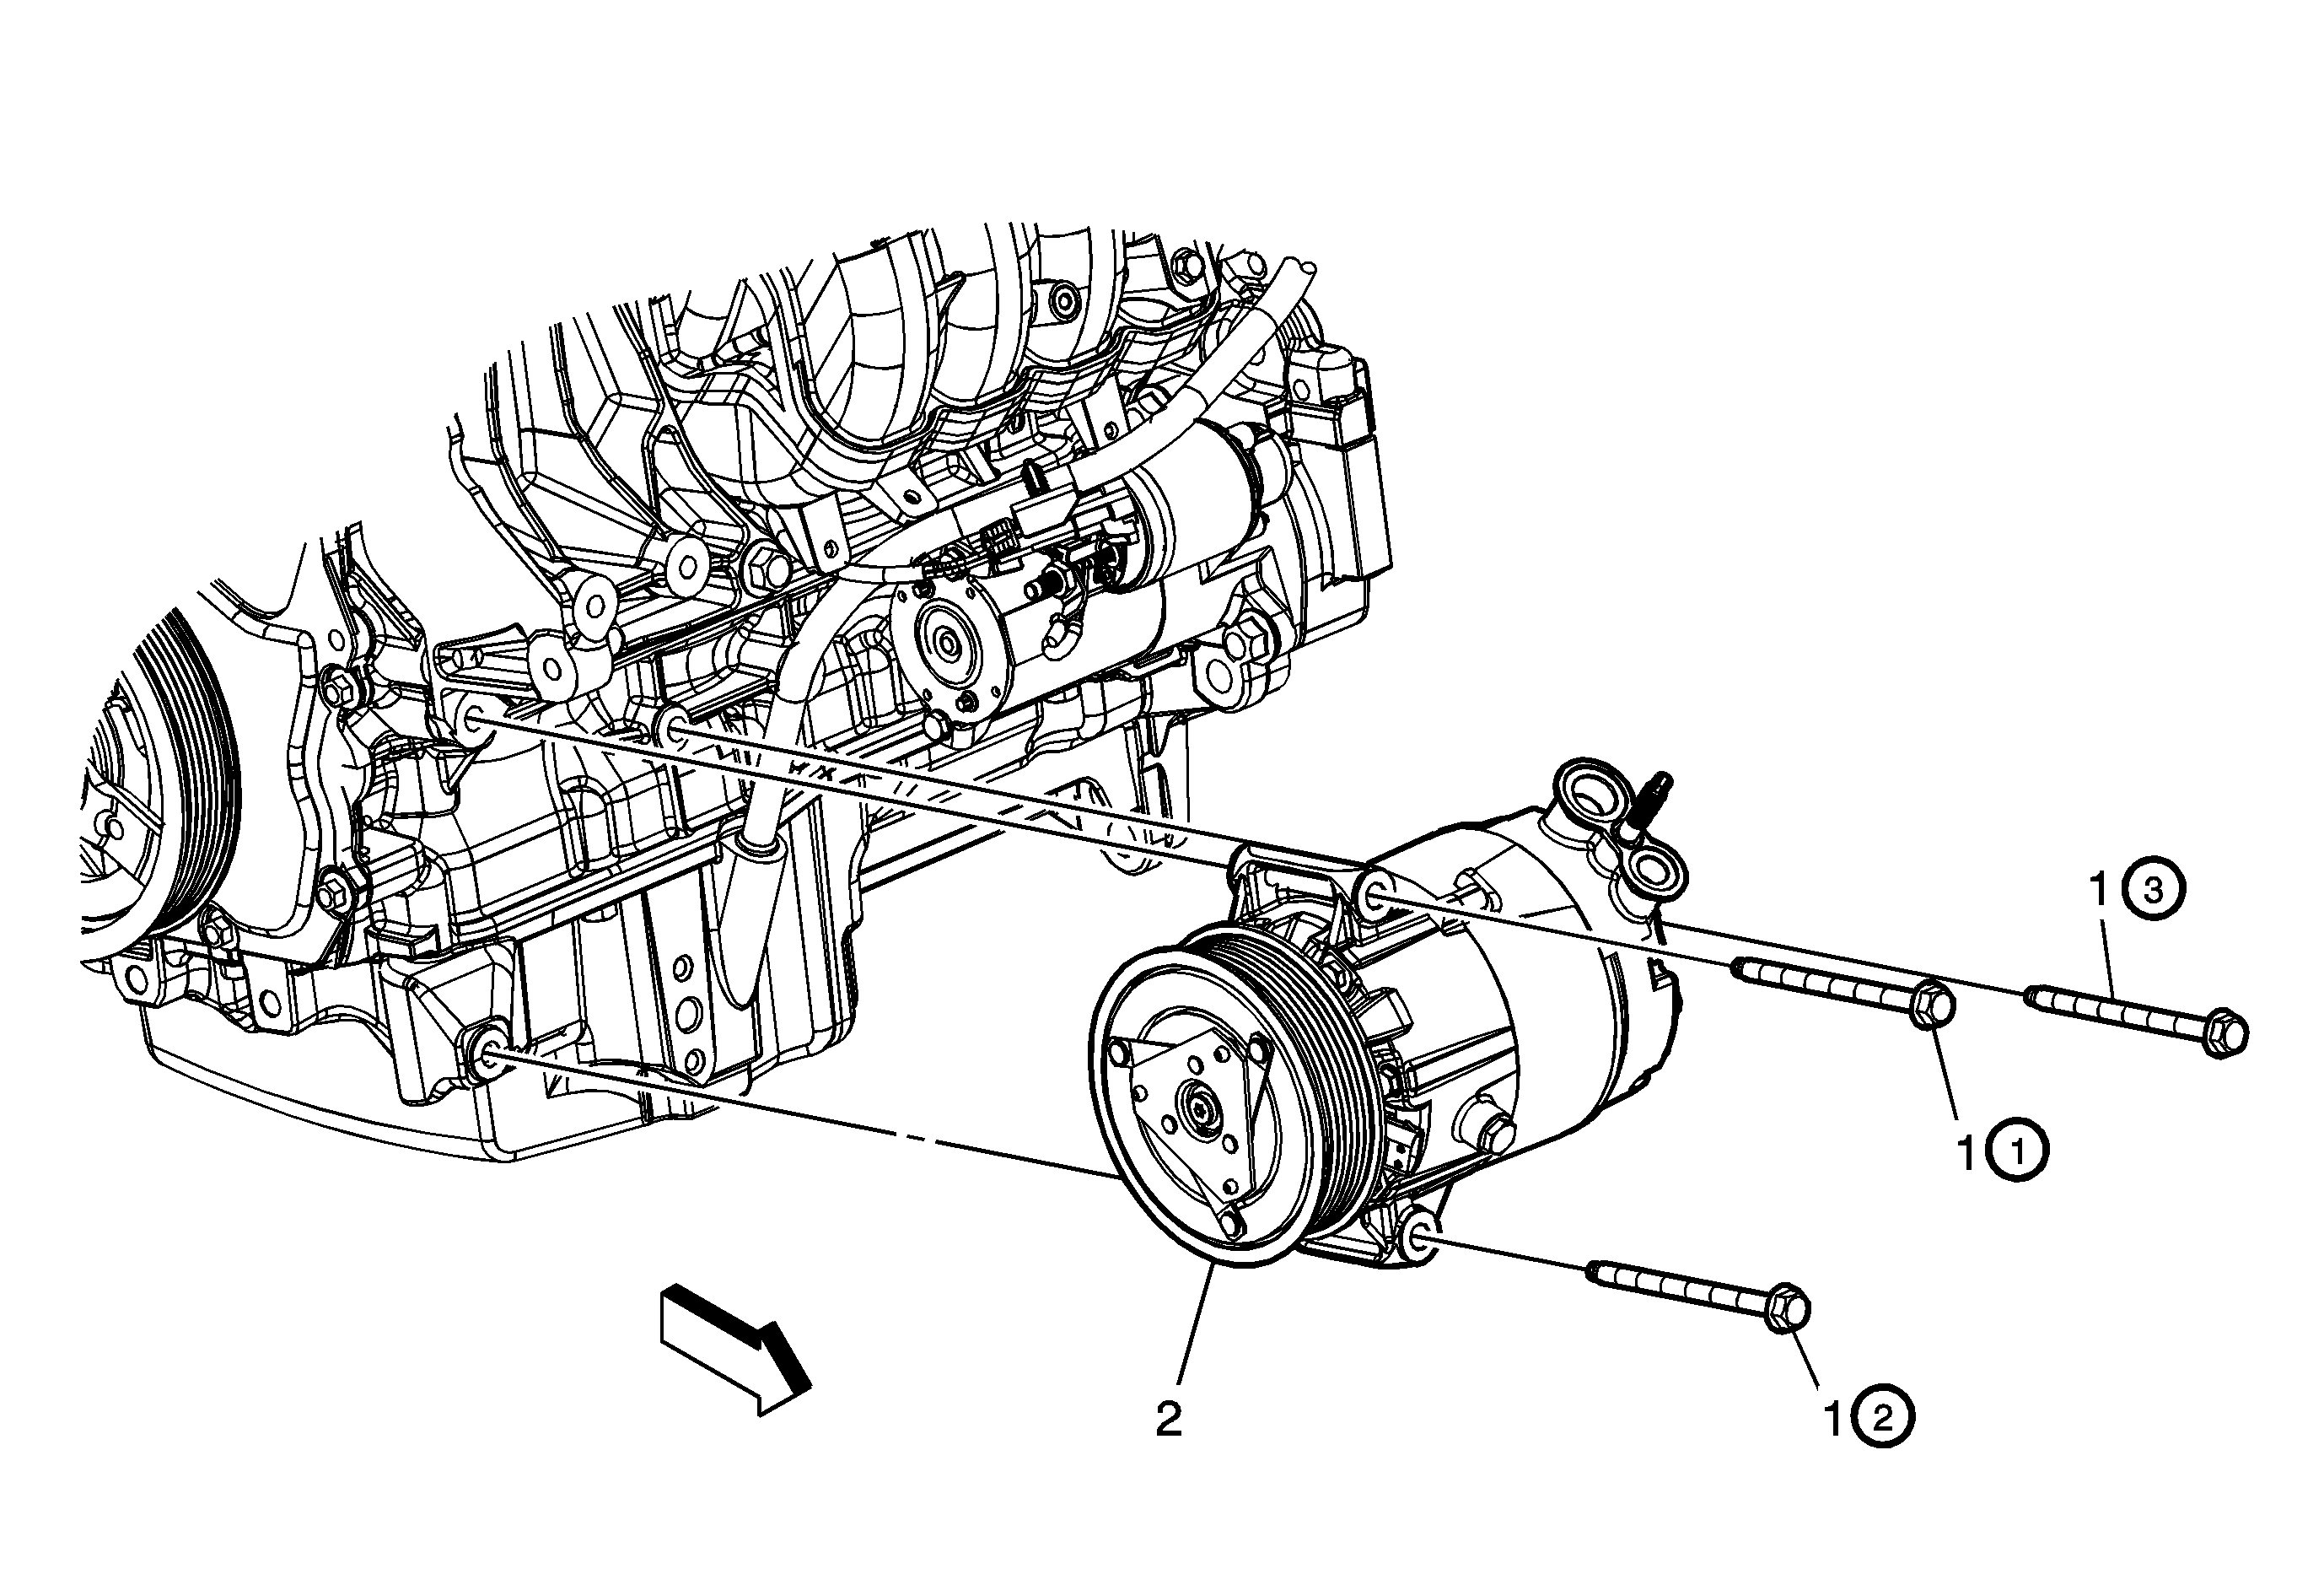
Callout | Component Name | ||||
|---|---|---|---|---|---|
Preliminary Procedures
| |||||
1 | A/C Compressor Bolt (Qty: 3) Notice: Refer to Fastener Notice in the Preface section. TIP:
Tighten | ||||
2 | A/C Compressor Assembly Procedure
Special ToolsJ 39400 Electronic Halogen Leak Detector | ||||
Air Conditioning Compressor Replacement LY7
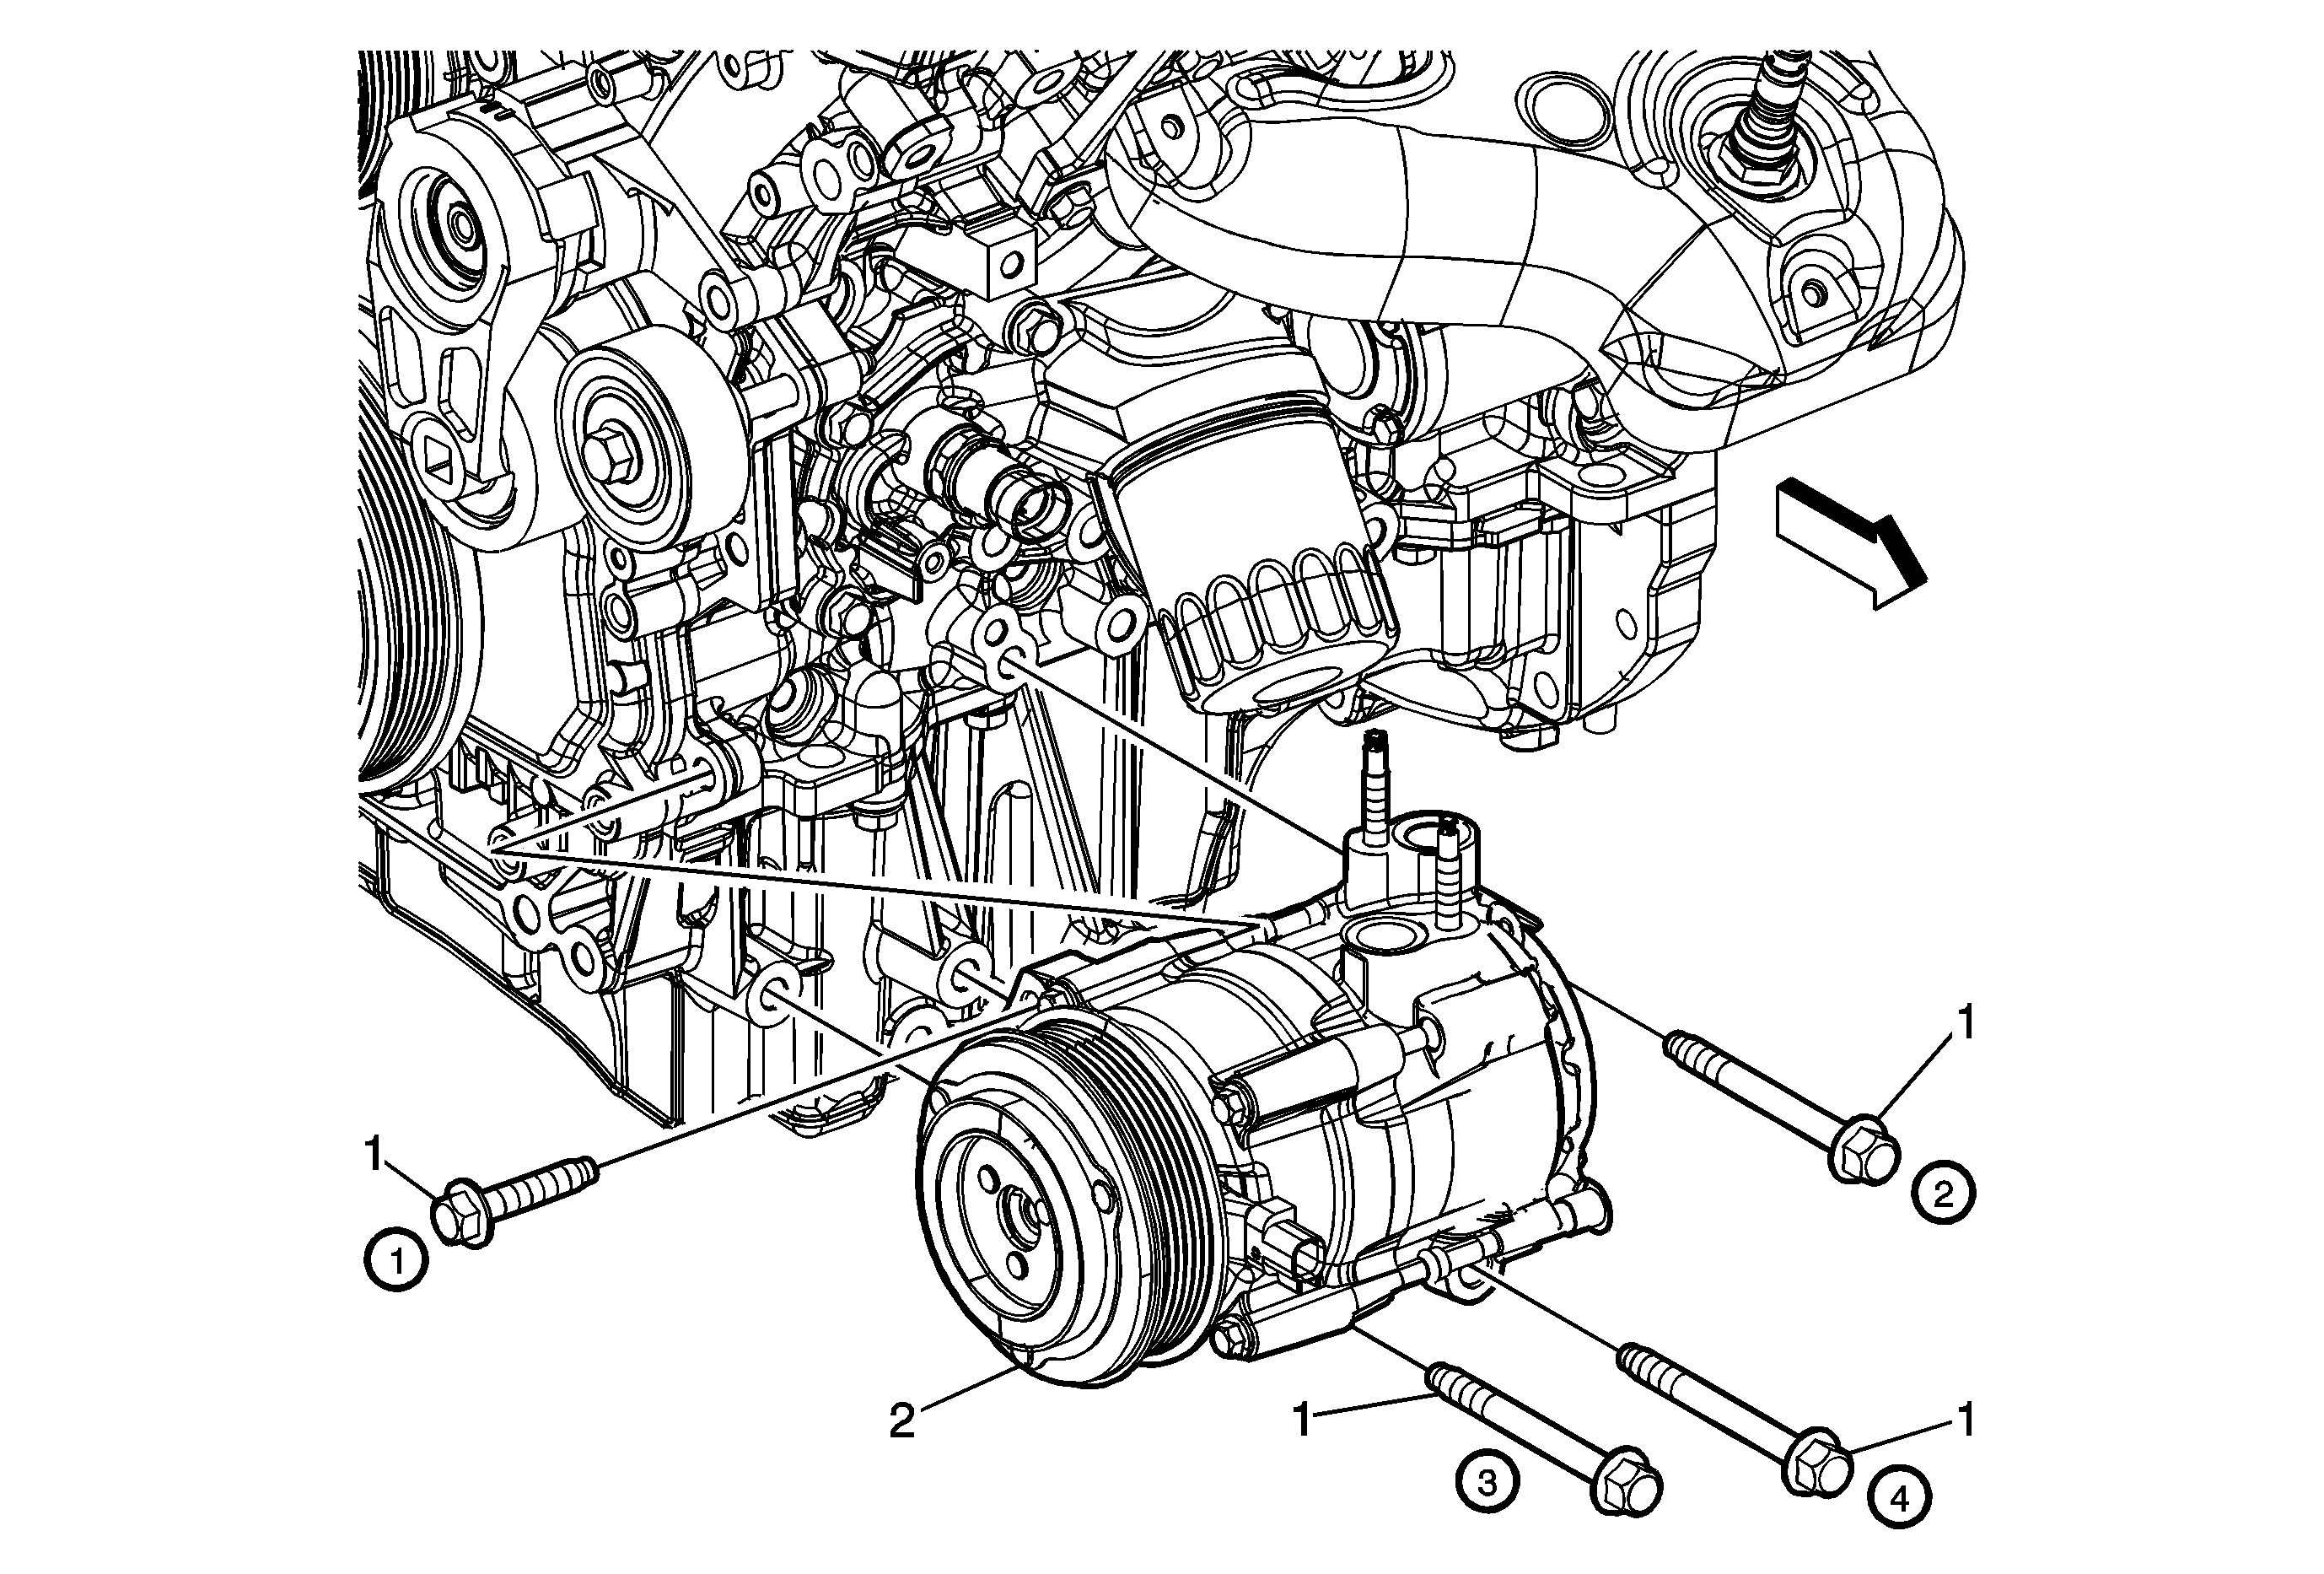
Callout | Component Name | ||||
|---|---|---|---|---|---|
Preliminary Procedures
| |||||
1 | A/C Compressor Bolt (Qty: 4) Notice: Refer to Fastener Notice in the Preface section. TIP:
Tighten | ||||
2 | A/C Compressor Assembly Procedure
Special ToolsJ 39400 Electronic Halogen Leak Detector | ||||
Air Conditioning Compressor Replacement LZ4-Second Design
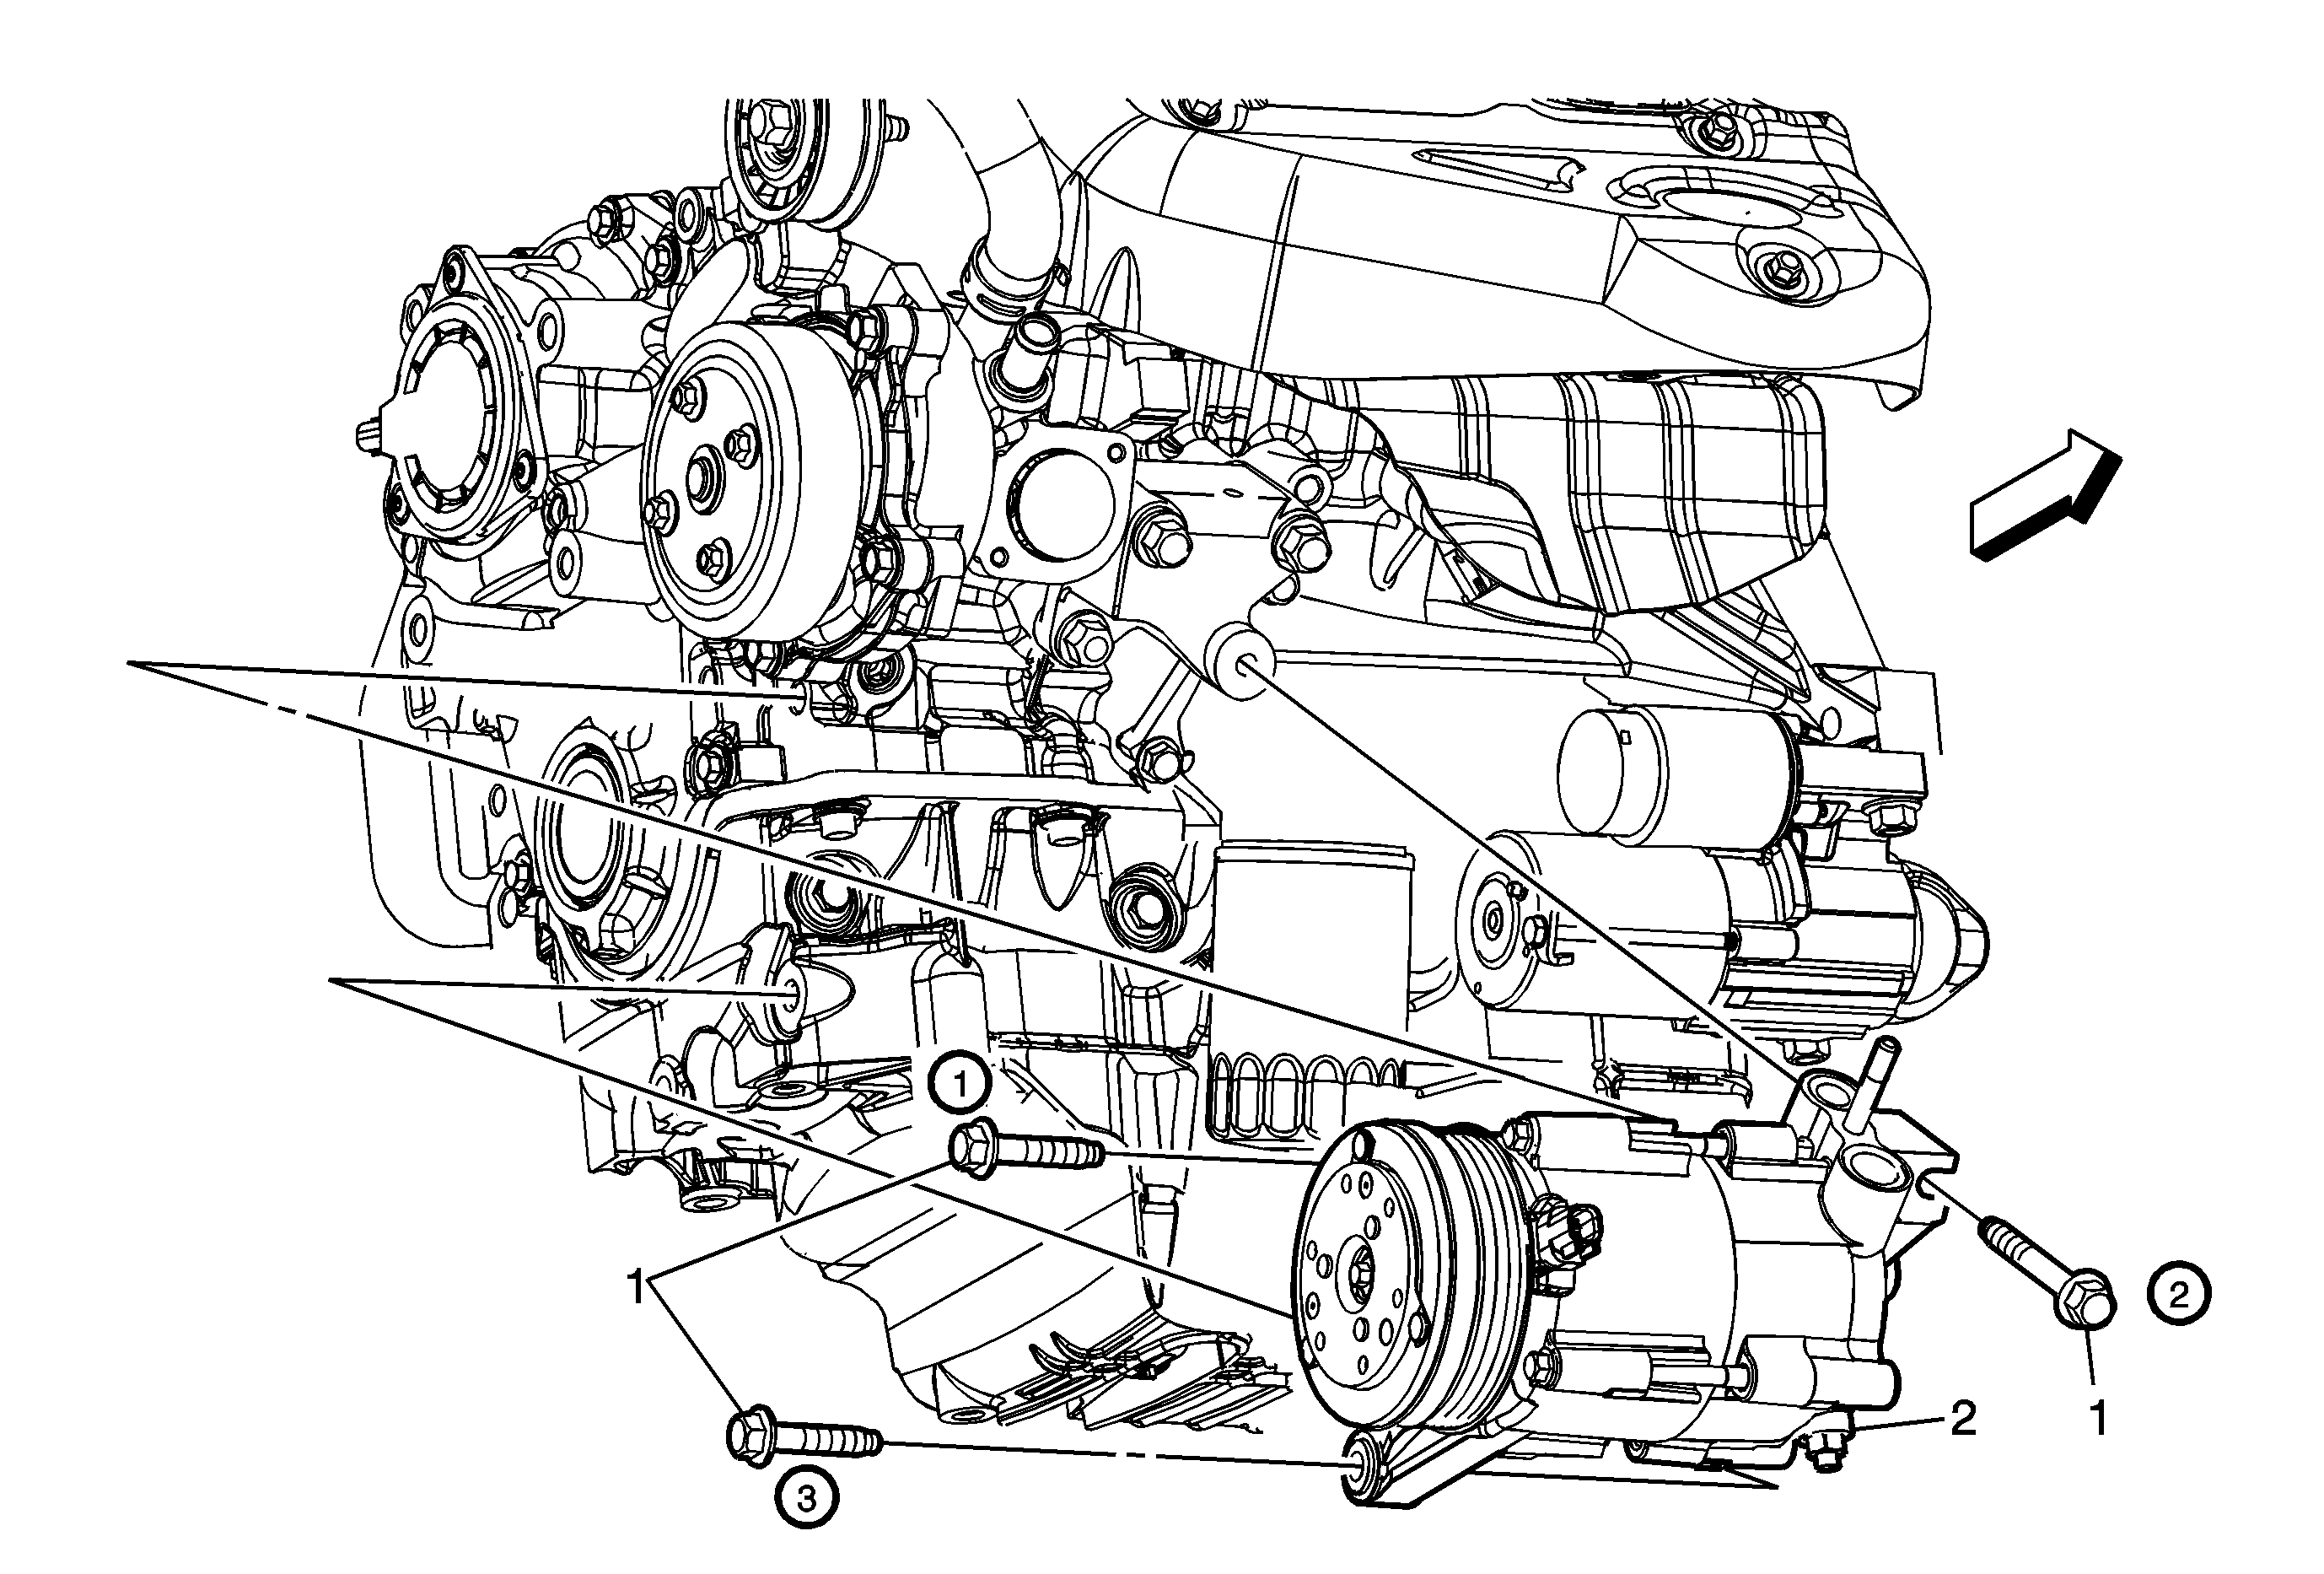
Callout | Component Name |
|---|---|
Preliminary Procedures
| |
1 | A/C Compressor Bolt (Qty: 3) Notice: Refer to Fastener Notice in the Preface section. Procedure
Tighten |
2 | A/C Compressor Assembly Procedure
Tip Special ToolsJ 39400 Electronic Halogen Leak Detector |
Air Conditioning Compressor Replacement LZ4-First Design
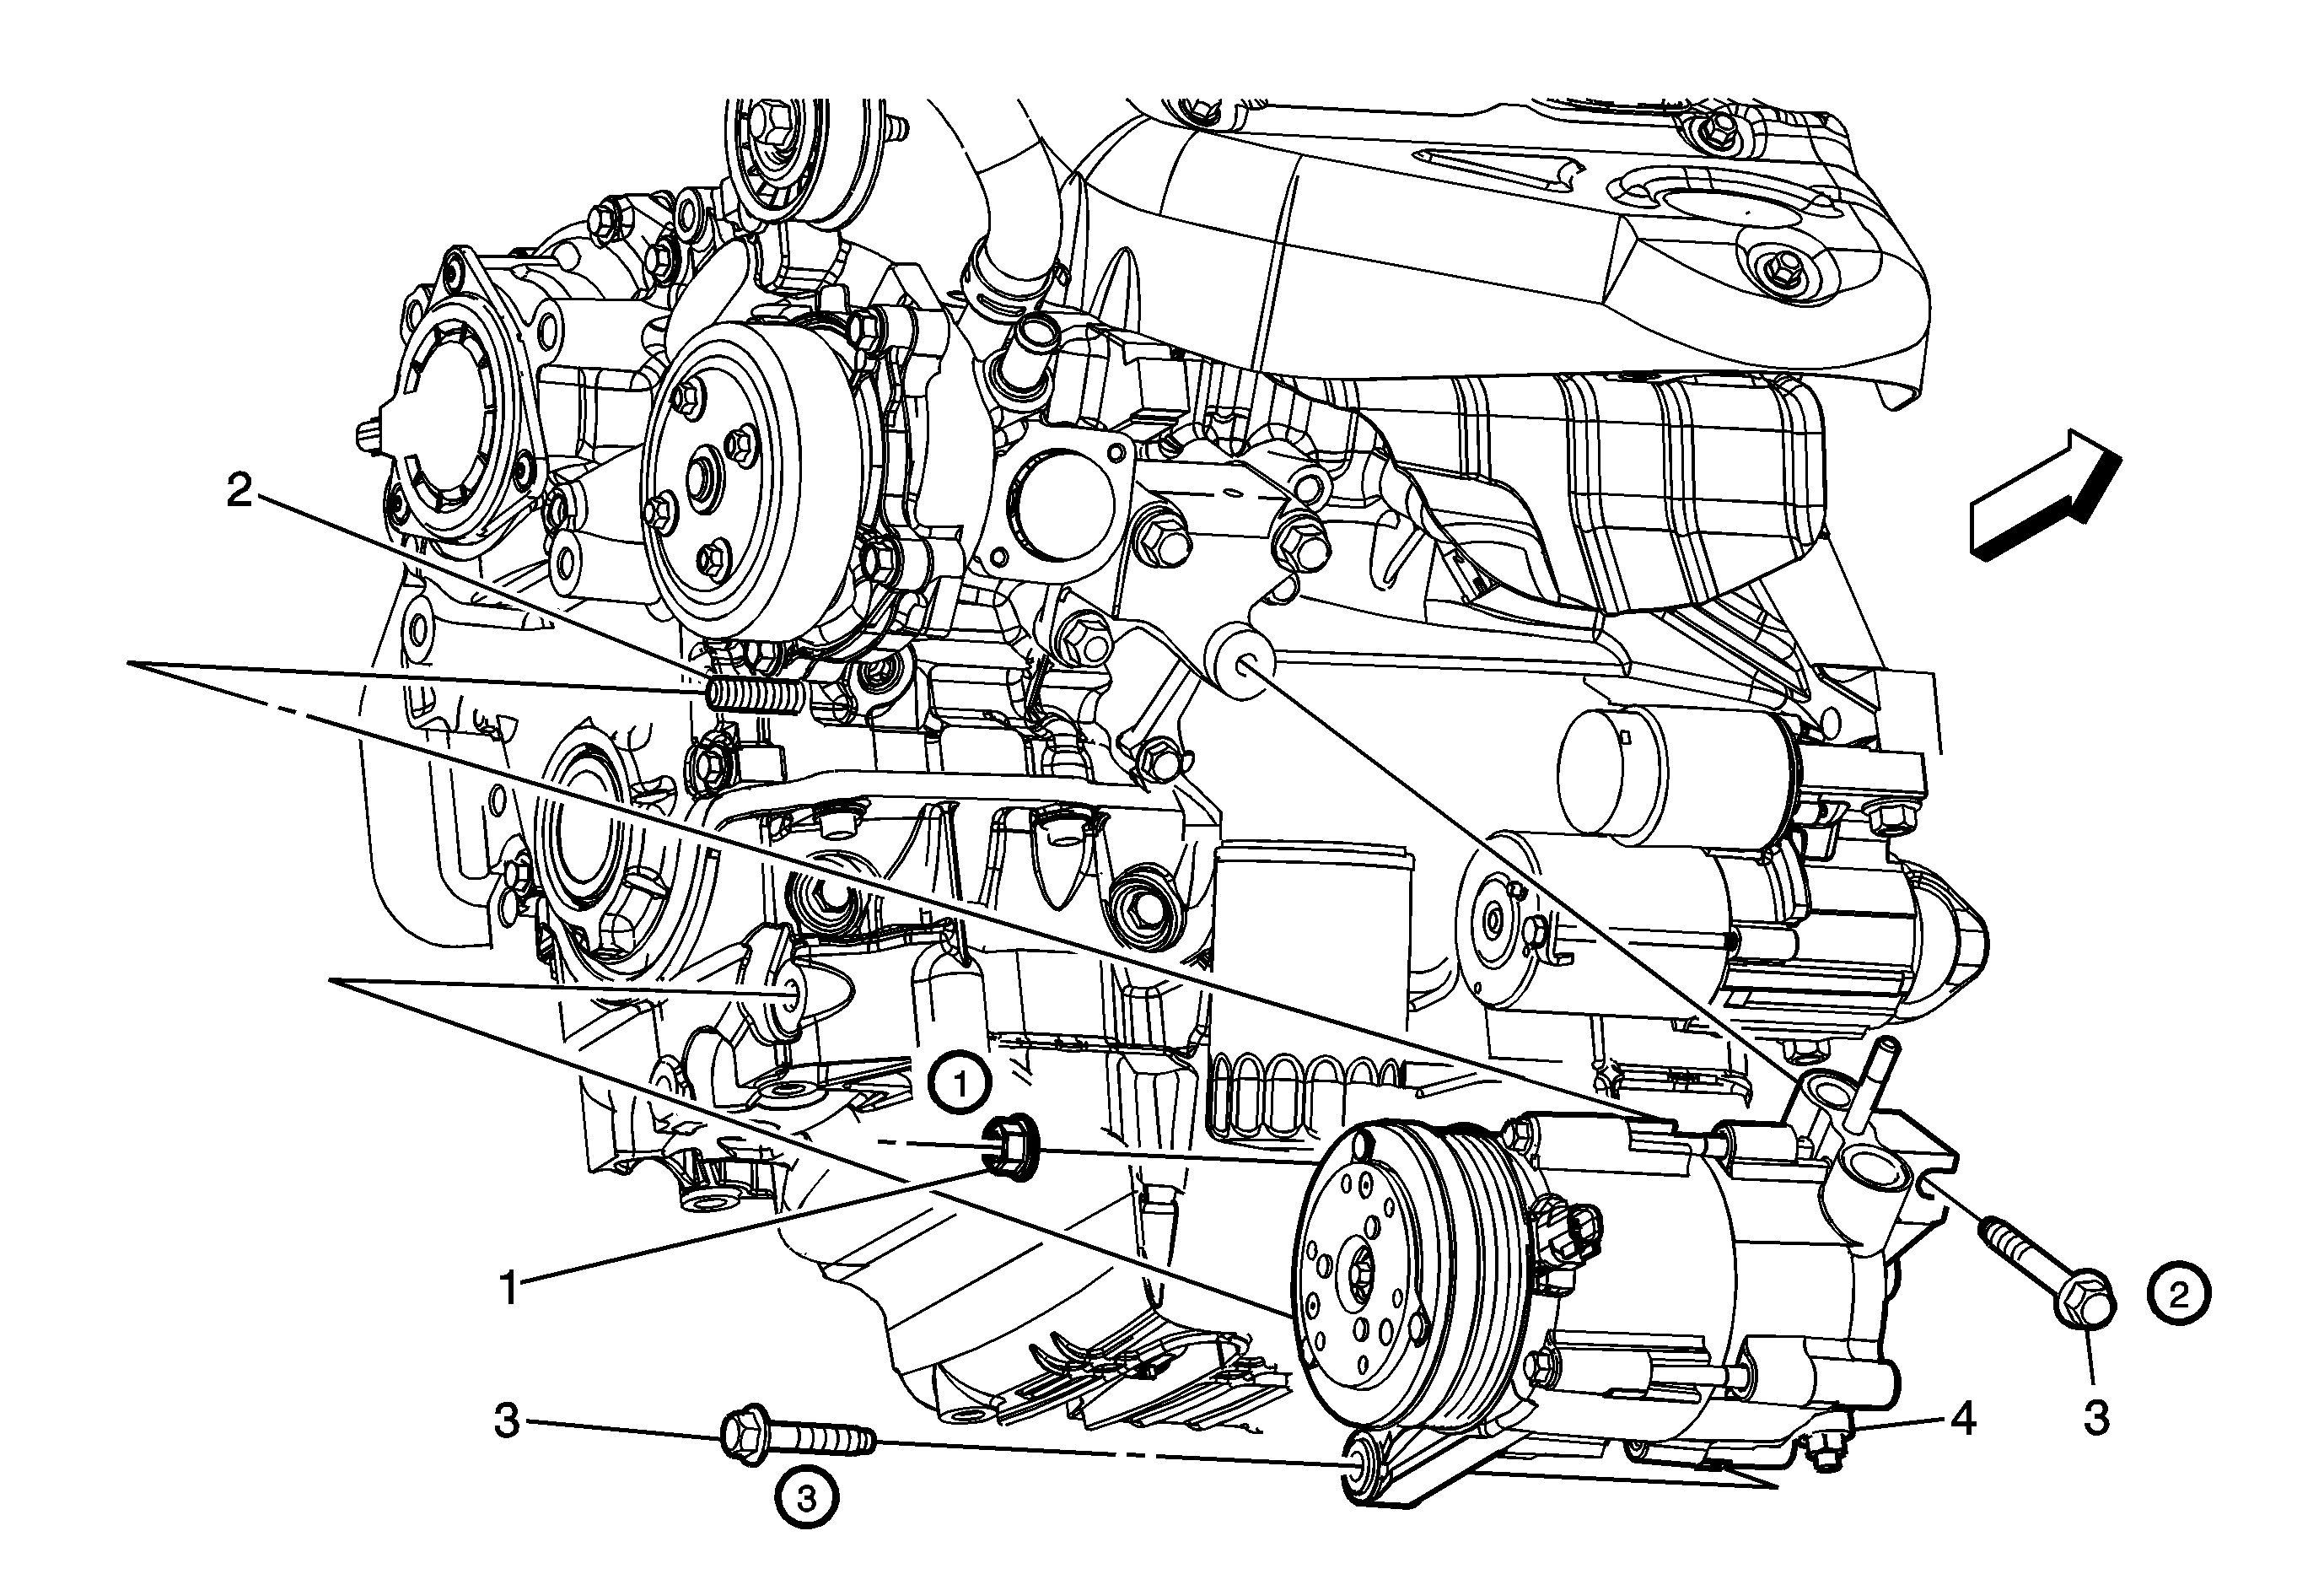
Callout | Component Name |
|---|---|
Preliminary Procedures
| |
1 | A/C Compressor Nut Notice: Refer to Fastener Notice in the Preface section. Tip Tighten |
2 | A/C Compressor Stud Tighten |
3 | A/C Compressor Bolt (Qty: 2) Procedure
Tighten |
4 | A/C Compressor Assembly Procedure
Tip Special ToolsJ 39400 Electronic Halogen Leak Detector |
Air Conditioning Compressor Replacement HP5
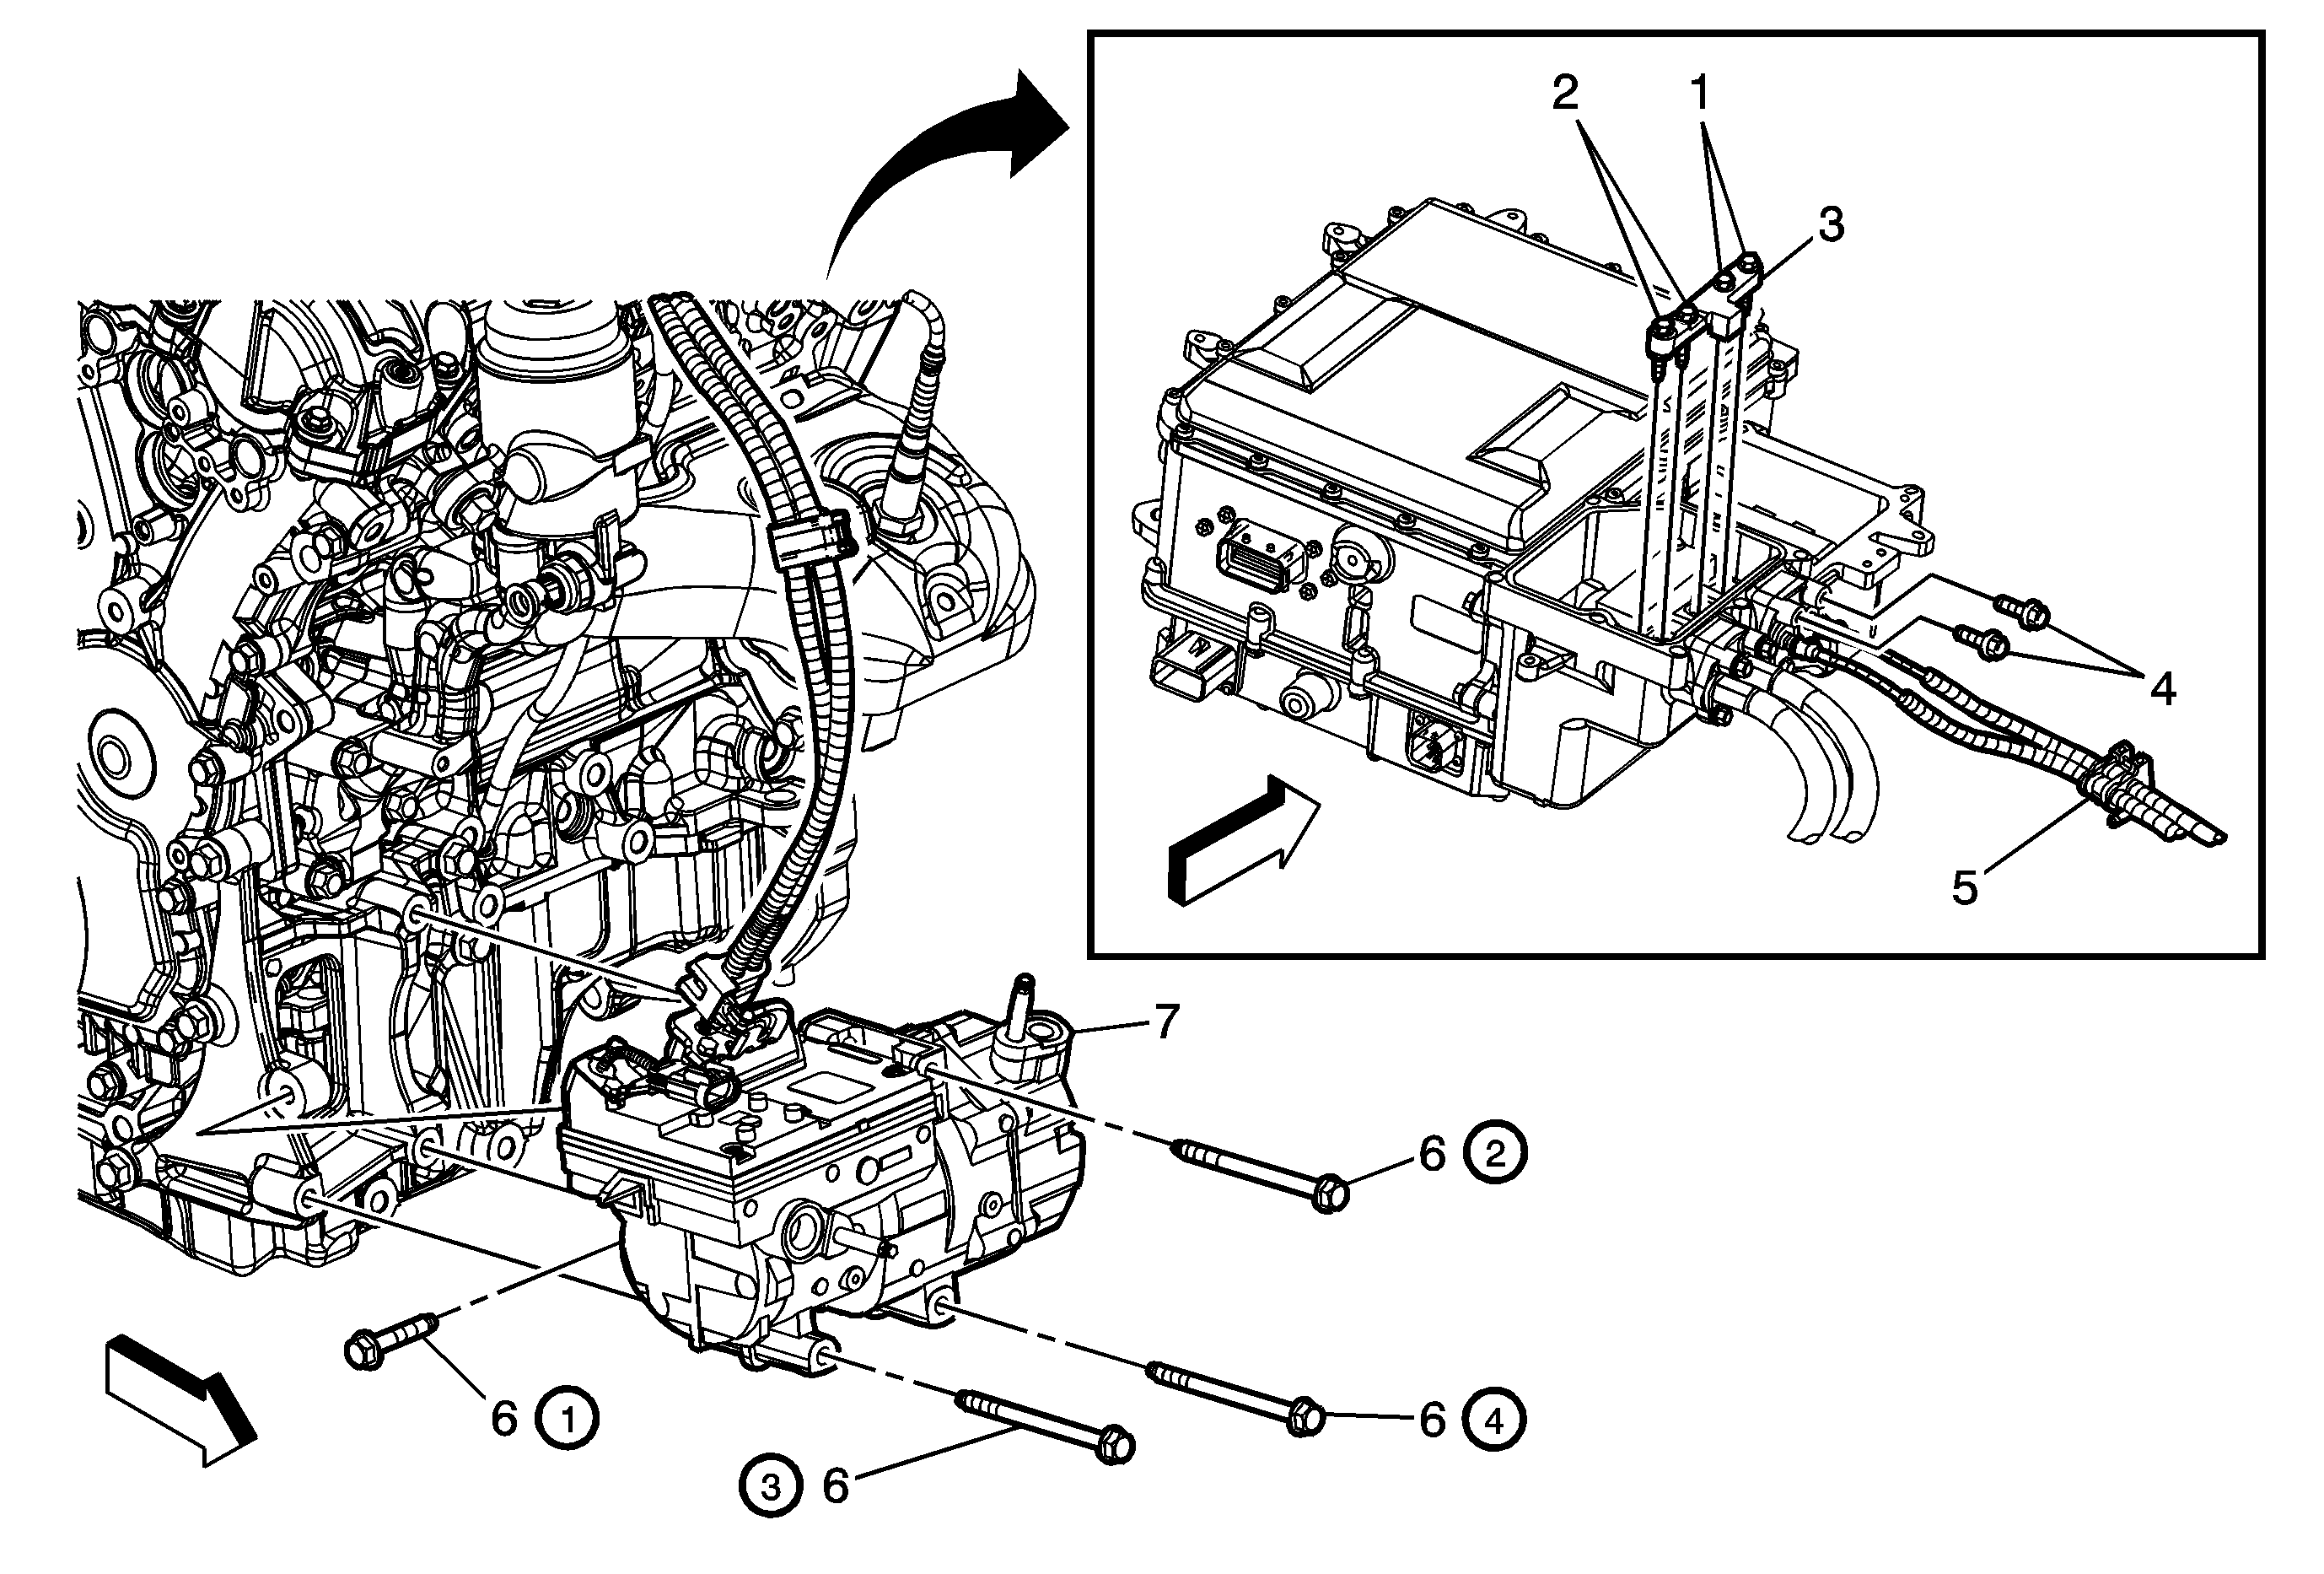
Callout | Component Name | ||||||
|---|---|---|---|---|---|---|---|
|
Danger: Always perform the High Voltage Disabling procedure prior to servicing any High Voltage component or connection. Personal Protection Equipment (PPE) and proper procedures must be followed. The High Voltage Disabling procedure will perform the following tasks:
Preliminary Procedures
Note: Ensure to cap all HVAC line connections immediately after removal to avoid contamination. Refer to Handling of Refrigerant Lines and Fittings. | |||||||
1 | A/C Compressor Cable Bolt (Qty: 2) Caution: High Voltage (HV) cables should never be removed from the mounting block. Removal of the individual HV cable from the mounting block may result in HV cable and/or component damage from improper:
Notice: Refer to Fastener Caution in the Preface section. Tighten | ||||||
2 | Battery Positive and Negative Cable Mounting Bolt (Qty: 2) Tighten | ||||||
3 | Battery Cable and A/C Compressor Cable Guide Assembly | ||||||
4 | A/C Compressor Cable Bolt (Qty: 2) Tighten | ||||||
5 | A/C Compressor Cable Procedure
| ||||||
6 | A/C Compressor Bolt (Qty: 4) Tighten Procedure
| ||||||
7 | A/C Compressor Procedure
| ||||||
Air Conditioning Compressor Replacement LY7

Callout | Component Name | ||||
|---|---|---|---|---|---|
Preliminary Procedures
| |||||
1 | A/C Compressor Bolt (Qty: 4) Caution: Refer to Fastener Caution in the Preface section. TIP:
Tighten | ||||
2 | A/C Compressor Assembly Procedure
Special ToolsJ 39400 Electronic Halogen Leak Detector | ||||
Air Conditioning Compressor Replacement LZ4

Callout | Component Name |
|---|---|
Preliminary Procedures
| |
1 | A/C Compressor Bolt (Qty: 3) Caution: Refer to Fastener Caution in the Preface section. Procedure
Tighten |
2 | A/C Compressor Assembly Procedure
Tip Special ToolsJ 39400 Electronic Halogen Leak Detector |
