For 1990-2009 cars only
Camshaft Replacement 6.0L, 7.0L
Removal Procedure
- Disconnect the battery negative cable. Refer to Battery Replacement in Engine Electrical.
- Drain the cooling system. Refer to Cooling System Draining and Filling in Engine Cooling.
- Remove the air intake duct from the air cleaner. Refer to Air Intake System Replacement in Engine Controls-6.0, 7.0L.
- Remove the air cleaner from the throttle body. Refer to Air Cleaner and Extension Replacement in Engine Controls-6.0, 7.0L.
- Remove the air conditioning compressor from the accessory bracket (if equipped).
- Remove the radiator and supports from the vehicle. Refer to Radiator Replacement in Engine Cooling.
- Remove the A/C condenser from the vehicle (if equipped).
- Remove the intake manifold from the engine block. Refer to Intake Manifold Replacement .
- Remove the valve rocker arms and the push rods from the cylinder heads. Refer to Valve Rocker Arm and Push Rod Replacement .
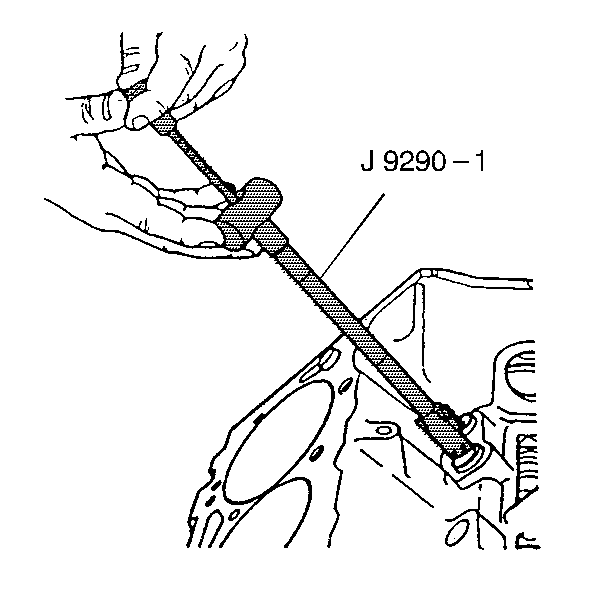
- Remove the valve lifter from the engine block. Refer to Valve Lifter Replacement .
- Remove the water pump from the engine block. Refer to Water Pump Replacement in Engine Cooling.
- Remove the engine front cover from the engine block. Refer to Engine Front Cover Replacement .
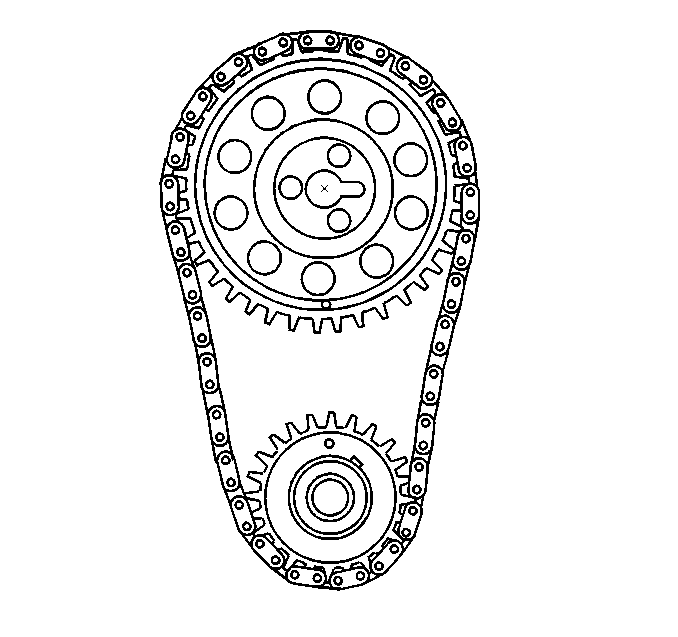
- Remove the timing chain and camshaft gear. Refer to Timing Chain and Sprocket Replacement .
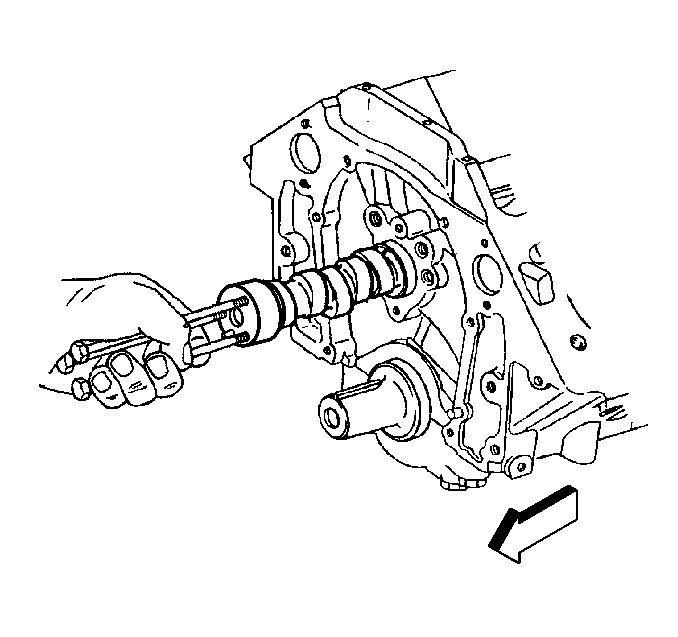
- Remove the camshaft by using the following procedure:


| 14.1. | Install three 5/16 18 bolts 100 mm (4-5 in) long into the threaded holes of the camshaft. Use these bolts as a handle to remove the camshaft from the engine block. |
| 14.2. | Slowly pull the camshaft from the engine block, as not to damage the camshaft bearings in the engine block. |
| 14.3. | Remove the camshaft from the engine block |
Installation Procedure
Important: When Installing a new camshaft, always replace the valve lifters and coat the foot of the lifter with a moly type lubricant.
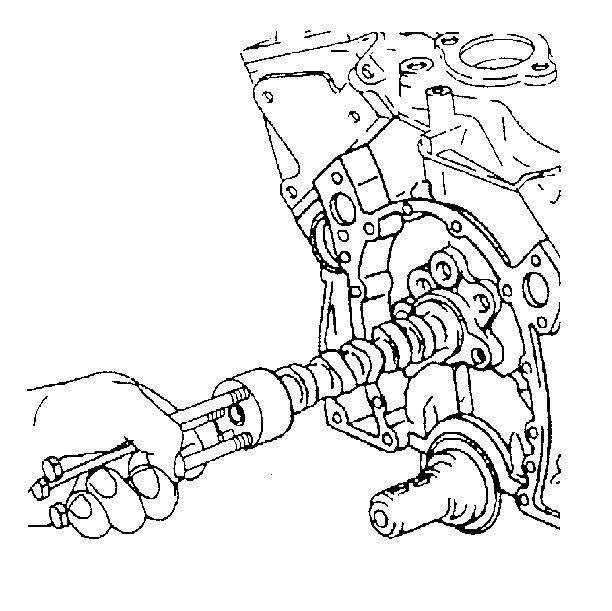
- Install three 5/16 in or 5/16 in bolts that are 100 mm to 125 mm (5 in to 6 in) long into the camshaft threaded holes. Use the bolts as a handle in order to install the camshaft.
- Coat the camshaft lobes and the journals with high viscosity oil with zinc GM P/N 123455001 or an equivalent.
- Install the camshaft into the engine. Handle the camshaft carefully in order to prevent damage to the camshaft bearings.
- Remove the bolts that you used as a handle.
- Install the timing chain and gear on the camshaft . Refer to Timing Chain and Sprocket Replacement .
- Install the front cover to the engine block. Refer to Engine Front Cover Replacement .
- Install the valve lifter into the engine block. Refer to Valve Lifter Replacement .
- Install the valve push rods and valve rocker arms in the engine assembly. Refer to Valve Rocker Arm and Push Rod Replacement .
- Install the water pump to the engine block. Refer to Water Pump Replacement .
- Install the intake manifold on the engine block. Refer to Intake Manifold Replacement .
- Install the radiator and the radiator support. Refer to Radiator Replacement in Engine Cooling.
- Install the A/C condenser to the vehicle (if equipped).
- Install the air conditioning compressor to the mounting bracket (if equipped).
- Install the air intake duct to the vehicle. Refer to Air Intake System Replacement in Engine Controls-6.0, 7.0L.
- Install the air cleaner assembly. Refer to Air Cleaner and Extension Replacement in Engine Controls-6.0L, 7.0L.
- Connect the battery negative cable to the battery terminal. Refer to Battery Replacement in Engine Electrical.
- Refill the cooling system. Refer to Cooling System Draining and Filling in Engine Cooling.


Important: Line up the timing marks on the camshaft sprocket and the crankshaft sprocket.
Important: Do the following when you install a new camshaft:
• Install new valve lifter • Change the oil • Install a new oil filter • Add high viscosity oil with zinc GM P/N 12345501
or an equivalent. • Coat the foot of the valve laughter with a moly type lubricant.
