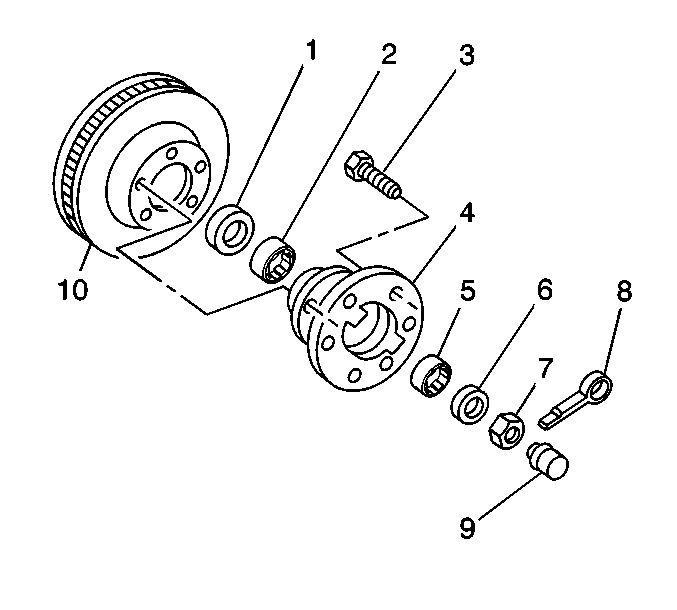
Notice: Start the races squarely inside the hub/rotor to avoid distortion and
possible cracking.
- Install the races into the hub/rotor.
- Use a press to install the outer bearing race into position.
Make sure the bearing race is seated fully.
- Install the inner bearing race into position.
Make sure the bearing race is seated fully.
Important:
| • | Use an approved, high-temperature front wheel bearing grease in order to lubricate the bearings. Refer to
Fluid and Lubricant Recommendations
in Maintenance and Lubrication. |
| • | Do not mix different greases because mixing may change the grease properties, resulting in poor performance. |
- Apply a thin film of grease to the steering knuckle spindle at the outer wheel bearing seat and at the inner wheel bearing seat, the shoulder, and the seal seat.
- Apply a small amount of grease inboard of each wheel bearing retainer/cap.
Notice: Failure to completely pack the wheel bearing (cones, rollers, and cage)
with grease will result in premature wheel bearing damage and/or wear.
- Fill each wheel bearing ,cone and roller assembly full of grease.
| • | Use a cone-type grease machine that forces grease into the bearing. |
| • | If a cone-type grease machine is not available, pack the wheel bearing by hand. When packing the wheel bearing by hand, work the grease into the bearings between the rollers, the cones, and the cage. |
- Install the inner wheel bearing into the hub/rotor. Put an additional quantity of grease outboard of this bearing.
- Install the new seal.
| 8.1. | Using a seal installer or a block, install the seal in order to ensure that the seal is flush with the hub/rotor flange. |
| 8.2. | Lubricate the seal lip with a thin layer of grease. |
- Install the hub/rotor. Do not damage the steering knuckle spindle threads.
- Install the outer wheel bearing. Slide the bearing over the spindle until the wheel bearing fully seats against the hub/rotor outer race.
Notice: Use the correct fastener in the correct location. Replacement fasteners
must be the correct part number for that application. Fasteners requiring
replacement or fasteners requiring the use of thread locking compound or sealant
are identified in the service procedure. Do not use paints, lubricants, or
corrosion inhibitors on fasteners or fastener joint surfaces unless specified.
These coatings affect fastener torque and joint clamping force and may damage
the fastener. Use the correct tightening sequence and specifications when
installing fasteners in order to avoid damage to parts and systems.
- Install the washer, the nut, and the cotter pin. Do not place the cotter pin through the hole in the spindle until the wheel bearings are adjusted.
Tighten
Tighten the nut to 16 N·m (12 lb ft), while turning the hub/rotor assembly by hand.
| 11.1. | Apply an additional amount of grease outboard of the wheel bearing. |
- Install the cotter pin.
- Install the retainer/cap in place.
- Install the brake caliper. Refer to
Front Brake Caliper Replacement
in Disc Brakes.
- Install the tire and wheel. Refer to
Tire and Wheel Removal and Installation
in Tires and Wheels.
- Lower the vehicle.


