For 1990-2009 cars only
Slave Receptacle Harness Replacement Ambulance/Maintenance Body
Removal Procedure
- Disconnect the battery cables. Refer to Battery Cable Disconnect and Connection .
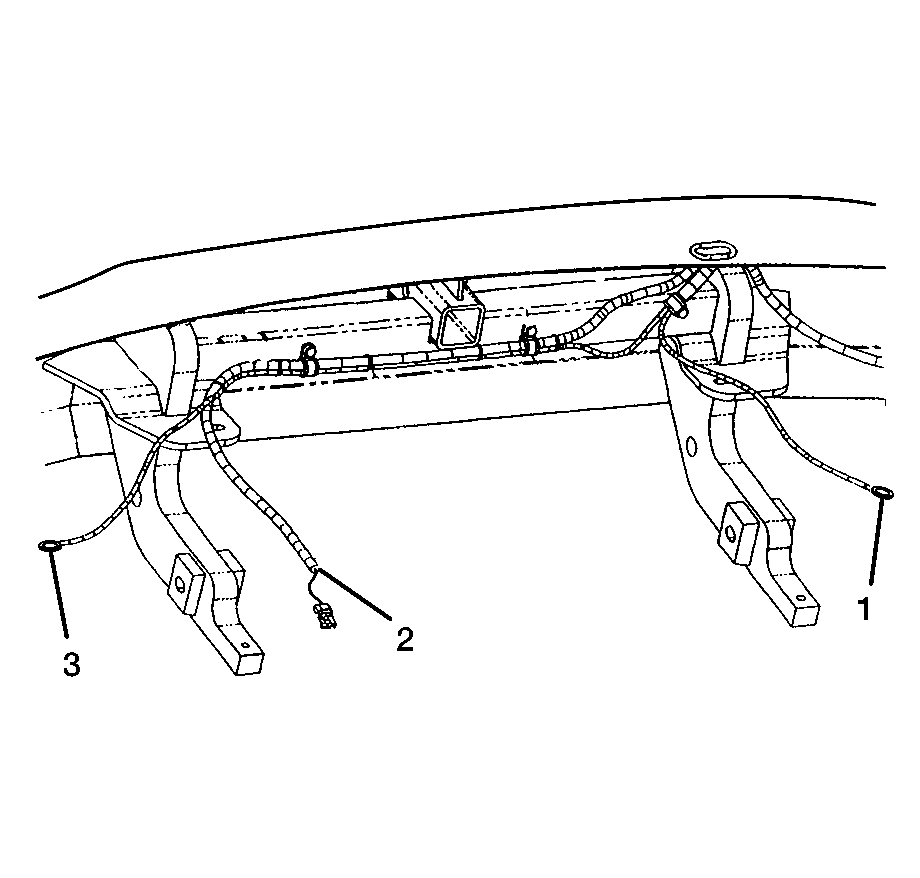
- Trace the negative slave receptacle cable connector (1) to the cable ground connection.
- Disconnect the negative slave receptacle ground cable from the ground connection.
- Trace the positive slave receptacle cable connector (3) to the 24V battery connection.
- Disconnect the positive slave receptacle cable (3) from the 24V battery connection.
- Disconnect the slave receptacle connectors from the slave receptacle. Refer to Slave Receptacle Replacement .
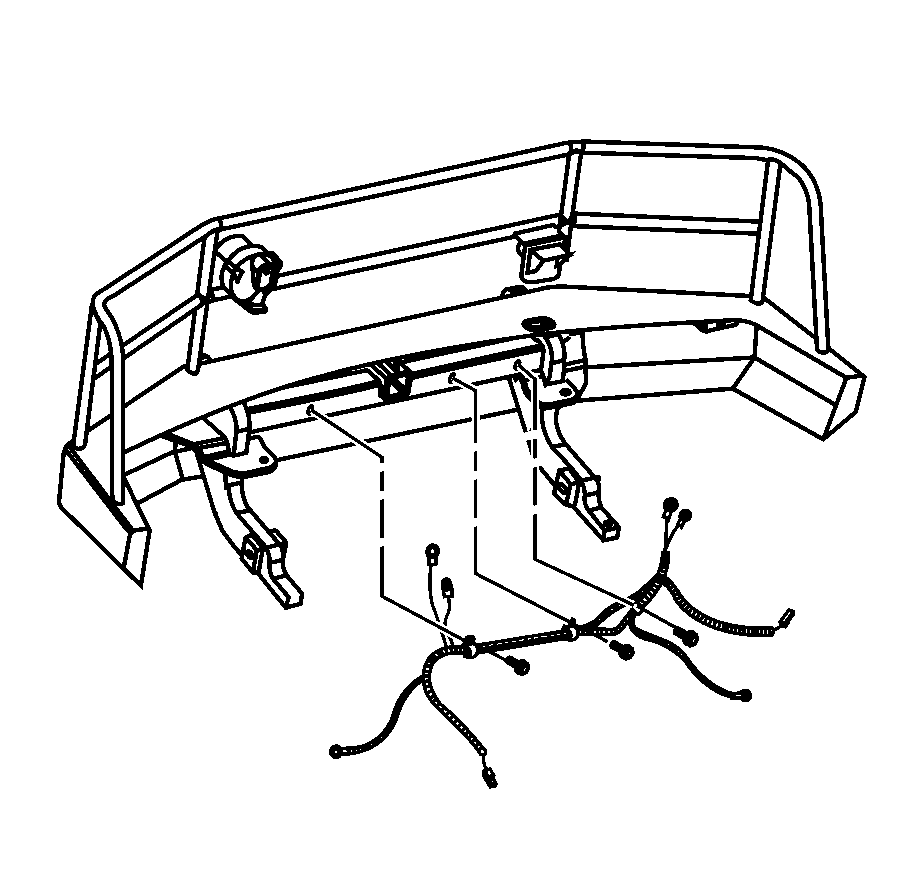
- Remove the fasteners from the clamps securing the slave receptacle harness and the blackout (B/O) harness.
- Remove the slave receptacle harness from the bumper assembly.
Caution: Refer to Battery Disconnect Caution in the Preface section.


Installation Procedure
- Position the slave receptacle harness onto the bumper assembly.
- Install the 3 clamps and the fasteners onto the slave receptacle harness and the blackout (B/O) harness.
- Connect the slave receptacle connectors to the slave receptacle. Refer to Slave Receptacle Replacement .
- Install the positive slave receptacle cable in the same routing location as removed.
- Connect the positive slave receptacle cable connector (3) to the 24V battery connection.
- Install the negative slave receptacle cable in the same routing location as removed.
- Connect the negative slave receptacle connector (1) to the cable ground connection.
- Connect the battery cables. Refer to Battery Cable Disconnect and Connection .

Important: Verify all connections are clean prior to installation.

Slave Receptacle Harness Replacement LSSV
Removal Procedure
- Disconnect the battery cables. Refer to Battery Cable Disconnect and Connection .
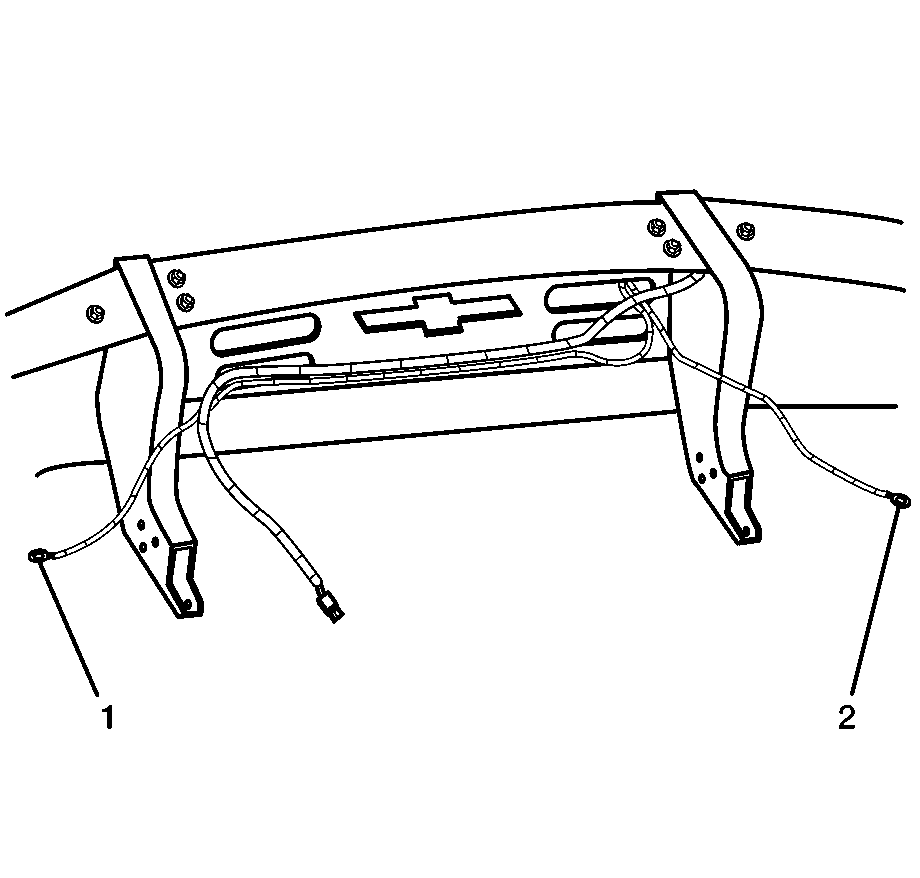
- Trace the negative slave receptacle cable connector (2) to the cable ground connection.
- Disconnect the negative slave receptacle ground cable from the ground connection.
- Trace the positive slave receptacle cable connector (1) to the 24V battery connection.
- Disconnect the positive slave receptacle cable (3) from the 24V battery connection.
- Disconnect the slave receptacle connectors from the slave receptacle. Refer to Slave Receptacle Replacement .
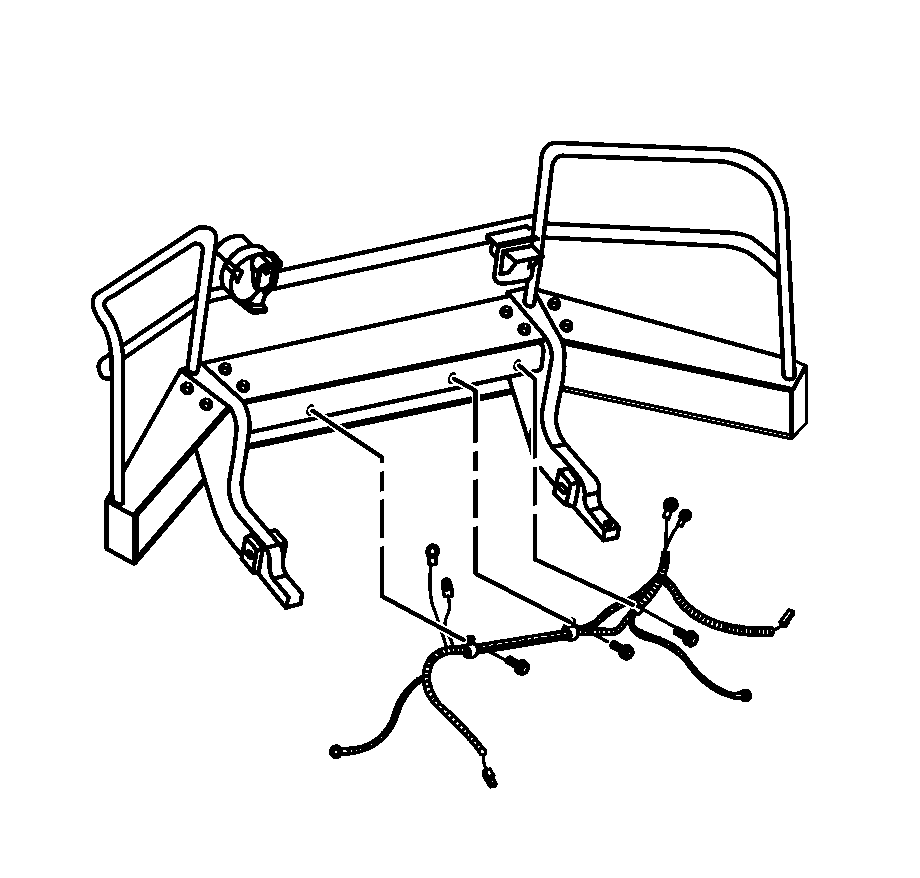
- Remove the wiring harness straps securing the slave receptacle harness and the blackout (B/O) harness.
- Remove the slave receptacle harness from the bumper assembly.
Caution: Refer to Battery Disconnect Caution in the Preface section.


Installation Procedure
- Position the slave receptacle harness onto the bumper assembly.
- Install the 3 clamps and the fasteners onto the slave receptacle harness and the blackout (B/O) harness.
- Connect the slave receptacle connectors to the slave receptacle. Refer to Slave Receptacle Replacement .
- Install the positive slave receptacle cable in the same routing location as removed.
- Connect the positive slave receptacle cable connector (1) to the 24V battery connection.
- Install the negative slave receptacle cable in the same routing location as removed.
- Connect the negative slave receptacle connector (2) to the cable ground connection.
- Connect the battery cables. Refer to Battery Cable Disconnect and Connection .

Important: Verify all connections are clean prior to installation.

