Spare Tire Carrier Replacement In Vehicle
Removal Procedure
- Remove the spare tire. Refer to Spare Tire Replacement .
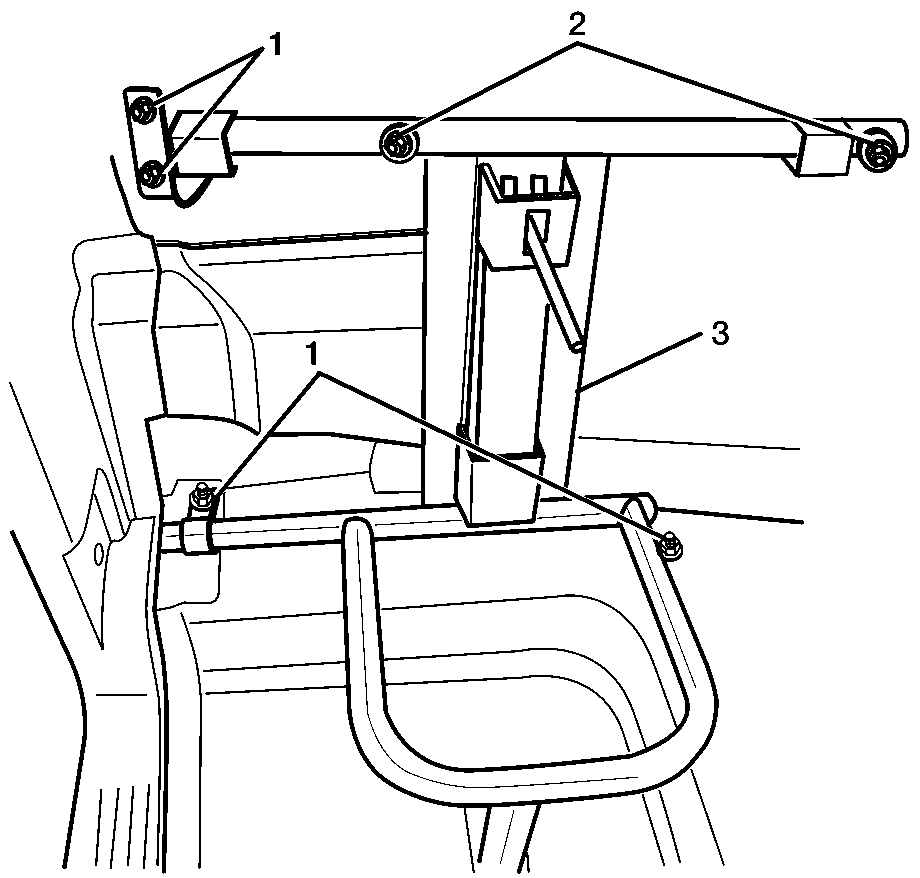
- Remove the hex bolts (1) from the carrier.
- Remove the torx bolts (2) from the carrier.
- Remove the carrier (3) from the vehicle.

Installation Procedure
- Install the carrier (3) into the vehicle.
- Install the torx bolts (2) and tighten.
- Install the hex bolts (1) and tighten.
- Install the spare tire. Refer to Spare Tire Replacement .

Notice: Refer to Fastener Notice in the Preface section.
Tighten
Tighten the torx bolts to 53 N·m (39 lb ft).
Tighten
Tighten the hex bolts to 35 N·m (26 lb ft).
Spare Tire Carrier Replacement Bed Mounted
Removal Procedure
- Remove the spare tire wheel nuts.
- Remove the spare tire from the spare tire carrier.
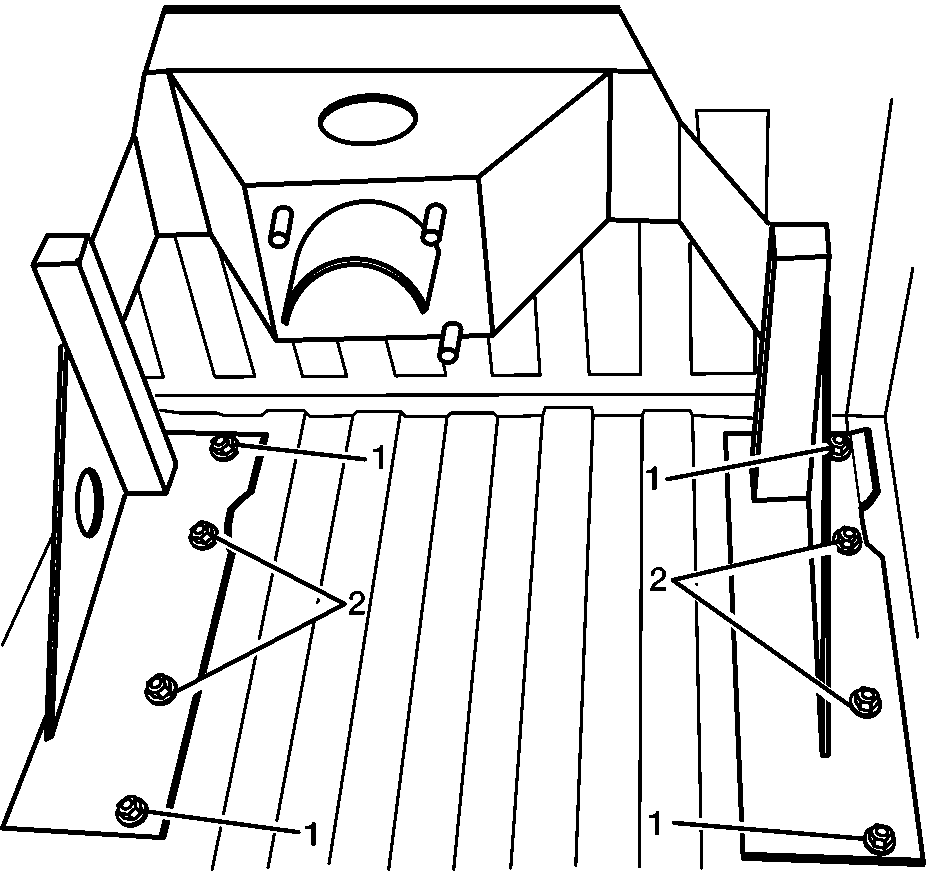
- Remove the short bolts (2) from both sides of the carrier.
- Remove the long bolts (1) from both sides of the carrier.
- Remove the carrier from the bed of the vehicle.

Caution: Be careful not to drop tire and wheel assemblies on your hands and feet. Lift properly, using your legs as well as your body. Tires and wheels are heavy and can cause injury if not handled correctly.
Installation Procedure
- Install the carrier into the vehicle bed over the mounting holes.
- Using the aid of an assistant position the reinforcement bracket under the bed and install bolts (1, 2).
- Tighten the long carrier bolts (1) to 68 N·m (50 lb ft).
- Tighten the short carrier bolts (2) to 68 N·m (50 lb ft).
- Install the spare tire onto the spare tire carrier.
- Install the wheel nuts onto the studs.

Notice: Refer to Fastener Notice in the Preface section.
Important: Tighten the bolts in the following sequence.
Tighten
Tighten
Tighten the spare tire nuts to 90 N·m (66 lb ft).
Spare Tire Carrier Replacement Swing Away
Removal Procedure
- Remove the spare tire wheel nuts.
- Remove the spare tire from the spare tire carrier.
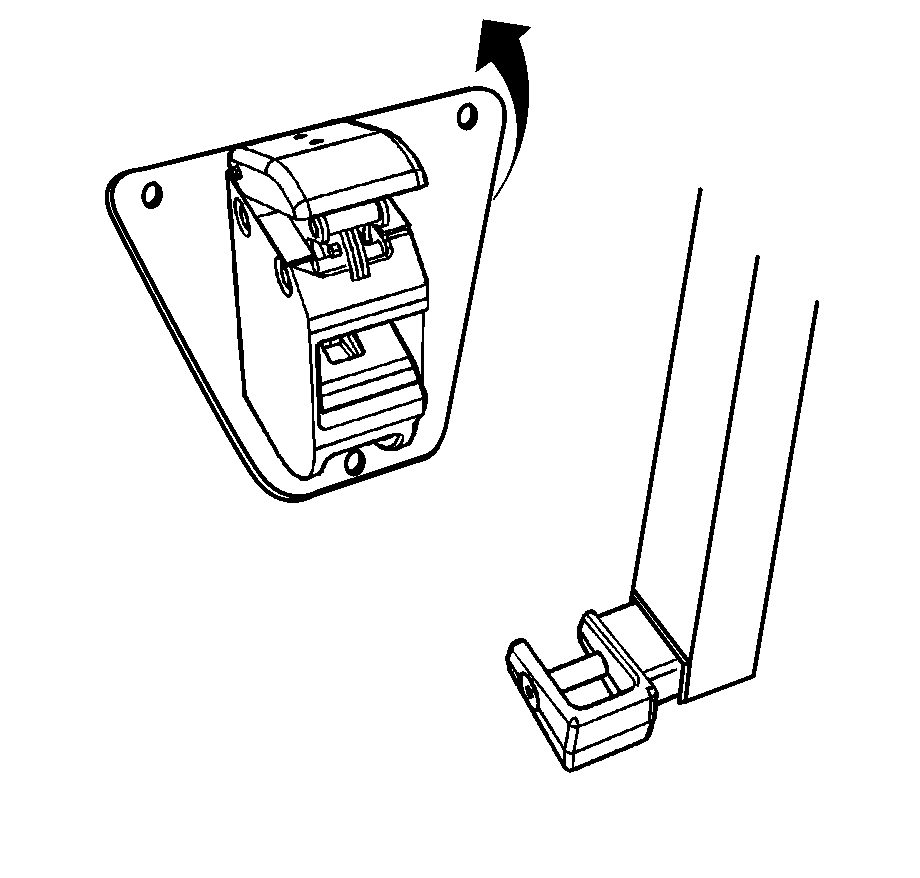
- Unlatch and open the spare tire carrier swing arm.
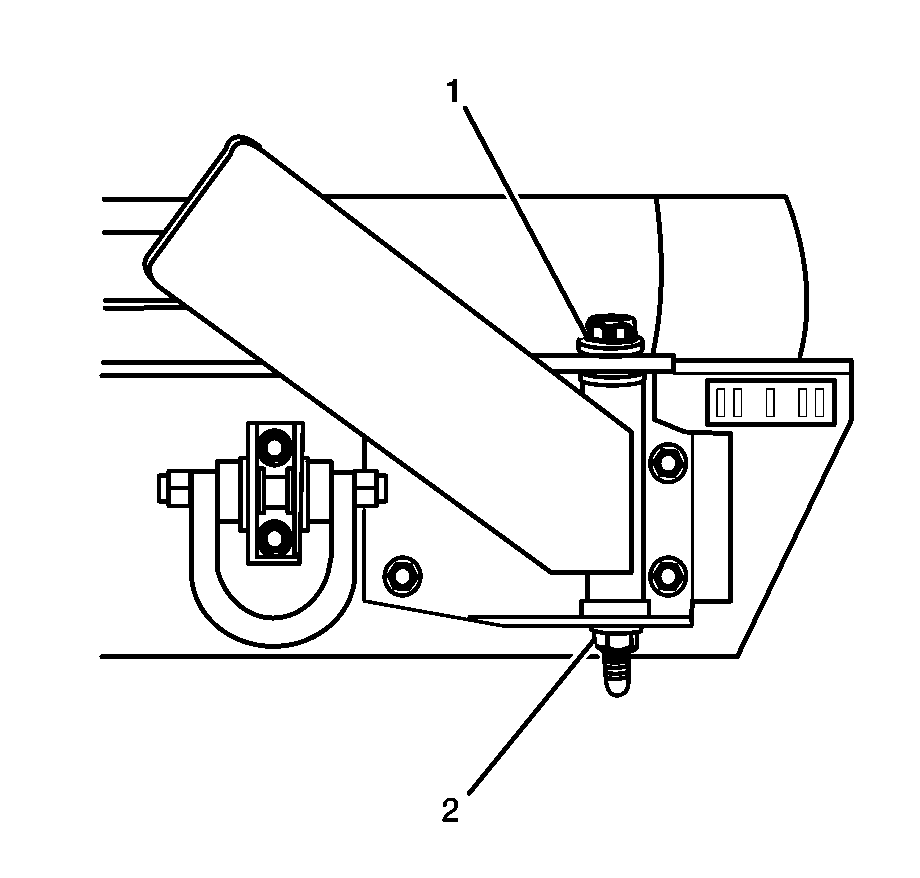
- Remove the nut (2) from the pivot bolt.
- Hold the carrier and remove the pivot bolt (1).
- Remove the carrier from the mount.

Caution: Be careful not to drop tire and wheel assemblies on your hands and feet. Lift properly, using your legs as well as your body. Tires and wheels are heavy and can cause injury if not handled correctly.

Note location of any shims or washers before removing the pivot bolt.
Installation Procedure
- Install the carrier into the bracket.
- Install any shims are washers and install the pivot bolt (1).
- Lubricate the pivot joint with chassis lubricant. Refer to Fluid and Lubricant Recommendations in Maintenance and Lubrication.
- Install the nut (2) onto the pivot bolt and tighten until slight pivoting resistance is felt.
- Install the spare tire onto the spare tire carrier.
- Install the wheel nuts onto the studs.
- Adjust the carrier latch. Refer to Spare Tire Carrier Latch Adjustment .
- Close and ensure that the spare tire carrier is latched.


Notice: Refer to Fastener Notice in the Preface section.
Tighten
Tighten the wheel nuts to 50 N·m (37 lb ft).
