For 1990-2009 cars only
Front Bumper Impact Bar Bracket Replacement 1500
- Remove all related panels and components.
- Remove damaged bumper bracket.
- Position the service template on the end of the frame rail. Use 3M's Repositionable Adhesive or equivalent.
- Drill three 13 mm (1/2 in) holes at locations indicated on template.
- Apply approved anti-corrosion primer to bare metal surfaces.
- Position replacement bumper bracket.
- Install the bolts.
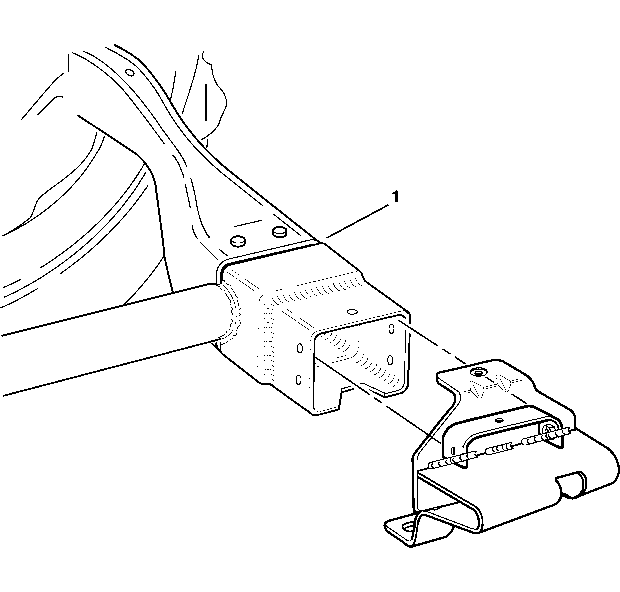
Important: Do not remove any material from end of frame rail.
Important: Prior to refinishing, refer to the Publication GM 4901M-D-2000 "GM Approved Refinish Materials" for recommended products. Do not combine paint systems. Refer to paint manufacturer's recommendations.
Notice: Refer to Fastener Notice in the Preface section.
Tighten
Tighten the bolts to 50 N·m (37 lb ft).
Front Bumper Impact Bar Bracket Replacement 2500
- Remove all related panels and components.
- Remove the damaged bumper bracket.
- Visually inspect the frame and restore all damage to factory specifications using 3-dimensional measuring.
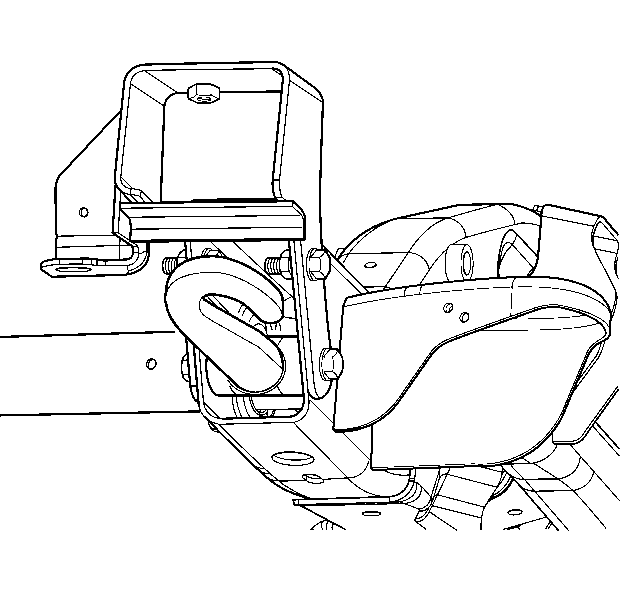
- Align the replacement bracket lower bolt holes with tow hook mounting locations and install the bolts (1) supplied.
- Align the front edge of bracket with front edge of frame and mark upper bolt locations (1) on frame.
- Rotate the bracket forward and drill 13 mm (1/2 in) holes in frame at upper bolt locations.
- Rotate the bracket back into position.
- Install the fasteners supplied.
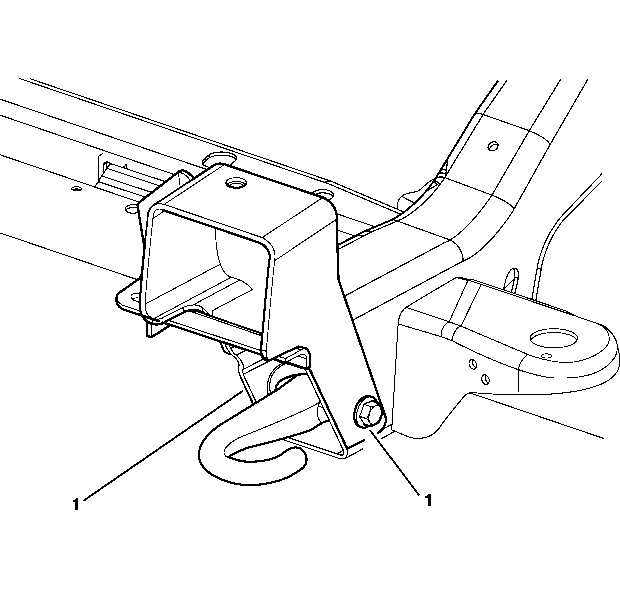
Important: If the vehicle is equipped with tow hooks, discard original fasteners.
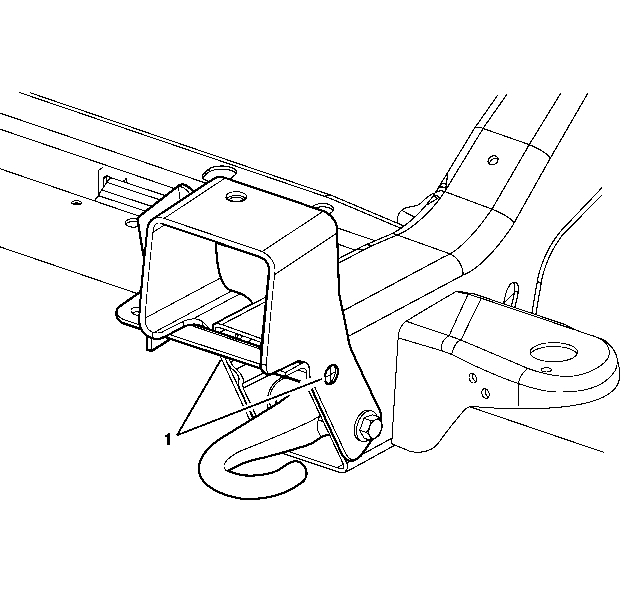
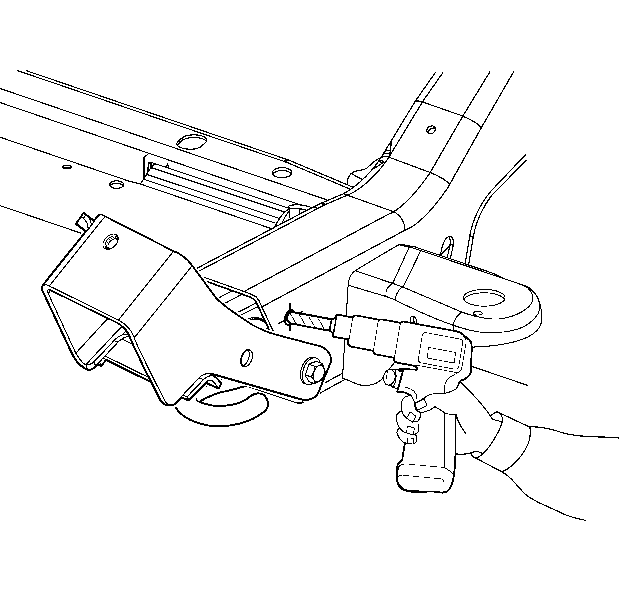
Notice: Refer to Fastener Notice in the Preface section.
Tighten
Tighten the torque bracket fasteners to 70 N·m (52 lb ft).
Removal Procedure
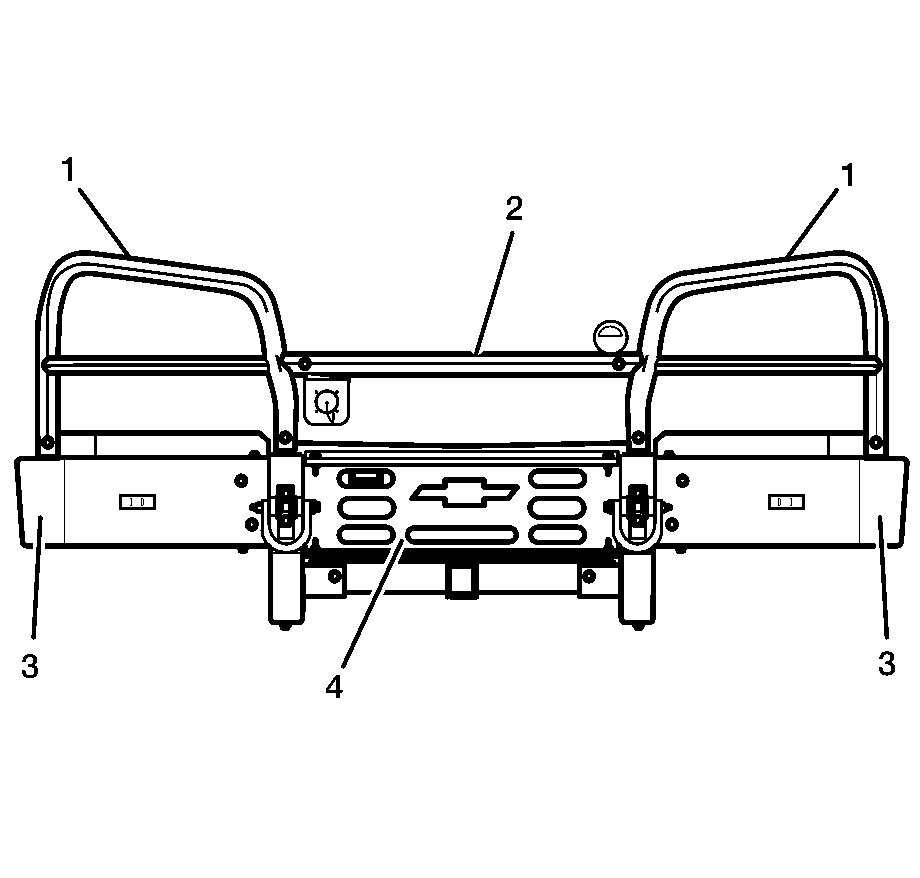
- Remove the center brush guard (2). Refer to Center Radiator Grille Brush Guard Replacement .
- Remove the end brush guard (1). Refer to Outer Radiator Grille Brush Guard Replacement .
- Remove the center bumper (4). Refer to Center Front Bumper Replacement .
- Remove the bumper end cap (3). Refer to Front Bumper End Cap Replacement .
- Remove the front winch mount. Refer to Front Winch Harness and Connector Replacement in Engine Electrical.
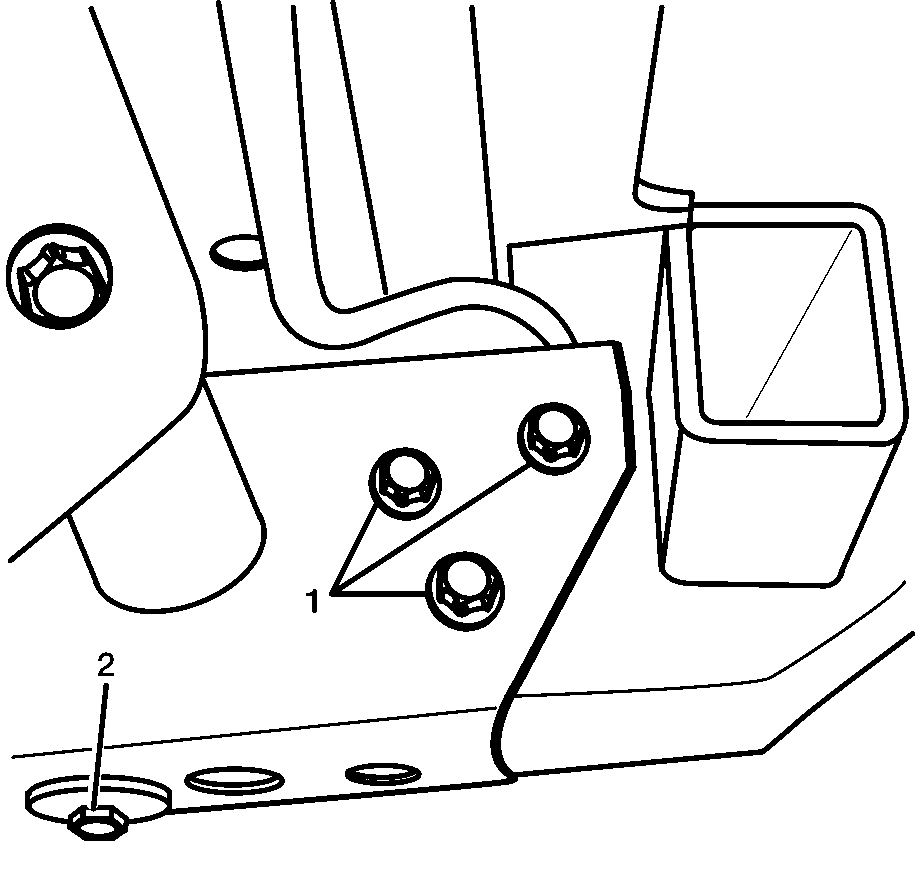
- Remove the side bolts (1) from the inside and outside frame.
- Remove the lower washered bracket bolt (2) from the frame.
- Remove the bracket from the vehicle frame.
Installation Procedure
- Install the front bumper bracket onto the frame.
- Install the side and lower bolts, do not tighten at this time.
- Install the center bumper (4). Refer to Center Front Bumper Replacement .
- Install the bumper end cap (3). Refer to Front Bumper End Cap Replacement .
- Install the end brush guard (1). Refer to Outer Radiator Grille Brush Guard Replacement .
- Install the center brush guard (2). Refer to Center Radiator Grille Brush Guard Replacement .
- Install the front winch mount. Refer to Front Winch Harness and Connector Replacement in Engine Electrical.
- Align the front bumper and tighten the side frame bolts (1) and lower frame washered bracket bolt (2).


Notice: Refer to Fastener Notice in the Preface section.
Tighten
| • | Tighten side bolts to 128-148 N·m (94-109 lb ft). |
| • | Tighten lower bolt to 68-92 N·m (50-68 lb ft). |
