In order to determine the correct replacement bearing size,
the bearing clearance must be measured accurately. Either the micrometer or
plastic gauge method may be used, however, the micrometer method gives more
reliable results and is preferred. Refer to
Crankshaft and Bearing Cleaning and Inspection
for the micrometer method.
The crankshaft bearings are of the precision insert type and do not
use shims for adjustment. If the clearances are excessive, the new upper and
the lower bearings will be required. The service bearings are available in
the standard size and an undersize.
The selective fitting of the crankshaft bearings are necessary in production
in order to obtain close tolerances. For this reason, you may use one-half
of a standard crankshaft bearing with one-half of a undersize crankshaft
bearing.
Notice: Do not shim, scrape, or file bearing inserts. Do not touch the bearing
surface of the insert with bare fingers. Skin oil and acids will etch the
bearing surface.
Plastic Gauge Method
- Install the crankshaft bearings into the crankshaft bearing cap
and the engine block.
- Install crankshaft.
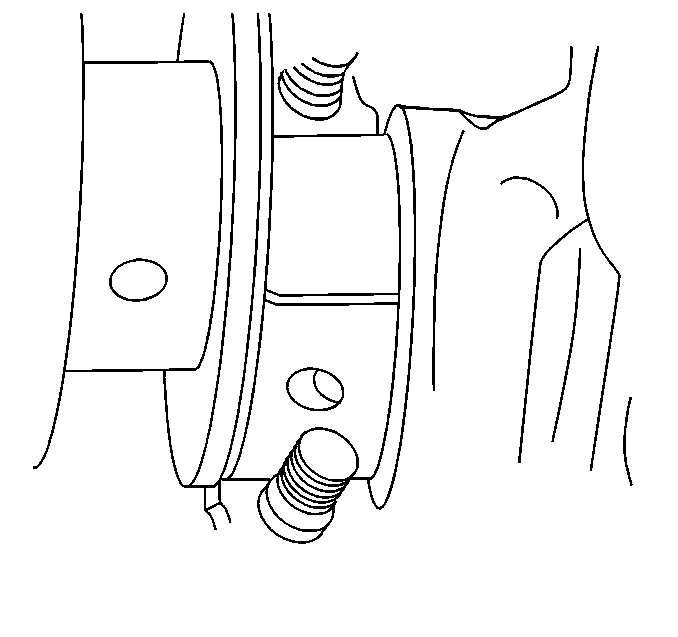
- Install the gauging plastic on the crankshaft main journal perpendicular
to the crankshaft bearing.
Notice: In order to prevent the possibility of cylinder block or
crankshaft bearing cap damage, the crankshaft bearing caps are tapped into
the cylinder block cavity using a brass, lead, or a leather mallet before
the attaching bolts are installed. Do not use attaching bolts to pull the
crankshaft bearing caps into the seats. Failure to use this process may damage
a cylinder block or a bearing cap.
- Install the crankshaft bearing caps and the bolts. Ensure that the arrows
on the crankshaft bearings caps are facing the front of the engine.
Important: Tighten inside bearing cap bolts first and outside bearing cap bolts
last.
Tighten
Tighten the bolts to 135 N·m (100 lb ft).
Notice: Use the correct fastener in the correct location. Replacement fasteners
must be the correct part number for that application. Fasteners requiring
replacement or fasteners requiring the use of thread locking compound or sealant
are identified in the service procedure. Do not use paints, lubricants, or
corrosion inhibitors on fasteners or fastener joint surfaces unless specified.
These coatings affect fastener torque and joint clamping force and may damage
the fastener. Use the correct tightening sequence and specifications when
installing fasteners in order to avoid damage to parts and systems.
- Remove crankshaft bearing cap bolts and caps.
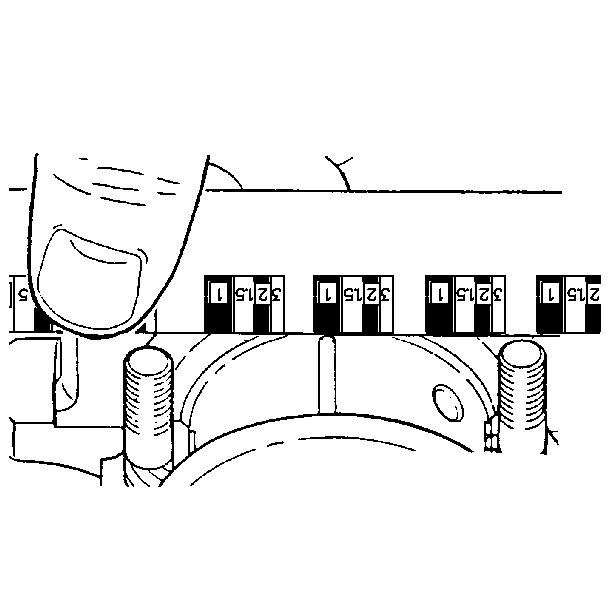
- Measure gauging plastic.
| • | Gauging plastic may adhere to either the crankshaft bearing or
crankshaft journal. |
| • | Without removing the gauging plastic, measure the compressed width
at the widest point using a graduated scale provided on the gauging plastic
envelope. |
- If the flattened gauging plastic tapers toward the middle or the
ends, there is a difference in clearance indicating taper, low spot or other
irregularity of the bearing or the journal.
- Normally the crankshaft bearing journals wear evenly and are not
out-of-round. However, if a bearing is being fitted to an out-of-round
0.0254 mm (0.001 in maximum) journal, be sure to fit to the
maximum diameter of the journal. If the bearing is fitted to the minimum diameter
and the journal is excessively out-of-round, the interference
between the bearing and the journal will result in rapid bearing failure.
- If the bearing clearance is within specifications, the bearing
is satisfactory. If the clearance is not within specifications, replace the
bearing. Always replace both the upper and the lower bearings as a unit.
- A standard or undersize bearing combination may result in the
proper clearance. If the proper bearing clearance cannot be achieved using
the standard or the undersize bearings, it will be necessary to replace or
repair the crankshaft.
- Remove the flattened gauging plastic.
- Measure the remaining journals.
Final Crankshaft Bearing Installation Procedure
Important: If undersized bearings are used, ensure that the bearings are fitted
to the proper journals.
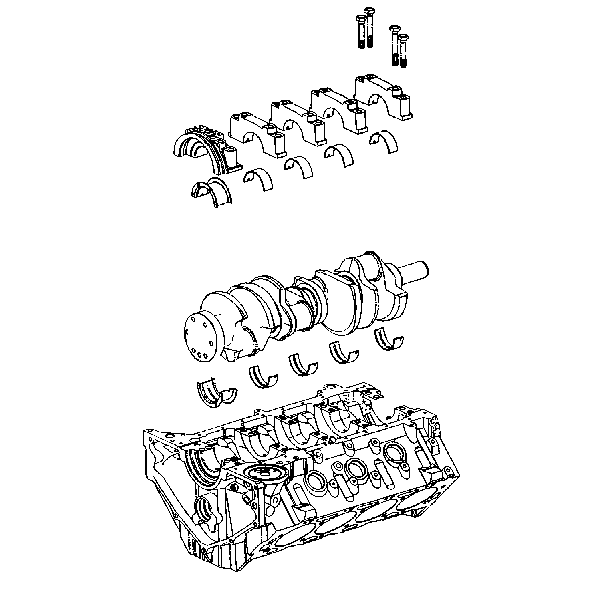
- Install the upper crankshaft bearings to the block.
- Install the lower crankshaft bearings to the crankshaft bearing
caps.
- Lubricate the crankshaft bearings with clean engine oil.
- Install the crankshaft.
Notice: In order to prevent the possibility of cylinder block or
crankshaft bearing cap damage, the crankshaft bearing caps are tapped into
the cylinder block cavity using a brass, lead, or a leather mallet before
the attaching bolts are installed. Do not use attaching bolts to pull the
crankshaft bearing caps into the seats. Failure to use this process may damage
a cylinder block or a bearing cap.
- Install the crankshaft bearing caps and the bolts. Ensure that the arrows
on the crankshaft bearings caps are facing the front of the engine. Do not
install the rear crankshaft bearing cap at this time.
Important: Tighten inside bearing cap bolts first and outside bearing cap bolts
last.
Tighten
Tighten the crankshaft bearing cap bolts to 135 N·m (100 lb ft).
Notice: Use the correct fastener in the correct location. Replacement fasteners
must be the correct part number for that application. Fasteners requiring
replacement or fasteners requiring the use of thread locking compound or sealant
are identified in the service procedure. Do not use paints, lubricants, or
corrosion inhibitors on fasteners or fastener joint surfaces unless specified.
These coatings affect fastener torque and joint clamping force and may damage
the fastener. Use the correct tightening sequence and specifications when
installing fasteners in order to avoid damage to parts and systems.
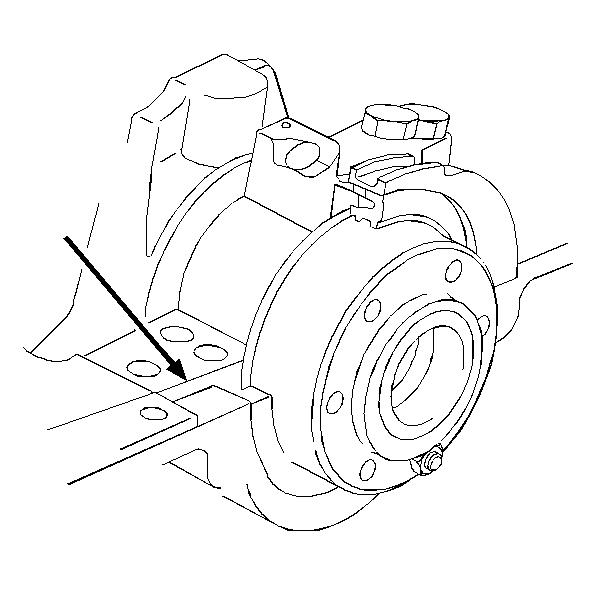
- Apply anaerobic sealing compound to the rear bearing cap sealing face
or to the rear bearing cap channel of the engine block, from the corner of
the rear thrust bearing pocket to the edge of the channel.
- Install the rear crankshaft bearing cap and the bolts to the block.
- Install the rear crankshaft bearing cap bolts temporarily to 4 N·m
(35 lb in).
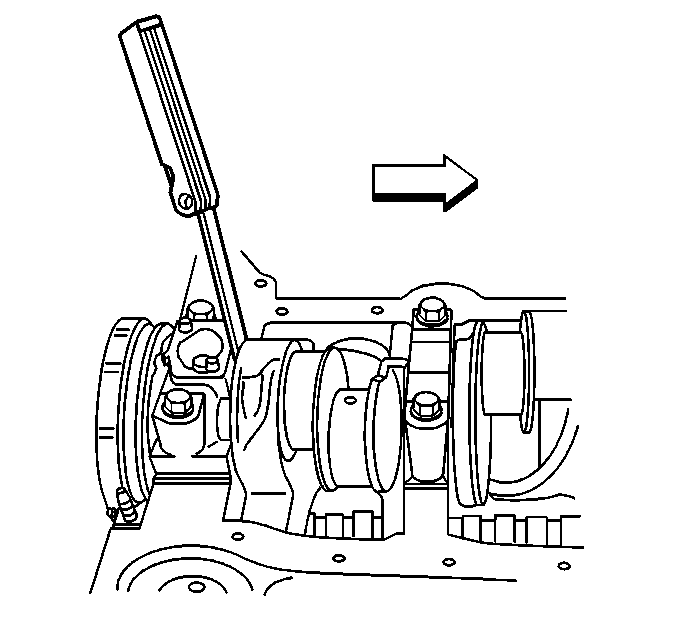
- Measure the crankshaft end play as follows:
| 9.1. | Firmly thrust the crankshaft first rearward then forward. This
will line up the rear crankshaft bearing and the crankshaft thrust surfaces. |
| | Important: Tighten inside bearing cap bolts first and outside bearing cap bolts
last.
|
Tighten
Tighten the rear crankshaft bearing cap bolts to 135 N·m
(100 lb ft).
| 9.2. | With the crankshaft wedged forward, measure at the front end of
the rear crankshaft bearing with a feeler gauge. The proper clearance is 0.0508 -
0.2540 mm (0.002 - 0.010 in) |
- Inspect the crankshaft for binding as follows:
| 10.1. | Try turning the crankshaft to check for binding. |
| 10.2. | If the crankshaft does not turn freely, loosen the crankshaft
bearing cap bolts on one cap at a time until the tight bearing is located. |
| 10.3. | A bent crankshaft or lack of bearing clearance could cause binding. |
- A lack of bearing clearance may be caused by the following conditions:
| • | Burrs on the bearing cap. |
| • | Foreign matter between the bearing and the block. |
| • | Foreign matter between the bearing and the bearing cap. |


