For 1990-2009 cars only
Removal Procedure
- Remove the carpet retainer. Refer to Front Floor Panel Carpet Replacement in Interior Trim.
- Remove the center pillar upper trim panel. Refer to Center Pillar Upper Trim Panel Replacement in Interior Trim.
- Remove the center pillar lower trim panel. Refer to Center Pillar Lower Trim Panel Replacement in Interior Trim.
- Remove the rear quarter upper trim panel. Refer to Rear Quarter Upper Trim Panel Replacement in Interior Trim.
- Remove the body lock pillar trim panel. Refer to Body Lock Pillar Trim Replacement in Interior Trim.
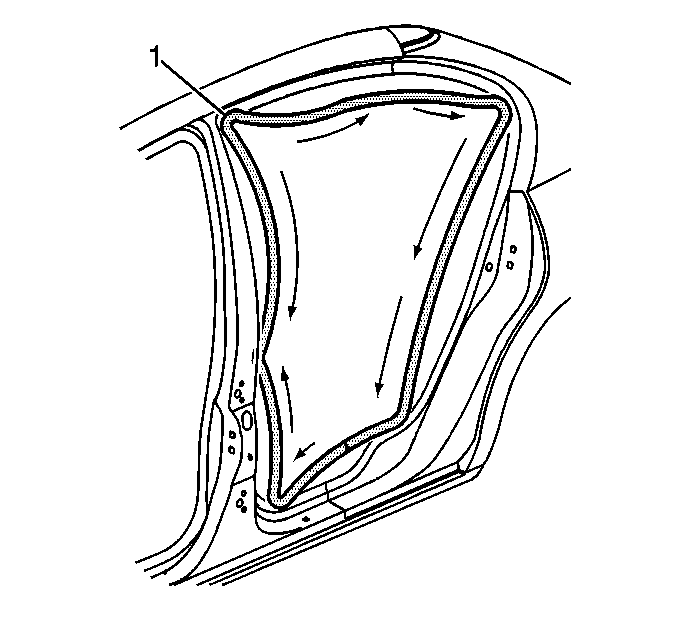
- Remove the door opening weatherstrip (1) from the door opening.
- Grasp the weatherstrip (1) and pull it from the body flange.
- Clean any adhesive from the body flange using 3M™ adhesive remover P/N 8984, or equivalent.
Installation Procedure
- Apply a small amount of weatherstrip adhesive GM P/N 12345096, or equivalent to the weatherstrip.
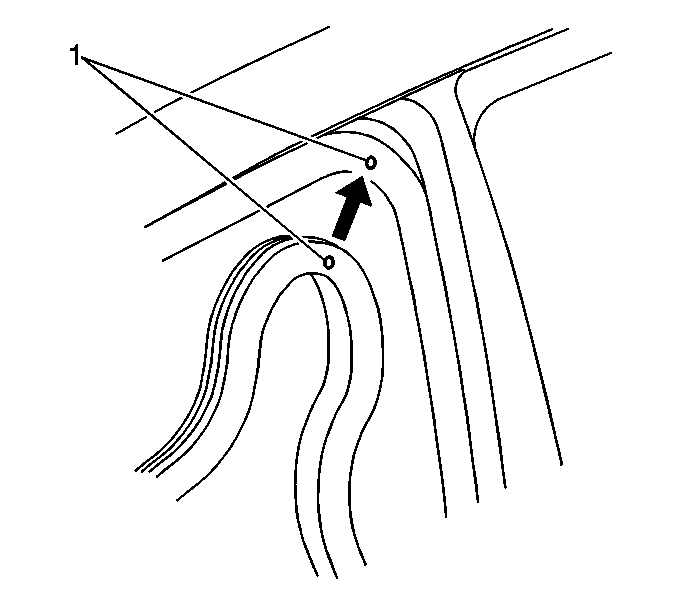
- Install the door opening weatherstrip by aligning the appropriate color dot (1) with the top rear of the door opening and pressing until fully seated.
- Finish installing the door opening weatherstrip by pressing the weatherstrip into place in a clockwise direction around the door opening.
- Install the rear quarter upper trim panel. Refer to Rear Quarter Upper Trim Panel Replacement
- Install the body lock pillar trim panel. Refer to Body Lock Pillar Trim Replacement in Interior Trim.
- Install the center pillar lower trim panel. Refer to Center Pillar Lower Trim Panel Replacement in Interior Trim.
- Install the center pillar upper trim panel. Refer to Center Pillar Upper Trim Panel Replacement in Interior Trim.
- Install the carpet retainer. Refer to Front Floor Panel Carpet Replacement in Interior Trim.