For 1990-2009 cars only
Condenser Tube Replacement RPOs L61, LE5
Special Tools
J 39400-A Halogen Leak Detector
Removal Procedure
- Recover the refrigerant. Refer to Refrigerant Recovery and Recharging.
- Raise the vehicle. Refer to Lifting and Jacking the Vehicle.
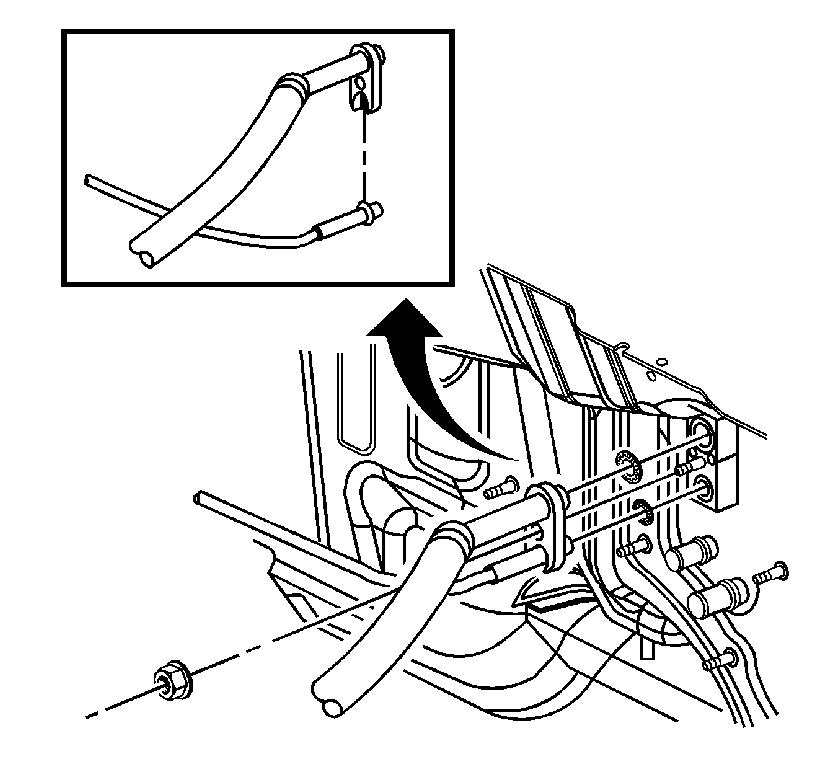
- Remove the condenser tube bolt and tube from the condenser.
- Remove and discard the sealing washers.
- Lower the vehicle.
- Remove the air cleaner assembly. Refer to Air Cleaner Assembly Replacement.
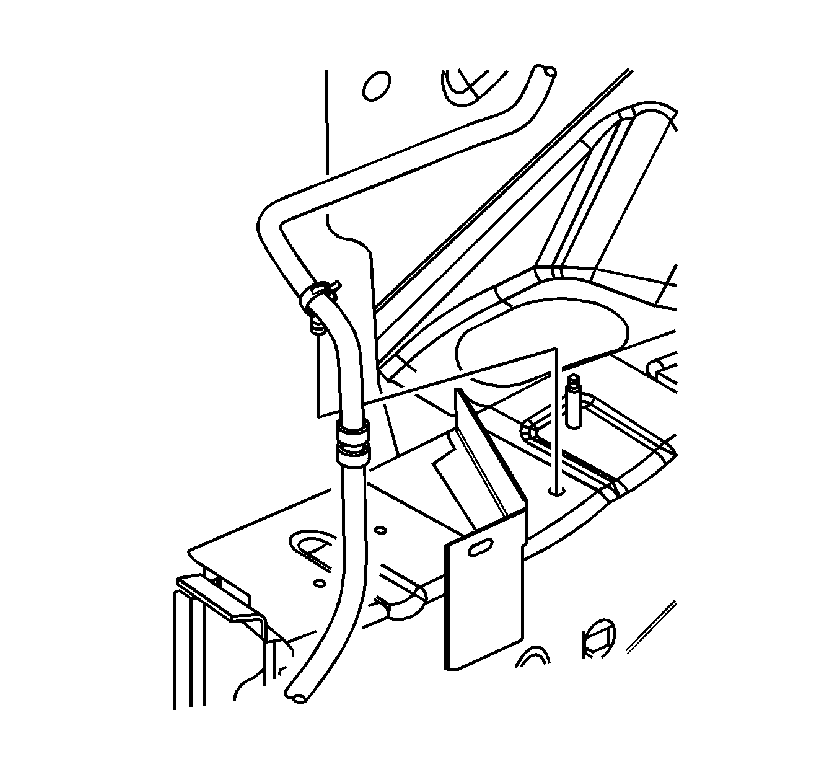
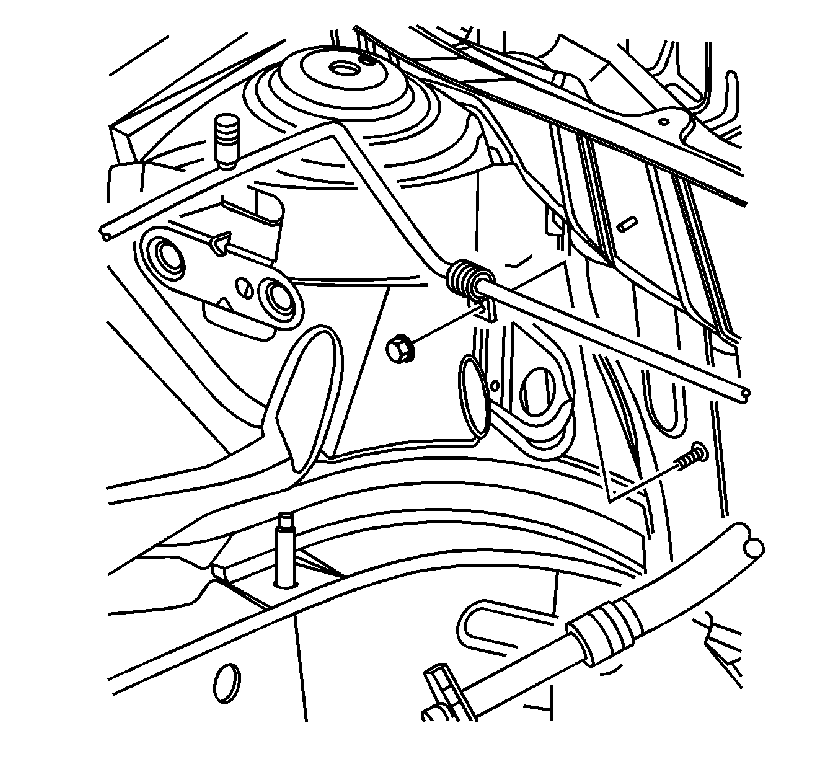
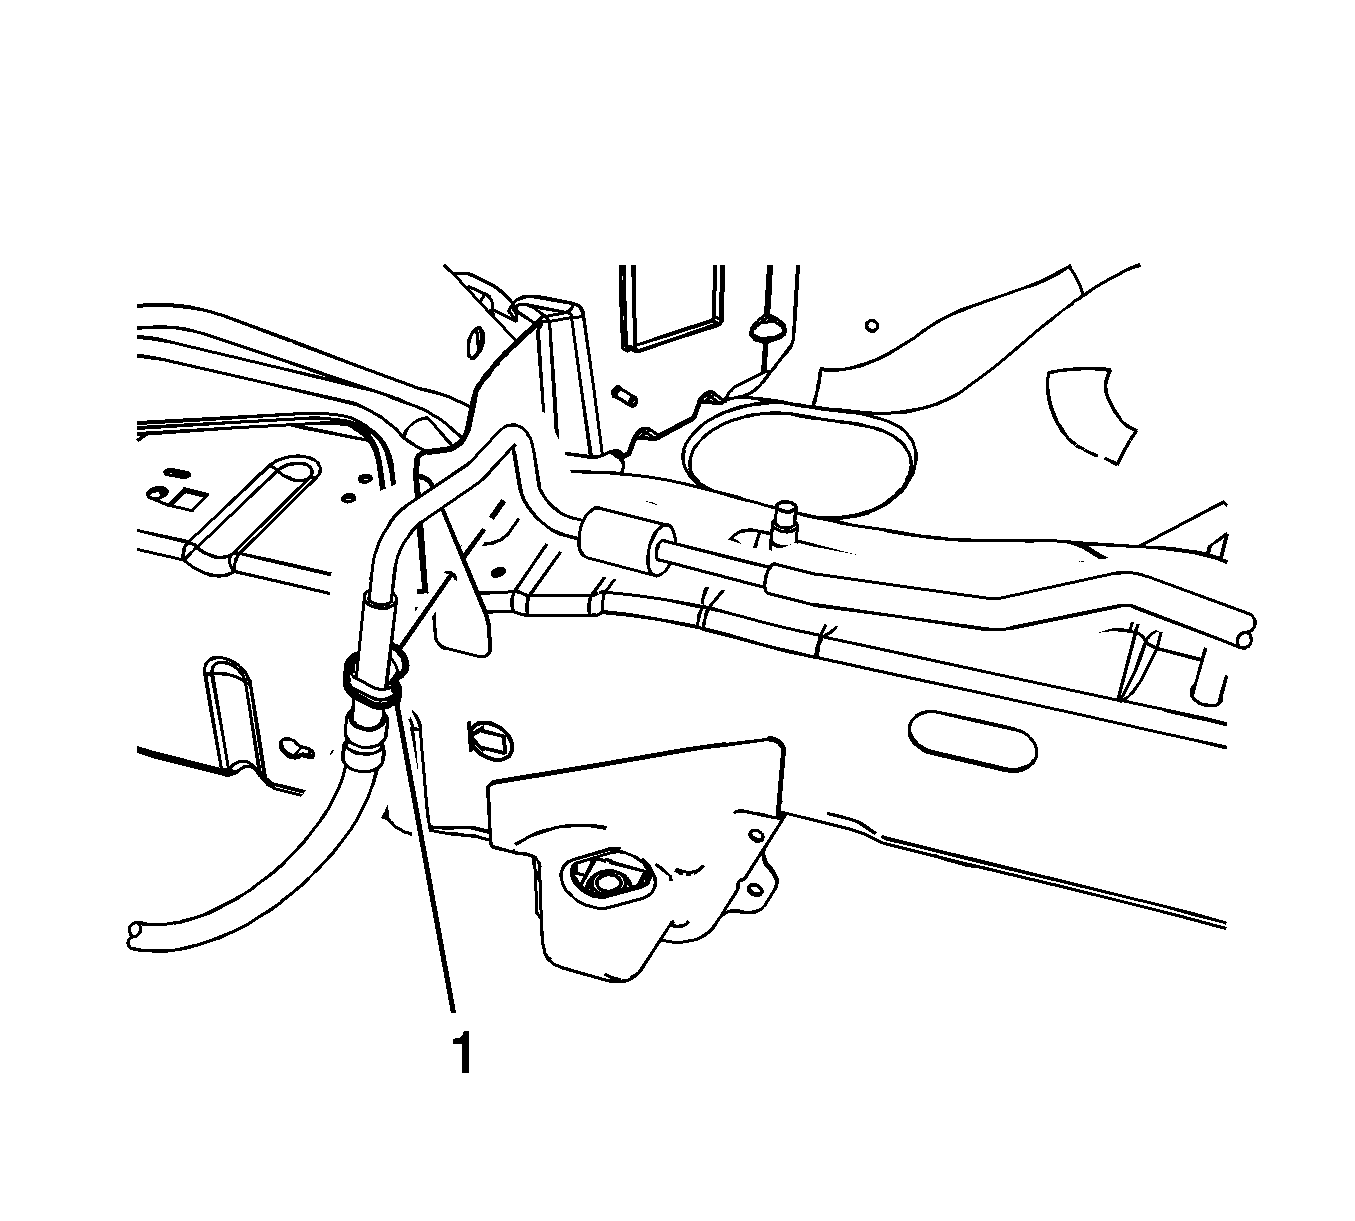
- Remove the condenser tube from the frame rail.
- Remove the condenser tube from the front of dash.
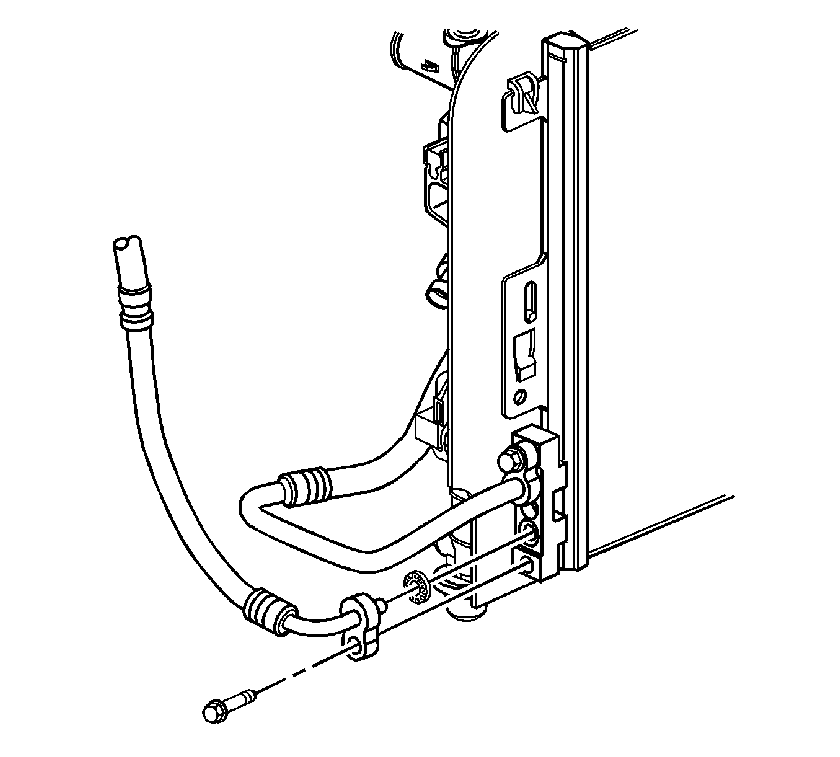
- Remove the condenser tube and evaporator hose from the thermal expansion valve (TXV).
- Remove and discard the seal washer.
Installation Procedure
- Install new sealing washers on the condenser tube and evaporator hose fittings. Refer to Sealing Washer Replacement.
- Install the condenser tube and evaporator hose to the TXV.
- Install the TXV nut.
- Install the condenser tube to the front of dash.
- Install the condenser tube to the frame rail.
- Install the air cleaner assembly. Refer to Air Cleaner Assembly Replacement.
- Raise the vehicle. Refer to Lifting and Jacking the Vehicle.
- Install a new seal washer to the condenser tube. Refer to Sealing Washer Replacement.
- Install the condenser tube and bolt to the condenser.
- Lower the vehicle.
- Evacuate and charge the refrigerant system. Refer to Refrigerant Recovery and Recharging.
- Leak test the fittings using the J 39400-A .
Notice: Refer to Fastener Notice in the Preface section.
Tighten
Tighten the nut to 20 N·m (15 lb ft).
Tighten
Tighten the nut to 10 N·m (88 lb in).
Tighten
Tighten the bolt to 20 N·m (15 lb ft).
Condenser Tube Replacement LNF
Special Tools
J 39400-A Halogen Leak Detector
Removal Procedure
- Remove the charged air cooler outlet pipe. Refer to Charge Air Cooler Outlet Pipe Replacement
- Recover the refrigerant. Refer to Refrigerant Recovery and Recharging.
- Raise the vehicle. Refer to Lifting and Jacking the Vehicle.
- Remove the condenser tube bolt and tube from the condenser.
- Remove and discard the sealing washers.
- Lower the vehicle.
- Remove the air cleaner assembly. Refer to Air Cleaner Assembly Replacement.
- Remove the air cleaner inlet duct. Refer to Air Cleaner Inlet Duct Replacement
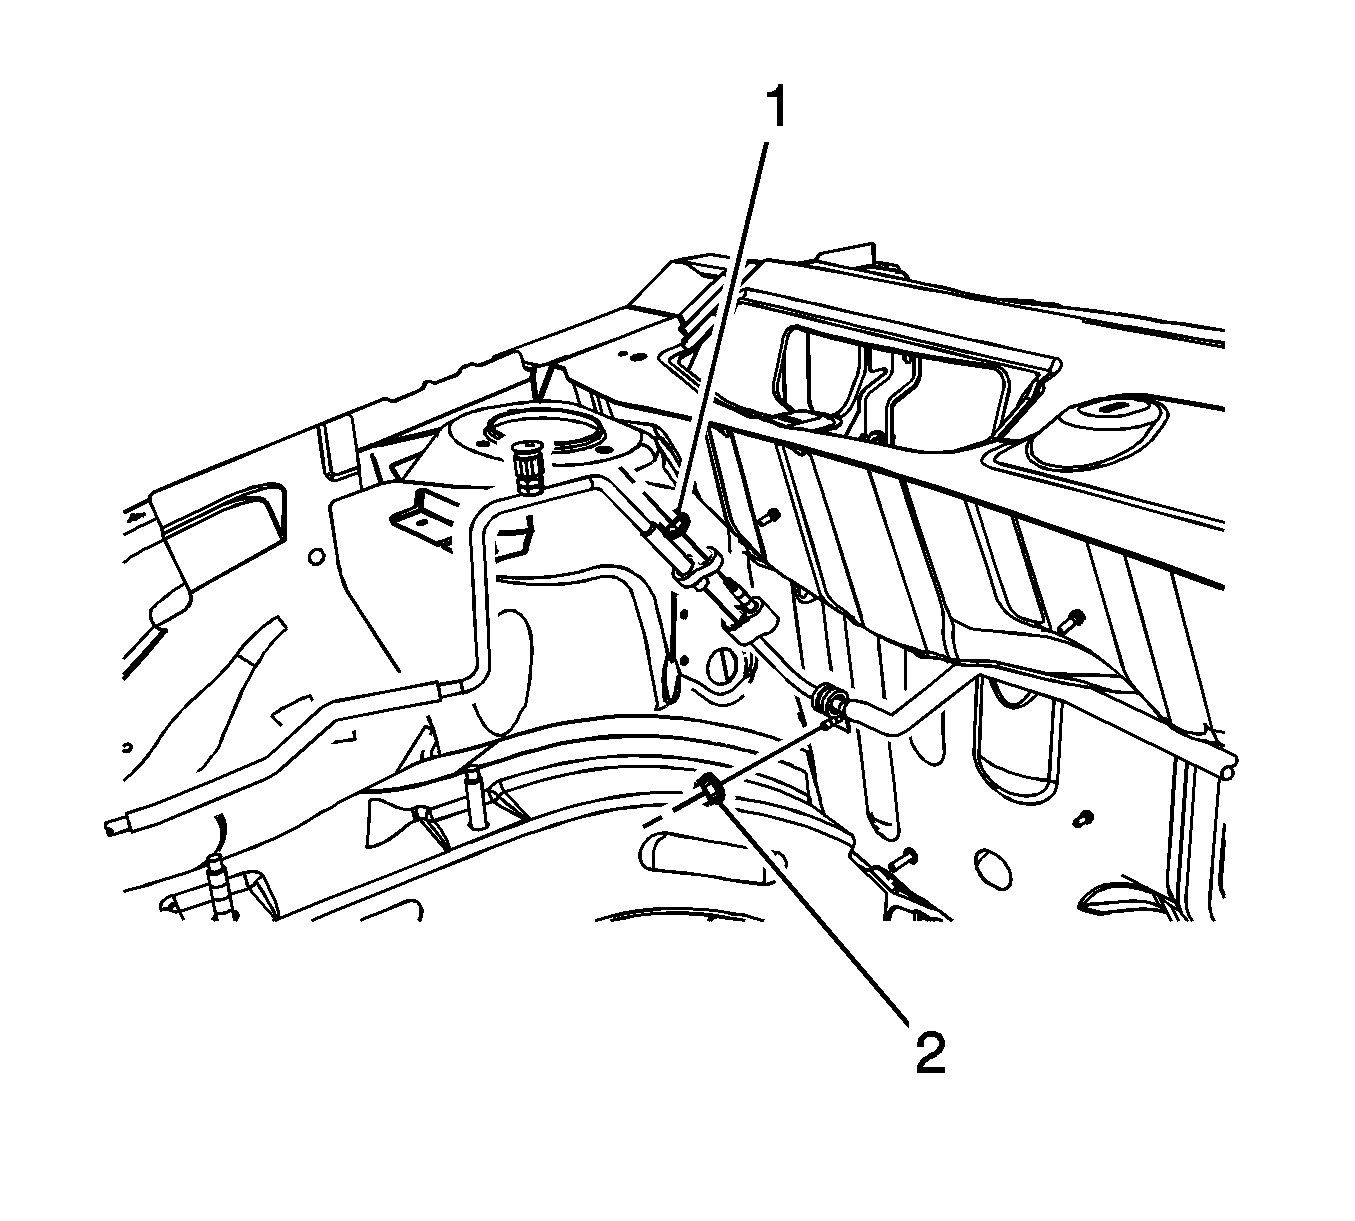
- Remove the condenser tube from the frame rail bracket (1).
- Remove front condenser tube from rear condenser tube (1).
- Remove the condenser tube from the front of dash (2).
- Remove the charged air cooler inlet pipe. Refer to Charge Air Cooler Inlet Pipe Replacement
- Remove the condenser tube and evaporator hose from the thermal expansion valve (TXV).
- Remove and discard the seal washer.
Installation Procedure
- Install new sealing washers on the condenser tube and evaporator hose fittings. Refer to Sealing Washer Replacement.
- Install the condenser tube and evaporator hose to the TXV.
- Install the TXV nut.
- Install the front condenser tube to the rear condenser tube (1).
- Install the condenser tube to the front of dash (2).
- Install the charged air cooler inlet pipe. Refer to Charge Air Cooler Inlet Pipe Replacement
- Install the condenser tube to the frame rail bracket (1).
- Install the air cleaner inlet duct. Refer to Air Cleaner Inlet Duct Replacement
- Install the air cleaner assembly. Refer to Air Cleaner Assembly Replacement.
- Raise the vehicle. Refer to Lifting and Jacking the Vehicle.
- Install a new seal washer to the condenser tube. Refer to Sealing Washer Replacement.
- Install the condenser tube and bolt to the condenser.
- Lower the vehicle.
- Install the charged air cooler outlet pipe. Refer to Charge Air Cooler Outlet Pipe Replacement
- Evacuate and charge the refrigerant system. Refer to Refrigerant Recovery and Recharging.
- Leak test the fittings using the J 39400-A .
Notice: Refer to Fastener Notice in the Preface section.
Tighten
Tighten the nut to 20 N·m (15 lb ft).
Tighten
Tighten the nut to 20 N·m (15 lb ft).
Tighten
Tighten the nut to 10 N·m (88 lb in).
Tighten
Tighten the bolt to 20 N·m (15 lb ft).
