Exhaust Manifold Replacement Left Side
Removal Procedure
- Disconnect the negative battery cable. Refer to
Caution: Unless directed otherwise, the ignition and start switch must be in the OFF or LOCK position, and all electrical loads must be OFF before servicing any electrical component. Disconnect the negative battery cable to prevent an electrical spark should a tool or equipment come in contact with an exposed electrical terminal. Failure to follow these precautions may result in personal injury and/or damage to the vehicle or its components.
in General Information. - Raise and suitably support the vehicle. Refer to SECTION 0A.
- Remove the underbody crossbrace (convertible only). Refer to SECTION 10-3.
- Remove the catalytic converter nuts from the exhaust manifolds.
- Remove the complete exhaust system. Refer to General Exhaust System Replacement in Engine Exhaust.
- Lower the vehicle.
- Remove the air intake duct.
- Remove the drive belt. Refer to Drive Belt Replacement .
- Disconnect the TCS adjuster from the wheel well center panel and reposition. Refer to SECTION 5E2.
- Reposition the generator.
- Reposition the A/C compressor. Refer to SECTION 1B.
- Remove the secondary air injection pipe, check valve and hose as an assembly from the exhaust manifold.
- Disconnect the spark plug wire harness from the spark plugs and the wire clips from the supports.
- Remove the spark plug wire supports.
- Remove the exhaust manifold studs and bolts.
- Remove the heat shields, exhaust manifold and gasket.
- Clean the following items:
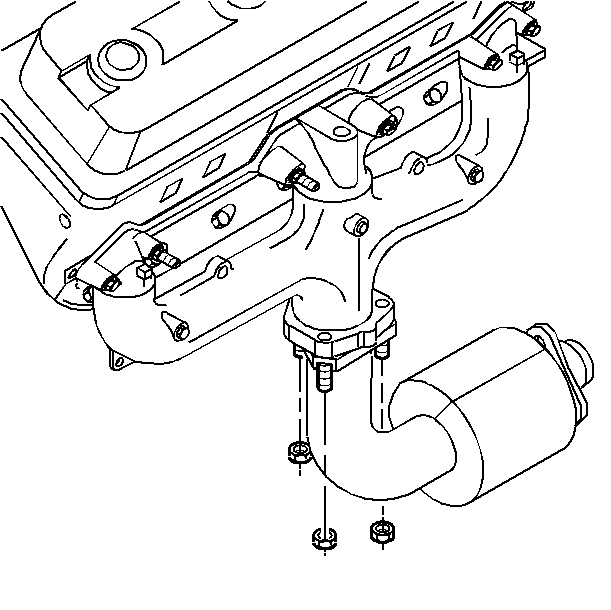
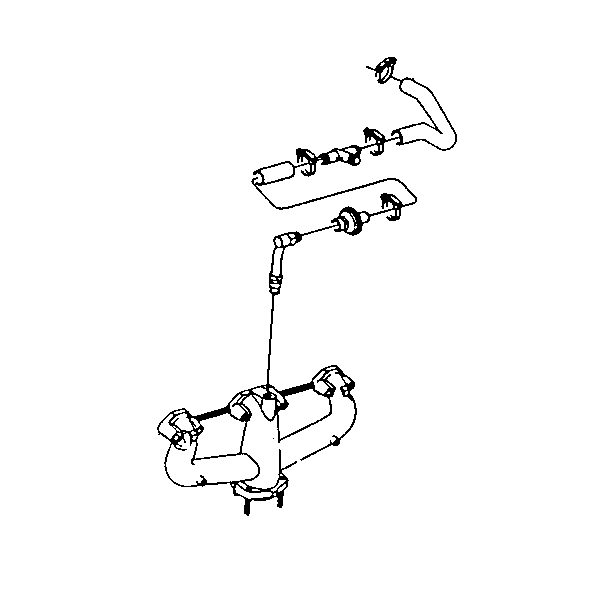
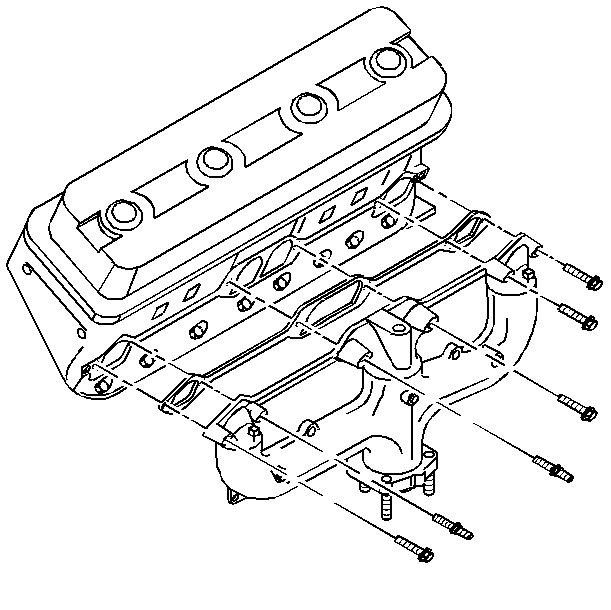
| • | The exhaust manifold and cylinder head sealing surfaces |
| • | The exhaust manifold bolts |
Installation Procedure
- Install the exhaust manifold gasket, manifold and heat shields.
- Install the exhaust manifold studs and bolts.
- Install the spark plug wire supports.
- Install the spark plug wire harness and clips.
- Install the secondary air injection pipe and the check valve as an assembly.
- Install the A/C compressor. Refer to SECTION 1B.
- Install the generator. Refer to Generator Replacement in Engine Electrical.
- Install the drive belt. Refer to Drive Belt Replacement .
- Install the air intake duct.
- Install the TCS adjuster. Refer to SECTION 5E2.
- Raise and support the vehicle. Refer to SECTION 0A.
- Install the catalytic converter and nuts to the exhaust manifolds.
- Install the complete exhaust system. Refer to General Exhaust System Replacement in Engine Exhaust.
- Install the underbody crossbrace (convertible only). Refer to SECTION 10-3.
- Lower the vehicle.
- Connect the negative battery cable.

Tighten
Tighten the exhaust manifold studs and bolts to 40 N·m
(30 lb ft).
Notice: Use the correct fastener in the correct location. Replacement fasteners must be the correct part number for that application. Fasteners requiring replacement or fasteners requiring the use of thread locking compound or sealant are identified in the service procedure. Do not use paints, lubricants, or corrosion inhibitors on fasteners or fastener joint surfaces unless specified. These coatings affect fastener torque and joint clamping force and may damage the fastener. Use the correct tightening sequence and specifications when installing fasteners in order to avoid damage to parts and systems.
Tighten
Tighten the support bolts to 12 N·m (106 lb in).
Tighten
Tighten the secondary air injection pipe fitting-to-exhaust manifold
to 55 N·m (41 lb ft).

Tighten
Tighten the converter-to-exhaust manifold nuts to 21 N·m
(15 lb ft).
Tighten
Tighten the negative battery cable bolt to 15 N·m (11 lb ft).
Exhaust Manifold Replacement Right Side
Removal Procedure
- Disconnect the negative battery cable. Refer to
Caution: Unless directed otherwise, the ignition and start switch must be in the OFF or LOCK position, and all electrical loads must be OFF before servicing any electrical component. Disconnect the negative battery cable to prevent an electrical spark should a tool or equipment come in contact with an exposed electrical terminal. Failure to follow these precautions may result in personal injury and/or damage to the vehicle or its components.
in General Information. - Raise and suitably support the vehicle. Refer to SECTION 0A.
- Remove the underbody crossbrace (convertible only). Refer to SECTION 10-3.
- Remove the catalytic converter nuts from the exhaust manifolds.
- Remove the complete exhaust system. Refer to General Exhaust System Replacement in Engine Exhaust.
- Lower the vehicle.
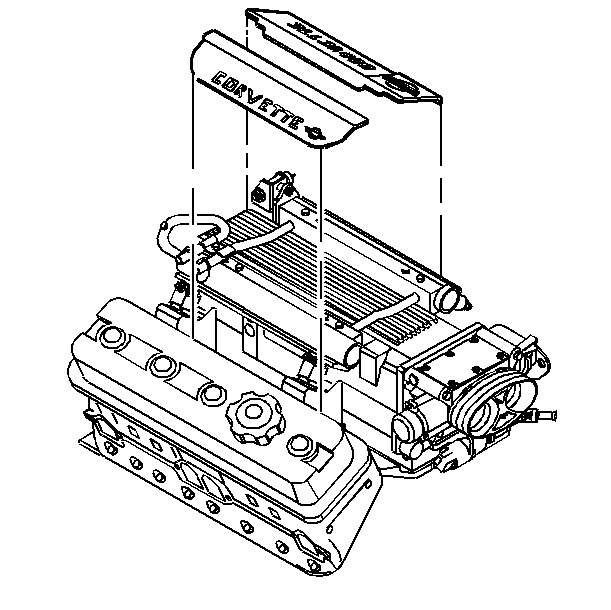
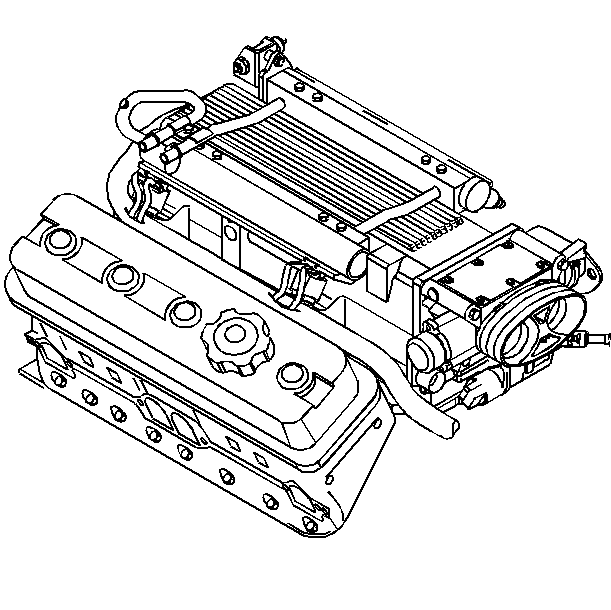
- Remove the fuel rail covers.
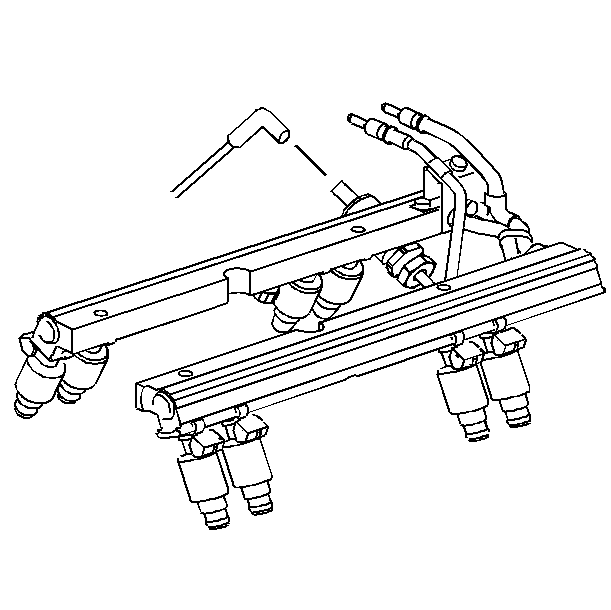
- Remove the wiring harness connectors from the fuel injectors.
- Disconnect the vacuum tube from the fuel pressure regulator.
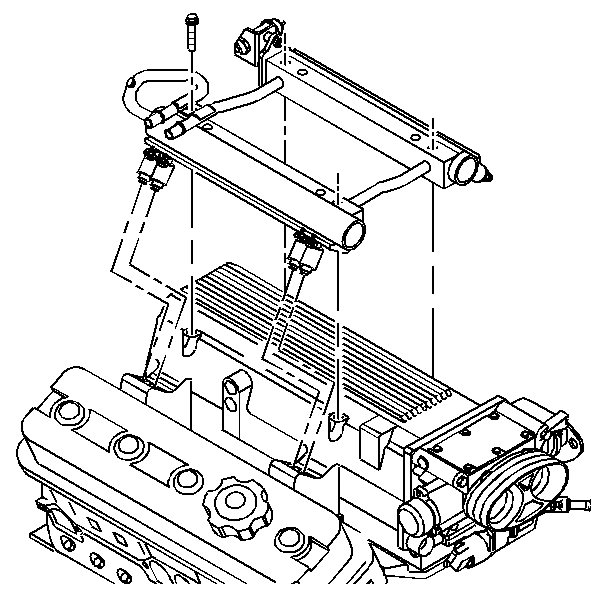
- Remove the fuel rail bolts.
- Remove the fuel rail assembly with the injectors from the intake manifold.
- Disconnect the spark plug wire harness from the spark plugs and the wire clips from the supports.
- Remove the front spark plug bracket and bolt.
- Remove the oil level indicator and tube. Refer to Oil Level Indicator and Tube Replacement .
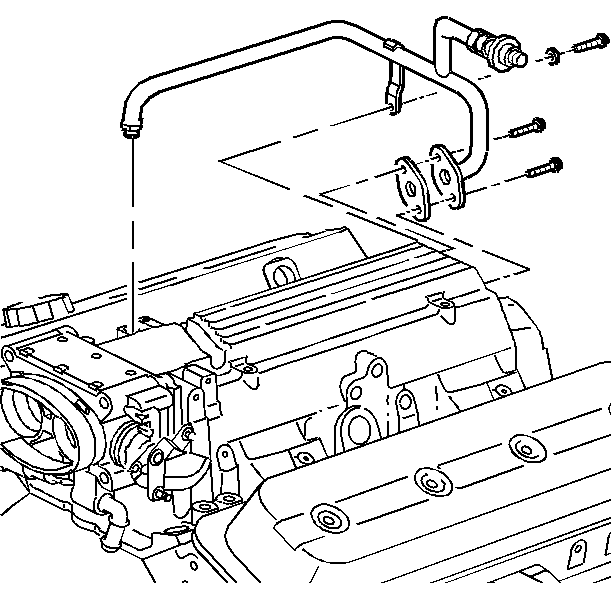
- Remove the secondary air injection pipe, gasket and check valve as an assembly from the intake and exhaust manifolds and cylinder head.
- Remove the exhaust manifold studs and bolts.
- Remove the heat shields, exhaust manifold and gasket.
- Clean the following items:


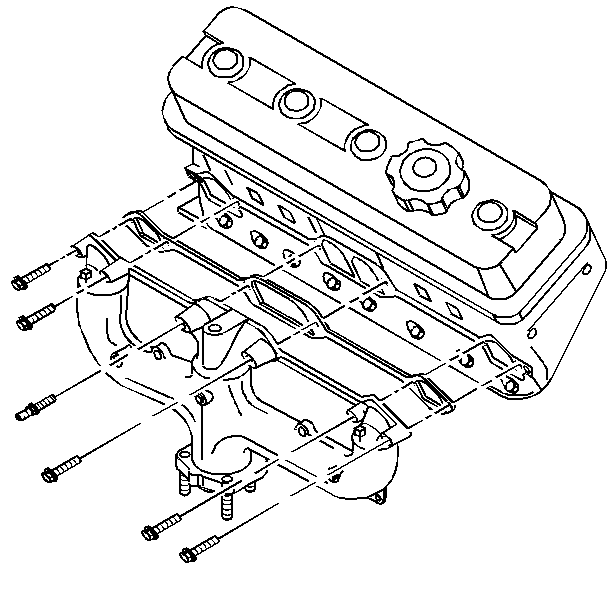
| • | The exhaust manifold and cylinder head sealing surfaces |
| • | The exhaust manifold bolts |
Installation Procedure
- Install the exhaust manifold gasket, manifold and heat shields.
- Install the exhaust manifold studs and bolts.
- Install the secondary air injection pipe and the check valve as an assembly. Install the air injection pipe and the check valve bolts.
- Apply a sealer GM P/N 1052080 or equivalent around the oil level indicator tube 13 mm (0.50 in) below the bead.
- Install the oil level indicator and tube to the cylinder head. Refer to Oil Level Indicator and Tube Replacement .
- Install the front spark plug bracket and bolt.
- Connect the spark plug wire harnesses and clips.
- Install the fuel rail with injectors to the intake manifold.
- Install the fuel rail bolts.
- Connect the vacuum tube to the fuel pressure regulator.
- Install the wiring harness connectors from the fuel pressure regulator.
- Raise and suitably support the vehicle. Refer to SECTION 0A.
- Install the complete exhaust system. Refer to General Exhaust System Replacement in Engine Exhaust.
- Install the catalytic converter and nuts to the exhaust manifold.
- Install the underbody crossbrace (convertible only). Refer to SECTION 10-3.
- Lower the vehicle.
- Install the fuel rail covers.
- Connect the negative battery cable.

Tighten
Tighten the exhaust manifold studs and bolts to 40 N·m
(30 lb ft).
Notice: Use the correct fastener in the correct location. Replacement fasteners must be the correct part number for that application. Fasteners requiring replacement or fasteners requiring the use of thread locking compound or sealant are identified in the service procedure. Do not use paints, lubricants, or corrosion inhibitors on fasteners or fastener joint surfaces unless specified. These coatings affect fastener torque and joint clamping force and may damage the fastener. Use the correct tightening sequence and specifications when installing fasteners in order to avoid damage to parts and systems.

Tighten
| • | Tighten the secondary air injection pipe fitting-to-exhaust manifold to 55 N·m (41 lb ft). |
| • | Tighten the secondary air injection pipe bracket bolt to 40 N·m (30 lb ft). |
| • | Tighten the secondary air injection pipe flange bolts to 26 N·m (19 lb ft). |

Tighten
Tighten the spark plug bracket bolts 12 N·m (106 lb in).

Tighten
Tighten the fuel rail bolts and screws to 10 N·m (89 lb ft).


| • | Use the numbers marked on the electrical connectors in order to match the electrical connectors to the correct fuel injectors. |
| • | If the connectors are not marked, refer to Fuel Injector Replacement in Engine Controls. |

Tighten
Tighten the converter-to-exhaust manifold nuts to 21 N·m
(15 lb ft).

Tighten
Tighten the negative battery cable bolt to 15 N·m (11 lb ft).
