The steps in the following procedure are in a specific order. Follow
these steps in this order and ignore no details or vehicle damage could occur.
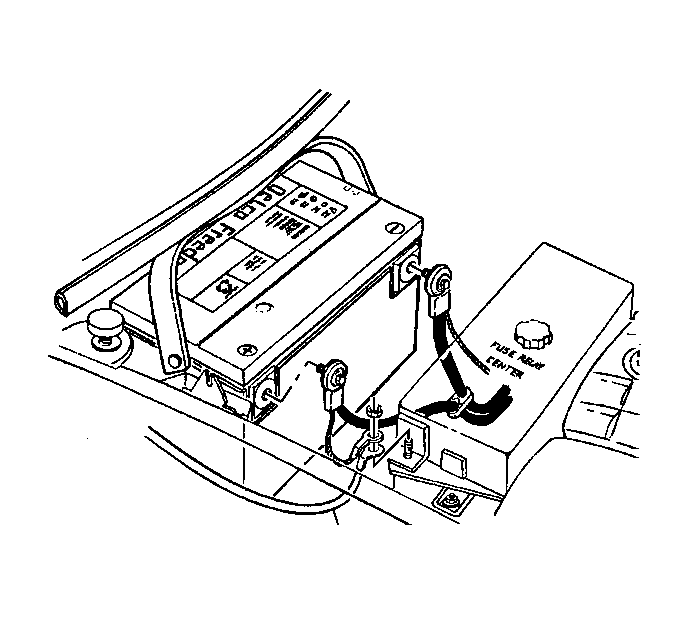
- Disconnect the negative battery cable. Refer to
Caution: Unless directed otherwise, the ignition and start switch must be in the OFF or LOCK position, and all electrical loads must be OFF before servicing
any electrical component. Disconnect the negative battery cable to prevent an electrical spark should a tool or equipment come in contact with an exposed electrical terminal. Failure to follow these precautions may result in personal injury and/or damage to
the vehicle or its components.
in General Information.
- Evacuate the A/C system. Refer to
Evacuation
in HVAC.
- Raise the vehicle and support. Refer to
Lifting and Jacking the Vehicle
in General Information.
- Drain the coolant. Refer to
Cooling System Draining and Filling
in Engine Cooling.
- Lower the vehicle.
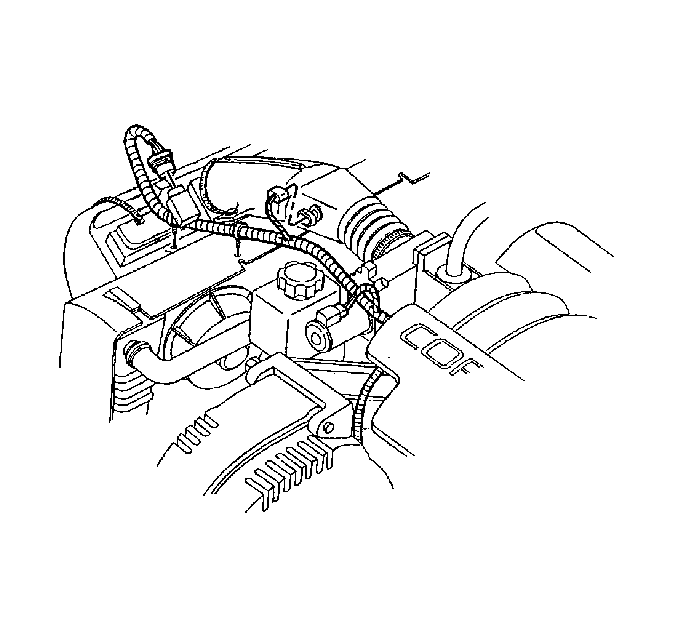
- Disconnect the IAT sensor connector.
- Disconnect the MAF sensor connector.
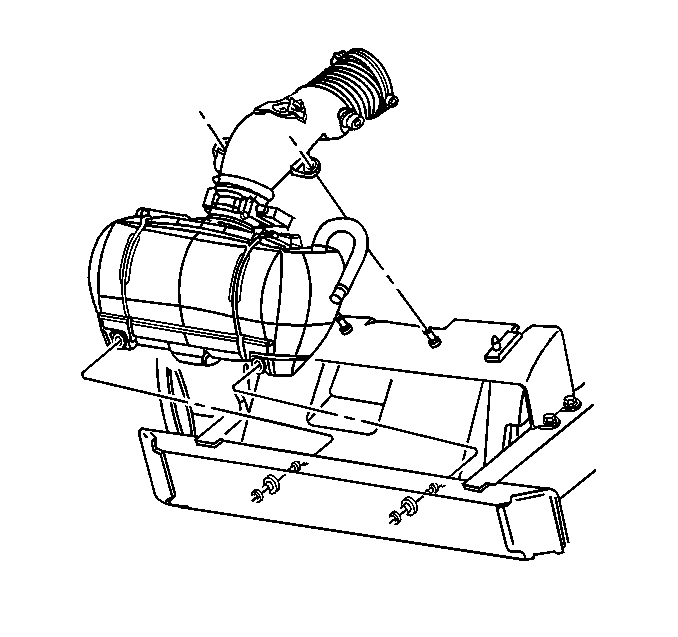
- Disconnect the fuel regulator purge line from the air intake duct.
- Remove the air intake duct and the air cleaner assembly.
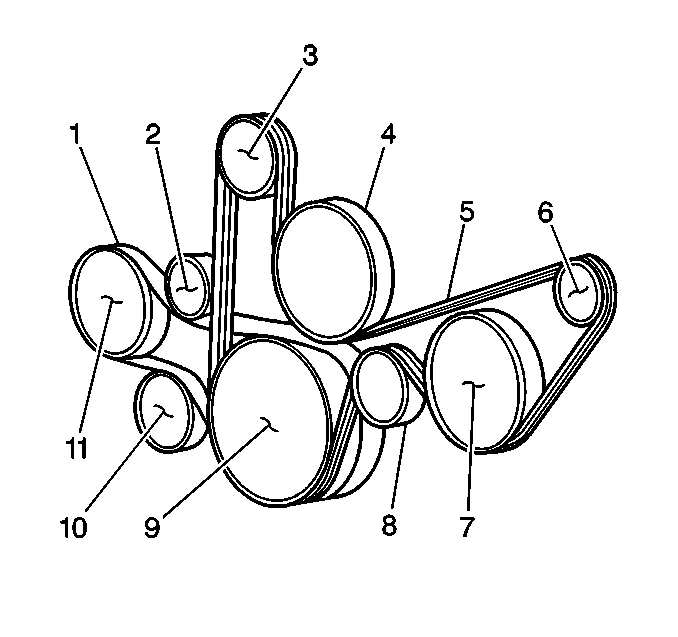
- Remove the accessory drive belt. (5)
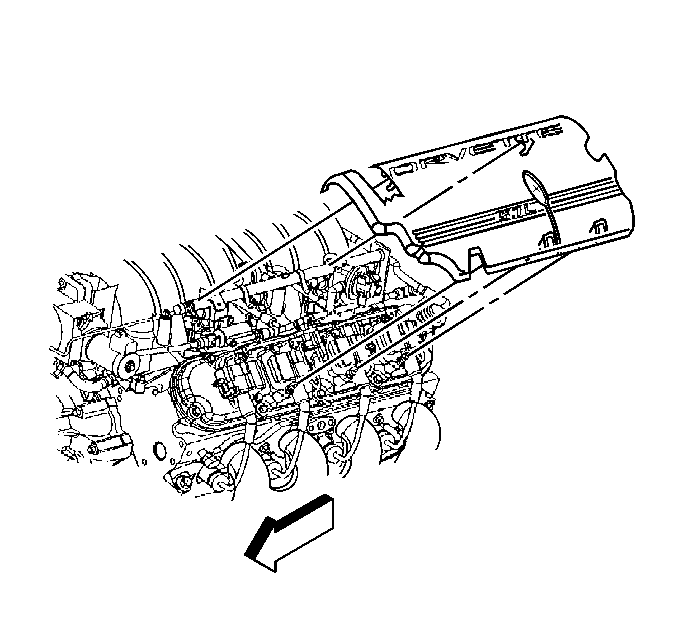
- Remove the fuel rail covers.
- Relieve the fuel system pressure using J 34730-1A
.
Important: Cap the fittings and plug the holes when separating fuel system components
in order to prevent dripping of fuel and/or dirt and other contaminants from
entering the fuel system.
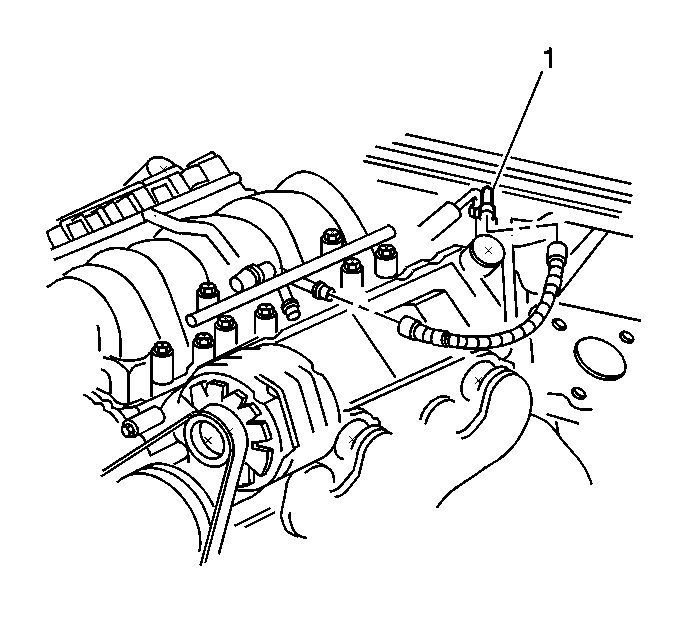
- Disconnect the fuel lines (3 and 4) at the fuel rail.
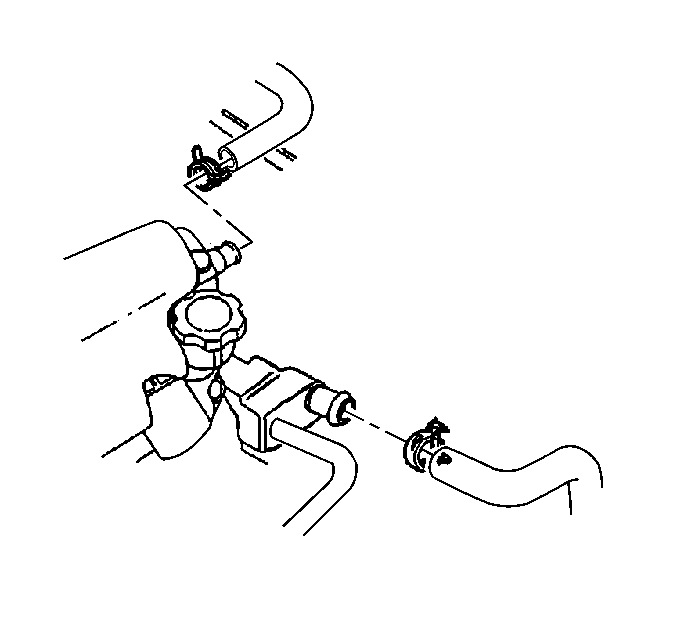
- Disconnect the radiator hoses from the water pump.
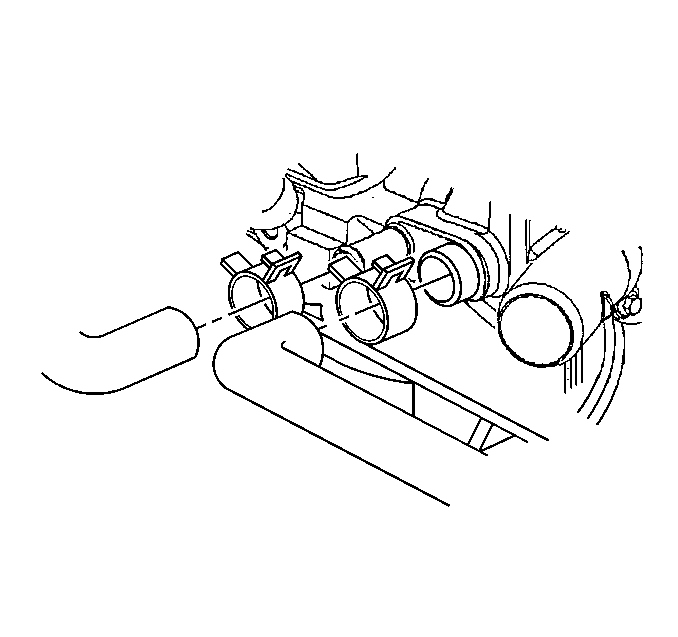
- Disconnect the heater hoses from the water pump.
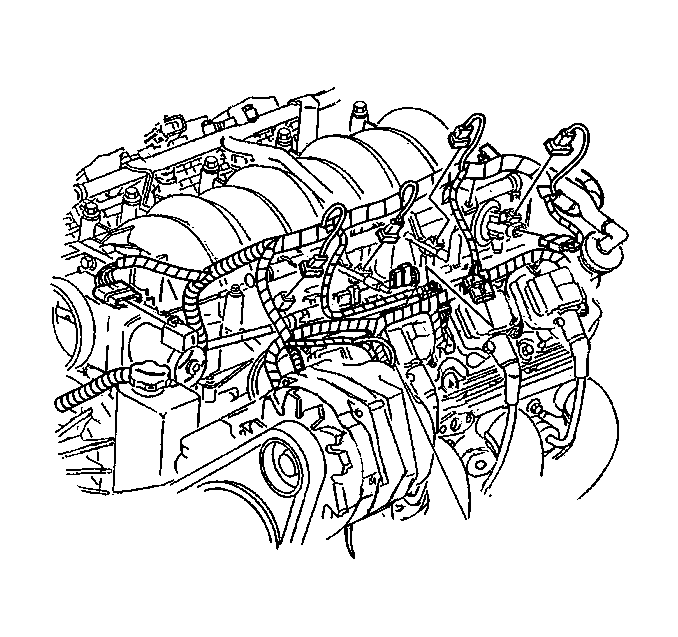
- Disconnect the following electrical connectors:
| 16.2. | Ignition coil main connectors |
| 16.4. | Electric throttle motor |
| 16.5. | Throttle position sensor |
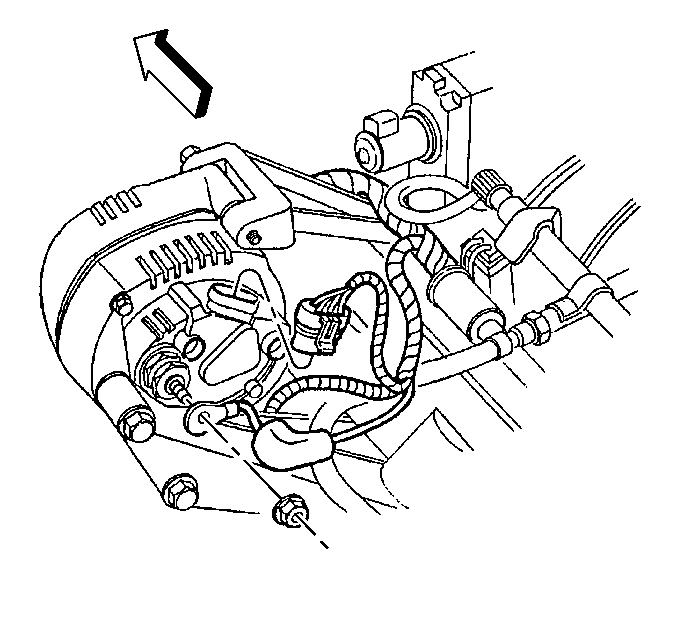
- Disconnect the generator electrical connectors.
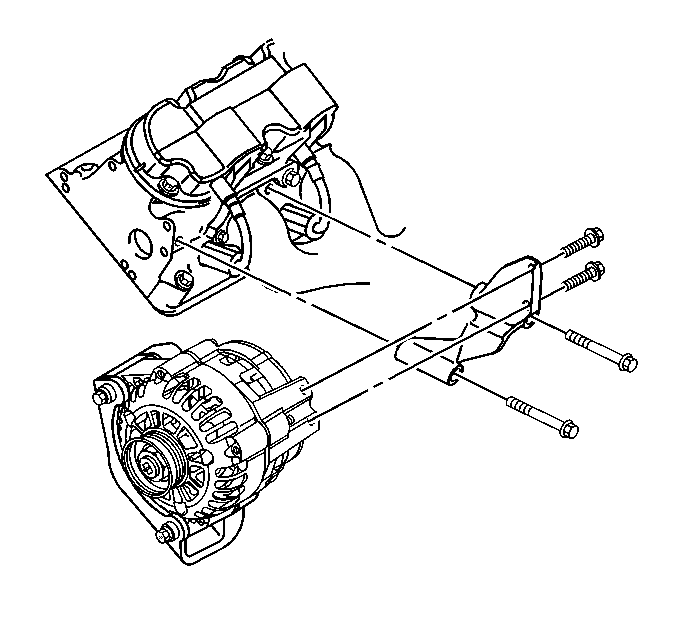
- Remove the generator rear bracket bolts.
- Remove the generator rear bracket.
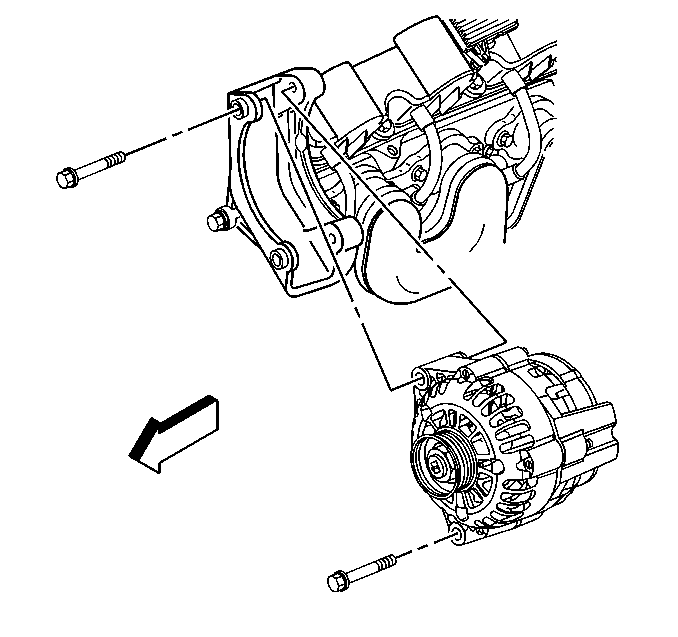
- Remove the generator mounting bolts.
- Remove the generator.
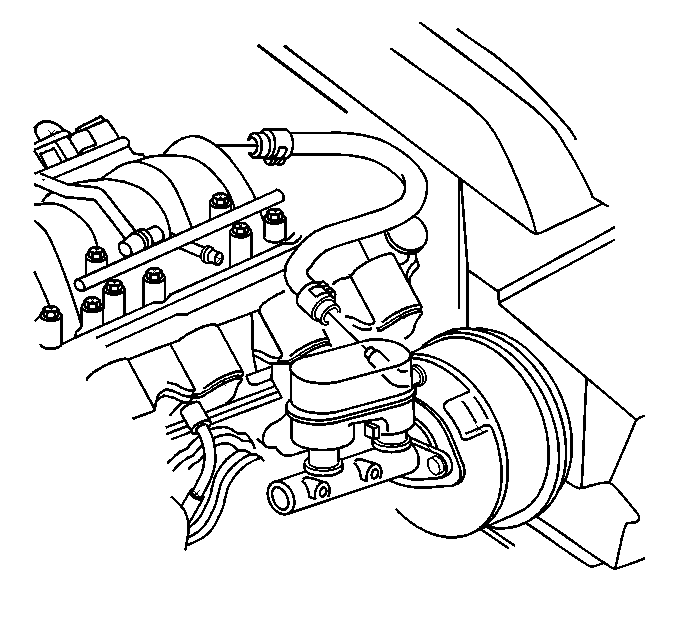
- Disconnect the brake booster vacuum hose from the brake booster.
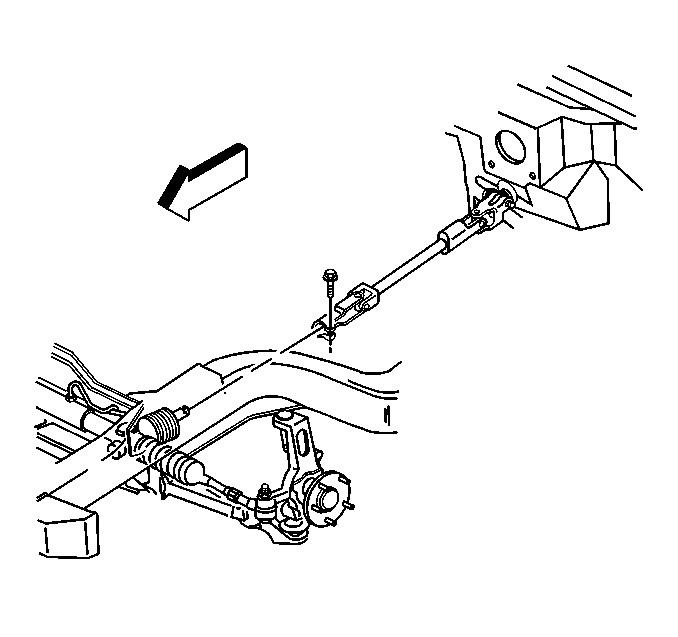
- Remove the intermediate shaft to steering gear bolt.
- Disconnect the intermediate steering shaft from the steering gear
and slave left to the frame rail.
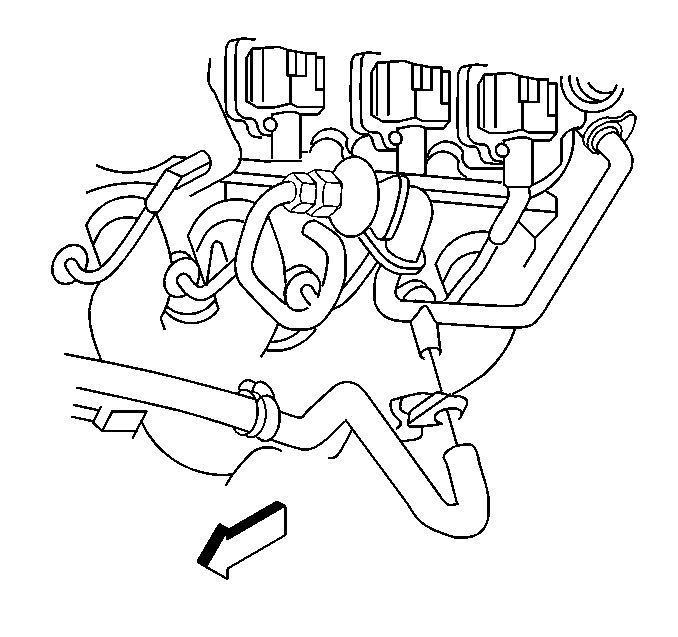
- Disconnect the AIR hose from the LH exhaust
manifold.
Important: Do not remove the engine flywheel housing to driveline support assembly
bolts until it is called out in the procedure.
- Raise the vehicle.
- Remove the front tire and wheel assemblies.
- Remove the intermediate exhaust pipe. Refer to
Intermediate Pipe
in Engine Exhaust.
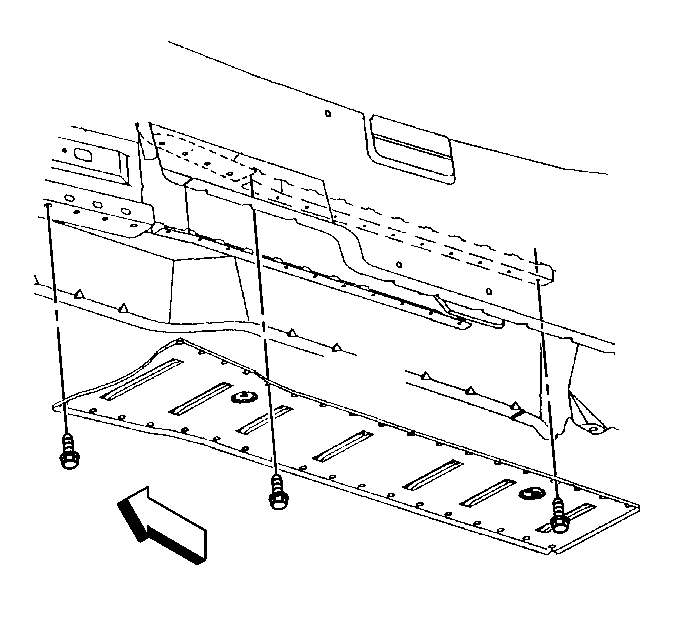
- Remove the close-out panel bolts.
- Remove the close-out panel.
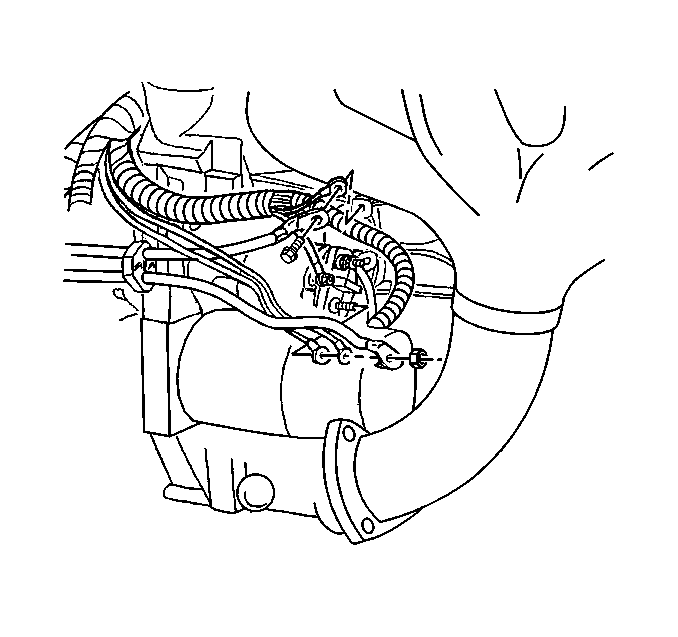
- Remove the starter electrical connectors.
- Remove all grounds from the right side of the engine block.
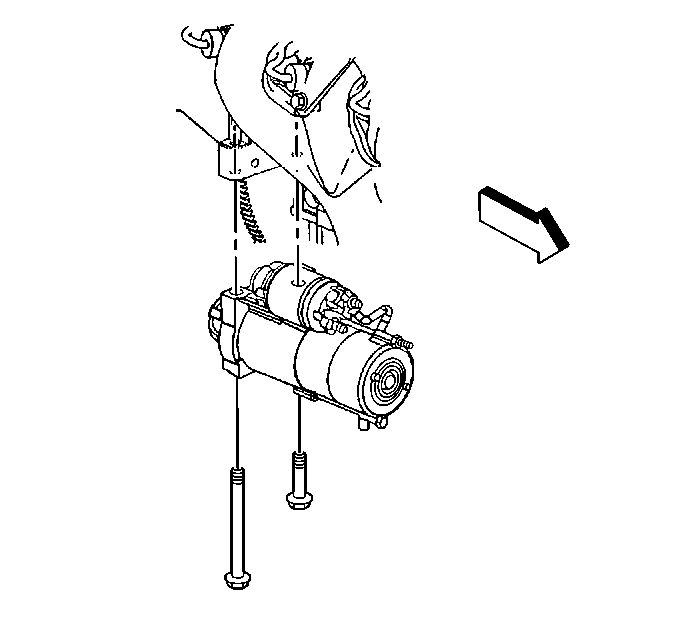
- Remove the starter bolts.
- Remove the starter.
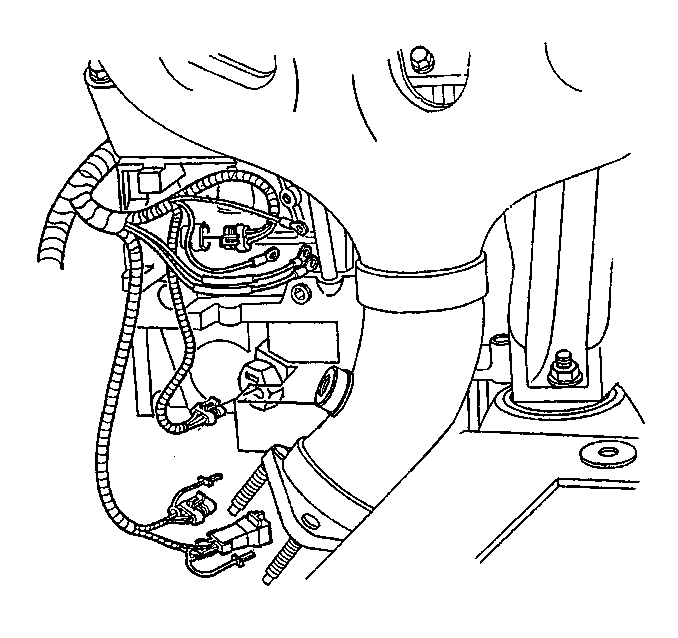
- Disconnect the oil level sensor connector.
- Disconnect the crank position sensor connector.
- Disconnect the RH front HO2S connector.
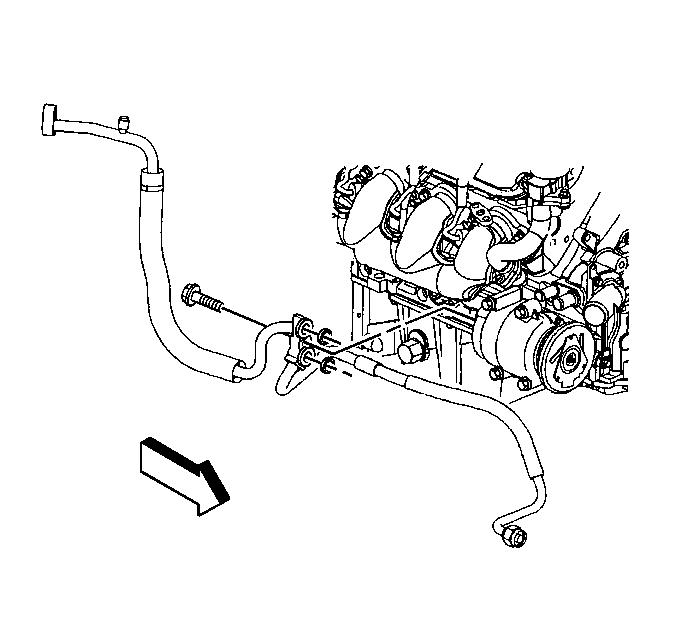
- Remove the A/C compressor hose retaining bolt.
- Remove the A/C compressor hose from the A/C compressor.
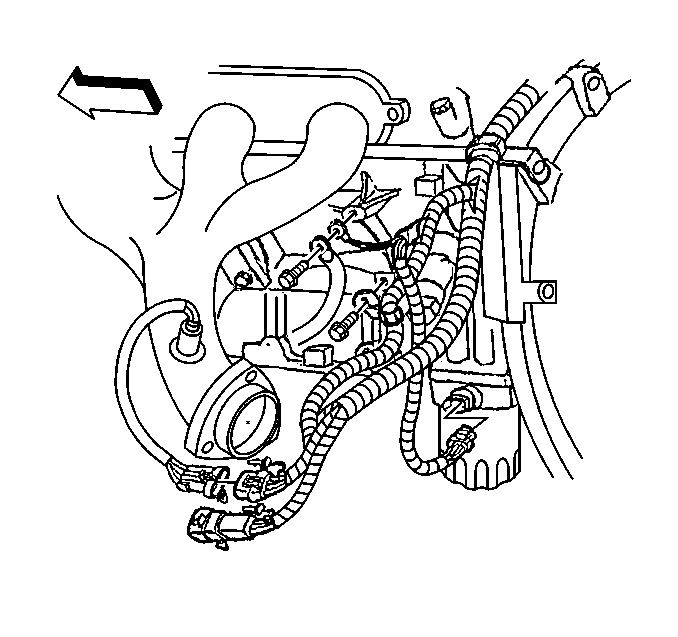
- Disconnect the engine oil temperature sensor connector.
- Disconnect all grounds from the left side of the engine block.
- Disconnect the LH front HO2S connector.
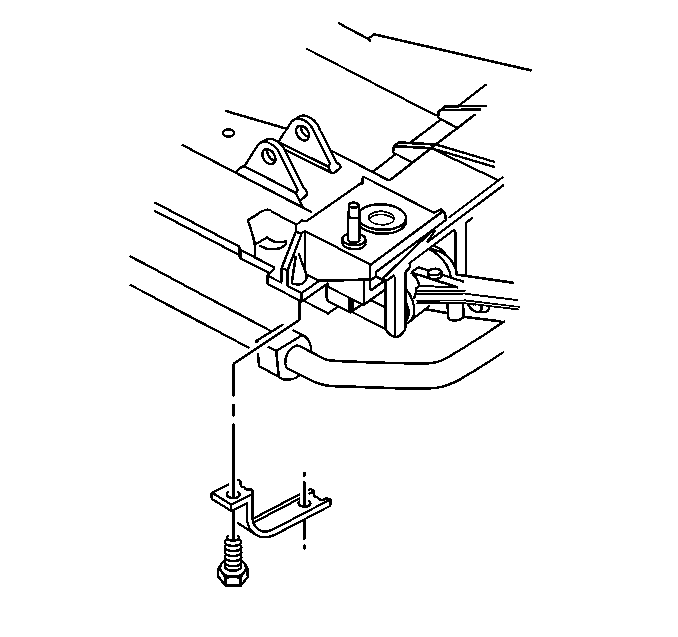
- Remove the front stabilizer bar bolts and straps.
- Disconnect the front stabilizer bar from the cradle.
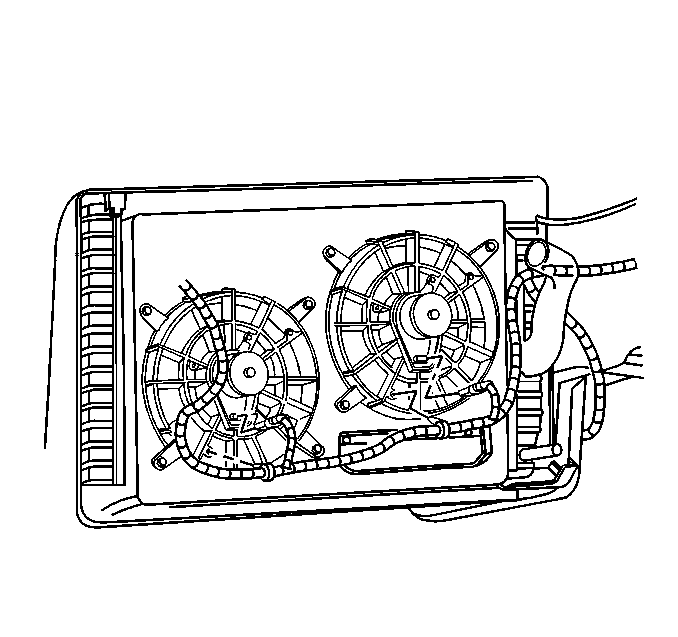
- Disconnect the electrical connectors and harness from the electric cooling
fans.
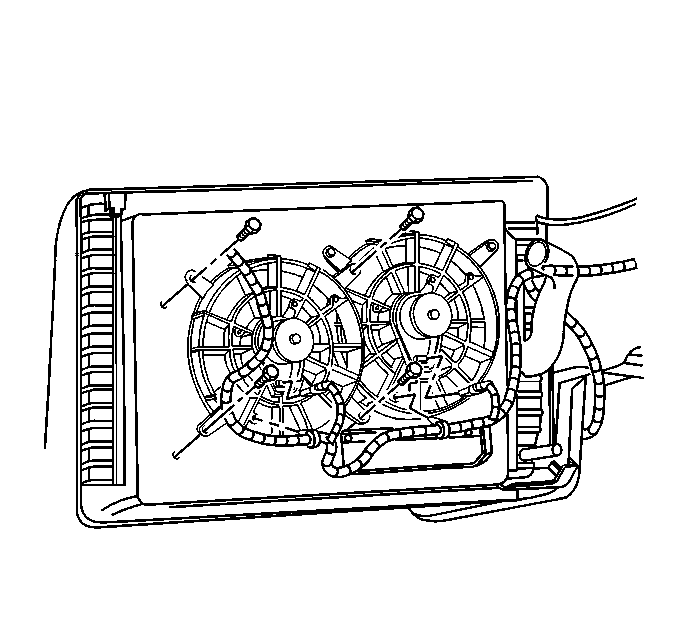
- Remove the electric cooling fan bolts.
- Remove both electric cooling fans.
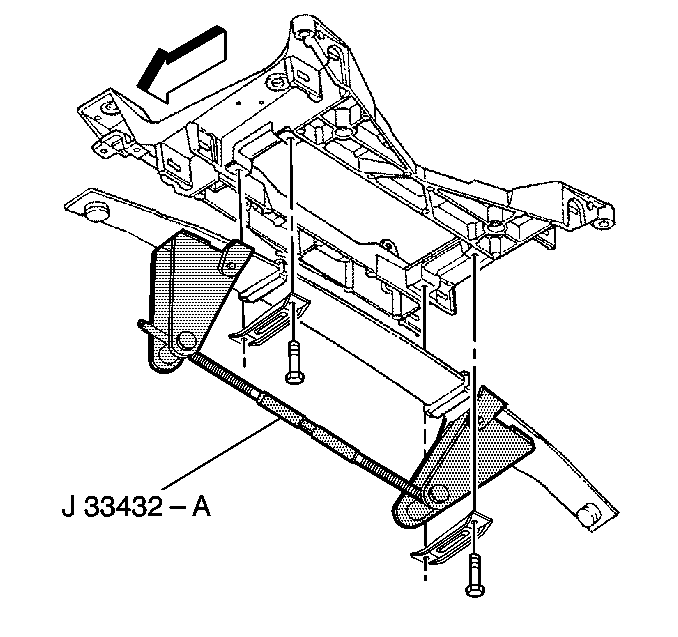
- Install J 33432-A
to the
front spring.
- Compress the front transverse spring using J 33432-A
.
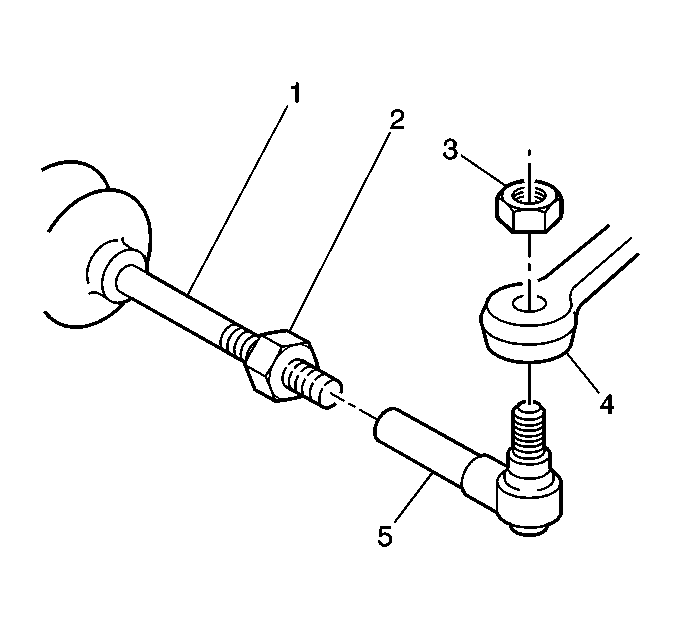
- Remove the tie rod end nuts. (3)
- Remove the tie rod ends (5) from steering knuckles (4) using J 42188
.
- Disconnect the ABS electrical connectors at the cradle.
- Disconnect the EVO connector at the cradle.
- Disconnect the RTD connectors at the cradle. (if equipped)
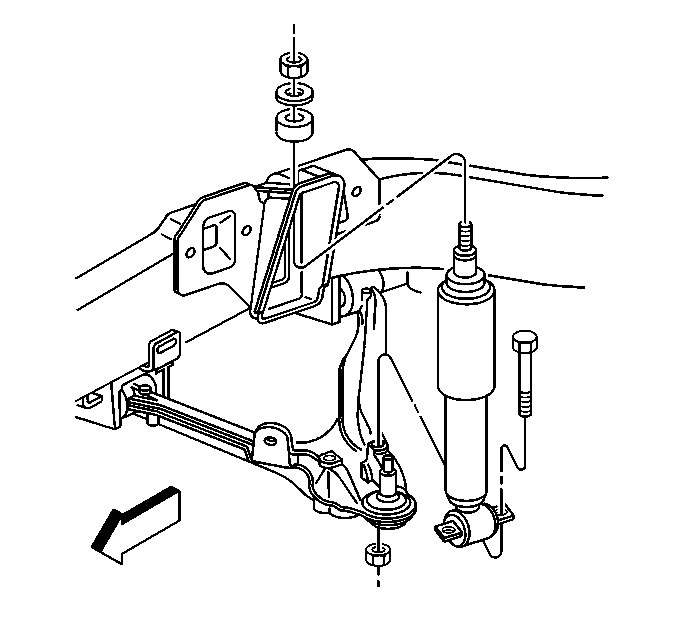
- Remove the lower shock absorber mounting bolts.
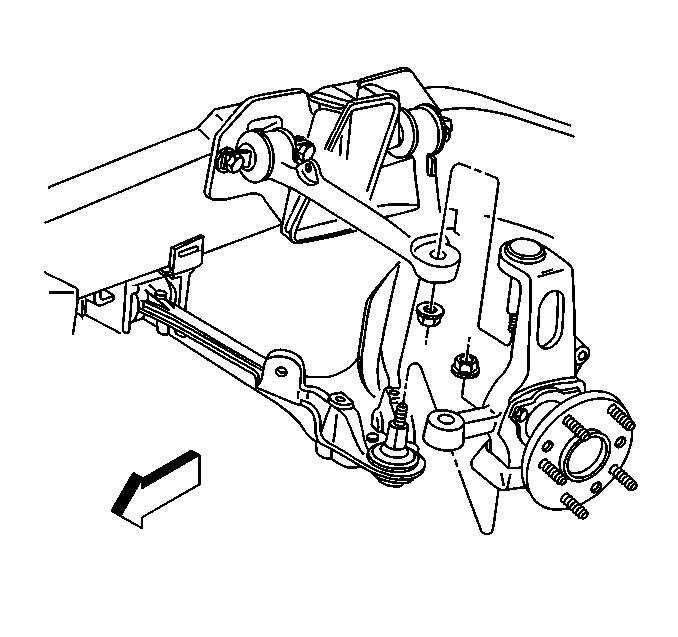
- Separate the lower ball joints using J 42188
.

- Remove J 33432-A
from the
front spring.
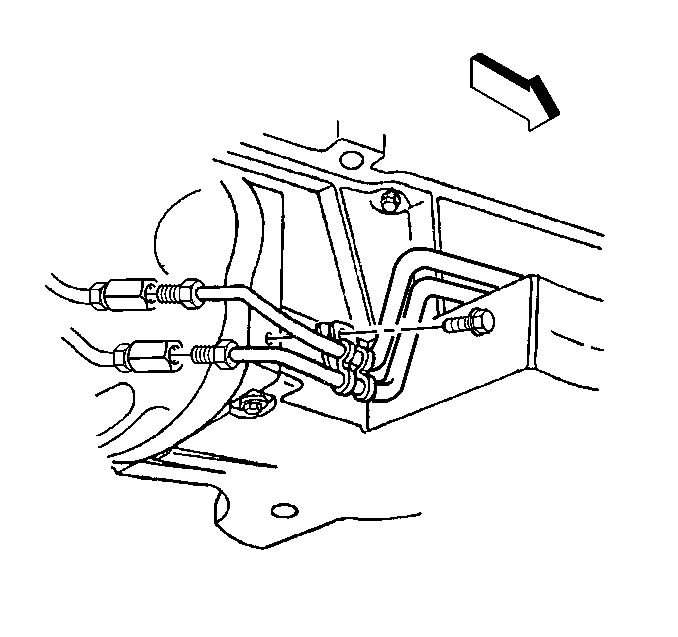
- Disconnect the automatic transmission cooler lines at the engine flywheel
housing junction. (if equipped)
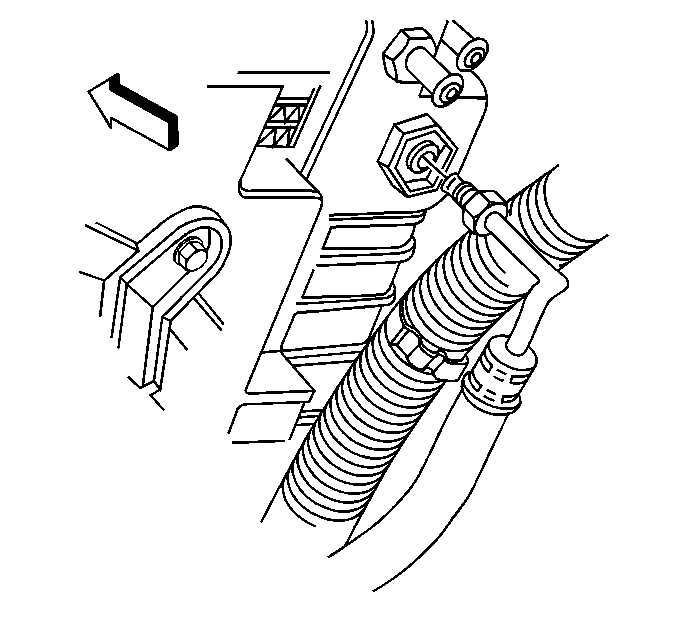
- Disconnect the automatic transmission cooler lines from the radiator. (if
equipped)
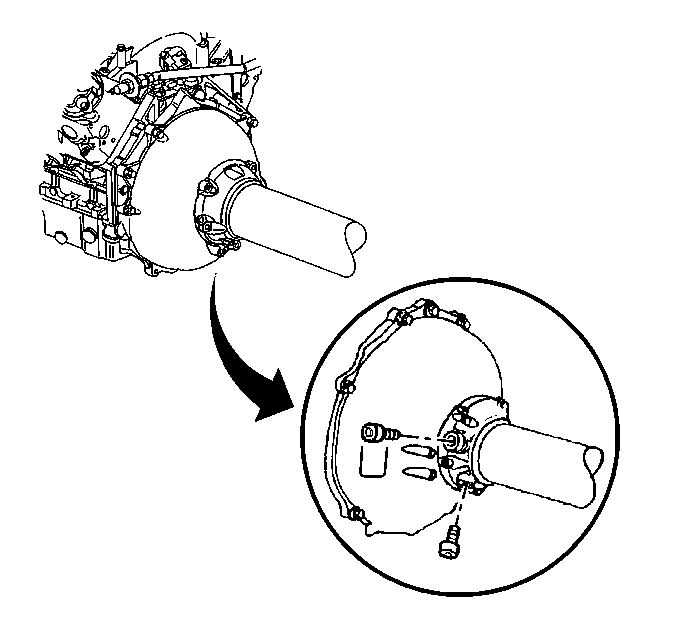
- With automatic transmission vehicles, use the following steps:
| 60.1. | Remove the two plugs in the driveline support assembly. |
| | Important: Failure to use the minimum fastener length specified will prevent proper
retention of the propeller shaft during disassembly.
|
| 60.2. | Install a M10.0 X 1.5 bolt, 55 millimeters or longer in each location. |
Tighten
Tighten the M10.0 bearing support bolts to 35 N·m (26 lb ft).
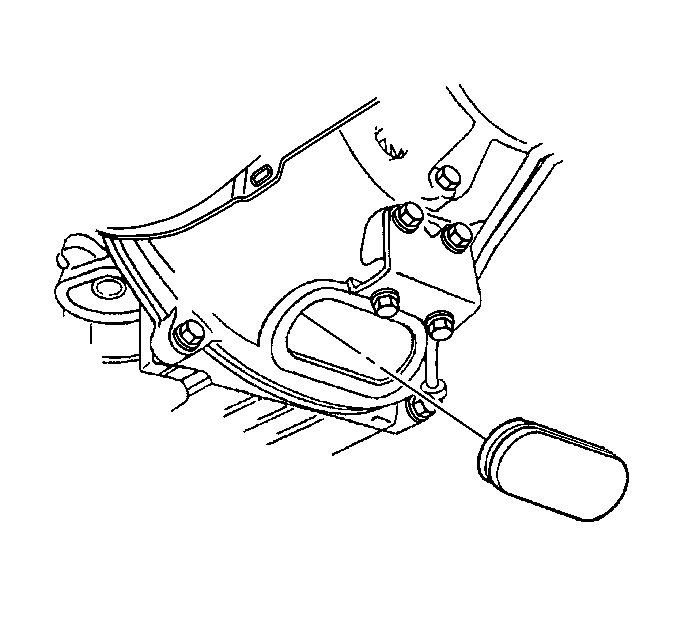
- With automatic transmission vehicles, remove the engine flywheel housing access
plug.
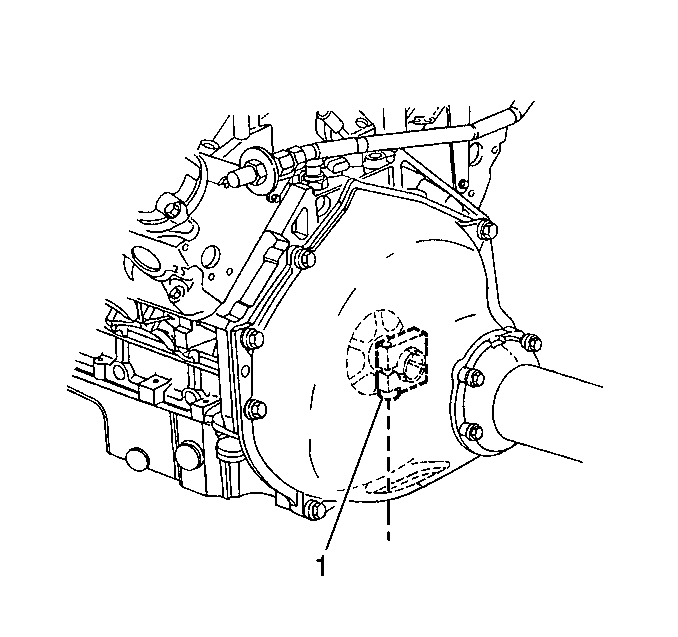
- Orientate the automatic transmission flywheel hub collar to access the bolt
(1).
- Loosen the automatic transmission flywheel hub collar bolt (1).
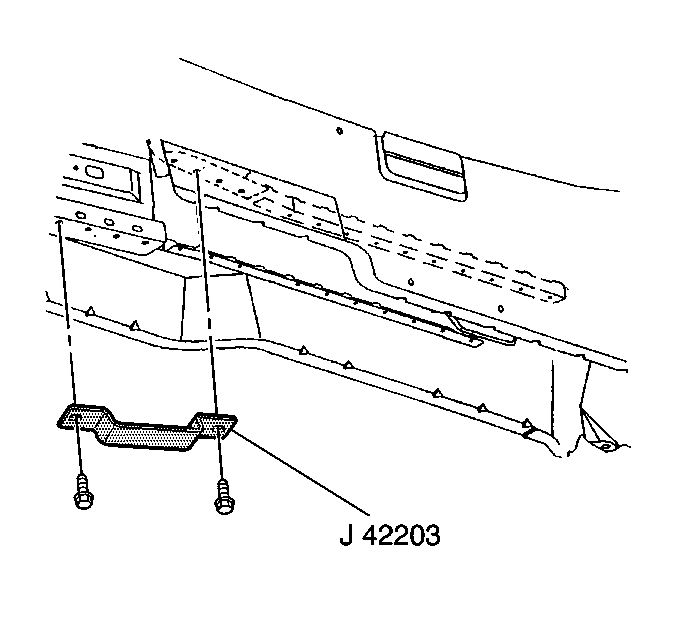
Important: The weight of the engine should never be supported by J42203.
- Install J 42203
to
the close-out panel flange.
- Partially lower the vehicle.
- Support the engine and front cradle assembly on J 39580
.
- Remove the front cradle nuts.
- Partially lower the engine and front cradle.
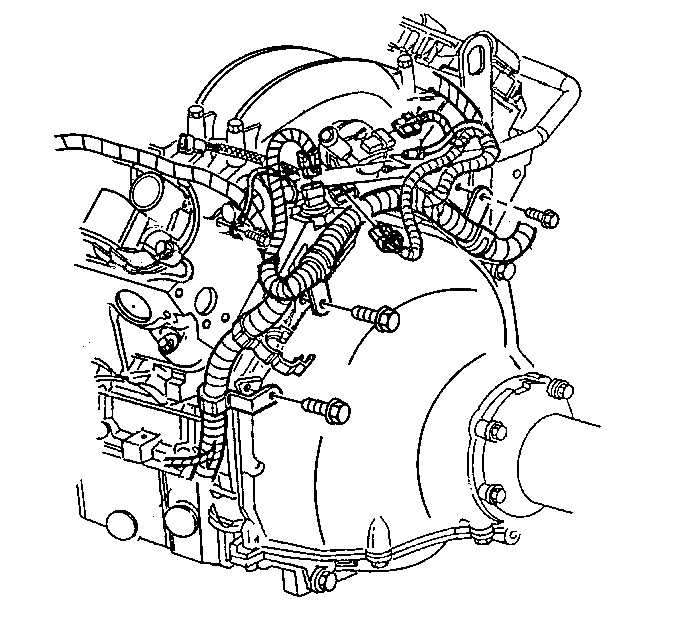
- Disconnect the following electrical connectors:
| 69.1. | Engine oil pressure gauge |
| 69.2. | Camshaft position sensor |
| 69.5. | ground on rear of LH head |
| 69.6. | All remaining electrical connections |
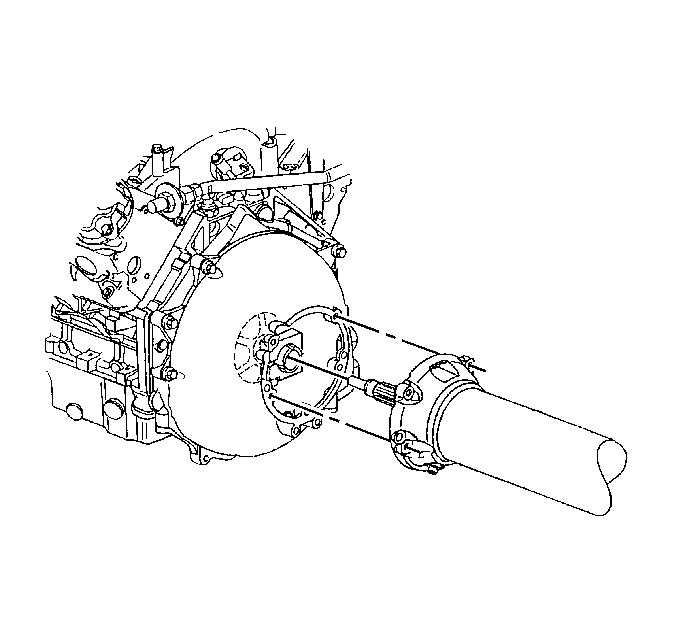
- Remove the front driveline support assembly bolts.
- Slide the engine and cradle assembly forward to clear the propeller
shaft spline.
- Raise the vehicle completely off of the engine and cradle assembly.
Important: It is not necessary to open the P/S system during the engine removal
procedure.
- Remove the P/S pump and reservoir from the engine and slave to the cradle.
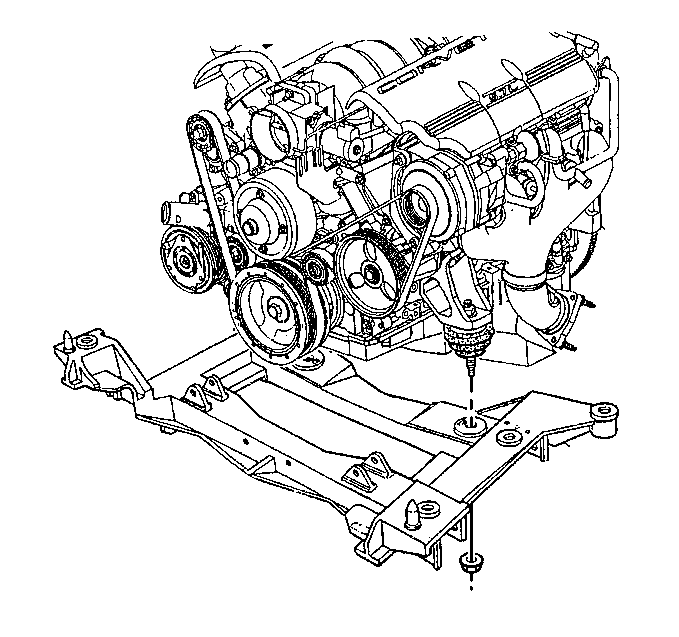
- Remove the engine mount to cradle nuts.
- Remove the engine from the cradle.
The steps in the following procedure are in a specific order. Follow
these steps in this order and ignore no details or vehicle damage could occur.

- Install the engine to the front cradle.
- Install the engine mount to cradle nuts.
Tighten
Tighten the engine mount nuts to 54 N·m (40 lb ft).
Notice: Use the correct fastener in the correct location. Replacement fasteners
must be the correct part number for that application. Fasteners requiring
replacement or fasteners requiring the use of thread locking compound or sealant
are identified in the service procedure. Do not use paints, lubricants, or
corrosion inhibitors on fasteners or fastener joint surfaces unless specified.
These coatings affect fastener torque and joint clamping force and may damage
the fastener. Use the correct tightening sequence and specifications when
installing fasteners in order to avoid damage to parts and systems.
- Install the P/S pump and reservoir to the engine.
Tighten
Tighten the P/S pump mounting bolts to 25 N·m (18 lb ft).
- Partially lower the vehicle to the engine and front cradle assembly.

- Route the electrical harnesses and connect the following electrical connectors:
| 5.1. | Engine oil pressure gauge |
| 5.2. | Camshaft position sensor |
| 5.5. | Ground on rear of LH head |
| 5.6. | All remaining electrical connections at the rear of the engine |

Important: Do not tighten the flywheel hub collar bolt at this time.
- Slide the engine and front cradle assembly rearward and install the
propeller shaft spline to the engine. Do not force the engine onto the propeller
spline.
- Install the front driveline support bolts.
Tighten
Tighten the engine flywheel housing to driveline support assembly bolts
to 50 N·m (37 lb ft).
- Lower the vehicle on to the cradle and align dowels.
- Install the front cradle nuts.
Tighten
Tighten the front cradle nuts to 110 N·m (81 lb ft).
- Raise the vehicle.

- Remove J 42203
from the vehicle.

- Install J 33432-A
to the
front spring.
- Compress the front transverse spring using J 33432-A
.

- Install the lower shock absorber mounting bolts.
Tighten
Tighten the shock absorber mounting bolts to 28 N·m (20 lb ft).

- Connect the lower ball joints to the steering knuckles.
Tighten
Tighten the lower ball joint nuts to 75 N·m (55 lb ft).

- Install the tie rod ends (5) to steering knuckles (4).
Tighten
Tighten the tie rod end nuts (3) to 45 N·m (33 lb ft).
- Install the ABS electrical connectors at the cradle.
- Install the EVO electrical connector at the cradle.
- Install RTD electrical connectors at the cradle. (if equipped)

- Remove J 33432-A
from the
vehicle.

- With automatic transmission vehicles use the following steps:
| 21.1. | Remove the previously installed M10-1.5 x 55mm bolts from
the front of the driveline support assembly. |
| 21.2. | Install the plugs to the front of the driveline support assembly. |
Tighten
Tighten the plugs to 35 N·m (26 lb ft).

- Connect the automatic transmission oil cooler lines to the radiator. (if equipped)
Tighten
Tighten the cooler lines to 27 N·m (20 lb ft).

- Connect the automatic transmission cooler lines at the engine flywheel housing
junction. (if equipped)
Tighten
Tighten the automatic transmission cooler lines to 27 N·m
(20 lb ft).

- Install both electric cooling fans.
- Install the electric cooling fan bolts.
Tighten
Tighten the electric cooling fan bolts to 10 N·m (89 lb in).

- Connect the electrical connectors and harness to the electric cooling fans.

- Install the front stabilizer bar to the front cradle.
- Install the front stabilizer mounting bolts and straps.
Tighten
Tighten the front stabilizer mounting bolts to 54 N·m (40 lb ft).

- Connect the LH front HO2S connector.
- Connect all the grounds on the left side of the engine block.
- Connect the engine oil temperature sensor connector.

- Install the A/C compressor hose to the A/C compressor.
- Install the A/C compressor line retaining bolt.
Tighten
Tighten the A/C compressor hose mounting bolts to 35 N·m
(26 lb ft).

- Connect the RH front HO2S connector.
- Connect the crank position sensor connector.
- Connect the oil level sensor connector.

- Install the starter.
- Install the starter mounting bolts.
Tighten
Tighten the starter mounting bolts to 50 N·m (37 lb ft).

- Install all the grounds on the RH side of the engine block.
- Connect the positive battery cable to the starter.
Tighten
Tighten positive battery cable nut to 15 N·m (11 lb ft).
- Connect the S terminal wire to the starter.
Tighten
Tighten S terminal wire nut to 4 N·m (35 lb in).

- Install the close-out panel.
- Install the close-out panel bolts.
Tighten
Tighten the close-out panel bolts to 12 N·m (102 lb in).
- Install the intermediate exhaust pipe. Refer to
Intermediate Pipe
in Engine Exhaust.
- Install the front tire and wheel assemblies.
Tighten
Tighten the wheel nuts to 140N·m (100 lb ft).
- Lower the vehicle.

- Connect the AIR hose to the LH exhaust manifold.

- Connect the intermediate steering shaft to the steering gear.
- Install the intermediate steering shaft bolt.
Tighten
Tighten the intermediate steering shaft bolt to 48 N·m
(35 lb ft).

- Connect the brake booster vacuum hose to the brake booster.

- Install the generator.
- Install the generator mounting bolts.
Tighten
Tighten the generator mounting bolts to 50 N·m (37 lb ft).

- Install the generator rear bracket.
- Install the generator rear bracket bolts.
Tighten
Tighten the generator rear bracket mounting bolts to 50 N·m
(37 lb ft).

- Connect the generator electrical connectors.
Tighten
Tighten the nut to 13 N·m (10 lb ft).

- Connect the following electrical connectors:
| 56.2. | Ignition coil main connectors |
| 56.4. | Electric throttle motor |
| 56.5. | Throttle position sensor |

- Connect the heater hoses to the water pump.

- Connect the radiator hoses to the water pump.

- Connect the fuel lines at the fuel rail. (3 and 4)

- Install the fuel rail covers.

- Install the generator accessory drive belt. (5)

- Install the air intake duct and the air cleaner assembly.
- Connect the fuel regulator purge line to the air intake duct.

- Connect the IAT sensor connector.
- Connect the MAF sensor connector.

- Connect the negative battery cable.
Tighten
Tighten the negative battery cable bolt to 15 N·m (11 lb ft).
- Fill or top off the engine with oil.
- Refill the cooling system. Refer to
Cooling System Draining and Filling
in Engine Cooling.
- Recharge the A/C system. Refer to
Air Conditioning (A/C) Charging Using ACR4
in HVAC.
- With automatic transmission vehicles use the following steps:
| 70.1. | With the flywheel hub collar bolt removed, start the engine and
warm to operating temperature. |
Idle or drive for at least 10 minutes.
| 70.2. | Shut off the engine. |
| 70.3. | Allow engine to cool to room temperature. |
| 70.4. | Install hub collar bolt. |
Tighten
Tighten the flywheel hub collar bolt to 60 N·m (44 lb ft).
- Check the engine for problems. Refer to
Engine Set-Up and Testing
.


