Removal Procedure
- Remove the front license plate.
- Remove the plastic headed screws attaching the fascia license plate opening to the absorber.
- Raise the vehicle and suitably support. Refer to Lifting and Jacking the Vehicle in General Information.
- Remove the air deflector and the left and right outer valance.
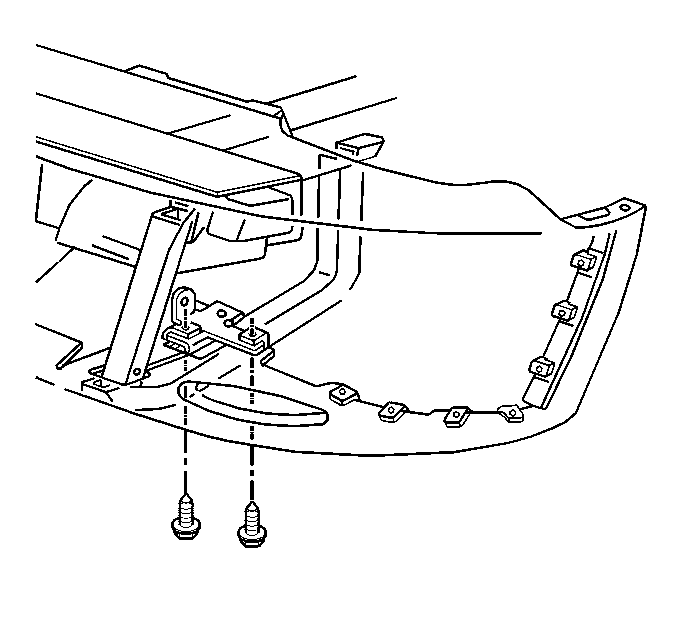
- Remove the bolts attaching the fascia to the skid bar.
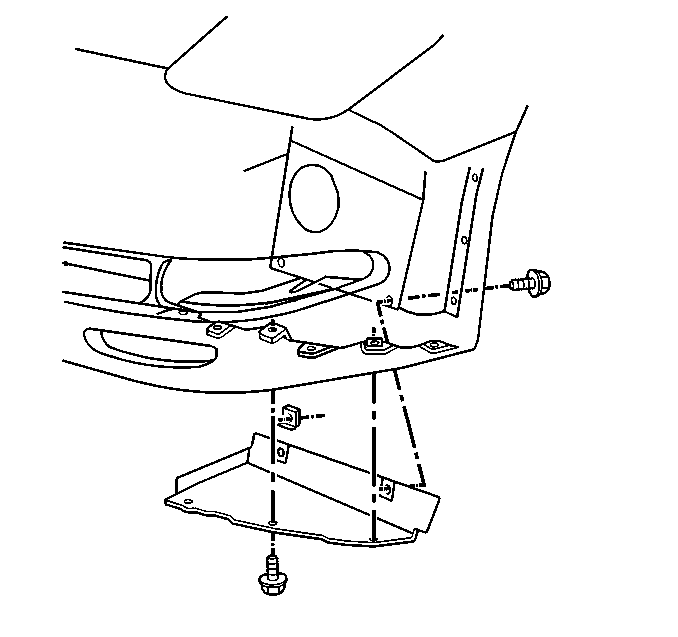
- Remove the bolts attaching the fascia to the radiator support.
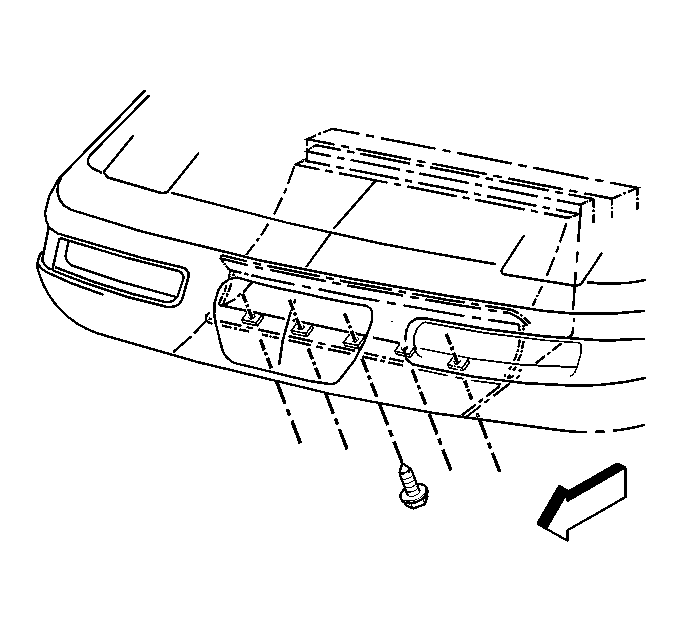
- Remove the fascia lower close out panels.
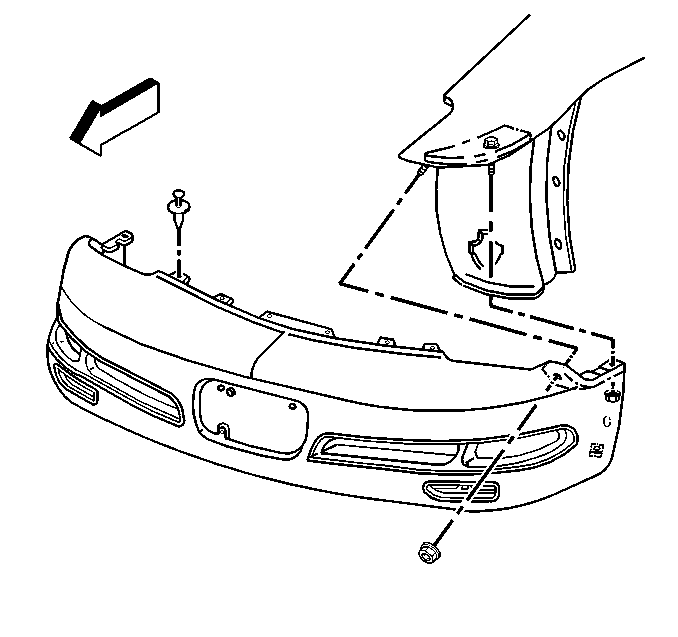
- Remove the bolts attaching the wheelhouse panel to the fascia.
- Disconnect the fascia harness connector.
- Remove the nuts from the fender reinforcement studs.
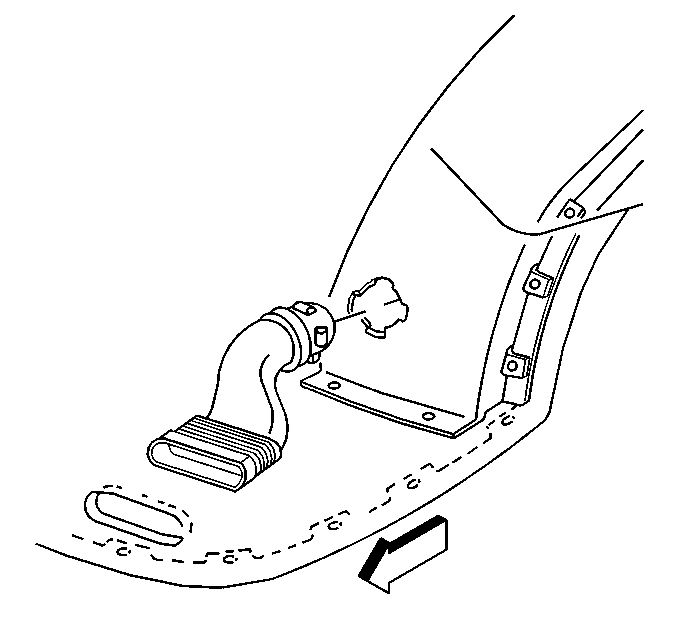
- Disconnect the front brake caliper cooling ducts from the fascia.
- Lower the vehicle.
- Remove the push-pins attaching the fascia upper flange to the fascia retainer.
- Remove the fascia.
- Transfer parts as necessary.


Important: Use only the exact size square headed tool when removing or installing the plastic headed screws to avoid stripping the screw heads.


Installation Procedure
- Position the fascia to the front of the vehicle.
- Secure the upper flange of the fascia to the fascia retainer with push-pin retainers. Start at the center of the fascia and work outward.
- Raise the vehicle and suitably support. Refer to Lifting and Jacking the Vehicle in General Information.
- Connect the fascia harness connector.
- Align the fascia to the fenders at the headlamp opening and flush the fender to the vertical joint.
- Install the nuts attaching the fascia to the forward studs on the right and left fender reinforcements.
- Align and flush the fascia to the fender at the horizontal joint.
- Install the nuts attaching the fascia to the rearward studs on the right and left front fender reinforcement.
- Install the bolts attaching the wheelhouse to the fascia.
- Install the brake caliper cooling ducts to the fascia. Refer to Front Fascia, Brake Air Inlet Duct .
- Install the fascia close out panels. Refer to Front Front Fascia Lower Close Out Panel .
- Install the screws attaching the lower fascia flange to the radiator support.
- Install the bolts attaching the fascia to the skid bar bracket.
- Install the plastic headed screws attaching the license plate opening to the absorber.
- Install the license plate or insert.
- Install the air deflector. Refer to Front Air Deflector Replacement .
- Install the right and left outer valance. Refer to Front Bumper Valance Panel Replacement .
- Lower the vehicle
Tighten
Tighten the fascia to the fender reinforcement stud nuts to 7 N·m
(62 lb in).
Notice: Use the correct fastener in the correct location. Replacement fasteners must be the correct part number for that application. Fasteners requiring replacement or fasteners requiring the use of thread locking compound or sealant are identified in the service procedure. Do not use paints, lubricants, or corrosion inhibitors on fasteners or fastener joint surfaces unless specified. These coatings affect fastener torque and joint clamping force and may damage the fastener. Use the correct tightening sequence and specifications when installing fasteners in order to avoid damage to parts and systems.
Tighten
Tighten the fascia to the fender reinforcement stud nuts to 7 N·m
(62 lb in).
Tighten
Tighten the front wheelhouse to fascia bolts to 5 N·m (44 lb in).
Tighten
Tighten the front fascia close out panel bolts to 7 N·m
(62 lb in).
Tighten
Tighten the front fascia lower flange to the radiator support screws
to 8 N·m (71 lb in).
Tighten
Tighten the fascia to the skid bar bracket bolts to 5 N·m
(44 lb in).
Important: Use only the exact size square headed tool when removing or installing the plastic headed screws to avoid striping the plastic screw heads.
Tighten
Tighten the license plate opening to absorber screws to 1 N·m
(9 lb in).
| 15.1. | Insert the insert upper tabs into slots in the fascia. |
| 15.2. | Secure the insert or plate with screws. |
Tighten
Tighten the air deflector screws to 7 N·m (62 lb in).
Tighten
Tighten the outer valance screws to 7 N·m (62 lb in).
