Removal Procedure
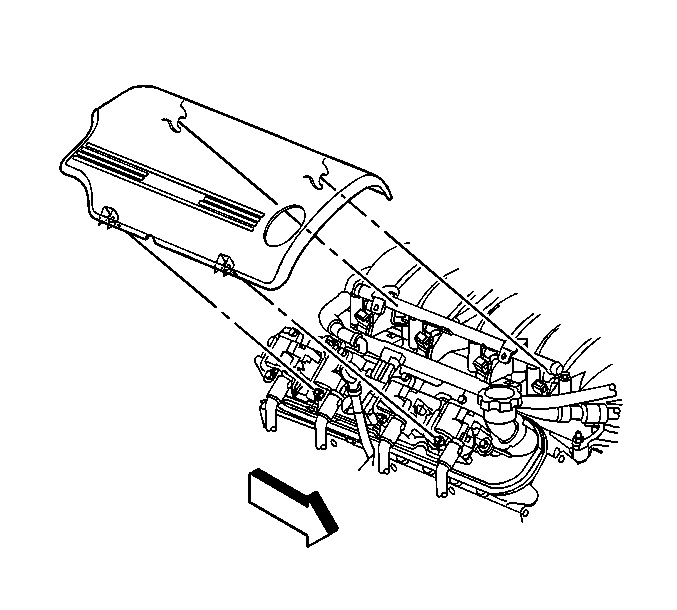
- Remove the fuel rail cover.
- Raise and suitably support the vehicle. Refer to Lifting and Jacking the Vehicle .
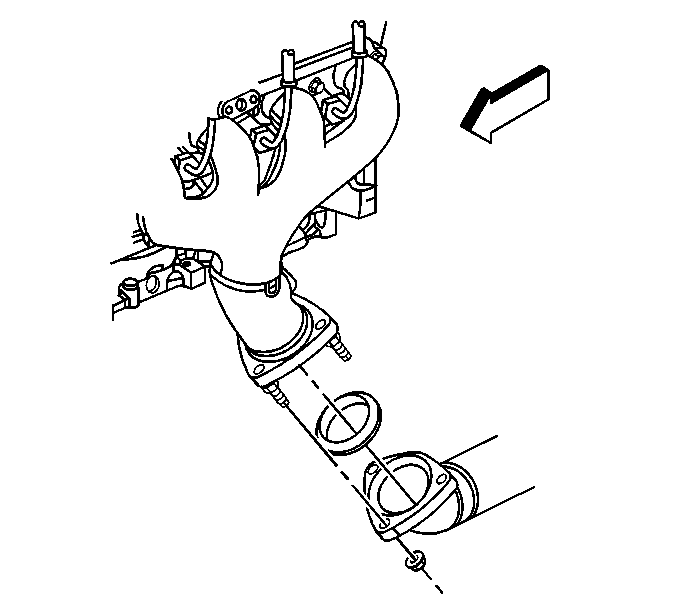
- Remove the exhaust manifold nuts. (left side shown, right side similar)
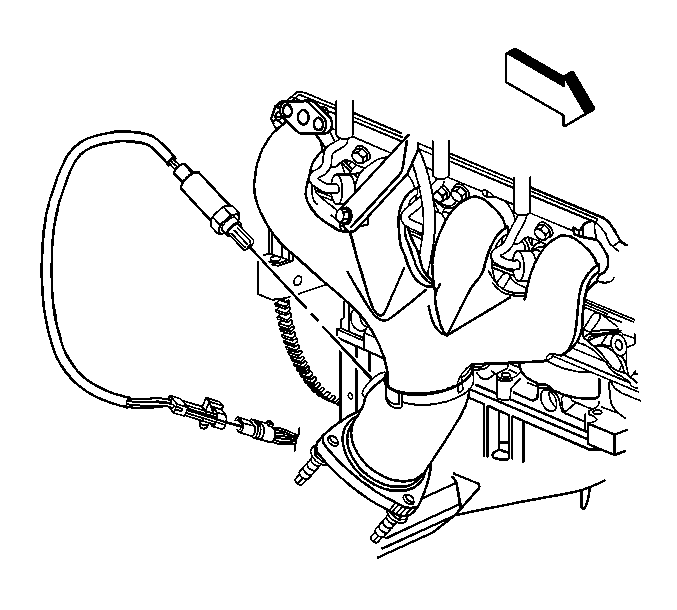
- Remove the connector position assurance (CPA) lock.
- Disconnect the oxygen sensor electrical connector.
- Remove the oxygen sensor.
- Lower the vehicle.
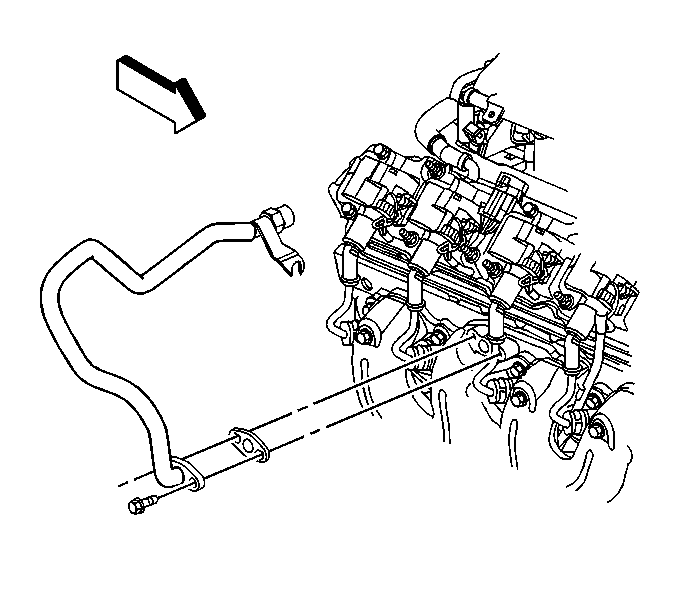
- Remove the hose clamp at the right check valve.
- Remove the secondary air injection (AIR) pipe hose (1) from the right check valve.
- Loosen, DO NOT remove the AIR pipe bolt at the rear of the left cylinder head.
- Remove the AIR pipe bolts.
- Reposition the AIR pipe.
- Remove the old AIR pipe gasket. Discard the gasket
- Remove the oil level indicator tube. Refer to Oil Level Indicator and Tube Replacement .
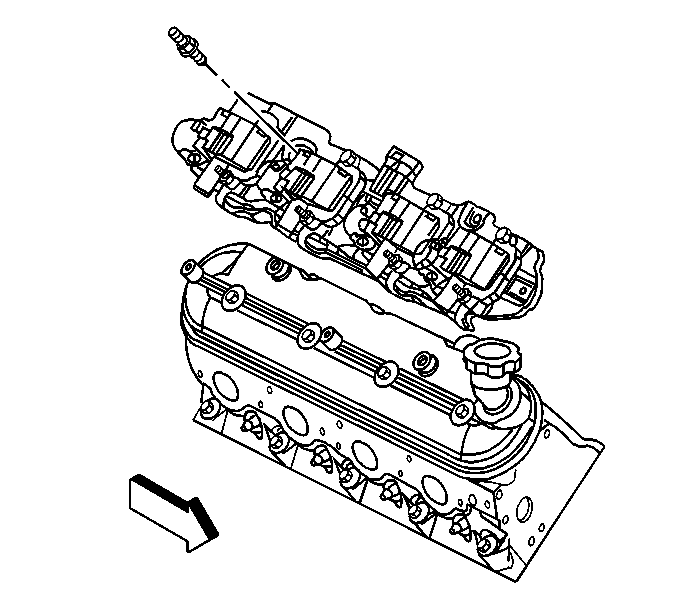
- Remove the ignition coil bracket studs.
- Remove the ignition coil bracket.
- Remove the spark plugs. Refer to Spark Plug Replacement .
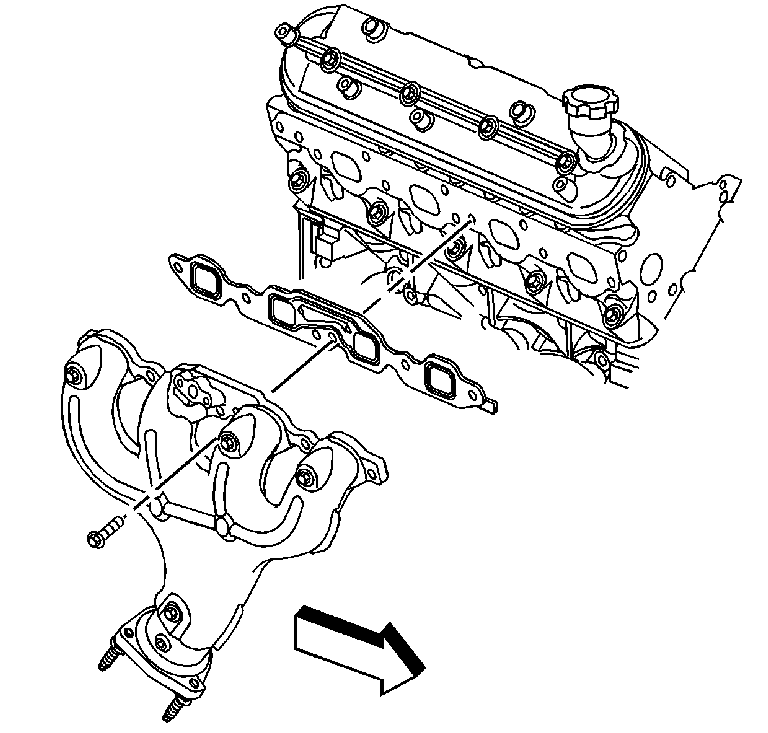
- Remove and discard the exhaust manifold bolts.
- Remove the exhaust manifold, and old gasket. Discard the gasket.
- If necessary, remove the exhaust manifold heat shield bolts and shield.
Notice: Handle the oxygen sensors carefully in order to prevent damage to the component. Keep the electrical connector and the exhaust inlet end free of contaminants. Do not use cleaning solvents on the sensor. Do not drop or mishandle the sensor.
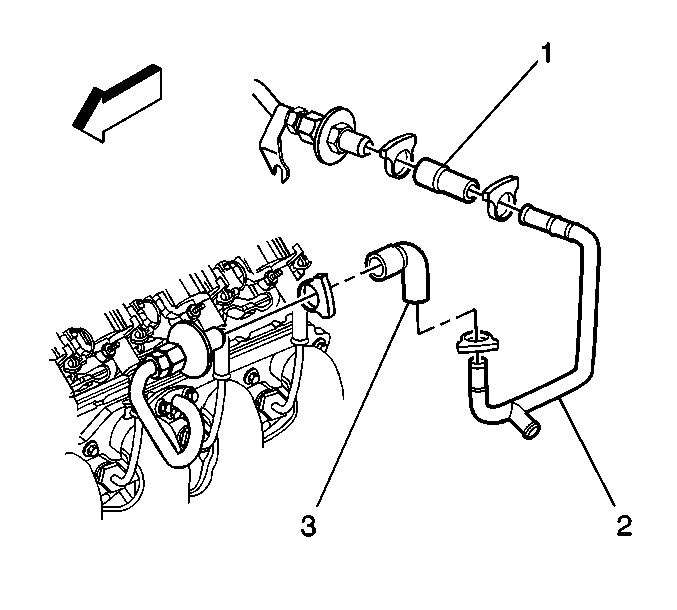
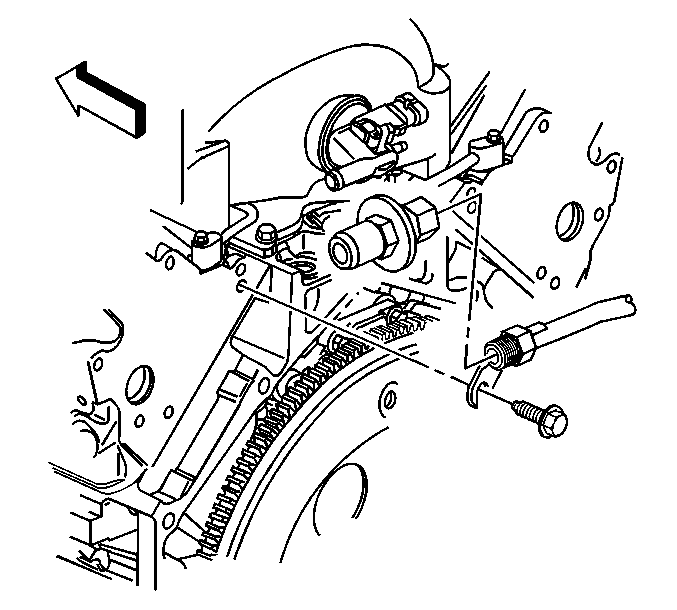
Important: Do not remove the check valve from the AIR pipe unless valve service is required.
Installation Procedure
- Install the exhaust manifold to the cylinder head. Refer to Exhaust Manifold Installation - Right Side .
- Install the ignition coil bracket.
- Apply threadlock GM P/N 12345382 (Canadian P/N 10953489), or equivalent to the threads of the bracket studs.
- Install the ignition coil bracket studs.
- Install the spark plugs. Refer to Spark Plug Replacement .
- Install the oil level indicator tube. Refer to Oil Level Indicator and Tube Replacement .
- Position the AIR pipe (with check valve) and NEW gasket into place.
- Install the AIR pipe bolts.
- Tighten the AIR pipe bolt at the rear of the left cylinder head.
- Install the AIR pipe hose (1) to the right check valve.
- Install the hose clamp at the right check valve.
- Raise the vehicle.
- Apply anti-sieze compound GM P/N 12377953 or equivalent to the threads of the oxygen sensor.
- Install the oxygen sensor.
- Connect the oxygen sensor electrical connector.
- Install the CPA lock.
- Install the exhaust manifold nuts. (left side shown, right side similar)
- Lower the vehicle.
- Install the fuel rail cover.
Notice: Refer to Fastener Notice in the Preface section.
Tighten
Tighten the ignition coil bracket studs to 12 N·m (106 lb in).
Important: Ensure that the AIR pipe bracket slides behind the bolt at the left cylinder head.
Tighten
Tighten the AIR pipe bolts to 20 N·m (15 lb ft).
Tighten
Tighten the AIR pipe bolt to 20 N·m (15 lb ft).
Notice: Handle the oxygen sensors carefully in order to prevent damage to the component. Keep the electrical connector and the exhaust inlet end free of contaminants. Do not use cleaning solvents on the sensor. Do not drop or mishandle the sensor.
Tighten
Tighten the oxygen sensor to 42 N·m (30 lb ft).
Tighten
Tighten the exhaust manifold nuts to 20 N·m (15 lb ft).
