Removal Procedure
- Apply the parking brake for additional clearance around the parking brake lever.
- Shift the transmission into SECOND (A/T), or FOURTH (M/T).
- Remove the console. Refer to Console Replacement .
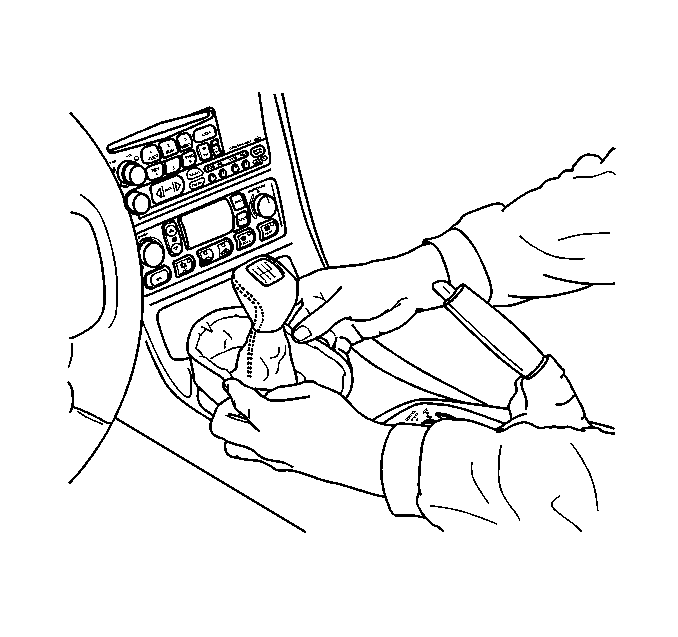
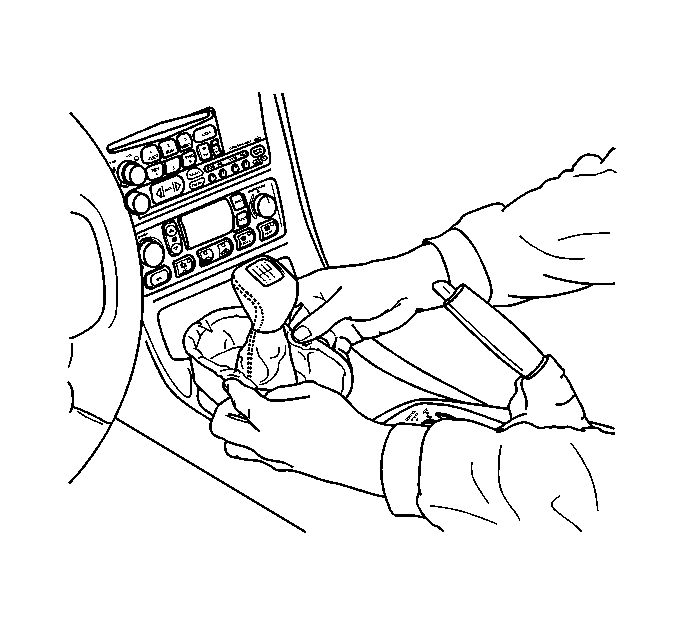
- Grasp the shift control boot (M/T) and apply light pressure in toward the shift control lever, to begin to release the shift boot retaining tabs from the instrument panel (IP) accessory trim plate.
- Using light pressure, continue to release the remaining boot retaining tabs, then lift the boot away from the trim plate.
- Open the cigar lighter door and remove the ashtray.
- Remove the IP accessory trim plate grille.
- Remove the accessory trim plate retaining screws next to the cigar lighter and behind the ashtray.
- Remove the accessory trim plate retaining screw in the grille opening.
- Grasp the sides of the accessory trim plate near the curve at the base.
- Pull the trim plate rearward to release the locking tabs.
- Disconnect the electrical connector from the cigar lighter.
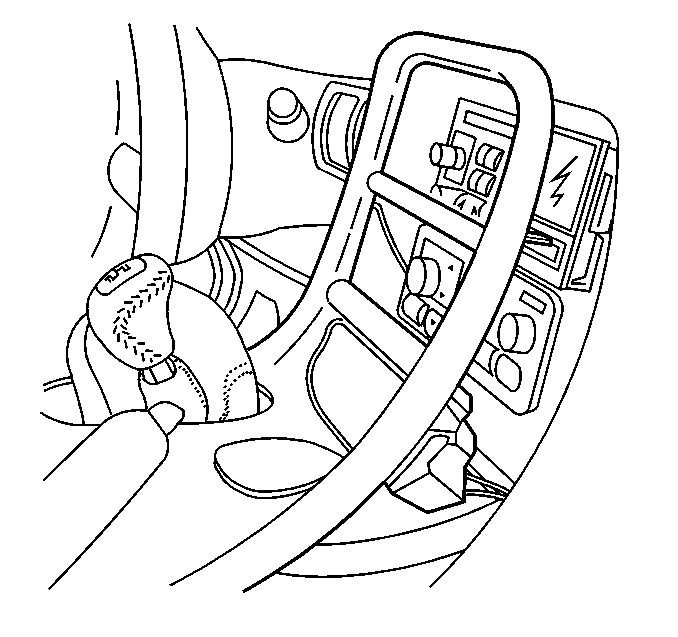
- Rotate the shift control boot (M/T) and reposition one end down into the shifter opening in the trim plate.
- Lift the accessory trim plate over the shifter (and shift control boot, M/T), and remove the trim plate.
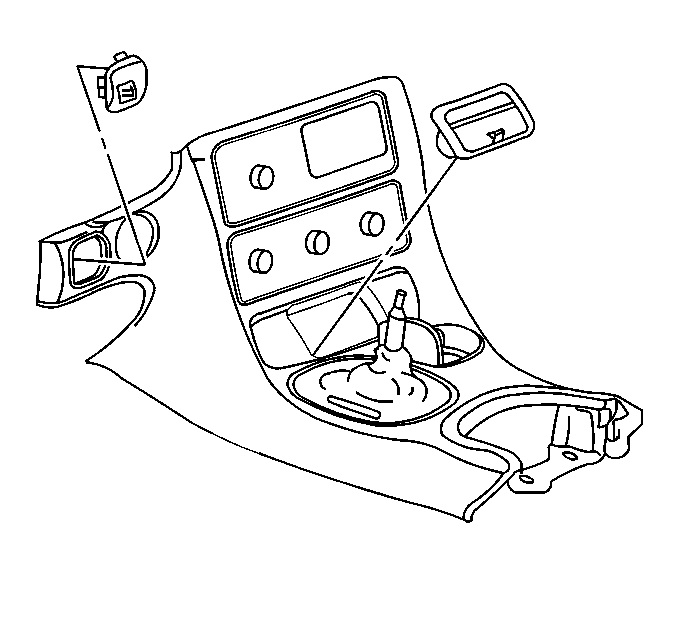
Pry gently at the side edge with a flat-bladed screwdriver to release the tab.
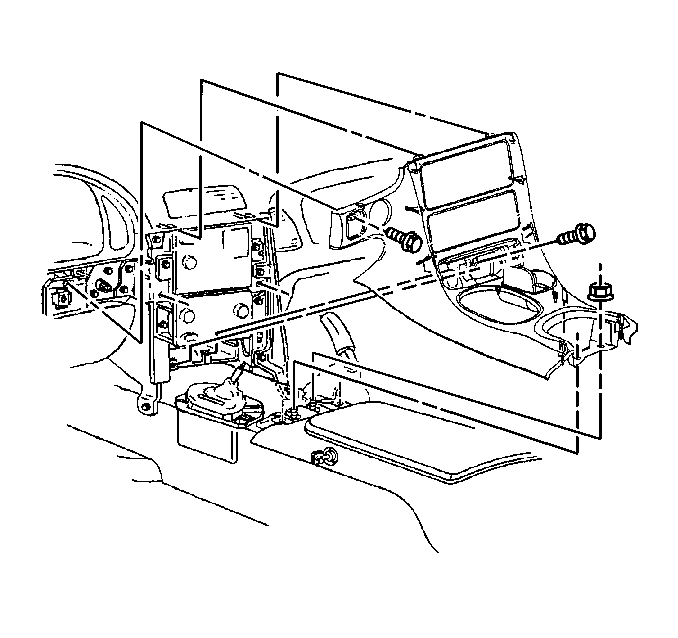
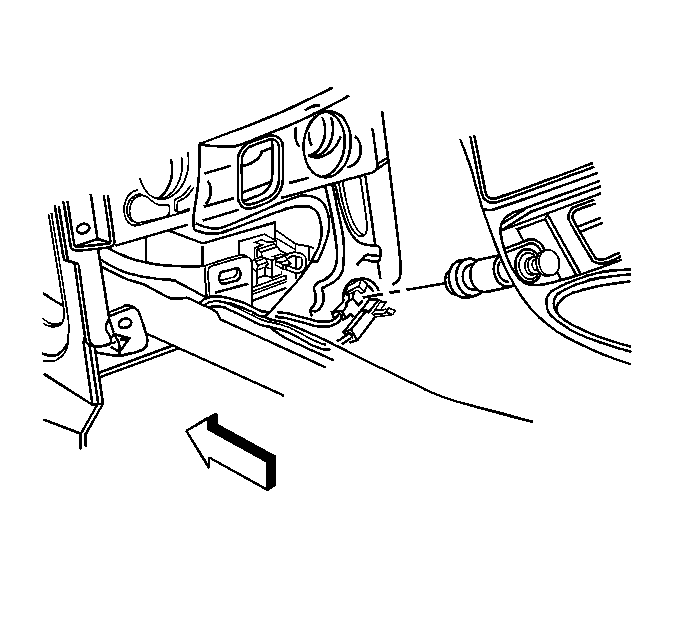
Lift the rear of the trim plate to clear the driveline tunnel studs.
Installation Procedure
- Lower the IP accessory trim plate over the shifter and under the parking brake lever.
- Connect the electrical connector to the cigar lighter.
- Install the trim plate into position.
- Begin to install the upper locator tabs and the upper locking tabs, then work downward to install the remaining tabs.
- Install the accessory trim plate retaining screws.
- Install the accessory trim plate grille.
- Install the ashtray.
- Install the console. Refer to Console Replacement .
- Align the shift control boot to the IP accessory trim plate opening, then press to lock the boot retaining tabs.
- Adjust the shape of the boot for appearance, if necessary.
- Shift the transmission into PARK (A/T), or REVERSE (M/T).
- Release the parking brake.

Position the shift control boot (M/T) as during removal and insert the boot up through the shifter opening in the accessory trim plate.


Align the locator tabs and the locking tabs to the slots.
Install the rear of the trim plate onto the driveline tunnel studs.
Notice: Use the correct fastener in the correct location. Replacement fasteners must be the correct part number for that application. Fasteners requiring replacement or fasteners requiring the use of thread locking compound or sealant are identified in the service procedure. Do not use paints, lubricants, or corrosion inhibitors on fasteners or fastener joint surfaces unless specified. These coatings affect fastener torque and joint clamping force and may damage the fastener. Use the correct tightening sequence and specifications when installing fasteners in order to avoid damage to parts and systems.
Tighten
| • | Tighten the IP accessory trim plate retaining screw next to cigar lighter to 1.9 N·m (17 lb in). |
| • | Tighten the IP accessory trim plate retaining screw behind ashtray to 1.9 N·m (17 lb in). |
| • | Tighten the IP accessory trim plate retaining screw in grille opening to 1.9 N·m (17 lb in). |

Position the grille, then push to secure.
