Removal Procedure
- Remove the folding top stowage compartment lid extension panel (convertible). Refer to Folding Top Stowage Compartment Lid Extension in Interior Trim.
- Open the console door.
- Pull up on the rear of the electronic traction control, ride control switch (2) in order to release the retaining clips; if the switch does not release from the trim plate, perform the following steps:
- Disconnect the electrical connector (1) from the switch.
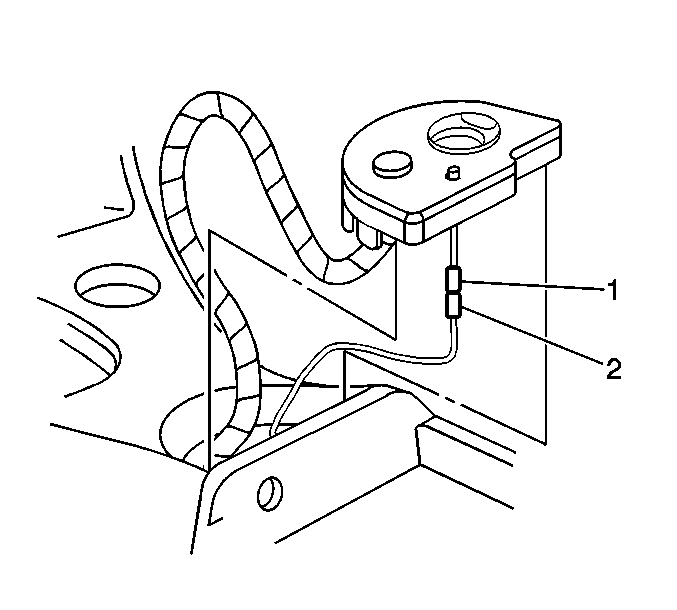
- Disconnect the LED connector (1) from the wiring harness connector (2).
- Remove the switch.
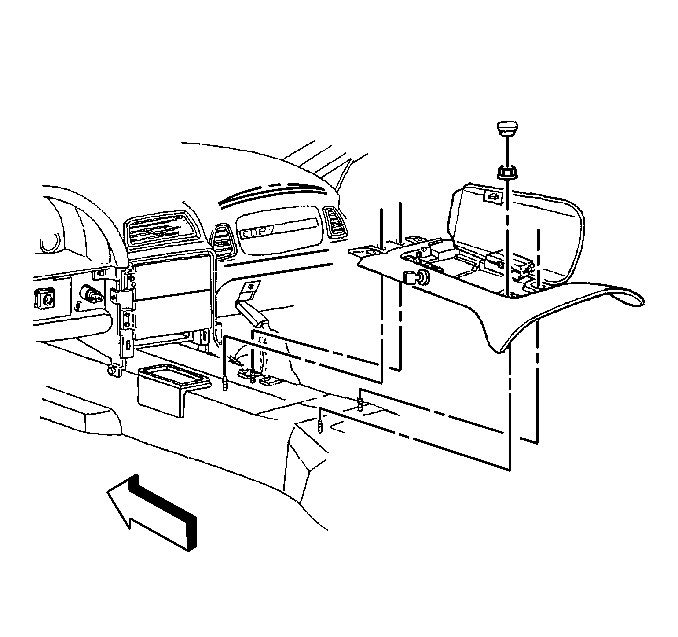
- Using a small flat bladed screwdriver, carefully remove the console retaining nut covers.
- Remove the nuts retaining the rear of the console.
- Remove the nuts retaining the front of the console and the IP accessory trim plate.
- Lift the rear of the console slightly and pull rearward to release the front of the console from under the IP accessory trim plate.
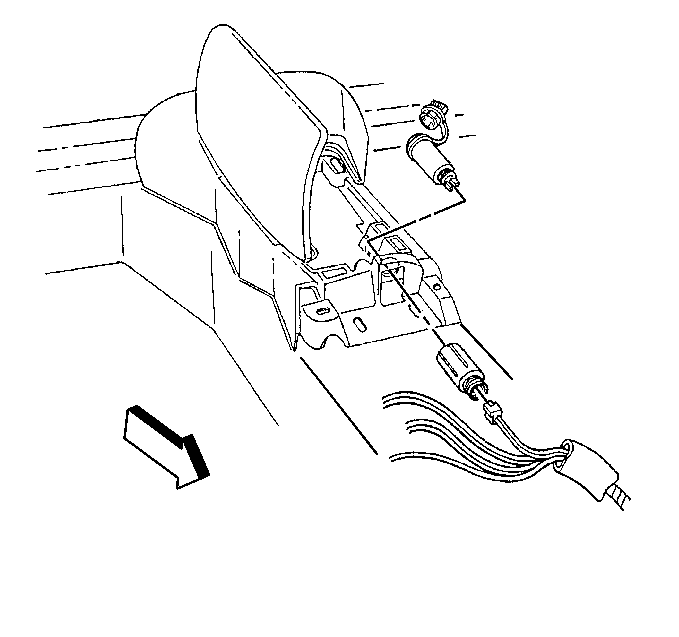
- Disconnect the electrical connector from the electrical accessory plug.
- Unscrew to remove the console electrical accessory plug retainer from the console electrical accessory plug housing.
- Remove the electrical accessory plug housing from the console.
- Disconnect the electrical connector from the fuel door release, rear lift window release (export) switch.
- Remove the fuel door release, rear lift window release (export) switch from the console.
- Remove the console from the vehicle.
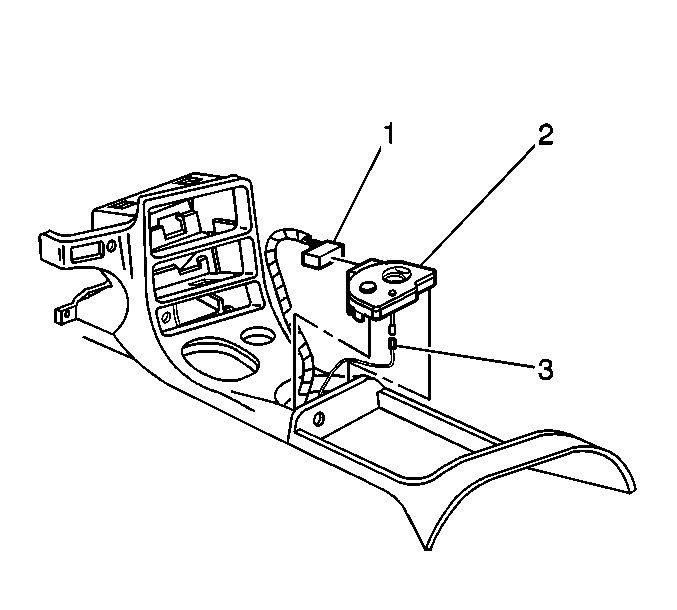
| • | Carefully insert a screwdriver into the recess located at the rear of the switch. |
| • | Gently pull up the rear of the switch. |
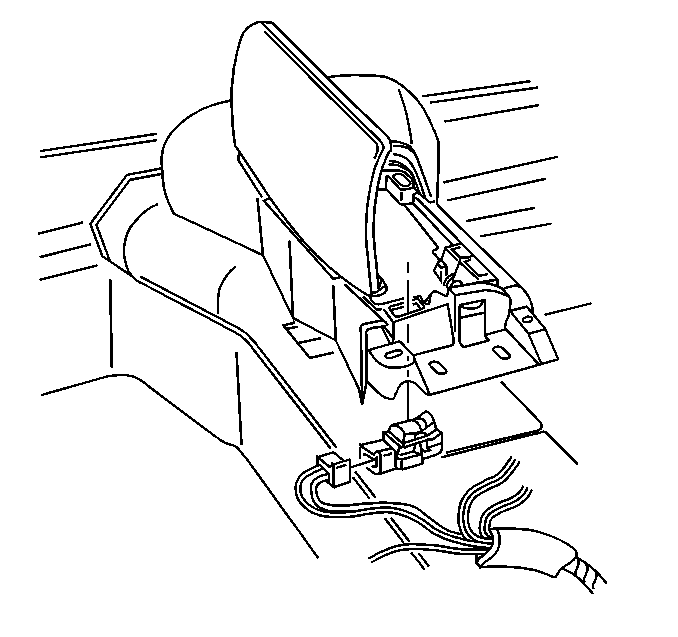
Turn the console over and carefully insert a small flat bladed screwdriver to release the switch tabs.
Installation Procedure
- Install the fuel door release, rear lift window release (export) switch to the console.
- Connect the electrical connector to the switch.
- Install the electrical accessory plug housing to the console.
- Install the electrical accessory plug retainer onto the accessory plug housing.
- Connect the electrical connector to the electrical accessory plug.
- Install the console into position.
- Loosely install the console retaining nuts.
- Position the console to the IP accessory trim plate (at the front) and the floor extension carpet (at the rear) for best appearance.
- Connect the electrical connector (1) to the electronic traction control, ride control switch.
- Connect the LED connector (1) to the wiring harness connector (2).
- Insert the electronic traction control, ride control switch front retaining tab under the edge of the IP accessory trim plate.
- Lower the rear of the switch into position, then push to secure the retaining clips.
- Close the console door.
- Install the folding top stowage compartment lid extension panel (convertible). Refer to Folding Top Stowage Compartment Lid Extension in Interior Trim.

Align the switch, then push to secure.

Check that the cover plug is in place on the accessory plug housing.
Screw the retainer onto the housing until secure.

Important: Be sure to install the front of the console UNDER the rear of the IP accessory trim plate.
Insert the front of the console under the rear of the IP accessory trim plate.
Notice: Use the correct fastener in the correct location. Replacement fasteners must be the correct part number for that application. Fasteners requiring replacement or fasteners requiring the use of thread locking compound or sealant are identified in the service procedure. Do not use paints, lubricants, or corrosion inhibitors on fasteners or fastener joint surfaces unless specified. These coatings affect fastener torque and joint clamping force and may damage the fastener. Use the correct tightening sequence and specifications when installing fasteners in order to avoid damage to parts and systems.
Tighten
Tighten the console retaining nuts to 10 N·m (89 lb in).


